Mar 8, 2018
TechnologyConfiguration
The configuration files is listed as following:
# Worker nodes are the ones that will run your workloads on the cluster.
worker:
  expected_count: 1
  nodes:
  - host: "allinone"
    ip: "10.15.205.93"
    internalip: ""
    labels: {}

storage:
  expected_count: 3
  nodes:
  - host: "gluster1"
    ip: "10.15.205.90"
    internalip: ""
    labels: {}
  - host: "gluster2"
    ip: "10.15.205.91"
    internalip: ""
    labels: {}
  - host: "gluster3"
    ip: "10.15.205.92"
    internalip: ""
    labels: {}

# A set of NFS volumes for use by on-cluster persistent workloads
nfs:
  nfs_volume: []
But it won’t startup, the reason is because Ubuntu have a bug of rpcbind,
solved by:
# systemctl add-wants multi-user.target rpcbind.service
# systemctl enable rpcbind.service
# ufw disable
Then you should reboot all of the nodes.
verification
Create a new glusterfs volume and expose it in k8s as a PV use:
# kismatic volume add 10 storage01 -r 2 -d 1 -c="durable" -a *.*.*.*
New PVC:
kind: PersistentVolumeClaim
apiVersion: v1
metadata:
  name: my-app-frontend-claim
  annotations:
    volume.beta.kubernetes.io/storage-class: "durable"
spec:
  accessModes:
    - ReadWriteMany
  resources:
    requests:
      storage: 10Gi
Use pvc in a pod volume:
kind: Pod
apiVersion: v1
metadata:
  name: my-app-frontend
spec:
  containers:
    - name: my-app-frontend
      image: nginx
      volumeMounts:
      - mountPath: "/var/www/html"
        name: html
  volumes:
    - name: html
      persistentVolumeClaim:
        claimName: my-app-frontend-claim
Whenyou scale the pod out, each instance of the pod should have access to that
directory.
Feb 11, 2018
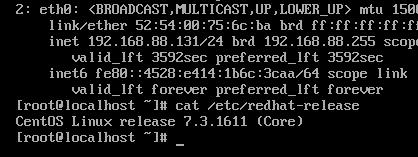
Technology环境准备
IP地址及CentOS版本截图如下:
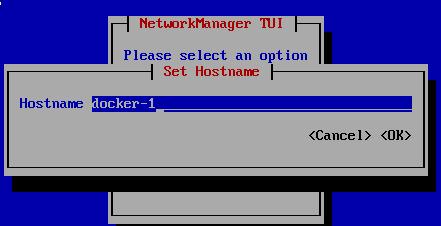
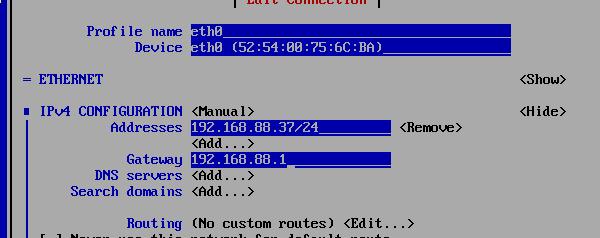
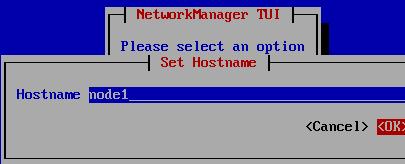
nmtui改动hostname及IP地址:
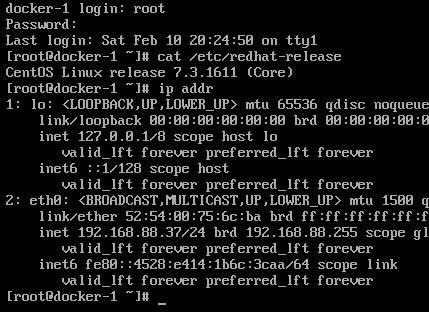
改动完毕以后的系统如下:
准备部署
Kubernetes在部署kubelet的时候需要检测swap分区是否为关闭,否则无法继续安装,因而我们
首先关闭掉swap分区:
# swapoff -a
关闭默认安装的防火墙firewalld,否则kismatic安装时将在helm安装一节报错:
# systemctl stop firewalld && systemctl disable firewalld
配置安装所需的yum仓库, 192.192.189.111是我们搭建在内网的安装源:
[root@docker-1 ~]# cd /etc/yum.repos.d/
[root@docker-1 yum.repos.d]# ls
CentOS-Base.repo  CentOS-CR.repo  CentOS-Debuginfo.repo  CentOS-fasttrack.repo
CentOS-Media.repo  CentOS-Sources.repo  CentOS-Vault.repo
[root@docker-1 yum.repos.d]# mkdir back
[root@docker-1 yum.repos.d]# mv * back
mv: cannot move ‘back’ to a subdirectory of itself, ‘back/back’
[root@docker-1 yum.repos.d]# vi base.repo
[base]
name=Base
baseurl=http://192.192.189.111/base
enabled=1
gpgcheck=0
gpgkey=file:///etc/pki/rpm-gpg/RPM-GPG-KEY-CentOS-7

[updates]
name=Updates
baseurl=http://192.192.189.111/updates
enabled=1
gpgcheck=0
gpgkey=file:///etc/pki/rpm-gpg/RPM-GPG-KEY-CentOS-7

[docker]
name=Docker
baseurl=http://192.192.189.111/docker
enabled=1
gpgcheck=0
gpgkey=file:///etc/pki/rpm-gpg/RPM-GPG-KEY-CentOS-7

[kubernetes]
name=Kubernetes
baseurl=http://192.192.189.111/kubernetes
enabled=1
gpgcheck=0
gpgkey=file:///etc/pki/rpm-gpg/RPM-GPG-KEY-CentOS-7

[gluster]
name=gluster
baseurl=http://192.192.189.111/gluster
enabled=1
gpgcheck=0
gpgkey=file:///etc/pki/rpm-gpg/RPM-GPG-KEY-CentOS-7

[other]
name=other
baseurl=http://192.192.189.111/other
enabled=1
gpgcheck=0
gpgkey=file:///etc/pki/rpm-gpg/RPM-GPG-KEY-CentOS-7

[root@docker-1 yum.repos.d]# yum makecache
配置Kubernetes所需的docker镜像仓库(离线),我们只需在系统中添加mirror.dddd.com
域名解析即可,docker镜像仓库也搭建在192.192.189.111机器上:
[root@docker-1 yum.repos.d]# vi /etc/hosts
127.0.0.1   localhost localhost.localdomain localhost4 localhost4.localdomain4
::1         localhost localhost.localdomain localhost6 localhost6.localdomain6
192.192.189.111	mirror.dddd.com
开始部署
进入gj_deploy目录,这里包含了用于部署Kubernetes系统的所有安装定义文件,我们需要
改动的主要有两个,
1. 手动安装ssh pub key
这里的ssh pub key来自于安装目录下的kismaticuser.key.pub.

将部署所需的ssh pub key安装到节点机上:
[root@docker-1 ~]# vi /root/.ssh/authorized_keys


ssh-rsa
AAAAB3NzaC1yc2EAAAADAQABAA
......
填入的内容就是上面文件的内容
kismatic-cluster.yaml
这里只需要改动一行:

签名文件,改动到当前的绝对路径下。这个签名文件是用于离线部署kubernetes 所需docker镜像
所使用的。
部署
部署命令非常简单,
# ./kismatic install apply
当看到下列画面时,代表安装成功:
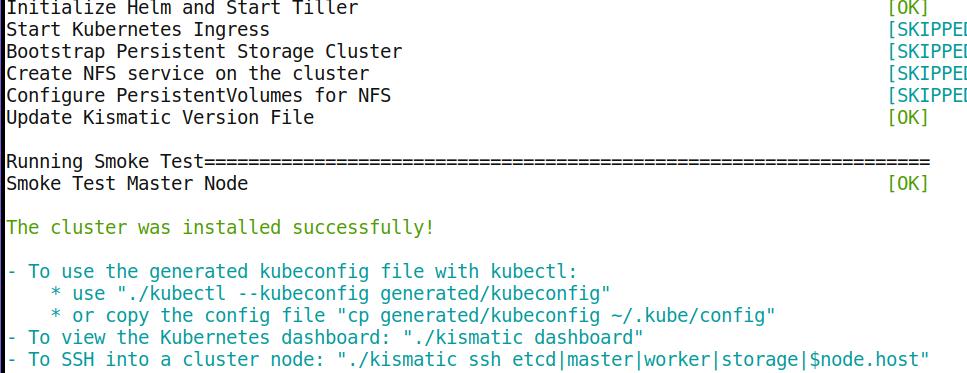
访问集群
搭建完毕的kismatic集群可以通过以下方式快捷访问:
# ./kismatic dashboard
弹出的画面即为Kubernetes的dashboard:
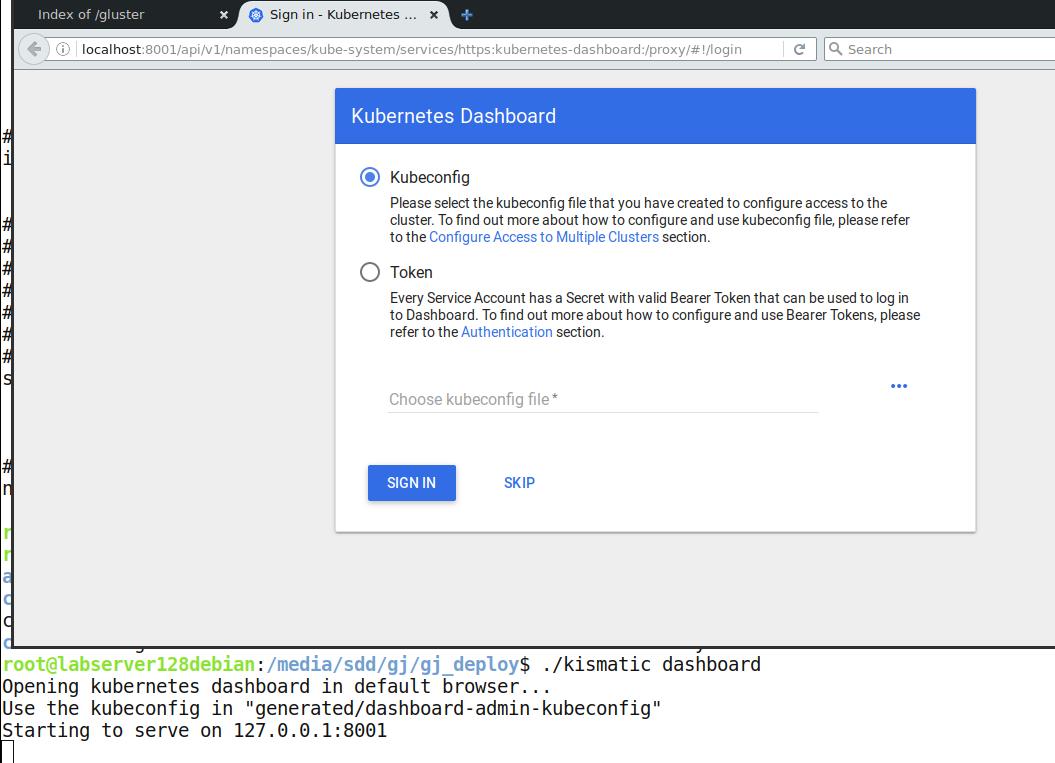
需要使用key来访问,key的位置如下(当前目录的generated目录下):
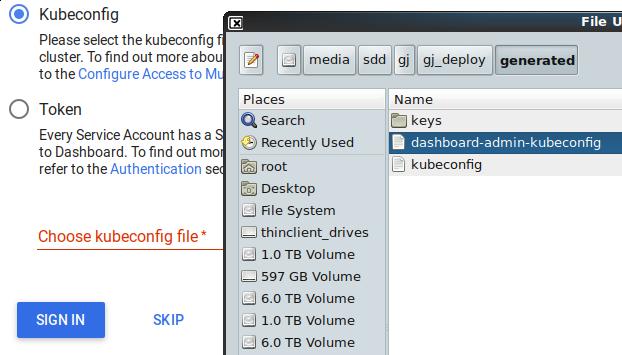
访问成功:
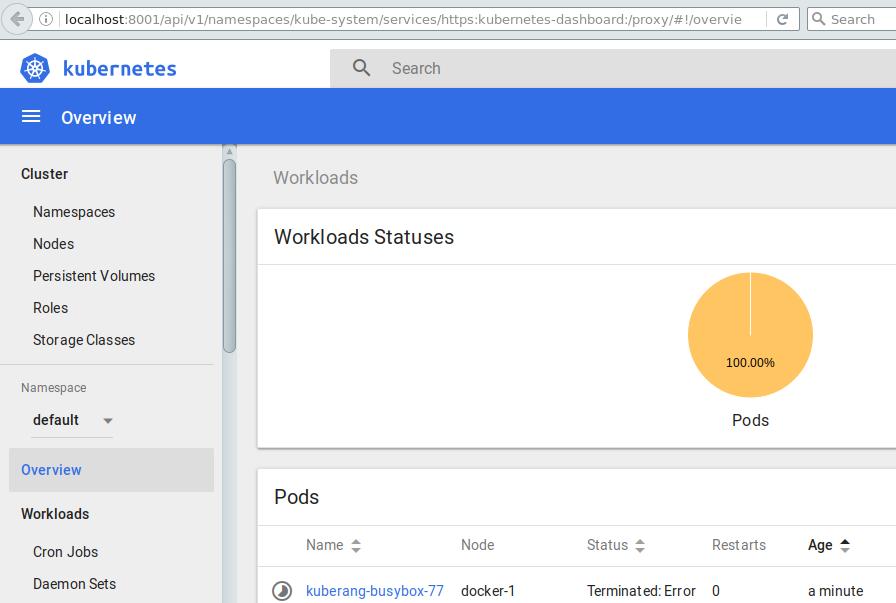
至此,kubernetes环境搭建成功。
Dashboard对外访问
更改运行中dashboard的service:
# ./kubectl --kubeconfig generated/kubeconfig edit svc kubernetes-dashboard -n
kube-system
将type:ClusterIP 改为 type:NodePort.
外部访问则是通过:
# ./kubectl --kubeconfig generated/kubeconfig get svc kubernetes-dashboard -n
kube-system
得到kubernetes-dashboard的NodePort端口即可.

Feb 9, 2018
TechnologyRepo
Use kismatic’s offline repository for deploying, CentOS 7.4.1708:
[base]
name=Base
baseurl=http://10.15.205.2/base
enabled=1
gpgcheck=0
gpgkey=file:///etc/pki/rpm-gpg/RPM-GPG-KEY-CentOS-7

[updates]
name=updates
baseurl=http://10.15.205.2/updates
enabled=1
gpgcheck=0
gpgkey=file:///etc/pki/rpm-gpg/RPM-GPG-KEY-CentOS-7

[docker]
name=docker
baseurl=http://10.15.205.2/docker
enabled=1
gpgcheck=0
gpgkey=file:///etc/pki/rpm-gpg/RPM-GPG-KEY-CentOS-7

[kubernetes]
name=kubernetes
baseurl=http://10.15.205.2/kubernetes
enabled=1
gpgcheck=0
gpgkey=file:///etc/pki/rpm-gpg/RPM-GPG-KEY-CentOS-7

[gluster]
name=gluster
baseurl=http://10.15.205.2/gluster
enabled=1
gpgcheck=0
gpgkey=file:///etc/pki/rpm-gpg/RPM-GPG-KEY-CentOS-7
Then install docker-ce via:
# yum install -y --setopt=obsoletes=0  docker-ce-17.03.0.ce-1.el7.centos
# systemctl enable docker && systemctl start docker
Feb 2, 2018
TechnologyEnvironment
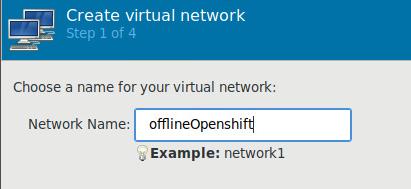
Create a new isolated network in virt-manager:
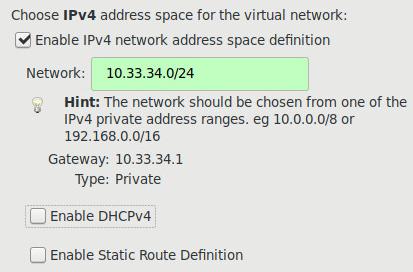
Specify the cidr of this network:
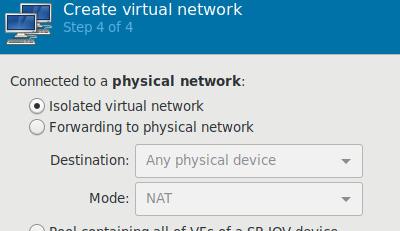
specify isolated:
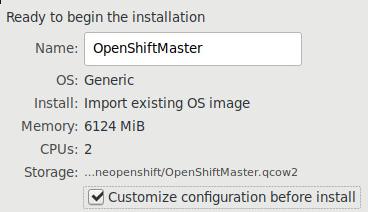
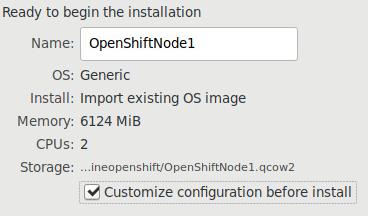
Virtual Machine
Two nodes, created via qemu-img:
# qemu-img create -f qcow2 -b base/centos74.qcow2 OpenShiftMaster.qcow2
# qemu-img create -f qcow2 -b base/centos74.qcow2 OpenShiftNode1.qcow2
Master node:
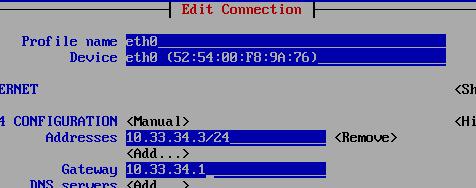
Node node1:
Repository Preparation
Mount the iso for becomming the iso repo:
# mkdir isopkgs
# mount -t iso9660 -o loop ./CentOS-7-x86_64-Everything-1708.iso isopkgs
mount: /media/sda/offlineopenshift/isopkgs: WARNING: device write-protected, mounted read-only.
# mkdir centos74iso
# cp -ar isopkgs/* centos74iso
Thus your repository will be:
# vim all.repo
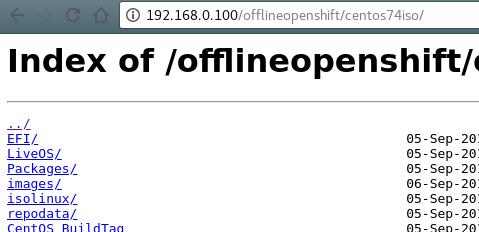
[iso]
name=iso
baseurl=http://192.168.0.100/offlineopenshift/centos74iso/
enabled=1
gpgcheck=0
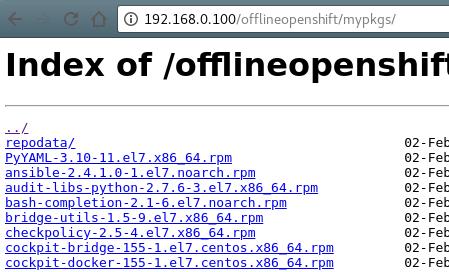
[local]
name=repo
baseurl=http://192.168.0.100/offlineopenshift/mypkgs/
enabled=1
gpgcheck=0
To upload this file to both master and node’s /etc/yum.repos.d/, and remove
all of the other repos:
[root@node1 yum.repos.d]# ls
all.repo  back
# yum makecache
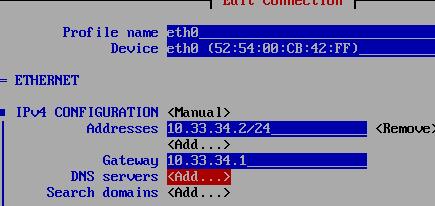
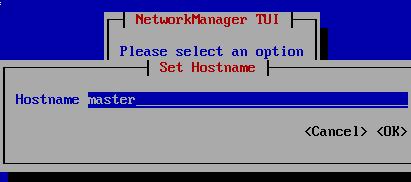
Networking For Nodes
Add both for master and node1, and enable password-less login for master/node1:
# vim /etc/hosts
127.0.0.1   localhost localhost.localdomain localhost4 localhost4.localdomain4
::1         localhost localhost.localdomain localhost6 localhost6.localdomain6
10.33.34.2      master
10.33.34.3      node1
# ssh-copy-id root@master
# ssh-copy-id root@node1
master
Install ansible for deploying the offline openshift:
# yum install -y ansible
Edit the hosts configuration:
# vim /etc/ansible/hosts
	############################# openshift ##############################3
	# Create an OSEv3 group that contains the masters, nodes, and etcd groups
	[OSEv3:children]
	masters
	nodes
	etcd

	# Set variables common for all OSEv3 hosts
	[OSEv3:vars]
	ansible_ssh_user=root
	deployment_type=origin
	openshift_disable_check=docker_image_availability,docker_storage,memory_availability

	[masters]
	master

	# host group for etcd
	[etcd]
	node1

	# host group for nodes, includes region info
	[nodes]
	master openshift_node_labels="{'region': 'infra', 'zone': 'default'}" openshift_schedulable=true
	node1 openshift_node_labels="{'region': 'infra', 'zone': 'default'}" openshift_schedulable=true
Test the connectivity:
# ansible all -m ping
master | SUCCESS => {
    "changed": false,
    "failed": false,
    "ping": "pong"
}
node1 | SUCCESS => {
    "changed": false,
    "failed": false,
    "ping": "pong"
}
Checkout the , and edit the yml for disabling the repository updating:
# vim ./roles/openshift_repos/tasks/centos_repos.yml
- name: Configure origin gpg keys
  copy:
    src: "origin/gpg_keys/openshift-ansible-CentOS-SIG-PaaS"
    dest: "/etc/pki/rpm-gpg/RPM-GPG-KEY-CentOS-SIG-PaaS"
  notify: refresh cache

# openshift_release is formatted to a standard string in openshift_version role.
# openshift_release is expected to be in format 'x.y.z...' here.
# Here, we drop the '.' characters and try to match the correct repo template
# for our corresponding openshift_release.
#- name: Configure correct origin release repository
#  template:
#    src: "{{ item }}"
#    dest: "/etc/yum.repos.d/{{ (item | basename | splitext)[0] }}"
#  with_first_found:
#    - "CentOS-OpenShift-Origin{{ (openshift_release | default('')).split('.') | join('') }}.repo.j2"
#    - "CentOS-OpenShift-Origin{{ ((openshift_release | default('')).split('.') | join(''))[0:2] }}.repo.j2"
#    - "CentOS-OpenShift-Origin.repo.j2"
#  notify: refresh cache
Ansible play magic:
# cd openshift-ansible
# ansible-playbook playbooks/byo/config.yml
Access Webpage
visit https://10.33.34.2:8443, username is dev, password is dev.
Jan 31, 2018
TechnologyOracle In Docker
Reference as:
https://blog.ansheng.me/article/django-using-oracle-database.html?from=singlemessage&isappinstalled=0
# firefox https://github.com/oracle/docker-images
### to get the docker-images-master.zip
# unzip docker-images-master.zip
# cd ./docker-images-master/OracleDatabase/dockerfiles/12.2.0.1
# firefox http://www.oracle.com/technetwork/database/enterprise-edition/downloads/index.html
### to get linuxx64_12201_database.zip
# ls linuxx64_12201_database.zip  -l -h
-rw-r--r-- 1 root root 3.3G Jan 29 22:31 linuxx64_12201_database.zip
# cd ..
# ls
11.2.0.2  12.1.0.2  12.2.0.1  buildDockerImage.sh
### edit following lines, ignore healthy check, or your building will be
### failed.
# vim 12.2.0.1/Dockerfile.ee
.....
VOLUME ["$ORACLE_BASE/oradata"]
EXPOSE 1521 5500
#HEALTHCHECK --interval=1m --start-period=5m \
#   CMD "$ORACLE_BASE/$CHECK_DB_FILE" >/dev/null || exit 1
.....
# ./buildDockerImage.sh -v 12.2.0.1 -e
After building , you will find the successfully-built image:
# docker images | grep oracle
oracle/database                                                             12.2.0.1-se2        ace79efeb013        32 hours ago        13.3 GB
oracle/database                                                             12.2.0.1-ee         f9f11957b88d        39 hours ago        13.3 GB
Upgraing from 11g
For using this docker image, do following:
# docker run -d --name oracle -p 1521:1521 -p 5500:5500 -e ORACLE_SID=testsid
-e ORACLE_PWD=testpassword123 oracle/database:12.2.0.1-ee
# docker logs -f oracle
the instance will take around 1 minutes for using.
System Configuration before importing sql:
# docker exec -it oracle /bin/bash
[oracle@2e931f80a99a ~]$ ls
setPassword.sh
[oracle@2e931f80a99a ~]$ scp -r root@192.192.189.129:/root/fresh_install1 .
[oracle@2e931f80a99a ~]$ echo
"SQLNET.ALLOWED_LOGON_VERSION_SERVER=8">>/opt/oracle/product/12.2.0.1/dbhome_1/network/admin/sqlnet.ora
[oracle@2e931f80a99a ~]$ echo
"SQLNET.ALLOWED_LOGON_VERSION_CLIENT=8">>/opt/oracle/product/12.2.0.1/dbhome_1/network/admin/sqlnet.ora
[oracle@2e931f80a99a ~]$ exit
exit
# docker restart oracle
Importing sql:
# docker exec -it oracle /bin/bash
[oracle@2e931f80a99a ~]$ export NLS_LANG="SIMPLIFIED CHINESE_CHINA.AL32UTF8"
[oracle@2e931f80a99a ~]$ sqlplus sys/testpassword123@localhost:1521/testsid as
sysdba

SQL*Plus: Release 12.2.0.1.0 Production on 星期三 1月 31 07:11:05 2018

Copyright (c) 1982, 2016, Oracle.  All rights reserved.


连接到:
Oracle Database 12c Enterprise Edition Release 12.2.0.1.0 - 64bit Production

SQL> @/home/oracle/fresh_install1/1_create_user_and_tablespace.sql
SP2-0734: 未知的命令开头 "--查询表..." - 忽略了剩余的行。

会话已更改。


系统已更改。
Using newly created username/password for importing more sql files:
[oracle@2e931f80a99a ~]$ sqlplus psm/psmpassword@localhost:1521/testsid

SQL*Plus: Release 12.2.0.1.0 Production on 星期三 1月 31 07:11:35 2018

Copyright (c) 1982, 2016, Oracle.  All rights reserved.


连接到:
Oracle Database 12c Enterprise Edition Release 12.2.0.1.0 - 64bit Production

SQL> @/home/oracle/fresh_install1/2_psm_ddl.sql
SQL> @/home/oracle/fresh_install1/3_psm_ddl.sql
SQL> @/home/oracle/fresh_install1/4_psm_ddl.sql
Testing using tord:
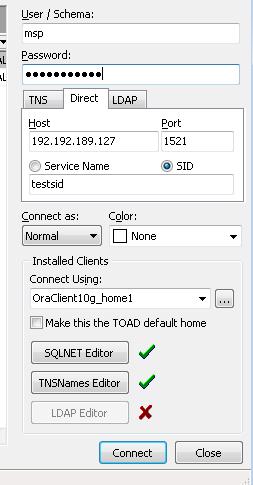
Now you could using this created oracle db for testing purpose.
Explanation
Add following lines for using oracle 12c:
Set following, or you won’t create the user like 11g:
alter session set "_ORACLE_SCRIPT"=true
Set following, or you won’t logon to the system using toad:
alter system set sec_case_sensitive_logon=false;
