KismatciDisconnectdInstallationRHEL74
Mar 18, 2018Technology
目的
基于Redhat 7.4搭建Kismatic自动化部署Kubernetes环境。
环境准备
软件:
rhel-server-7.4-x86_64-dvd.iso
virt-manager
网络 10.172.173.0/24, 无dhcp.
硬件:
4-Core, 32G台式机, 磁盘,大约200G
部署节点机准备
制作rhel74的基础镜像,虚拟机的制作过程同样可以适用于物理机器的部署流程.
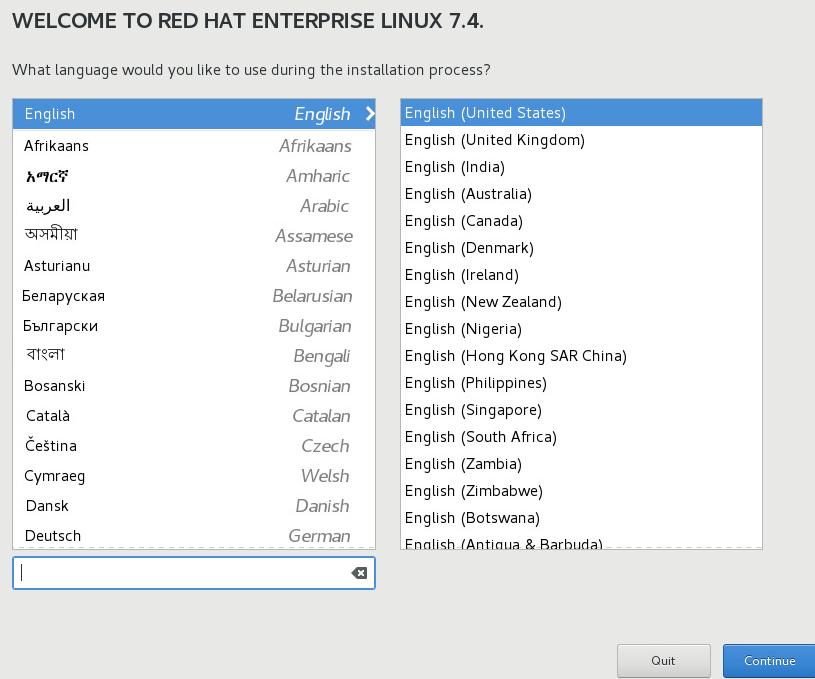
点击Installation destination, 分区:
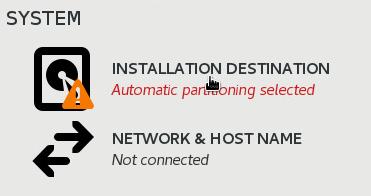
如下图所示,点击I will configure partitioning, 然后点击Done进入到分区界面:

点击Click here to create them automatically:
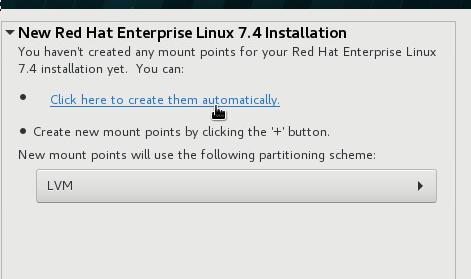
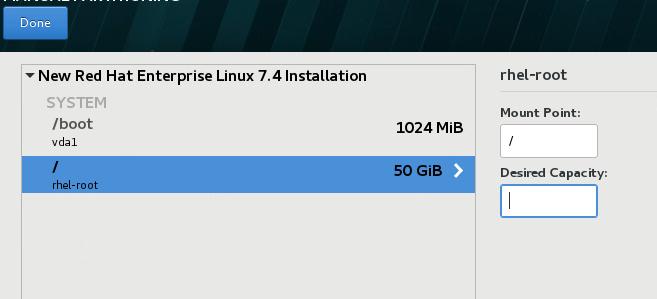
这里我们要删除swap分区,删除home分区,并手动调节root分区的大小,扩展到所有可用空间:
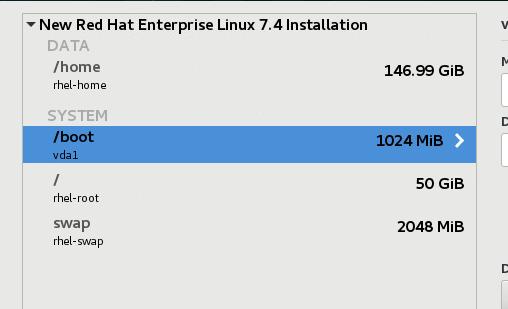
调整root分区大小如下:
点击两次Done按钮,出现警告:
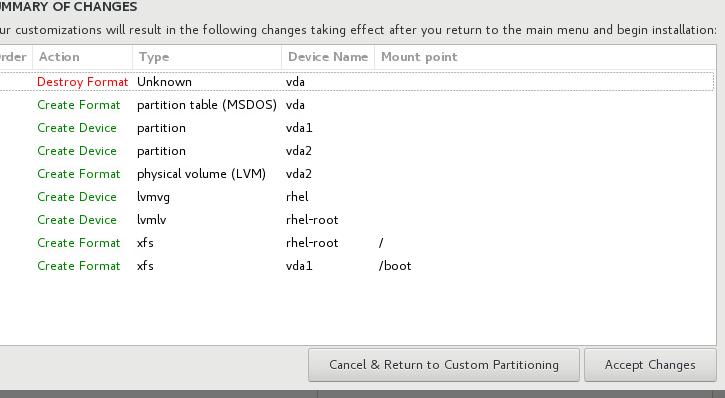
点击Accept,接受更改,进入到下一步, 配置Network & Host Name,
如此进入到安装界面,设置Root用户密码和用户/用户密码(如果你想添加用户的话)即可完成安装。
配置基本系统
selinux配置和防火墙配置, 禁用subscription:
# vi /etc/selinux/config
SELINUX=disabled
# systemctl disable firewalld
# vim /etc/yum/pluginconf.d/subscription-manager.conf
[main]
enabled=0
# mount /dev/sr0 /mnt
# vim /etc/yum.repos.d/local.repo
[local]
name=local
baseurl=file:///mnt
enabled=1
gpgcheck=0
# yum install -y vim httpd
现在保存基本系统,即可作为基础版本,供以后使用。
http server and docker registry server
创建镜像文件:
# qemu-img create -f qcow2 -b rhel74base/rhel74base.qcow2 rheldeployserver.qcow2
以此镜像文件,建立一个1核1G的rhel7系统.

成功启动系统后,同步镜像仓库,同步registry仓库(按照kismatic官方指南来),
具体步骤如下:
TBD
配置镜像仓库:
# systemctl enable httpd
# systemctl start httpd
配置docker-registry
# tar xzvf docker-registry.tar.gz
# mv docker-registry /
安装必要的包:
# yum install -y net-tools createrepo wget
创建repo:
# cd /var/www/html/
# for i in `ls `
do
createrepo $i
done
# wget -O /etc/yum.repos.d/epel.repo http://mirrors.aliyun.com/repo/epel-7.repo
# yum makecache
安装docker-compose:
# yum install -y python-pip
# pip install docker-compose
安装docker:
# yum install -y --setopt=obsoletes=0  docker-ce-17.03.0.ce-1.el7.centos
# systemctl enable docker
# systemctl start docker
载入registry所需的镜像:
# docker load<nginx.tar
# docker load<registry.tar
# docker images
REPOSITORY          TAG                 IMAGE ID            CREATED             SIZE
registry            <none>              d1fd7d86a825        2 months ago        33.3 MB
registry            2                   177391bcf802        3 months ago        33.3 MB
nginx               1.9                 c8c29d842c09        22 months ago       183 MB
配置docker-compose所需的系统级服务:
# vim  /etc/systemd/system/docker-compose.service
[Unit]
Description=DockerCompose
After=docker.service
Requires=docker.service

[Service]
ExecStart=/usr/bin/docker-compose -f /docker-registry/docker-compose.yml up -d

[Install]
WantedBy=multi-user.target
# systemctl start docker-compose
# systemctl enable docker-compose
登录/使用registry mirror的方法:
# vim /etc/hosts
192.168.205.13	mirror.xxxxx.com
# vim /etc/hosts
# docker login mirror.xxxx.com
Username (clouder): clouder
Password:
Login Succeeded
现在随意更改网络后,配置好对应的地址,即可使用该虚拟机进行部署。整个镜像的大小大约40G.
3-node kubernetes
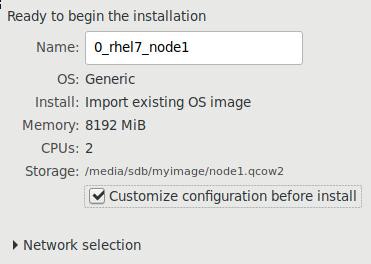
创建镜像文件:
# qemu-img create -f qcow2 -b rhel74base/rhel74base.qcow2 node1.qcow2
# qemu-img create -f qcow2 -b rhel74base/rhel74base.qcow2 node2.qcow2
# qemu-img create -f qcow2 -b rhel74base/rhel74base.qcow2 node3.qcow2
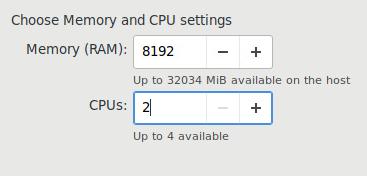
CPU/内存配置:
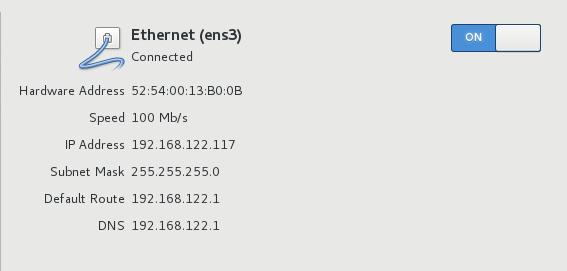
网络配置:
node1, node2, node3:
node1, 10.172.173.11
node2, 10.172.173.12
node3, 10.172.173.13
配置
三台机器上,分别添加/etc/hosts下的以下条目:
10.172.173.2 mirror.xxxx.com
其中10.172.173.2为我们配置的registry mirror服务器的地址。
然后就可以通过kismatic-cluster.yaml定义出对应的项,开始进行部署,部署完毕后我们得到一个拥有三个master的k8s集群.
[root@node1 ~]# kubectl get nodes
NAME      STATUS    ROLES     AGE       VERSION
node1     Ready     master    2h        v1.9.0
node2     Ready     master    2h        v1.9.0
node3     Ready     master    2h        v1.9.0
基于这个集群我们可以进行通用的开发。首先来配置高可用和ingress之类。
边缘节点
我们定义的边缘节点如下:
node1, 10.172.173.11
node2, 10.172.173.12
node3, 10.172.173.13
在三个节点上分别安装keepalived和ipvsadmin:
# yum install -y keepalived ipvsadm
配置文件:
[root@node1 mytraefik]# cat traefik.yaml
apiVersion: extensions/v1beta1
kind: DaemonSet
metadata:
  name: traefik-ingress-lb
  namespace: kube-system
  labels:
    k8s-app: traefik-ingress-lb
spec:
  template:
    metadata:
      labels:
        k8s-app: traefik-ingress-lb
        name: traefik-ingress-lb
    spec:
      terminationGracePeriodSeconds: 60
      hostNetwork: true
      restartPolicy: Always
      serviceAccountName: ingress
      containers:
      - image: mirror.xxxxx.com/traefik:latest
        imagePullPolicy: IfNotPresent
        name: traefik-ingress-lb
        resources:
          limits:
            cpu: 200m
            memory: 30Mi
          requests:
            cpu: 100m
            memory: 20Mi
        ports:
        - name: http
          containerPort: 80
          hostPort: 80
        - name: admin
          containerPort: 8580
          hostPort: 8580
        args:
        - --web
        - --web.address=:8580
        - --kubernetes
      nodeSelector:
        edgenode: "true"
[root@node1 mytraefik]# cat ui.yaml
apiVersion: v1
kind: Service
metadata:
  name: traefik-web-ui
  namespace: kube-system
spec:
  selector:
    k8s-app: traefik-ingress-lb
  ports:
  - name: web
    port: 80
    targetPort: 8580
---
apiVersion: extensions/v1beta1
kind: Ingress
metadata:
  name: traefik-web-ui
  namespace: kube-system
spec:
  rules:
  - host: traefik-ui.local
    http:
      paths:
      - path: /
        backend:
          serviceName: traefik-web-ui
          servicePort: web
[root@node1 mytraefik]# cat ingress-rbac.yaml
apiVersion: v1
kind: ServiceAccount
metadata:
  name: ingress
  namespace: kube-system

---

kind: ClusterRoleBinding
apiVersion: rbac.authorization.k8s.io/v1beta1
metadata:
  name: ingress
subjects:
  - kind: ServiceAccount
    name: ingress
    namespace: kube-system
roleRef:
  kind: ClusterRole
  name: cluster-admin
  apiGroup: rbac.authorization.k8s.io
创建服务:
# kubectl create -f ingress-rbac.yaml traefik.yaml ui.yaml
现在只需要添加一行到/etc/hosts中,即可访问traefik的ui界面:
10.172.173.100 traefik-ui.local
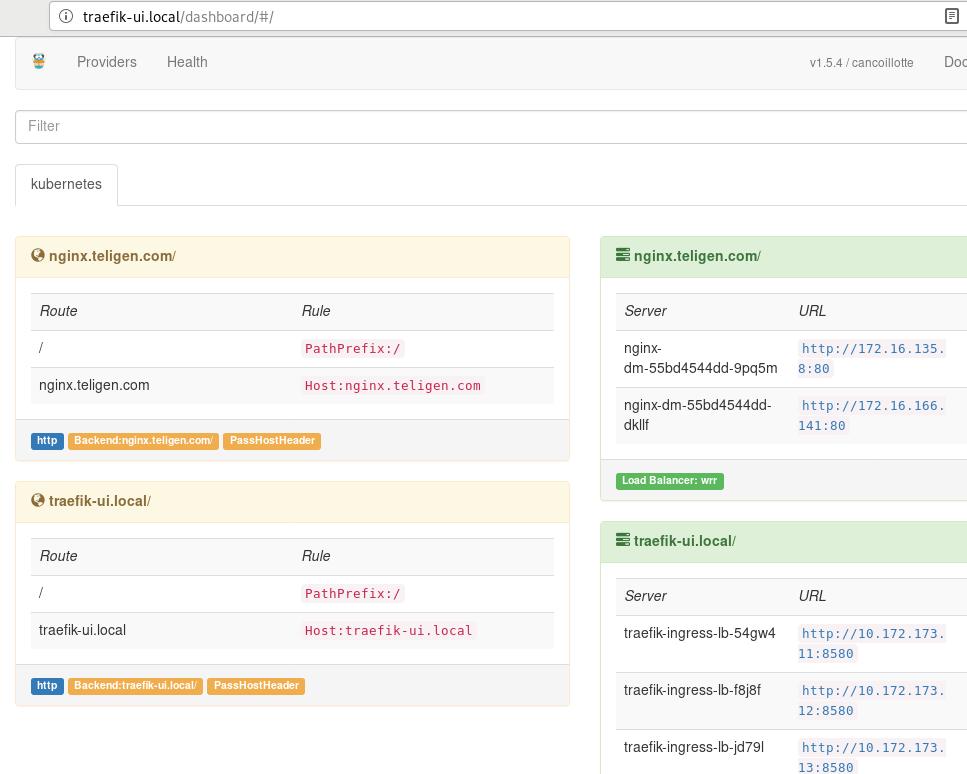
nginx服务
定义文件如下:
[root@node1 mytraefik]# cat nginx.yaml
apiVersion: extensions/v1beta1
kind: Deployment
metadata:
  name: nginx-dm
spec:
  replicas: 2
  template:
    metadata:
      labels:
        name: nginx
    spec:
      containers:
        - name: nginx
          image: mirror.xxxx.com/nginx:latest
          imagePullPolicy: IfNotPresent
          ports:
            - containerPort: 80

---
apiVersion: v1
kind: Service
metadata:
  name: nginx-dm
spec:
  ports:
    - port: 80
      targetPort: 80
      protocol: TCP
  selector:
    name: nginx
You have new mail in /var/spool/mail/root
[root@node1 mytraefik]# cat traefik-ingress.yaml
apiVersion: extensions/v1beta1
kind: Ingress
metadata:
  name: traefik-ingress
spec:
  rules:
  - host: nginx.xxxx.com
    http:
      paths:
      - path: /
        backend:
          serviceName: nginx-dm
          servicePort: 80
同样在外部添加/etc/hosts中的对应条目即可.