Apr 7, 2018
TechnologyEnvironment
Qemu Image
Qemu image preparation:
# mkdir offline-play-with-docker
# cd offline-play-with-docker
# qemu-img create -f qcow2 offline-play-with-docker.qcow2 200G
Formatting 'offline-play-with-docker.qcow2', fmt=qcow2 size=214748364800 cluster_size=65536 lazy_refcounts=off refcount_bits=16
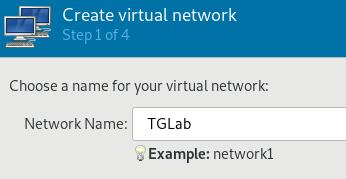
Virt-manager Networking
Network Name:
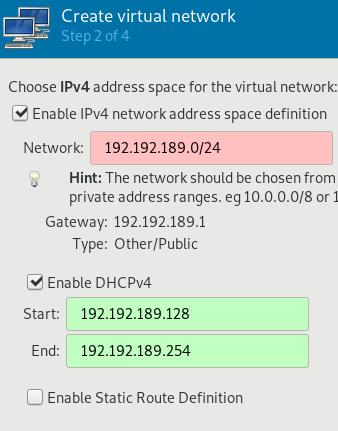
 Definition of IPV4:
Warning:

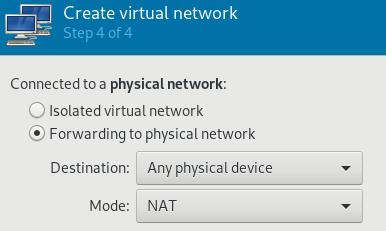
Isolation(Could be adjust to isolated):
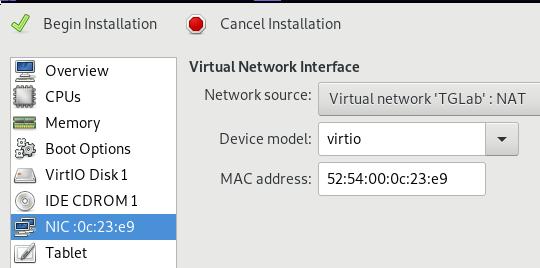
Create vm and specify vmworks:
Install CentOS 7.4, partition like following:
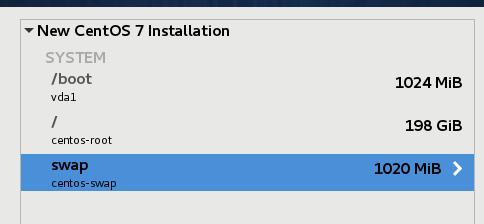
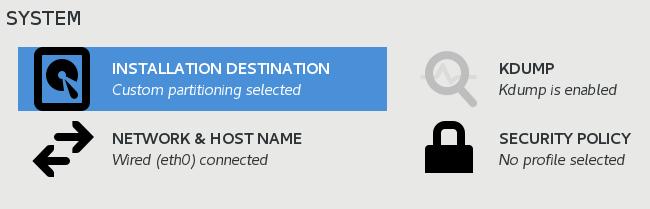
System
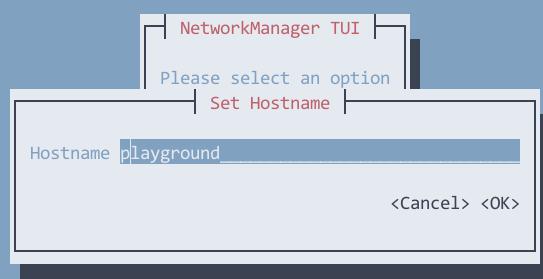
Set the hostname via:
Install mate desktop(for debugging purpose):
# wget -O /etc/yum.repos.d/epel.repo http://mirrors.aliyun.com/repo/epel-7.repo
# yum --enablerepo=epel -y groups install "MATE Desktop"
Install some tools:
# yum install -y vim wget python-pip gcc git nethogs
# pip install shadowsocks
# pip inststall --upgrade pip
# yum install -y libevent-devel
# build the redsocks for crossing the gfw!!!
Now you could cross the firewall for installing the go or other
staffs(crossing the gfw WILL let everything more smoothly).
Install docker-ce:
#  yum install -y yum-utils \
  device-mapper-persistent-data \
  lvm2
# yum-config-manager \
    --add-repo \
    https://download.docker.com/linux/centos/docker-ce.repo
# yum install -y docker-ce
Install docker-compose via pip:
# pip install docker-compose
Start and enable docker:
# systemctl enable docker
# systemctl start docker
# docker swarm init
You have to run docker swarm init, or you won’t login into the
play-with-docker.
Install golang:
# yum install -y golang
# mkdir ~/go
# vim ~/.bashrc
export GOPATH=/root/go
export PATH=$PATH:$GOPATH/bin
Create the directory and clone the source code:
# mkdir ~/Code
# cd Code
# git clone https://github.com/play-with-docker/play-with-docker.git
Build the play-with-go:
# go get -u github.com/golang/dep/cmd/dep
# which dep
/root/go/bin/dep
# cd ~/Code/play-with-docker/
# go get -v -d -t ./...
# cd /root/go/src/github.com/play-with-docker/play-with-docker
# dep ensure
Fixed IP
Fixed IP address then we could manually build the dind adjusting to this IP
address:

Local Registry
In order to work offline, we have to use local repository.
# mkdir ~/data
# cd ~/data
# docker run -it --rm --entrypoint cat registry:2 /etc/docker/registry/config.yml > config.yml
# vim config.yml
proxy:
      remoteurl: https://registry-1.docker.io
# mkdir ~/data/data
# docker run -d --restart=always -p 5000:5000 --name docker-registry-proxy-2 -v /root/data/config.yml:/etc/docker/registry/config.yml -v /root/data/data:/var/lib/registry registry:2
Now examine the docker registry running:
# docker ps
CONTAINER ID        IMAGE               COMMAND                  CREATED             STATUS              PORTS                    NAMES
0ea38c808e8d        registry:2          "/entrypoint.sh /etc…"   2 seconds ago       Up 1 second         0.0.0.0:5000->5000/tcp   docker-registry-proxy-2
Build dind
dind is docker in docker, which is a docker image for running docker
instance inside docker, we build it manually:
# vim
/root/go/src/github.com/play-with-docker/play-with-docker/dockerfiles/dind/daemon.json
    "insecure-registries": ["https://192.192.189.114:5000"],
# vim
/root/go/src/github.com/play-with-docker/play-with-docker/dockerfiles/dind/Dockerfile
......
    /usr/sbin/sshd -o PermitRootLogin=yes -o PrintMotd=no 2>/dev/null && \
    dockerd --registry-mirror=http://192.192.189.114:5000 &>/docker.log
......
Build the image:
# docker build -t franela/dind:latest .
# docker images | grep dind
franela/dind        latest              7832d23a42c7        About a minute ago   439MB
docker              stable-dind         d303f49c92a7        2 weeks ago          147MB
This dind image could use local registry, so we only need to sync once, then
we could let it running really offlinely.
Local play-with-docker
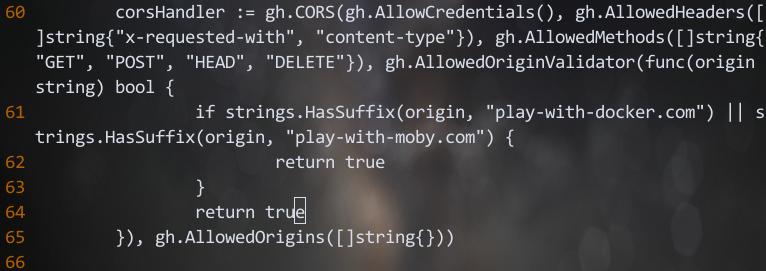
Change the source code:
# cd /root/go/src/github.com/play-with-docker/play-with-docker
# vim handlers/bootstrap.go +64
- return false
+ return true
# vim config/config.go
 flag.StringVar(&PlaygroundDomain, "playground-domain", "192.192.189.114", "Domain to use for the playground")
Make sure your dnsmasq is running, then edit the /etc/dnsmasq.conf via:
.................
# Add local-only domains here, queries in these domains are answered
# from /etc/hosts or DHCP only.
#local=/localnet/
address=/192.192.189.114/192.192.189.114
address=/localhost/127.0.0.1
.................
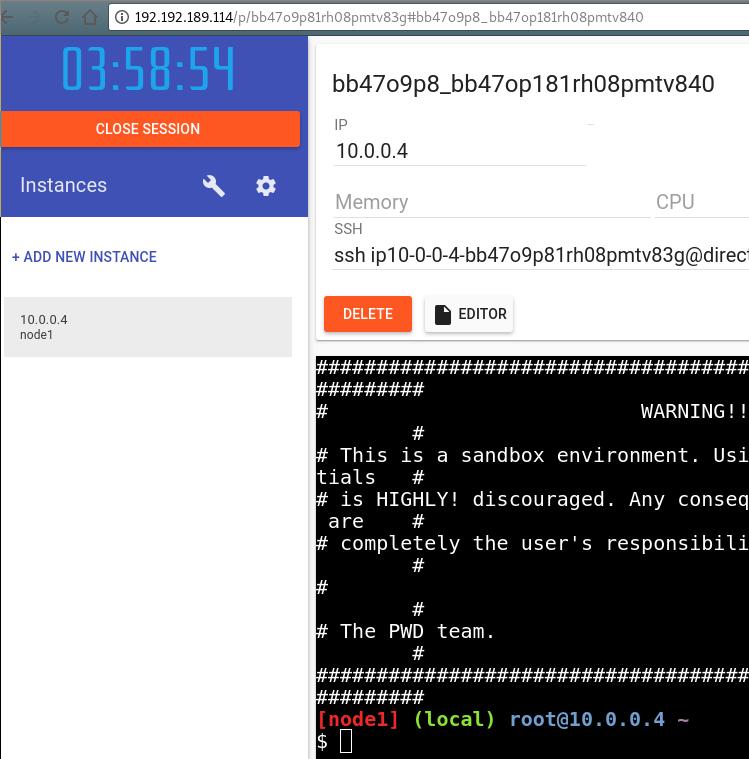
Run play-with-docker:
# cd /root/go/src/github.com/play-with-docker/play-with-docker
# docker-compose up
Then use a browser to access this website:
Examine the registry now:
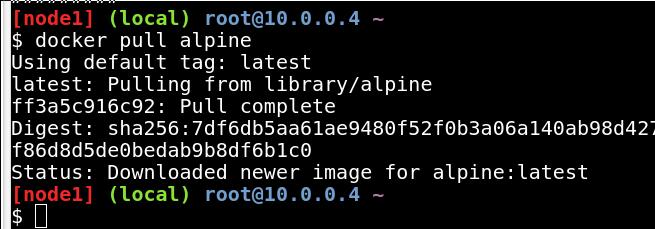
Then in host terminal, examine the downloaded registry cache:
curl http://192.192.189.114:5000/v2/_catalog
{"repositories":["library/alpine","library/ubuntu"]}
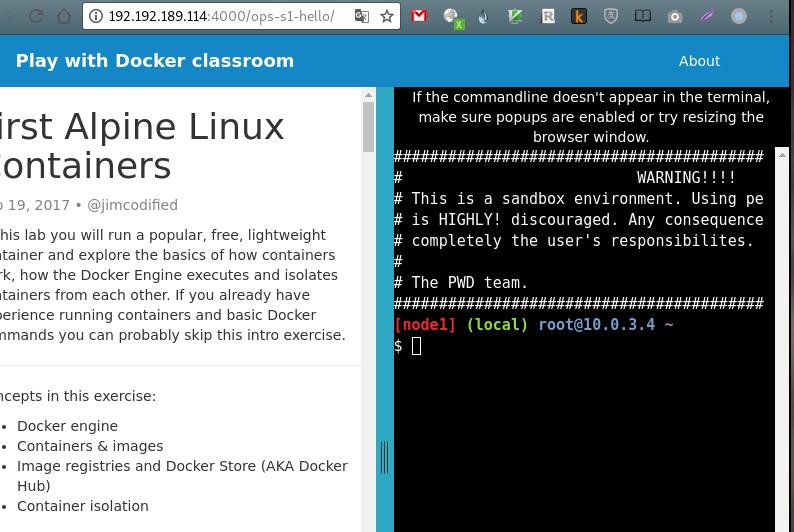
play-with-docker classroom
Clone the repository:
# cd ~/Code
# git clone https://github.com/play-with-docker/play-with-docker.github.io.git
# cd play-with-docker.github.io/
# vim _config.yml
pwdurl: http://192.192.189.114

# mkdir _site
# groupadd jekyll
# useradd jekyll -m -g jekyll
# chown jekyll:jekyll -R .
# docker-compose up
Now open the browser and see the result:
tips for docker-nginx
# docker run --name docker-nginx -p 8333:80 -d -v /root/gcr:/usr/share/nginx/html jrelva/nginx-autoindex
root@playwithdocker:/etc/systemd/system# cat mynginx.service
[Unit]
Description=mynginx
Requires=docker.service
After=docker.service

[Service]
Restart=always
ExecStart=/usr/bin/docker start -a docker-nginx
ExecStop=/usr/bin/docker stop -t 2 docker-nginx

[Install]
WantedBy=multi-user.target
Apr 7, 2018
TechnologyBackground
I want to run play-with-docker offline, so I have to setup the whole offline
environment. In chapter 2 of play-with-docker, it requires building image
using alpine, its command apk add nodejs requires internet-connection. In
order to let the whole tutorial working offlinely, I have to setup an Alpine
offline repository and let it working.
Vagrant Env
The libvirt vagrant box is easy to download and run via following command:
# vagrant init generic/alpine37
# vagrant up --provider=libvirt
# vagrant ssh
# cat /etc/issue
Welcome to Alpine Linux 3.7
Kernel \r on an \m (\l)
Repository Server
This server could reach internet, so it could get packages, and generate the
installation repository.
Take nodejs for example, I will create its offline installation reository in
this machine:
# apk add nodejs
This command will download all of the nodejs related package under
/var/cache/apk, then we could use these packages for installation:
# apk index -vU --allow-untrusted -o /etc/apk/cache/APKINDEX.tar.gz /etc/apk/cache/*.apk
Using following scripts for generating symbolic cheating apks for
installation:
#!/bin/bash
for f in $( cd /etc/apk/cache && ls *.apk ); do g=$(echo ${f:0:-13}.apk); cd /etc/apk/cache; ln -s $f $g; done
Your directory /etc/apk/cache will like following:
# ls -l -h | more
total 98612
-rw-r--r--    1 root     root       14.4K Apr  6 08:31 APKINDEX.tar.gz
lrwxrwxrwx    1 root     root          28 Apr  6 08:32 abuild-3.1.0-r3.apk -> abuild-3.1.0-r3.e1614238.apk
-rw-r--r--    1 root     root       71.5K Apr  6 05:57 abuild-3.1.0-r3.e1614238.apk
lrwxrwxrwx    1 root     root          26 Apr  6 08:32 acct-6.6.4-r0.apk -> acct-6.6.4-r0.f2caf476.apk
-rw-r--r--    1 root     root       57.7K Mar 22 17:31 acct-6.6.4-r0.f2caf476.apk
-rw-r--r--    1 root     root        1.6K Mar 22 17:31 alpine-base-3.7.0-r0.6e79e3bb.apk
lrwxrwxrwx    1 root     root          33 Apr  6 08:32 alpine-base-3.7.0-r0.apk -> alpine-base-3.7.0-r0.6e79e3bb.apk
Using following commands for uploading repository to http server:
scp -r /var/cache/apk/ xxx@192.168.122.1:/var/download/myapk/
In server 192.168.122.1's folder /var/download/myapk, do following
operation:
# ln -s x86_64 noarch
Client
In client, do following setting:
# vim  /etc/apk/repositories
    #https://dl-3.alpinelinux.org/alpine/v3.7/main
    #https://mirror.leaseweb.com/alpine/v3.7/main
    http://192.168.122.1/myapk
Update the repository via following command:
# apk update --allow-untrusted
fetch http://192.168.122.1/myapk/x86_64/APKINDEX.tar.gz
OK: 110 distinct packages available
Install nodejs via following commands:
# apk add nodejs --allow-untrusted
(1/8) Installing nodejs-npm (8.9.3-r1)
(2/8) Installing c-ares (1.13.0-r0)
(3/8) Installing libcrypto1.0 (1.0.2o-r0)
(4/8) Installing http-parser (2.7.1-r1)
(5/8) Installing libssl1.0 (1.0.2o-r0)
(6/8) Installing libstdc++ (6.4.0-r5)
(7/8) Installing libuv (1.17.0-r0)
(8/8) Installing nodejs (8.9.3-r1)
Executing busybox-1.27.2-r8.trigger
OK: 228 MiB in 82 packages
TBD
You could add trusted signature to repository, but this will let you get the
signature firstly.
Apr 1, 2018
TechnologyInstall via:
 $ git clone https://github.com/kdlucas/byte-unixbench.git
Cloning into 'byte-unixbench'...
remote: Counting objects: 204, done.
remote: Total 204 (delta 0), reused 0 (delta 0), pack-reused 204
Receiving objects: 100% (204/204), 198.85 KiB | 207.00 KiB/s, done.
Resolving deltas: 100% (105/105), done.
pi@raspberrypi:~ $ cd byte-unixbench/UnixBench/
Run steps:
pi@raspberrypi:~/byte-unixbench/UnixBench $ ./Run
gcc -o pgms/arithoh -Wall -pedantic -O3 -ffast-math -march=native -mtune=native -I ./src -DTIME -Darithoh src/arith.c
gcc -o pgms/register -Wall -pedantic -O3 -ffast-math -march=native -mtune=native -I ./src -DTIME -Ddatum='register int' src/arith.c
gcc -o pgms/short -Wall -pedantic -O3 -ffast-math -march=native -mtune=native -I ./src -DTIME -Ddatum=short src/arith.c
gcc -o pgms/int -Wall -pedantic -O3 -ffast-math -march=native -mtune=native -I ./src -DTIME -Ddatum=int src/arith.c
gcc -o pgms/long -Wall -pedantic -O3 -ffast-math -march=native -mtune=native -I ./src -DTIME -Ddatum=long src/arith.c
gcc -o pgms/float -Wall -pedantic -O3 -ffast-math -march=native -mtune=native -I ./src -DTIME -Ddatum=float src/arith.c
gcc -o pgms/double -Wall -pedantic -O3 -ffast-math -march=native -mtune=native -I ./src -DTIME -Ddatum=double src/arith.c
gcc -o pgms/hanoi -Wall -pedantic -O3 -ffast-math -march=native -mtune=native -I ./src -DTIME src/hanoi.c
gcc -o pgms/syscall -Wall -pedantic -O3 -ffast-math -march=native -mtune=native -I ./src -DTIME src/syscall.c
gcc -o pgms/context1 -Wall -pedantic -O3 -ffast-math -march=native -mtune=native -I ./src -DTIME src/context1.c
gcc -o pgms/pipe -Wall -pedantic -O3 -ffast-math -march=native -mtune=native -I ./src -DTIME src/pipe.c
gcc -o pgms/spawn -Wall -pedantic -O3 -ffast-math -march=native -mtune=native -I ./src -DTIME src/spawn.c
gcc -o pgms/execl -Wall -pedantic -O3 -ffast-math -march=native -mtune=native -I ./src -DTIME src/execl.c
gcc -o pgms/dhry2 -Wall -pedantic -O3 -ffast-math -march=native -mtune=native -I ./src -DTIME -DHZ= ./src/dhry_1.c ./src/dhry_2.c
gcc -o pgms/dhry2reg -Wall -pedantic -O3 -ffast-math -march=native -mtune=native -I ./src -DTIME -DHZ= -DREG=register ./src/dhry_1.c ./src/dhry_2.c
gcc -o pgms/looper -Wall -pedantic -O3 -ffast-math -march=native -mtune=native -I ./src -DTIME src/looper.c
gcc -o pgms/fstime -Wall -pedantic -O3 -ffast-math -march=native -mtune=native -I ./src -DTIME src/fstime.c
gcc -o pgms/whetstone-double -Wall -pedantic -O3 -ffast-math -march=native -mtune=native -I ./src -DTIME -DDP -DGTODay -DUNIXBENCH src/whets.c -lm
make all
make[1]: Entering directory '/home/pi/byte-unixbench/UnixBench'
make distr
make[2]: Entering directory '/home/pi/byte-unixbench/UnixBench'
Checking distribution of files
./pgms  exists
./src  exists
./testdir  exists
./tmp  exists
./results  exists
make[2]: Leaving directory '/home/pi/byte-unixbench/UnixBench'
make programs
make[2]: Entering directory '/home/pi/byte-unixbench/UnixBench'
make[2]: Nothing to be done for 'programs'.
make[2]: Leaving directory '/home/pi/byte-unixbench/UnixBench'
make[1]: Leaving directory '/home/pi/byte-unixbench/UnixBench'
sh: 1: 3dinfo: not found

   #    #  #    #  #  #    #          #####   ######  #    #   ####   #    #
   #    #  ##   #  #   #  #           #    #  #       ##   #  #    #  #    #
   #    #  # #  #  #    ##            #####   #####   # #  #  #       ######
   #    #  #  # #  #    ##            #    #  #       #  # #  #       #    #
   #    #  #   ##  #   #  #           #    #  #       #   ##  #    #  #    #
    ####   #    #  #  #    #          #####   ######  #    #   ####   #    #

   Version 5.1.3                      Based on the Byte Magazine Unix Benchmark

   Multi-CPU version                  Version 5 revisions by Ian Smith,
                                      Sunnyvale, CA, USA
   January 13, 2011                   johantheghost at yahoo period com

------------------------------------------------------------------------------
   Use directories for:
      * File I/O tests (named fs***) = /home/pi/byte-unixbench/UnixBench/tmp
      * Results                      = /home/pi/byte-unixbench/UnixBench/results
------------------------------------------------------------------------------

Use of uninitialized value in printf at ./Run line 1469.
Use of uninitialized value in printf at ./Run line 1470.
Use of uninitialized value in printf at ./Run line 1469.
Use of uninitialized value in printf at ./Run line 1470.
Use of uninitialized value in printf at ./Run line 1469.
Use of uninitialized value in printf at ./Run line 1470.
Use of uninitialized value in printf at ./Run line 1469.
Use of uninitialized value in printf at ./Run line 1470.
Use of uninitialized value in printf at ./Run line 1721.
Use of uninitialized value in printf at ./Run line 1722.
Use of uninitialized value in printf at ./Run line 1721.
Use of uninitialized value in printf at ./Run line 1722.
Use of uninitialized value in printf at ./Run line 1721.
Use of uninitialized value in printf at ./Run line 1722.
Use of uninitialized value in printf at ./Run line 1721.
Use of uninitialized value in printf at ./Run line 1722.

1 x Dhrystone 2 using register variables  1 2 3 4 5 6 7 8 9 10

1 x Double-Precision Whetstone  1 2 3 4 5 6 7 8 9 10

1 x Execl Throughput  1 2 3

1 x File Copy 1024 bufsize 2000 maxblocks  1 2 3

1 x File Copy 256 bufsize 500 maxblocks  1 2 3

1 x File Copy 4096 bufsize 8000 maxblocks  1 2 3

1 x Pipe Throughput  1 2 3 4 5 6^[[C 7 8 9 10

1 x Pipe-based Context Switching  1 2 3 4 5 6 7 8 9 10

1 x Process Creation  1 2 3

1 x System Call Overhead  1 2 3 4 5 6 7 8 9 10

1 x Shell Scripts (1 concurrent)  1 2 3

1 x Shell Scripts (8 concurrent)  1 2 3

4 x Dhrystone 2 using register variables  1 2 3 4 5 6 7 8 9 10

4 x Double-Precision Whetstone  1 2 3 4 5 6 7 8 9 10

4 x Execl Throughput  1 2 3

4 x File Copy 1024 bufsize 2000 maxblocks  1 2 3

4 x File Copy 256 bufsize 500 maxblocks  1 2 3

4 x File Copy 4096 bufsize 8000 maxblocks  1 2 3

4 x Pipe Throughput  1 2 3 4 5 6 7 8 9 10

4 x Pipe-based Context Switching  1 2 3 4 5 6 7 8 9 10

4 x Process Creation  1 2 3

4 x System Call Overhead  1 2 3 4 5 6 7 8 9 10

4 x Shell Scripts (1 concurrent)  1 2 3

4 x Shell Scripts (8 concurrent)  1 2 3

========================================================================
   BYTE UNIX Benchmarks (Version 5.1.3)

   System: raspberrypi: GNU/Linux
   OS: GNU/Linux -- 4.9.59-v7+ -- #1047 SMP Sun Oct 29 12:19:23 GMT 2017
   Machine: armv7l (unknown)
   Language: en_US.utf8 (charmap="UTF-8", collate="UTF-8")
   CPU 0: ARMv7 Processor rev 4 (v7l) (0.0 bogomips)

   CPU 1: ARMv7 Processor rev 4 (v7l) (0.0 bogomips)

   CPU 2: ARMv7 Processor rev 4 (v7l) (0.0 bogomips)

   CPU 3: ARMv7 Processor rev 4 (v7l) (0.0 bogomips)

   12:29:03 up 6 min,  4 users,  load average: 0.16, 0.08, 0.02; runlevel 2018-03-07

------------------------------------------------------------------------
Benchmark Run: Sun Apr 01 2018 12:29:03 - 12:57:08
4 CPUs in system; running 1 parallel copy of tests

Dhrystone 2 using register variables        4333035.5 lps   (10.0 s, 7 samples)
Double-Precision Whetstone                     1060.4 MWIPS (9.9 s, 7 samples)
Execl Throughput                                505.3 lps   (29.9 s, 2 samples)
File Copy 1024 bufsize 2000 maxblocks        142961.6 KBps  (30.0 s, 2 samples)
File Copy 256 bufsize 500 maxblocks           41135.5 KBps  (30.0 s, 2 samples)
File Copy 4096 bufsize 8000 maxblocks        365027.4 KBps  (30.0 s, 2 samples)
Pipe Throughput                              282493.9 lps   (10.0 s, 7 samples)
Pipe-based Context Switching                  58563.1 lps   (10.0 s, 7 samples)
Process Creation                               2040.7 lps   (30.0 s, 2 samples)
Shell Scripts (1 concurrent)                   1910.4 lpm   (60.0 s, 2 samples)
Shell Scripts (8 concurrent)                    545.6 lpm   (60.1 s, 2 samples)
System Call Overhead                         572609.5 lps   (10.0 s, 7 samples)

System Benchmarks Index Values               BASELINE       RESULT    INDEX
Dhrystone 2 using register variables         116700.0    4333035.5    371.3
Double-Precision Whetstone                       55.0       1060.4    192.8
Execl Throughput                                 43.0        505.3    117.5
File Copy 1024 bufsize 2000 maxblocks          3960.0     142961.6    361.0
File Copy 256 bufsize 500 maxblocks            1655.0      41135.5    248.6
File Copy 4096 bufsize 8000 maxblocks          5800.0     365027.4    629.4
Pipe Throughput                               12440.0     282493.9    227.1
Pipe-based Context Switching                   4000.0      58563.1    146.4
Process Creation                                126.0       2040.7    162.0
Shell Scripts (1 concurrent)                     42.4       1910.4    450.6
Shell Scripts (8 concurrent)                      6.0        545.6    909.3
System Call Overhead                          15000.0     572609.5    381.7
                                                                   ========
System Benchmarks Index Score                                         293.0

------------------------------------------------------------------------
Benchmark Run: Sun Apr 01 2018 12:57:08 - 13:25:34
4 CPUs in system; running 4 parallel copies of tests

Dhrystone 2 using register variables       13303366.2 lps   (10.0 s, 7 samples)
Double-Precision Whetstone                     3615.2 MWIPS (11.6 s, 7 samples)
Execl Throughput                               1843.0 lps   (30.0 s, 2 samples)
File Copy 1024 bufsize 2000 maxblocks        177911.7 KBps  (30.0 s, 2 samples)
File Copy 256 bufsize 500 maxblocks           49727.3 KBps  (30.0 s, 2 samples)
File Copy 4096 bufsize 8000 maxblocks        479258.8 KBps  (30.0 s, 2 samples)
Pipe Throughput                              931248.6 lps   (10.0 s, 7 samples)
Pipe-based Context Switching                 163404.7 lps   (10.0 s, 7 samples)
Process Creation                               4630.4 lps   (30.0 s, 2 samples)
Shell Scripts (1 concurrent)                   4356.6 lpm   (60.0 s, 2 samples)
Shell Scripts (8 concurrent)                    529.4 lpm   (60.3 s, 2 samples)
System Call Overhead                        2204195.4 lps   (10.0 s, 7 samples)

System Benchmarks Index Values               BASELINE       RESULT    INDEX
Dhrystone 2 using register variables         116700.0   13303366.2   1140.0
Double-Precision Whetstone                       55.0       3615.2    657.3
Execl Throughput                                 43.0       1843.0    428.6
File Copy 1024 bufsize 2000 maxblocks          3960.0     177911.7    449.3
File Copy 256 bufsize 500 maxblocks            1655.0      49727.3    300.5
File Copy 4096 bufsize 8000 maxblocks          5800.0     479258.8    826.3
Pipe Throughput                               12440.0     931248.6    748.6
Pipe-based Context Switching                   4000.0     163404.7    408.5
Process Creation                                126.0       4630.4    367.5
Shell Scripts (1 concurrent)                     42.4       4356.6   1027.5
Shell Scripts (8 concurrent)                      6.0        529.4    882.4
System Call Overhead                          15000.0    2204195.4   1469.5
                                                                   ========
System Benchmarks Index Score                                         646.8
结果说明
测试的结果是一个指数值(index value,如520),这个值是测试系统的测试结果与一个基线系统测试结果比较得到的指数值,这样比原始值更容易得到参考价值,测试集合里面所有的测试得到的指数值结合起来得到整个系统的指数值。
UnixBench也支持多CPU系统的测试,默认的行为是测试两次,第一次是一个进程的测试,第二次是N份测试,N等于CPU个数。这样的设计是为了以下目标:
- 测试系统的单任务性能
- 测试系统的多任务性能
- 测试系统并行处理的能力
Mar 27, 2018
Technology环境
gitlab搭建完毕,gitlabci配置完毕。
目的: 整合从代码到发布一条龙服务。
代码提交->生成中间制品pdf.
代码提交-> 更新静态网站.
步骤
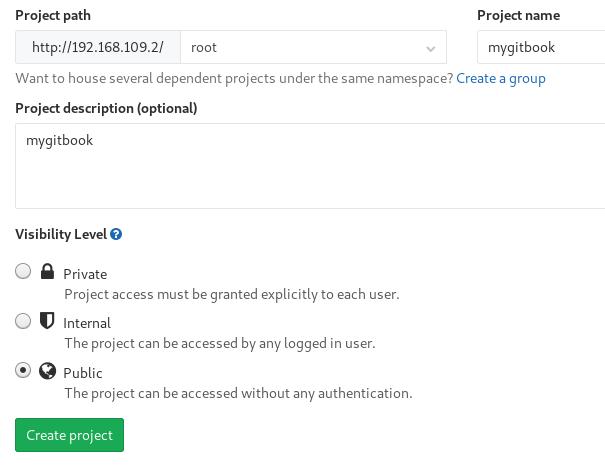
创建一个新项目:

命名该项目:
将已有的代码(书)提交到代码仓库:
# git init
# git remote add origin http://192.168.109.2/root/mygitbook.git
# git add .
# git commit -m "Initial commit"
# git push -u origin master
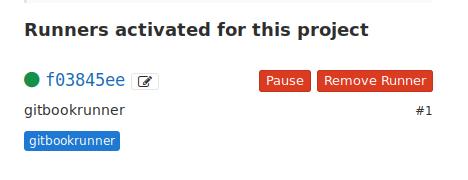
与此同时,注册runner, 并保证runner所依赖的容器镜像就绪:
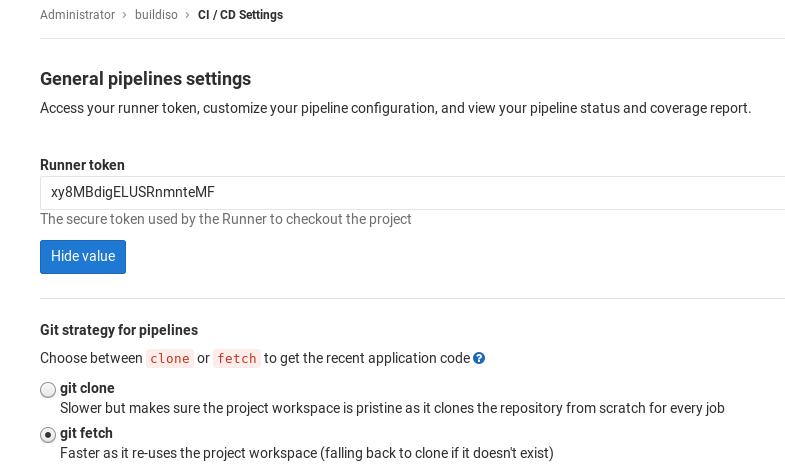
注: 下面需要填入的token来自于: settings->CI/CD-> General pipelines settings,
runner token,需要拷贝其值:
[root@csnode1 ~]# gitlab-ci-multi-runner register
Running in system-mode.

Please enter the gitlab-ci coordinator URL (e.g. https://gitlab.com/):
http://192.168.109.2/
Please enter the gitlab-ci token for this runner:
4dEFxKVNcmnoStBBDssd
Please enter the gitlab-ci description for this runner:
[csnode1]: myrunner
Please enter the gitlab-ci tags for this runner (comma separated):
myrunner tag
Whether to run untagged builds [true/false]:
[false]:
Whether to lock Runner to current project [true/false]:
[false]:
Registering runner... succeeded                     runner=4dEFxKVN
Please enter the executor: ssh, kubernetes, docker, docker-ssh, parallels, docker-ssh+machine, shell, virtualbox, docker+machine:
docker
Please enter the default Docker image (e.g. ruby:2.1):
mygitbook:latest
Runner registered successfully. Feel free to start it, but if it's running already the config should be automatically reloaded!
runner失败:
配置镜像的拉取规则:
# vim /etc/gitlab-runner/config.toml
[[runners]]
  name = "myrunner"
  url = "http://192.168.109.2/"
  token = "8996297cd5d5d80bd23c0acade3b95"
  executor = "docker"
  [runners.docker]
    tls_verify = false
    image = "mygitbook:latest"
    privileged = false
    disable_cache = false
    volumes = ["/cache"]
    pull_policy = "if-not-present"
    shm_size = 0
  [runners.cache]
# gitlab-runner restart
对应的gitlab定义文件如下:
image: "my_gitbook:latest"
stages:
  - gitbook_build_deploy

gitbook_build_deploy:
  stage: gitbook_build_deploy
  script:
    - gitbook build
    - gitbook pdf
    - ssh-keyscan -H 192.168.109.2 >> ~/.ssh/known_hosts
    - pwd && ls -l -h ./_book  && sshpass -p vagrant scp -P 22 -r _book/* vagrant@192.168.109.2:/home/vagrant/tmp
  artifacts:
    paths:
      - ./book.pdf
  tags:
    - myrunnertag
每次build将自动生成pdf供下载。
gitlabci运行buildiso
注册CI/CD pipeline时的选项:
# gitlab-ci-multi-runner register
Running in system-mode.

Please enter the gitlab-ci coordinator URL (e.g. https://gitlab.com/):
http://192.168.122.222/
Please enter the gitlab-ci token for this runner:
xy8MBdigELUSRnmnteMF
Please enter the gitlab-ci description for this runner:
[buildnode]: myrunner
Please enter the gitlab-ci tags for this runner (comma separated):
myrunner mytag
Whether to run untagged builds [true/false]:
[false]: true
Whether to lock Runner to current project [true/false]:
[false]:
Registering runner... succeeded                     runner=xy8MBdig
Please enter the executor: docker-ssh+machine, docker, docker-ssh, shell, ssh, parallels, virtualbox, docker+machine, kubernetes:
shell
Runner registered successfully. Feel free to start it, but if it's running already the config should be automatically reloaded!
Mar 20, 2018
Technology步骤
获取所需安装包的步骤如下:
$ sudo docker run -it ubuntu:16.04 /bin/bash
# 进入容器后的操作
# rm -f /etc/apt/apt.conf.d/docker-clean
# apt-get update
# apt-get install docker-compose dpkg-dev
获取所有的deb包并拷贝到某一目录下:
# cd /var/cache
# find . | grep deb$ | xargs -I % cp % /root/pkgs
# cd /root/pkgs
# dpkg-scanpackages . /dev/null | gzip -9c > Packages.gz
将整个目录拷贝到主机目录:
# sudo docker cp d1023d1b0a1f:/root/pkgs /xxxxxx/xxxxx
# tar czvf /xxxx/xxxx.tar.gz /xxxxxx/xxxx
使用步骤
下载地址:
http://192.192.189.127/big.tar.gz
下载所需要的大包,解压以后,得到以下四个文件:
# tar xzvf big.tar.gz
# ls big
images/ pkgs.tar.gz  docker-regsitry.tar.gz devdockerCA.crt
取得pkgs.tar.gz, 将其放置在自己的网页服务器目录,如:
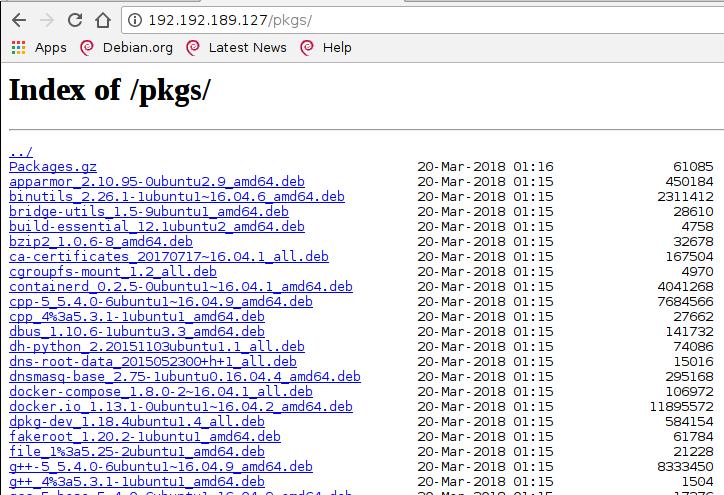
配置节点的apt:
# vim /etc/apt/sources.list
deb http://192.192.189.127/pkgs/	/
# apt-update
# apt-get install docker-compose
这将安装docker-compose, docker, 安装完毕以后,docker-compose可以正常使用。
载入镜像
载入registry所需的registry:2镜像和nginx镜像:
# docker load<images/1.tar
# docker load<images/2.tar
解压docker-compose目录,添加服务
解压到指定目录(可为任意目录,这里以/docker-registry为例):
# tar xzvf docker-registry.tar.gz -C /
# ls /docker-regsitry
data	docker-compose.yml nginx
创建systemd所需服务:
# vim /etc/systemd/system/docker-compose.service
[Unit]
Description=DockerCompose
After=docker.service
Requires=docker.service

[Service]
ExecStart=/usr/bin/docker-compose -f /docker-registry/docker-compose.yml up -d

[Install]
WantedBy=multi-user.target
启动、使能docker-compose服务:
# sudo systemctl enable docker-compose.service
# sudo systemctl start docker-compose.service
# docker ps
CONTAINER ID        IMAGE               COMMAND                  CREATED             STATUS              PORTS                          NAMES
50d2ec00e967        nginx:1.9           "nginx -g 'daemon ..."   26 hours ago        Up 3 seconds        80/tcp, 0.0.0.0:443->443/tcp   dockerregistry_nginx_1
e4e2cee1bf21        registry:2          "/entrypoint.sh /e..."   26 hours ago        Up 5 seconds        127.0.0.1:5000->5000/tcp       dockerregistry_registry_1
如此即设置好了整个regitry服务。可以通过https://YourIP来访问,签名文件也可以在目录中找到(devdockerCA)。
使用镜像仓库
Redhat rh74:
# mkdir -p /etc/docker/certs.d/mirror.xxxx.com
# wget xxxxxx.xxxx.xxx.com/ca.crt
# docker login -u xxxx -p xxxx mirror.xxxx.com
