May 21, 2018
LinuxTips1. Build maven project
For building the class, do mvn compile, for building the jar file, do mvn package, then you could get the jar under the target folder.
2. sed replace
via following commands:
# sed s/10.168.100.145/192.192.189.1/</home/dash/docker-compose.yml
3. get ip for ubuntu
Ubuntu 14.04 ~ 18.04, via following command:
hostname -I | awk '{print $1}'
4. view systemd logs
via following command:
# journalctl -u service-name.service -b
5. Disable unattended upgrades
Under Ubuntu18.04/16.04, could do :
# systemctl disable unattended-upgrade.service
6. rhel subscription
Via following steps:
sudo subscription-manager remove --all
sudo subscription-manager unregister
sudo subscription-manager clean

Now re-register the system, attach the subscriptions - execute these commands :

sudo subscription-manager register
sudo subscription-manager refresh
sudo subscription-manager attach --auto

Here are the commands to see which repos are enabled and what can be added :

Execute sudo subscription-manager repos --list-enabled to see all actually enabled subscriptions.
Execute sudo subscription-manager repos --list to see all subscriptions that are available for you.
Execute sudo subscription-manager repos --enable <repo> if you want to add additional repos.
7. anaconda issue
anaconda build rhel7 custom image Issue:
# dracut module 'anaconda' cannot be found or installed
how to solve?
8. kismatic reset
via:
./kismatic reset
9. kubernetes pkgs
Install via:
# vim /etc/yum.repos.d/kubernetes.repo
 [kubernetes]
 name=Kubernetes
 baseurl=https://packages.cloud.google.com/yum/repos/kubernetes-el7-x86_64
 enabled=1
 gpgcheck=0
 repo_gpgcheck=0
10. samba in ArchLinux
# pacman -S samba
# wget https://git.samba.org/samba.git/?p=samba.git;a=blob_plain;f=examples/smb.conf.default;hb=HEAD
# cp git..xxx /etc/samba/smb.conf
# vim /etc/samba/smb.conf
   log file = /var/log/samba/%m.log
[myshare]
   comment = Mary's and Fred's stuff
   path = /var1/Nov14
   valid users = dash
   public = no
   writable = yes
   printable = no
   create mask = 0765
# systemctl enable smb
# systemctl enable nmb
# systemctl start smb
# systemctl start nmb
11. tar with pigz
With pigz compression:
tar cf - paths-to-archive | pigz -9 -p 32 > archive.tar.gz
12. tips for centos
- install from iso
- sed the ip address.(isomaster)
- pigz package needed to be installed first. (isomaster)
13. tmpfs for debian
via :
# vim /etc/fstab
.....

tmpfs	/tmp	tmpfs	nodev,nosuid,size=8G 0	0
14. kong ingress configuration
Rewrite ingress rulers:
apiVersion: extensions/v1beta1
kind: Ingress
metadata:
  name: anagram.api
  annotations:
    ingress.kubernetes.io/rewrite-target: "/"
spec:
  rules:
  - host: anagram.api
    http:
      paths:
      - path: /external
        backend:
          serviceName: anagram-svc
          servicePort: 80
---
apiVersion: configuration.konghq.com/v1
kind: KongIngress
metadata:
  name: anagram.api
proxy:
  path: /
route:
  strip_path: true
15. Auto Restart pdnsd
The script for start pdnsd:
# cat /bin/pdnsd.sh
    touch /tmp/aaa.txt
    if [[ $(ps -ef | grep -v grep | grep pdnsd) ]]; then
    	echo "pdnsd alive">/tmp/aaa.txt
    else
    	echo "not alive">/tmp/aaa.txt
    	systemctl start pdnsd
    fi
Add this script into crontab:
# crontab -e
@reboot sleep 60 && /bin/pdnsd.sh
16. python simple http server
python 3 syntax:
python -m http.server 8000
17. cnpm install error
As normal user, you didn’t have the priviledge for making soft link for cnpm.
As rooot user, do following:
$ sudo npm cache clean --force
$ sudo npm install -g cnpm --registry=https://registry.npm.taobao.org
$ which cnpm
/usr/bin/cnpm
18. dnscrypt
start via, better enable it:
sudo systemctl start dnscrypt-proxy.service
19. Ubuntu 18.04 vnc
Via following steps:
install these packages

# apt-get install gnome-panel gnome-settings-daemon metacity nautilus gnome-terminal
and use this xstartup file

#!/bin/sh

export XKL_XMODMAP_DISABLE=1
unset SESSION_MANAGER
unset DBUS_SESSION_BUS_ADDRESS

[ -x /etc/vnc/xstartup ] && exec /etc/vnc/xstartup
[ -r $HOME/.Xresources ] && xrdb $HOME/.Xresources
xsetroot -solid grey
vncconfig -iconic &

gnome-panel &
gnome-settings-daemon &
metacity &
nautilus &
gnome-terminal &
But you will add some tips:
$ vim /usr/bin/gnome-panel-delay
!/bin/sh
sleep 4 && gnome-panel
Replace gnome-panel with gnome-panel-delay.
20. uefi for archlinux qemu
Install via:
$ sudo pacman -S ovmf
$ sudo vim /etc/libvirt/qemu.conf
user="root"
group="root"
nvram = [
    "/usr/share/ovmf/x64/OVMF_CODE.fd:/usr/share/ovmf/x64/OVMF_VARS.fd"
]
$ sudo systemctl restart libvirtd
21. unlock proxmox
via following command:
# qm unlock vm_id
22. Back to Work
Edit /etc/systemd/network/MyBridge.network, change the ip address, then
restart the networkd service via:
# systemclt restart systemd-networkd.service
Then your briged br0 will turn back to the ip address you just changed.
23. Debian upgrade kernel
Via following commands:
# echo "deb http://ftp.debian.org/debian stretch-backports main" | tee -a /etc/apt/sources.list > /dev/null
# apt-get update
# apt-cache search linux-image
# apt-get -t stretch-backports install linux-image-4.11.0-0.bpo.1-amd64
24. samba issue
From samba 4.8, the smbd, changed to smb, nmbd changed to nmb, so systemctl
will changd to smb/nmb
25. unzip iconv
Chinese unzip:
$ unzip-iconv
$ unzip -O cp936  xxxx.zip
thus you will get the chinese coded file extracted.
26. Quickly Setup NodeJS Dev
In Conoha:
# docker run -it -p 5000:5000 ubuntu:latest /bin/bash
# apt-get update
# apt-get -y install vim
Change archive.ubuntu.com to jp.archive.ubuntu.com
# apt-get update
# apt-get install -y nodejs npm
# cd ~
# mkdir Code
# cd Code
# mkdir node
# npm config set prefix=$HOME/node
# export PATH=$HOME/node/bin:$PATH
# npm install -g express
# npm install -g express-generator
# which express
# exporess defcon
# cd defcon/
# npm install -d
# npm install socket.io express
# npm install -d
You should follow
https://github.com/robdodson/defcon
Install with ejs template enabled:
# express -v ejs dash
27. registry setting(insecure)
Xenial , via:
Edit /etc/docker/daemon.json and update the key "insecure-registries".
e.g.
    {
        "insecure-registries" : ["10.84.34.155:5000"]
    }
28. paccache Saveing
Take care the directory size:
# pacman du -hs pkg
31G	pkg
# pacman du -hs pkg
9.4G	pkg
# pacman du -hs pkg
4.1G	pkg
By following command you could saving the disk space(keep 3 or keep 1):
# sudo paccache -r -k 3
# sudo paccache -r -k 1
29. kvm/vmware issue
kvm will be black-listed via vmware, solved via:
# cat /etc/modprobe.d/vmware.conf
blacklist kvm
blacklist kvm-amd   # For AMD CPUs
blacklist kvm-intel # For Intel CPUs
Uninstall vmware via:
# vmware-installer -l
Product Name         Product Version
==================== ====================
vmware-workstation   12.0.0.2985596
# vmware-installer -u vmware-workstation --required
Remove the service:
# rm /etc/systemd/system/vmware.service
# rm /etc/systemd/system/vmware-usbarbitrator.service
30. ansible for installing nfs-client
Install methods:
# apt-get install nfs-common
# vim local.ini
# ansible-playbook -i local.ini nfsclient.yaml --extra-vars "@roles/nfs-client/defaults/all.yaml"
31. chartmuseum
Delete and upload again:
#  curl -X DELETE portus.teligen.com:8988/api/charts/gitlab-runner/0.1.31
# curl --data-binary "@gitlab-runner-0.1.31.tgz" http://portus.teligen.com:8988/api/charts
32. docker volume rm
Via following command:
# docker volume ls | sed -n '1!p' |awk {'print $2'} | xargs -I % docker volume rm %
33. Generate crt/key in one line
Via following command:
# openssl req -new -newkey rsa:4096 -days 365 -nodes -x509 -subj "/C=US/ST=Denial/L=Springfield/O=Dis/CN=www.example.com" -keyout www.example.com.key -out www.example.com.cert
34. Ubuntu Server GUI
Install tasksel via:
# apt-get install -y tasksel
# tasksel --list
Install Ubuntu mate core via:
# tasksel install ubuntu-mate-core
# service lightdm start
Or Ubuntu/xubuntu-core/Lubuntu-core, etc, you could choose from the tasksel
list.
35. vncserver
For ArchLinux:
export XKL_XMODMAP_DISABLE=1
#exec startxfce4
exec startlxde
36. Internet Sharing
For ArchLinux, 2 cards, enp0s29u1u2u7 is the card for connecting the internet,
while the enp0s29u1u2u6 is the card for intranet. :
➜  ~ sudo iptables -t nat -A POSTROUTING -o enp0s29u1u2u7 -j MASQUERADE
➜  ~ sudo iptables -A FORWARD -m conntrack --ctstate RELATED,ESTABLISHED -j ACCEPT
➜  ~ sudo iptables -A FORWARD -i enp0s29u1u2u6 -o enp0s29u1u2u7 -j ACCEPT
37. time-sync in archlinux
ArchLinux ntp date.
# vim  /etc/systemd/timesyncd.conf
[Time]
NTP=0.arch.pool.ntp.org 1.arch.pool.ntp.org 2.arch.pool.ntp.org 3.arch.pool.ntp.org
FallbackNTP=0.pool.ntp.org 1.pool.ntp.org 0.fr.pool.ntp.org0.arch.pool.ntp.org 1.arch.pool.ntp.org 2.arch.pool.ntp.org 3.arch.pool.ntp.org
# sudo systemctl enable systemd-timesyncd
# timedatectl show-timesync --all
38. Combine pdf
The filename contains Chinese, so I have to do like following:
$ ls -tr *.pdf | awk -v q="'" {'print q$0q'}>list.txt
Then edit the list.txt
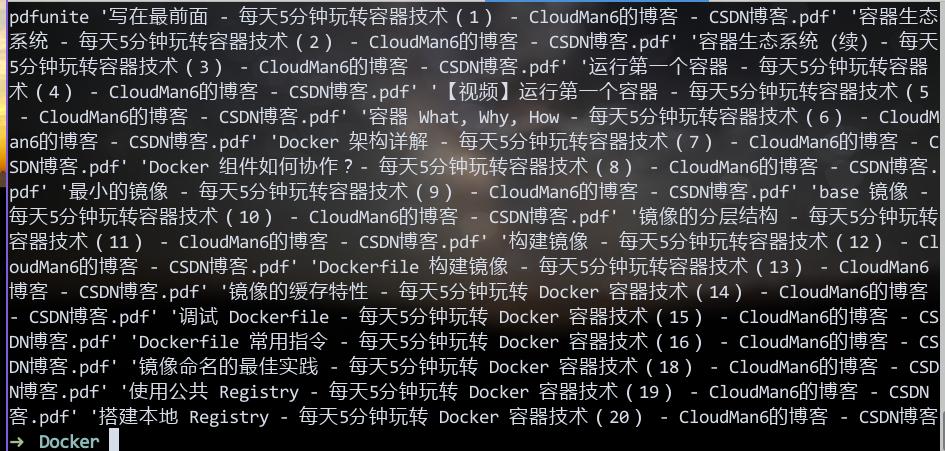
Then your generated Combine.
$ pdfunite in-1.pdf in-2.pdf in-n.pdf out.pdf
Your generated out.pdf contains all of the pdfs.
39. crontab and notify-send
Create /bin/touchXdbus.sh for getting the DBUS Session bus address:
#!/bin/sh

touch $HOME/.dbus/Xdbus
chmod 600 $HOME/.dbus/Xdbus
env | grep DBUS_SESSION_BUS_ADDRESS > $HOME/.dbus/Xdbus
echo 'export DBUS_SESSION_BUS_ADDRESS' >> $HOME/.dbus/Xdbus
On Awesome startup, use run_once function for calling it:
$ vim ~/.config/awesome/rc.lua
run_once("/bin/touchXdbus.sh")
Now in your crontab task you have to write like following:
$ crontab -l
10 9-18 * * * /bin/notify.sh
$ cat /bin/notify.sh
    #!/bin/sh
    + if [ -r "$HOME/.dbus/Xdbus" ]; then
    +   . "$HOME/.dbus/Xdbus"
    + fi
    current_time=`date`
    filename="/home/dash/tasks.txt"
    filecontent=`cat $filename`

    #### Until you click it, you won't get this window vanish #####
    notify-send -u critical -t 0 "$current_time, Stand UP, Boy" "$filecontent"
Now your notify-send will run properly.
40. unxz
Use unxz for uncompress xz compressed file.
41. ansible execute time
Add following configurations to ansible.cfg:
callback_whitelist = profile_tasks, timer
42. echo server
Run python echo server under kubernetes via:
# kubectl run myecho --image=echoserverpy:latest --replicas=3
# kubectl expose deployment myecho --port=31113
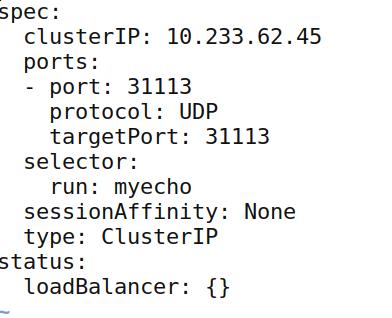
Edit for exposing UDP 31113 Port:
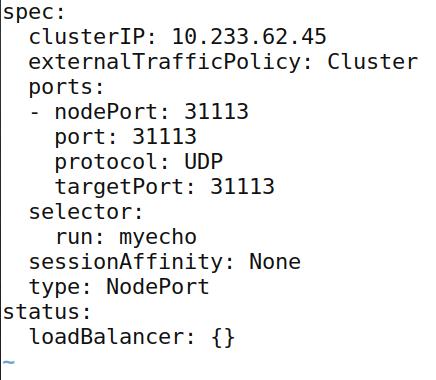
Add NodePort definition:
reconfigure keyboard on ubuntu is :
# sudo dpkg-reconfigure keyboard-configuration
44. raid issue
Deletes:
#/opt/MegaRAID/MegaCli/MegaCli64 -CfgLdDel -L1 -a0
List:
MegaCli -LDInfo -LALL -aAll 【显示所有逻辑磁盘组信息】
MegaCli -PDList -aAll 【显示所有的物理信息】
45. vagrant-libvirt
Install via:
# yaourt vagrant-libvirt
# vagrant plugin install /opt/vagrant/embedded/gems/cache/vagrant-libvirt-0.0.45.gem
# vagrant plugin install vagrant-mutate
#  vagrant plugin list
vagrant-libvirt (0.0.45, global)
  - Version Constraint: 0.0.45
vagrant-mutate (1.2.0, global)
After upgrading, do following:
# vagrant plugin install /opt/vagrant/embedded/gems/cache/vagrant-libvirt-0.0.45.gem
# vagrant plugin install vagrant-mutate
# yaourt vagrant-libvirt
Then all of your plugins will work properly.
46. apt auto update disable
disable via:
systemctl stop apt-daily.timer
systemctl disable apt-daily.timer
systemctl disable apt-daily.service
systemctl stop apt-daily-upgrade.timer
systemctl disable apt-daily-upgrade.timer
systemctl disable apt-daily-upgrade.service
Or

systemctl disable --now apt-daily{,-upgrade}.{timer,service}
47. openssl inspect lifetime of crt
Via following commands:
openssl x509 -in server.crt -noout -dates
48. Vagrant issue
Vagrant-libvirt, sometimes you have to manually build the ruby-libvirt plugin,
and copy the correspoding so file into the /opt/vagrant
49. wrapped lines in vim
via following commands:
First set your vim so that it understands that you want 80 characters:

:set tw=80
then, hilight the line:

V
and make vim reformat it:

gq
shareedit
Using following command:
set -e
set -x
for i in b c d e f g h i j k l; do
sudo fdisk -u /dev/vd${i}<<EOF
n
p
1


w
EOF
done
This command will format several disks, as you like.
52. Auto Change password
Change password via following commands:
$ openssl passwd -1 -salt 5RPVAd clear-text-passwd43

$1$5RPVAd$vgsoSANybLDepv2ETcUH7.

Then, copy the encrypted string to usermod. Make sure to wrap it with single quote.

$ usermod -p '$1$5RPVAd$vgsoSANybLDepv2ETcUH7.' root

Check it out in shadow file.

$ grep root /etc/shadow
53. rsync sync repo
syncing the ceph repository via following command:
# rsync -av --exclude "ceph-debuginfo" rsync://mirrors.ustc.edu.cn/ceph/rpm-luminous/el7/  `pwd`
# rsync -av --exclude "ceph-debuginfo" rsync://rsync.mirrors.ustc.edu.cn/ceph/rpm-luminous/el7/  ./
54. pool-start
Via following command you could view and start the virsh pool:
$ sudo virsh pool-list --all
$ sudo virsh pool-start vagrantpool
55. minikube start specify cpu/mem/disk
via following method:
# minikube start --cpus 4 --memory 8192 --disk-size 60g
56. Combine lines under linux
Via tr command you could combine several lines into one line:
# some output | tr '\n' ','
Replace the comma with some other characters.
57. prometheus for k8s
URL:
from https://github.com/coreos/prometheus-operator/tree/master/contrib/kube-prometheus
58. virtualbox tips
Debian’s virtualbox, 5.2 conflicts with kernel 4.17.0-9.bpo.1-amd64
59. libvirt’s bus issue
Changes to virtio bus:
lv.storage :file, :device => "hd#{driverletters[d]}", :path => "glusterdisk-#{i}-#{d}-#{DISK_UUID}.disk", :size => $kube_node_instances_with_disks_size, :bus => "virtio"
60. Minimum glusterfs nodes
Comment the replcas items. and set the volume type to None:
  volumetype: "none"
#  volumetype: "replicate:{{ hostvars[groups['glusterfs'][0]].replicate }}"
Or using heketi for creating the volume:
heketi-cli volume create -size=100 -durabilty=none
61. history without number
history without number using cut.
history | cut -c 8-
62. tr replace newline
Via following commands:
# tr '\r\n' ' '
63. two file difference
via grep command you could do this:
# git -v -f before.txt after.txt
64. vimdiff tips
vimdiff tips.
do (diff obtain) and dp (diff put) is what you need. Here is a small list of other helpful normal mode commands in this context.

]c               - advance to the next block with differences
[c               - reverse search for the previous block with differences
do (diff obtain) - bring changes from the other file to the current file
dp (diff put)    - send changes from the current file to the other file
zo               - unfold/unhide text
zc               - refold/rehide text
zr               - unfold both files completely
zm               - fold both files completely
65. pactree
Using pactree for viewing the dependencies:
# sudo pacman -S pacman-contri
# pactree xxxx
Using -d(1~n) could viewing the depth of the dependencies.
66. wifi list
unblock the wifi via following commands:
$rfkill list all
0: hp-wifi: Wireless LAN
	Soft blocked: yes
	Hard blocked: no
1: phy0: Wireless LAN
	Soft blocked: yes
	Hard blocked: yes

$sudo rfkill unblock all
67. sed disable swap
edit /etc/fstab via:
# sudo sed -i '/ swap / s/^/#/' /etc/fstab
68. python split
For using them in ambari-k8s, do following:
>>> long='nodes-1:10.222.129.101;nodes-2:10.222.129.102;nodes-3:10.222.129.103'
>>> map={}
>>> key=[]
>>> for i in long.split(";"):
...   key.append(i.split(":")[0])
...   map[i.split(":")[0]]=i.split(":")[1]
...
>>> for i in key:
...   print(i)
...
nodes-1
nodes-2
nodes-3
>>> for i in key:
...   print(i)
...   print(map[i])
...
nodes-1
10.222.129.101
nodes-2
10.222.129.102
nodes-3
10.222.129.103
69. proxmox Configuration
For AI project, do following:
# vim /etc/network/interfaces
auto lo
iface lo inet loopback

auto eno1
#real IP address
iface eno1 inet static
        address  198.51.100.5
        netmask  255.255.255.0
        gateway  198.51.100.1

auto vmbr0
#private sub network
iface vmbr0 inet static
        address  10.10.10.1
        netmask  255.255.255.0
        bridge_ports none
        bridge_stp off
        bridge_fd 0

        post-up echo 1 > /proc/sys/net/ipv4/ip_forward
        post-up   iptables -t nat -A POSTROUTING -s '10.10.10.0/24' -o eno1 -j MASQUERADE
        post-down iptables -t nat -D POSTROUTING -s '10.10.10.0/24' -o eno1 -j MASQUERADE
ZFS enabled when in installation.
70. proxmox inner network
Connecting inner network via:
post-up iptables -t nat -A POSTROUTING -s 10.10.10.0/24 -o enp2s0f0 -j SNAT
--to-source 192.192.18.44
In every nodes:
$ route add -net 10.10.10.0/24 gw 192.192.189.44
71. vagrant-libvirt
Remove the vagrant-libvirt package installed via yaourt, then install plugin
via:
# vagrant plugin install vagrant-libvirt
You won’t have the build issue.
72. beyond compare Linux
Reuse it after 30 day’s trial:
bcompare在ubuntu的配置文件的路径是:

/home/xxx/.config/bcompare

在该路径下找到 registry.dat删除即可

rm registry.dat
73. forwarding in Win
Use following command for setting up tunnel under windows:
netsh interface portproxy add v4tov4 listenport=4422 listenaddress=192.168.1.111 connectport=80 connectaddress=192.168.0.33
To remove forwarding:
netsh interface portproxy delete v4tov4 listenport=4422 listenaddress=192.168.1.111
May 19, 2018
TechnologyEnvironment
Runtime environment:
OS: Ubuntu 14.04.3 LTS
docker version: 18.03.1-ce
docker-compose version: docker-compose version 1.21.2, build a133471
IP: 192.192.189.53
domain name: portus.xxxx.com
For installing docker:
$ sudo apt-get purge lxc-docker-1.9.0
$ sudo apt-get install \
    linux-image-extra-$(uname -r) \
    linux-image-extra-virtual
$ sudo apt-get update
$ sudo apt-get install -y \
    apt-transport-https \
        ca-certificates \
            curl \
                software-properties-common

$ curl -fsSL https://download.docker.com/linux/ubuntu/gpg | sudo apt-key add -
$ sudo apt-key fingerprint 0EBFCD88
$ sudo add-apt-repository \
   "deb [arch=amd64] https://download.docker.com/linux/ubuntu \
      $(lsb_release -cs) \
         stable"
$ sudo apt-get update
$ sudo apt-get install -y docker-ce
$ sudo apt-get install -y libyaml-dev libpython-dev
$ sudo pip uninstall docker-py
$ sudo pip uninstall docker-compose
$ sudo pip install --upgrade --force-reinstall  docker-compose
Steps
Clone the source code from github:
# git clone https://github.com/SUSE/Portus.git
Make certification in secrets folder:
# cd /home/vagrant/Portus/examples/compose/secrets
# openssl req -newkey rsa:4096 -nodes -sha256 -keyout portus.key -x509 -days 3650 -out portus.crt
In the above steps, input following items:
Country Name (2 letter code) [AU]:CN
State or Province Name (full name) [Some-State]:Guangdong
Locality Name (eg, city) []:Guangzhou
Organization Name (eg, company) [Internet Widgits Pty Ltd]:kkkk
Organizational Unit Name (eg, section) []:cloud
Common Name (e.g. server FQDN or YOUR name) []:portus.kkkk.com
Email Address []:xxxx@xxxx.com
Docker Compose File
The docker compose file is the critical for portus deployment, following is
my configuration file:
version: "2"

services:
  portus:
    image: opensuse/portus:head
    environment:
      - PORTUS_MACHINE_FQDN_VALUE=${MACHINE_FQDN}

      # DB. The password for the database should definitely not be here. You are
      # probably better off with Docker Swarm secrets.
      - PORTUS_DB_HOST=db
      - PORTUS_DB_DATABASE=portus_production
      - PORTUS_DB_PASSWORD=${DATABASE_PASSWORD}
      - PORTUS_DB_POOL=5

      # Secrets. It can possibly be handled better with Swarm's secrets.
      - PORTUS_SECRET_KEY_BASE=${SECRET_KEY_BASE}
      - PORTUS_KEY_PATH=/certificates/portus.key
      - PORTUS_PASSWORD=${PORTUS_PASSWORD}

      # SSL
      - PORTUS_PUMA_TLS_KEY=/certificates/portus.key
      - PORTUS_PUMA_TLS_CERT=/certificates/portus.crt

      # NGinx is serving the assets instead of Puma. If you want to change this,
      # uncomment this line.
      #- RAILS_SERVE_STATIC_FILES='true'
    ports:
      - 3000:3000
    links:
      - db
    volumes:
      - ./secrets:/certificates:ro
      - static:/srv/Portus/public
    extra_hosts:
      - "portus.xxxx.com:192.192.189.53"

  background:
    image: opensuse/portus:head
    depends_on:
      - portus
      - db
    environment:
      # Theoretically not needed, but cconfig's been buggy on this...
      - CCONFIG_PREFIX=PORTUS
      - PORTUS_MACHINE_FQDN_VALUE=${MACHINE_FQDN}

      # DB. The password for the database should definitely not be here. You are
      # probably better off with Docker Swarm secrets.
      - PORTUS_DB_HOST=db
      - PORTUS_DB_DATABASE=portus_production
      - PORTUS_DB_PASSWORD=${DATABASE_PASSWORD}
      - PORTUS_DB_POOL=5

      # Secrets. It can possibly be handled better with Swarm's secrets.
      - PORTUS_SECRET_KEY_BASE=${SECRET_KEY_BASE}
      - PORTUS_KEY_PATH=/certificates/portus.key
      - PORTUS_PASSWORD=${PORTUS_PASSWORD}

      - PORTUS_BACKGROUND=true
    links:
      - db
    volumes:
      - ./secrets:/certificates:ro
    extra_hosts:
      - "portus.xxxx.com:192.192.189.53"

  db:
    image: library/mariadb:10.0.23
    command: mysqld --character-set-server=utf8 --collation-server=utf8_unicode_ci --init-connect='SET NAMES UTF8;' --innodb-flush-log-at-trx-commit=0
    environment:
      - MYSQL_DATABASE=portus_production

      # Again, the password shouldn't be handled like this.
      - MYSQL_ROOT_PASSWORD=${DATABASE_PASSWORD}
    volumes:
      - /var/lib/portus/mariadb:/var/lib/mysql
    extra_hosts:
      - "portus.xxxx.com:192.192.189.53"

  registry:
    image: library/registry:2.6
    command: ["/bin/sh", "/etc/docker/registry/init"]
    environment:
      # Authentication
      REGISTRY_AUTH_TOKEN_REALM: https://${MACHINE_FQDN}:3000/v2/token
      REGISTRY_AUTH_TOKEN_SERVICE: ${MACHINE_FQDN}:5000
      REGISTRY_AUTH_TOKEN_ISSUER: ${MACHINE_FQDN}
      #REGISTRY_AUTH_TOKEN_ISSUER: portus.test.lan
      REGISTRY_AUTH_TOKEN_ROOTCERTBUNDLE: /secrets/portus.crt

      # SSL
      REGISTRY_HTTP_TLS_CERTIFICATE: /secrets/portus.crt
      REGISTRY_HTTP_TLS_KEY: /secrets/portus.key

      # Portus endpoint
      REGISTRY_NOTIFICATIONS_ENDPOINTS: >
        - name: portus
          url: https://${MACHINE_FQDN}:3000/v2/webhooks/events
          #url: https://192.192.189.53:3000/v2/webhooks/events
          timeout: 2000ms
          threshold: 5
          backoff: 1s
    volumes:
      - /var/lib/portus/registry:/var/lib/registry
      - ./secrets:/secrets:ro
      - ./registry/config.yml:/etc/docker/registry/config.yml:ro
      - ./registry/init:/etc/docker/registry/init:ro
    ports:
      - 5000:5000
      - 5001:5001 # required to access debug service
    links:
      - portus:portus
    extra_hosts:
      - "portus.xxxx.com:192.192.189.53"

  nginx:
    image: library/nginx:alpine
    volumes:
      - ./nginx/nginx.conf:/etc/nginx/nginx.conf:ro
      - ./secrets:/secrets:ro
      - static:/srv/Portus/public:ro
    ports:
      - 80:80
      - 443:443
    links:
      - registry:registry
      - portus:portus
    extra_hosts:
      - "portus.xxxx.com:192.192.189.53"

volumes:
  static:
    driver: local
When everything is configured, startup the service via:
# docker-compose -f docker-compose.yml up
Configuration
Before open your browser for accessing the portus service, do following :
$ sudo echo "192.192.189.53 portus.xxxx.com">>/etc/hosts
Now open your browser for https://portus.xxxx.com:

Configure the registry via:
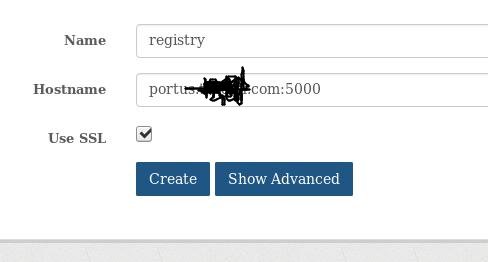
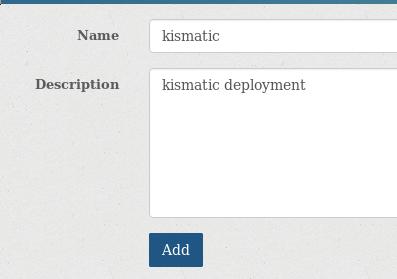
Team->Create new team, create team for kismatic deployment:
Admin->User->Create new user:
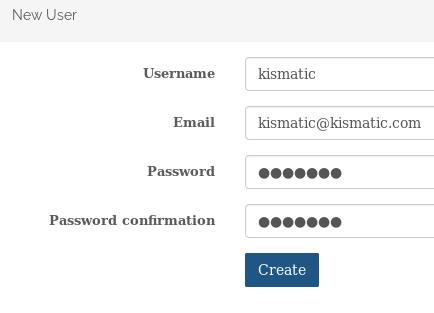
The created user is listed as:

Team->members->Add members:

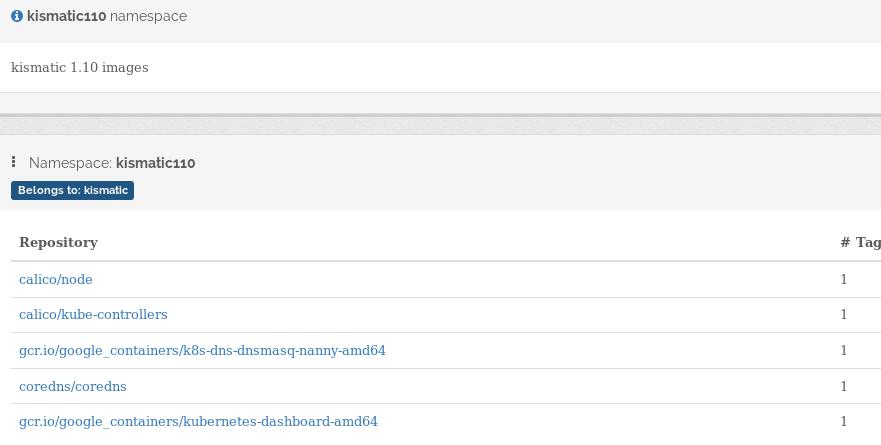
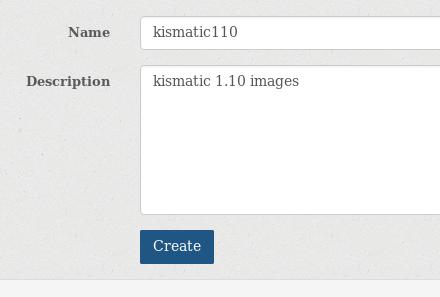
Create a new namespace for kismatic 1.10 deployment images:
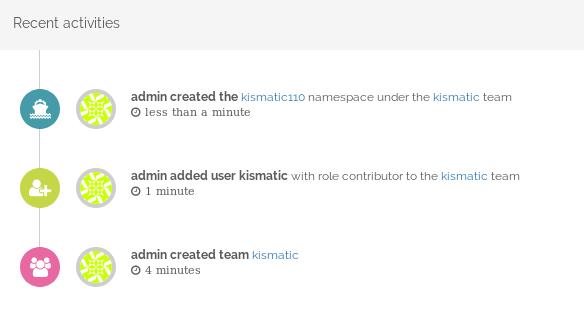
You can easily view portus logs at dashboard:
Push images
upload the portus.crt to remote machine(kismatic deployment node):
# scp ./portus.crt  kkkkk@192.192.189.1:/home/kkkkk/
root@registry3:~/Portus/examples/compose/secrets# pwd
/home/vagrant/Portus/examples/compose/secrets
Add the crt file into your system folder and trust this file, take ArchLinux
for example:
$ sudo cp portus.crt /etc/ca-certificates/trust-source/anchors/portus.xxxx.com.crt
$ sudo update-ca-trust
$ sudo trust extract-compat
$ sudo systemctl restart docker
$ sudo docker login portus.xxxx.com:5000
$ sudo docker login portus.xxxx.com
Username: kismatic
Password:
WARNING! Your password will be stored unencrypted in /root/.docker/config.json.
Configure a credential helper to remove this warning. See
https://docs.docker.com/engine/reference/commandline/login/#credentials-store

Are you sure you want to proceed? [y/N] y
Login Succeeded
kismatic configuration items:
# vim kismatic-cluster.yaml
docker_registry:

  # IP or hostname and port for your registry.
  server: "portus.xxxx.com:5000/kismatic110"

  # Absolute path to the certificate authority that should be trusted when
  # connecting to your registry.
  CA: "/home/xxxxx/portus.xxxx.com.crt"

  # Leave blank for unauthenticated access.
  username: "kismatic"

  # Leave blank for unauthenticated access.
  password: "xxxxxxxx"
# ./kismatic seed-registry --verbose
Now you will see the output for uploading:
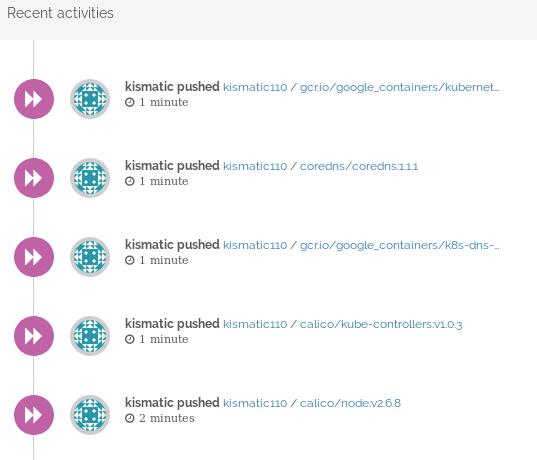
namespace for kismatic110:
