Jul 20, 2018
Technology单位里一些同事需要一个开箱即用的Docker环境,以下是制作自启动Docker的ISO制作过程。
准备
准备一台新安装的Ubuntu16.04机器,在其中安装docker, docker
load需要定制的镜像。而后,保存/var/lib/docker/目录下的条目,简而言之,就是将/var/lib/docker压包。
定制化ISO
从基础镜像起步,之前我已经定制了1604_pure.iso,
里面已经安装docker/docker-compose,并内置了用于运行portus(一个容器镜像仓库)所需的镜像文件,现在只需要从其中替换掉镜像文件即可。
Jul 18, 2018
Technology目的
AI组定制化ISO编译环境构建。
虚拟机准备
创建磁盘文件(后续用于直接迁移虚拟机):
# qemu-img create -f qcow2 ai_ubuntu.qcow2 40G
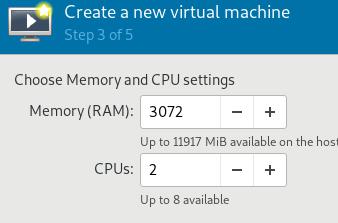
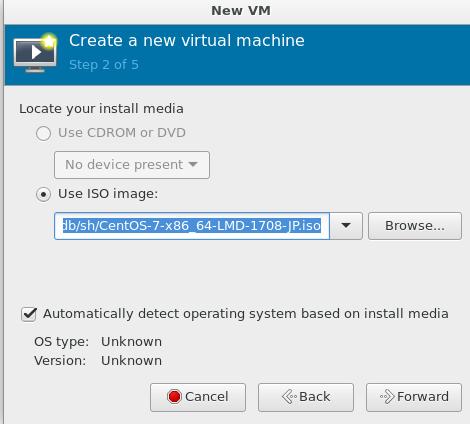
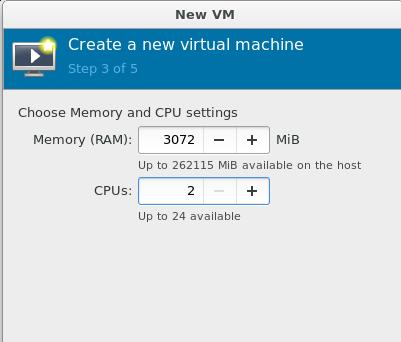
创建qemu虚拟机,使用ISO(ubuntu-16.04.4-server-amd64.iso)安装, CPU/内存可参考下图:
虚拟机名称如下:

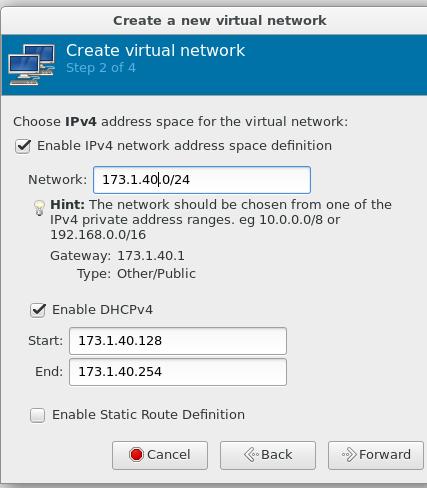
网络配置选择default, 后续我们将设置IP地址为192.168.122.166.

虚拟机安装
安装过程中,配置主机名为aiubuntu, 默认用户名为build/thinker@1.
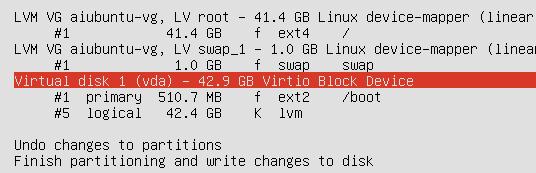
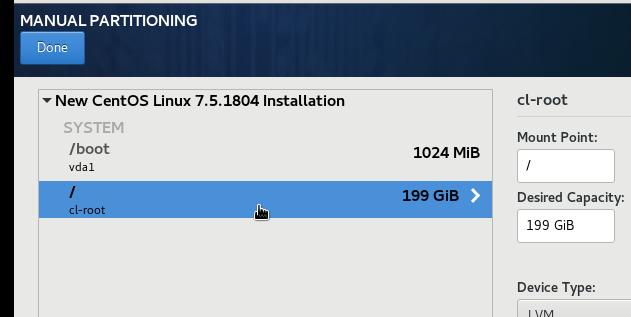
磁盘分区采用lvm, 默认如下:
接下来的包选择里选择上openssh server, 之后继续安装,直到安装完毕。
虚拟机配置
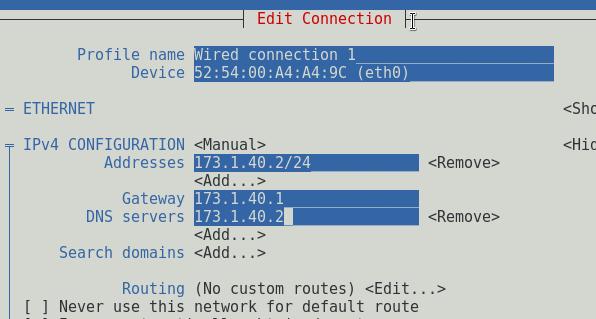
设置root密码, 允许sshd对root的登录。配置固定IP地址:
# vim /etc/network/interfaces
auto ens3
iface ens3 inet static
address 192.168.122.166
netmask 255.255.255.0
network 192.168.122.0
broadcast 192.168.122.255
gateway 192.168.122.1
dns-nameservers 192.168.122.1
配置gitlab-ce源,安装gitlab-ce/gitlab-runner等。
# apt-get install -y dpkg-dev  xorriso
# apt-get install gitlab-ce postfix gitlab-runner
配置gitlab-ce:
# vim /etc/gitlab/gitlab.rb
external_url 'http://192.168.122.252'
# gitlab-ctl reconfigure && gitlab-ctl restart
CI/CD配置
配置密码为thinker@1,
 登录(root/thinker@1):
更改gitlab-runner的配置:
# vim /etc/systemd/system/gitlab-runner.service
ExecStart=/usr/bin/gitlab-runner "run" "--working-directory" "/home/gitlab-runner" "--config" "/etc/gitlab-runner/config.toml" "--service" "gitlab-runner" "--syslog" "--user" "root"
# systemctl daemon-reload
# systemctl restart gitlab-runner
安装docker-ce, load
auto-index镜像,而后创建8888端口的http服务,服务目录为/opt/serve端口。这一步骤可以用别的静态网页服务器来进行。

创建三个project,
deploy_cd:
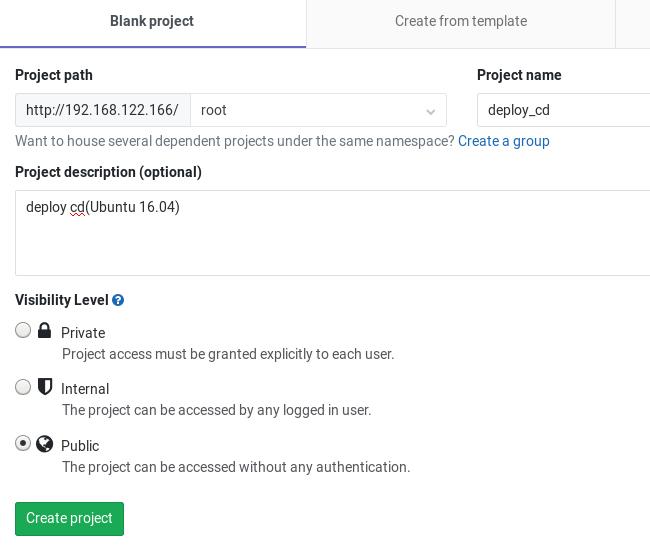
# cd /root/git/deploy_cd
# git config --global user.name "Administrator"
# git config --global user.email "admin@example.com"
# git init
# git remote add origin http://192.168.122.166/root/deploy_cd.git
# git add .
# git commit -m "Initial commit"
# git push -u origin master
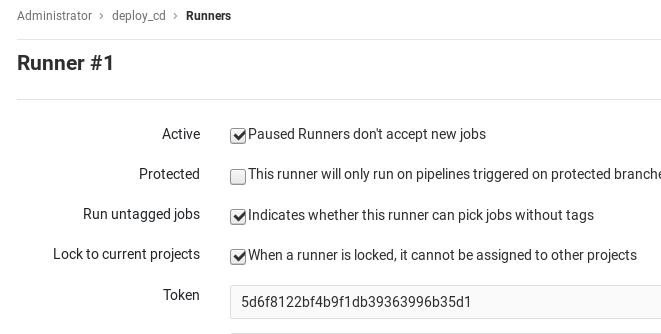
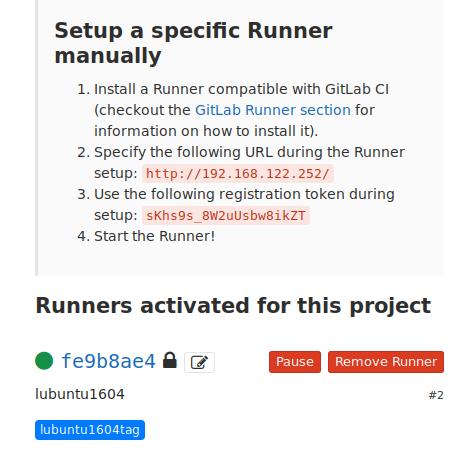
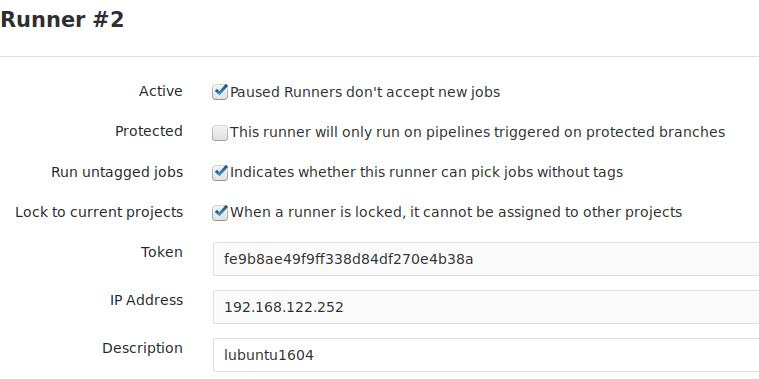
Setting->CI/CD->Runners Settings:
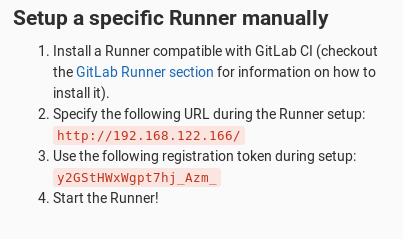
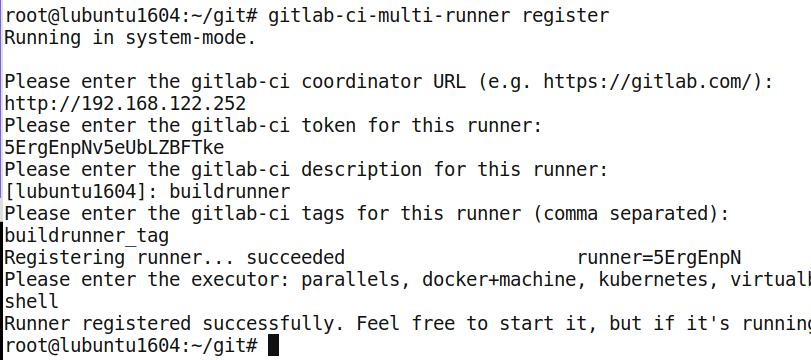
注册gitlab-runner:
# gitlab-ci-multi-runner register
Running in system-mode.

Please enter the gitlab-ci coordinator URL (e.g. https://gitlab.com/):
http://192.168.122.166
Please enter the gitlab-ci token for this runner:
y2GStHWxWgpt7hj_Azm_
Please enter the gitlab-ci description for this runner:
[aiubuntu]: deploy_cd
Please enter the gitlab-ci tags for this runner (comma separated):
deploy_cd_tag
Registering runner... succeeded                     runner=y2GStHWx
Please enter the executor: shell, ssh, docker, docker-ssh, parallels, virtualbox, docker+machine, docker-ssh+machine, kubernetes:
shell
Runner registered successfully. Feel free to start it, but if it's running already the config should be automatically reloaded!
设置trigger项:
依次类推,创建另外两个project, kismatic_source和node_cd,
并设置对应的gitlab-runner.
此后的任意一次提交将触发编译。
Trigger配置, 在deploy_cd的工程中,新建一个trigger:
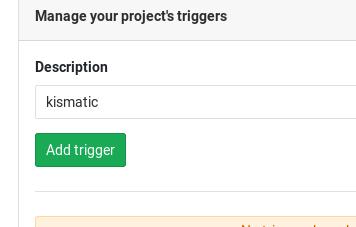
对应得到的字段:
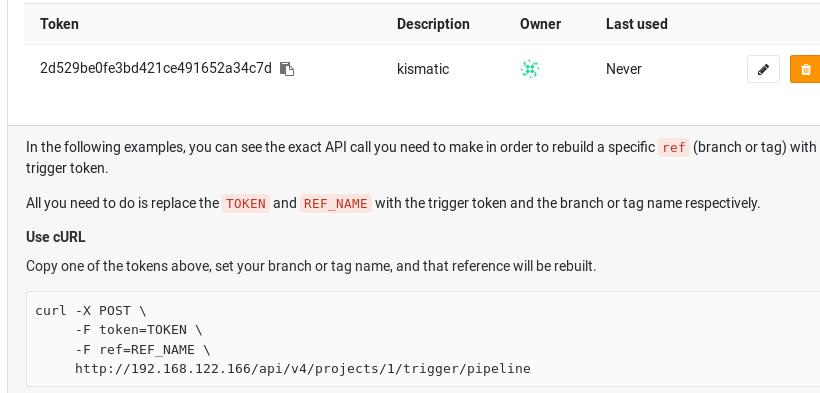
用字段替换kismatic_source下的文件.gitlab-ci.yml中的字段:
"curl -X POST -F token=2d529be0fe3bd421ce491652a34c7d -F ref=master http://192.168.122.252/api/v4/projects/1/trigger/pipeline"
提交kismatic_source的更改,查看是否编译成功。
编译完后的文件可以在`/home/gitlab-runner/builds下找到。
集群安装
文件列表:
1604_deploy.iso
1604_node.iso
分别对应deploy节点和node节点。下列假设,deploy节点为192.168.122.154,
node节点为192.168.122.122, 对应需要配置如下:
deploy节点安装后操作(192.168.122.154):
# cd /root/
# ./initial.sh
# vim /etc/bind/db.teligen.com
....
ubuntu	IN      A       192.168.122.122
.....
# systemctl restart bind9
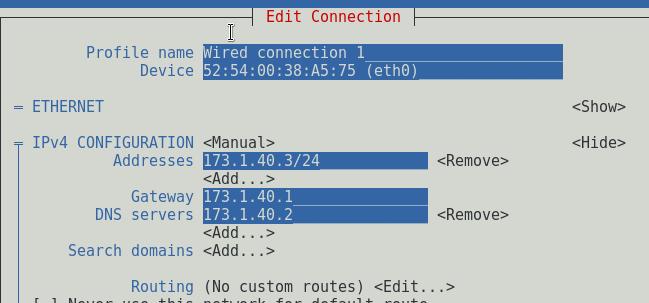
node节点配置(192.168.122.122):
# vim /etc/network/interfaces
....
	dns-nameservers 192.168.122.154
....
# systemctl restart networking
安装集群(192.168.122.154):
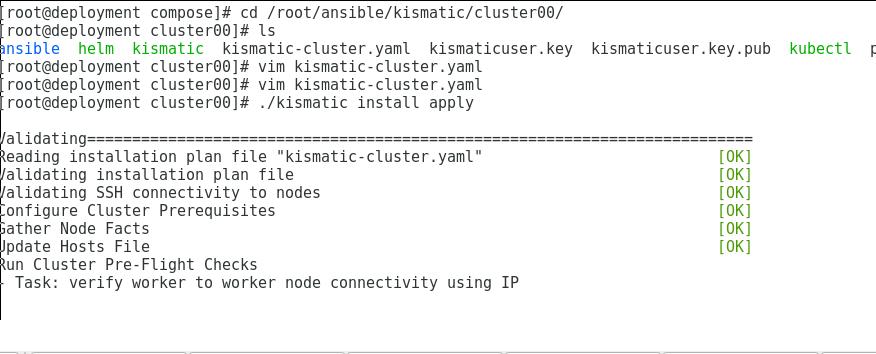
# cd /root/ansible/kismatic/cluster00
# ./kismatic install apply
....
安装完毕后,验证(192.168.122.122):
# kubectl get nodes
NAME                 STATUS    ROLES     AGE       VERSION
ubuntu.teligen.com   Ready     master    9m        v1.10.5
Jul 17, 2018
TechnologyInstall
Install via:
# apt-get install postfix gitlab-ce gitlab-runner
Configure the external_url:
# vim /etc/gitlab/gitlab.rb
external_url 'http://192.168.122.252'
# gitlab-ctl reconfigure && gitlab-ctl restart
Configure the gitlab-ci-multi-runner, take care of the gitlab-ci token is
taken from the webUI:
# gitlab-ci-multi-runner register
Setup the runner for specified project:
Configuration for the runner:
Change the gitlab-runner as root
# vim /etc/systemd/system/gitlab-runner.service
Change from --user gitlab-runner to --user root
# systemctl daemon-reload
# systemctl restart gitlab-runner.service
Jul 13, 2018
TechnologyDeployment
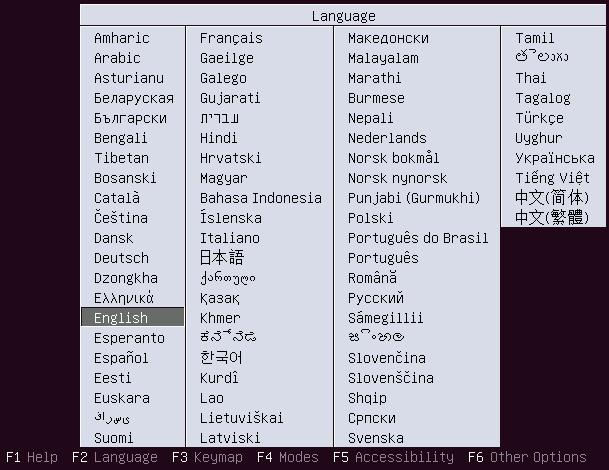
选择语言,默认English即可:
 选择第一项:

等待片刻安装完成.
安装完毕后,
# cd /root
# ./initial.sh
将自动重启机器,重启后,配置节点的DNS名字,如:
# vim /etc/bind/db.xxx.com
按示例条目添加所需选项。
Work Node
选择语言和系统安装选项与上面相同,等待片刻安装完成。
当安装时碰到以下画面时,直接按回车退出即可继续安装:
安装完毕后,配置dns指向Deployment节点:
# vim /etc/network/interfaces
....
dns-nameservers	192.168.122.154
部署kismatic
进入/root/ansible/kismatic/cluster00,
编辑对应的kismatic-cluster.yaml文件,主要是主机的dnsname和IP地址的一一对应关系,配置完毕后./kismatic install apply即可。
Jul 12, 2018
Technologyenv
network:
iso:
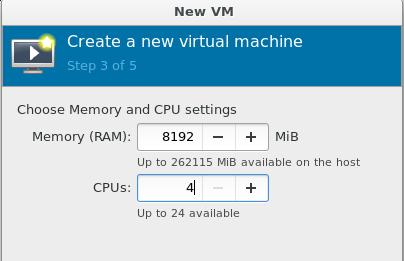
cpu/mem:
Install system
Choose item:
liveCD:
Trust and launch:

See for details.
Working nodes
cpu/mem:
Worker, no swap, disk layout:
deployment node config
notice dns:
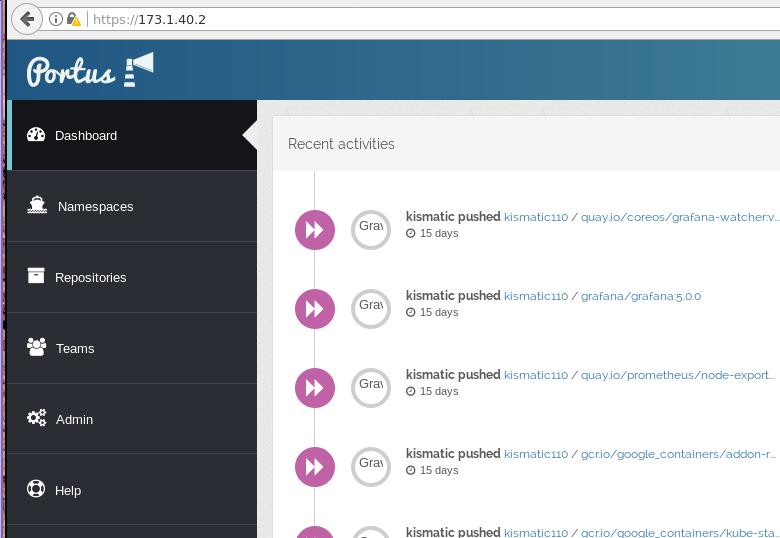
Docker Registry server:
deployment
In progress: