Aug 20, 2018
Technology环境准备
Iso使用官方下载的proxmox-ve_5.2-1.iso, CPU/内存配置为16核64G。
硬盘配置为- 系统:200G, Ceph存储, 600G
一共三台机器,均为虚拟机,位于不同的物理机器上,这点非常重要,如果处于同一机器上,则在线迁移虚拟机容易出现错误,具体表现为,虚拟机迁移完毕以后,被迁移出的那台机器节点将失去反应,节点无法登录。
CPU我们通过host-passthrough下发到虚拟机里。
IP地址配置
节点1(zzz_proxmox_127), 位于127服务器,ip为10.33.34.27, hostname为promox127.
节点2(zzz_proxmox_128), 位于128服务器,ip为10.33.34.28, hostname为promox128.
节点3(zzz_proxmox_129), 位于129服务器,ip为10.33.34.29, hostname为promox129.
用于Ceph的地址暂时不配置。
开启multicast
proxmox需要各个节点的multicast为可用状态,而默认的virt-manager禁用了该选项,我们使用以下命令来开启虚拟机上的multicast.
for dev in `ls /sys/class/net/ | grep macvtap`; do
    ip link set dev $dev allmulticast on
  done
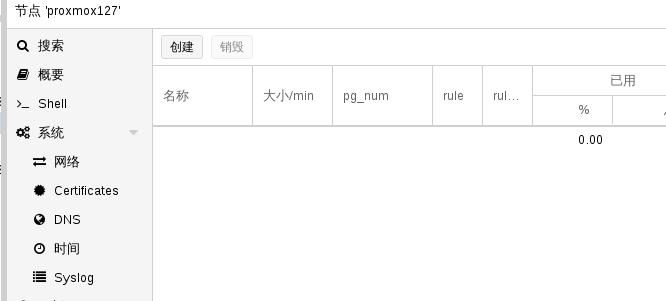
建立集群
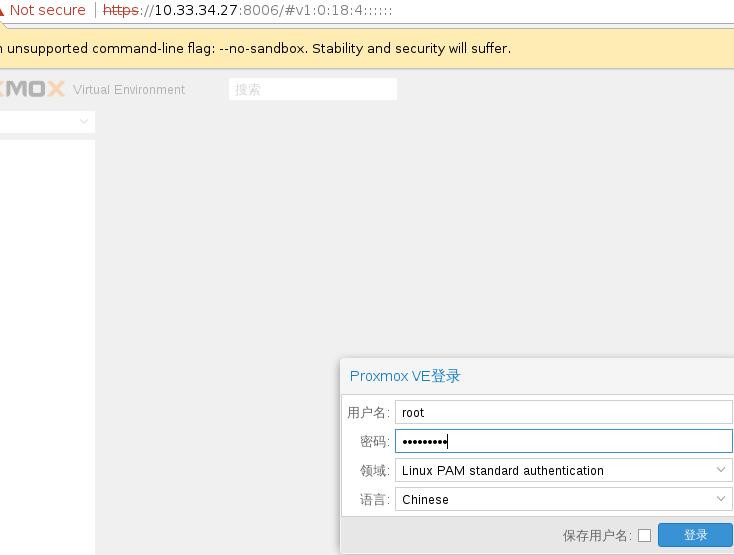
浏览器访问https://10.33.34.27:8006,选择语言后,页面如下:
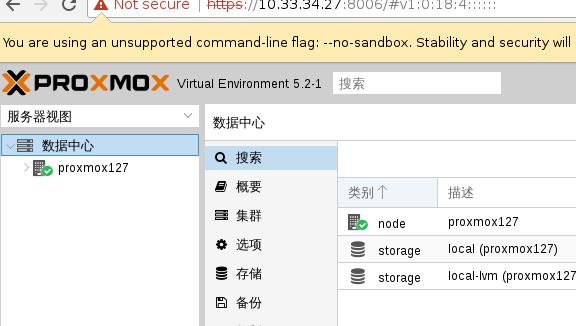
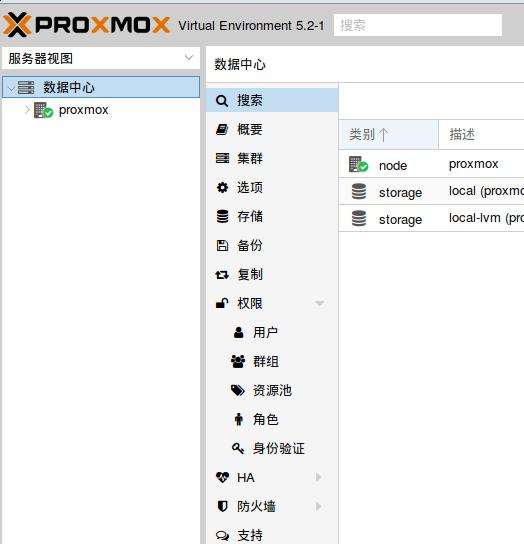
现在只有一个节点:
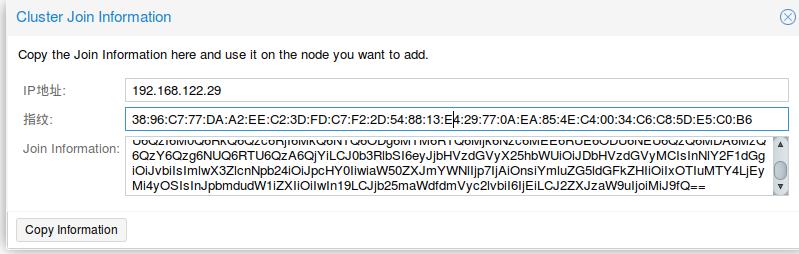
27上运行命令, create创建出一个集群,而status则是检查其状态:
# pvecm create firstcluster
# pvecm status
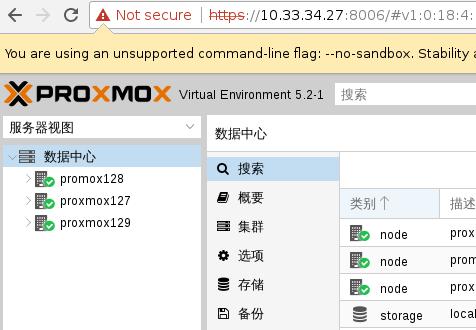
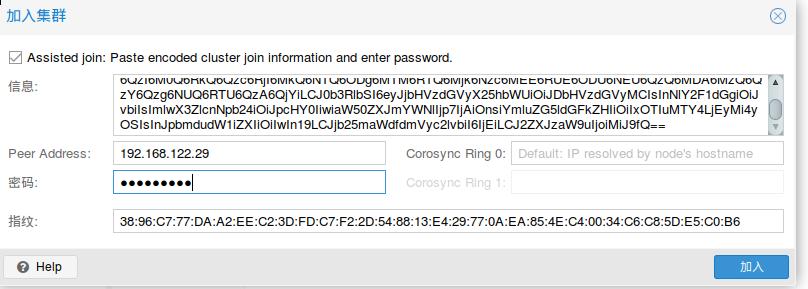
28/29上分别运行:
# pvecm add 10.33.34.27
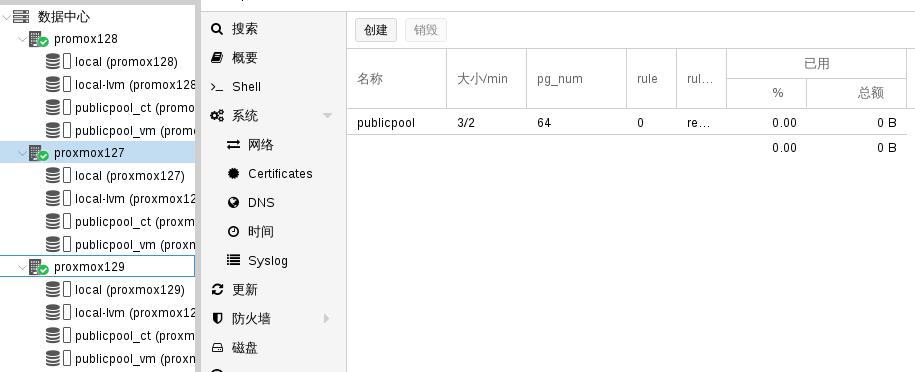
添加完毕后的集群如下:
Ceph
配置IP地址:
# from /etc/network/interfaces
auto eth2
iface eth2 inet static
  address  10.10.10.1
  netmask  255.255.255.0
修改pveceph的源:
# vi /usr/share/perl5/PVE/CLI/pveceph.pm
deb .......
# pveceph install --version luminous
添加存储:
创建一个pool,
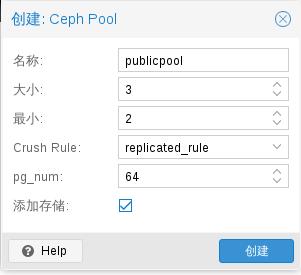
创建完毕后:
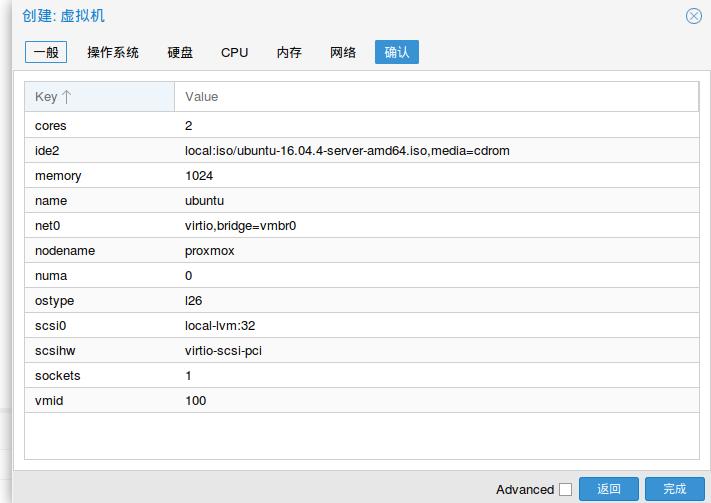
虚拟机
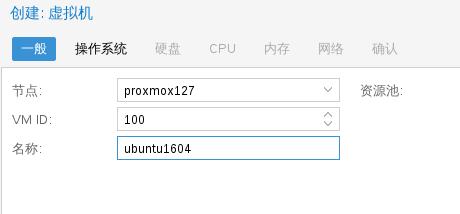
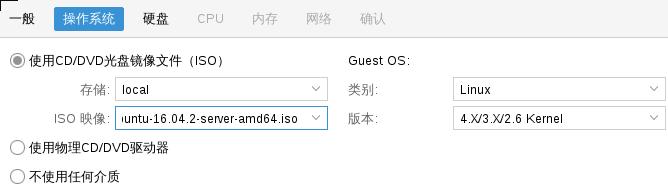
拷贝安装文件ubuntu-16.04.2-server-amd64.iso到/var/lib/vz/template/iso下,
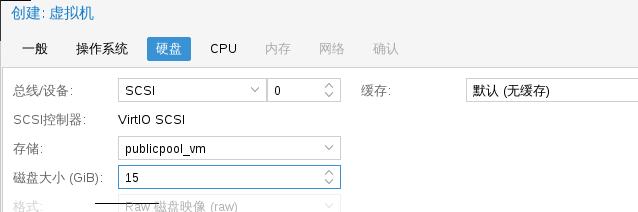
在27机器上, 然后创建虚拟机。
选择ISO:
选择硬盘:
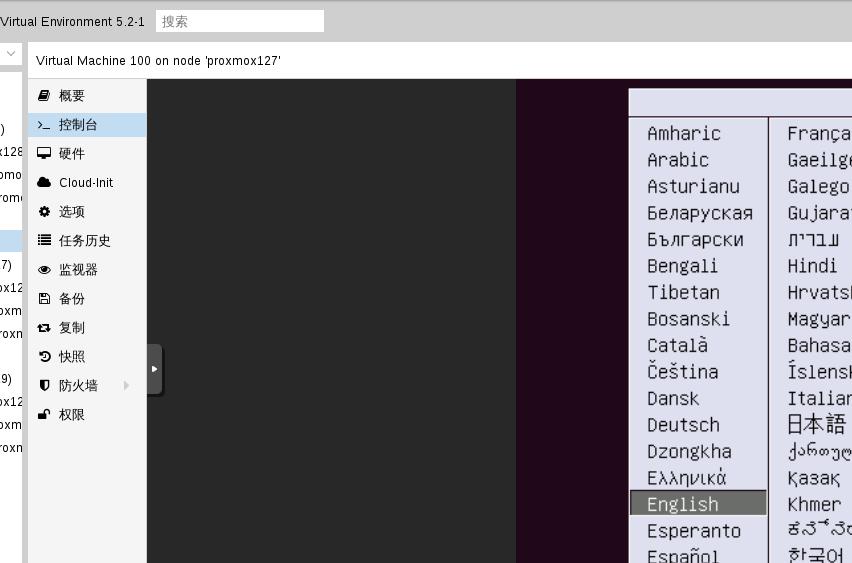
选择刚创建的虚拟机,点击启动:
Issue
嵌套虚拟化对内核版本的影响,因内网的机器运行的操作系统内核版本较为陈旧,相信可能会有问题。后期将新装服务器来进行。
新装物理服务器,dhcp得到同一网段地址,而后将继续proxmox的测试。
Aug 20, 2018
Technology目的
设置内网的独立实验网段,需要一个软路由,做转发。
准备
Debian 9.3.0 ISO.
虚拟机,1核, 512M, debian系统安装, 20G硬盘。
最小化安装 Debian x86_64系统。
双网卡,一个连接bridged网络,另一个连接本机上的192.168.122.0/24网络,该网络为虚拟机的默认网络,可通过NAT转换到外头。
配置
安装必要的包:
# apt-get update
# apt-get install net-tools isc-dhcp-server
配置网络:
# vim /etc//network/interfaces
# This file describes the network interfaces available on your system
# and how to activate them. For more information, see interfaces(5).

source /etc/network/interfaces.d/*

# The loopback network interface
auto lo
iface lo inet loopback

# The primary network interface
allow-hotplug ens3
iface ens3 inet static
address 192.168.122.254
netmask 255.255.255.0
gateway 192.168.122.1

auto ens4
iface ens4 inet static
address 10.33.34.1
netmask 255.255.255.0
配置dhcpd服务器:
# vim /etc/dhcp/dhcpd.conf
    # dhcpd.conf
    #
    # Sample configuration file for ISC dhcpd
    #

    # option definitions common to all supported networks...
    option domain-name "example.org";
    option domain-name-servers ns1.example.org, ns2.example.org;

    default-lease-time 600;
    max-lease-time 7200;

    # The ddns-updates-style parameter controls whether or not the server will
    # attempt to do a DNS update when a lease is confirmed. We default to the
    # behavior of the version 2 packages ('none', since DHCP v2 didn't
    # have support for DDNS.)
    ddns-update-style none;

    # If this DHCP server is the official DHCP server for the local
    # network, the authoritative directive should be uncommented.
    #authoritative;

    # Use this to send dhcp log messages to a different log file (you also
    # have to hack syslog.conf to complete the redirection).
    #log-facility local7;

    # No service will be given on this subnet, but declaring it helps the
    # DHCP server to understand the network topology.

    #subnet 10.152.187.0 netmask 255.255.255.0 {
    #}

    # This is a very basic subnet declaration.

    #subnet 10.254.239.0 netmask 255.255.255.224 {
    #  range 10.254.239.10 10.254.239.20;
    #  option routers rtr-239-0-1.example.org, rtr-239-0-2.example.org;
    #}

    # This declaration allows BOOTP clients to get dynamic addresses,
    # which we don't really recommend.

    #subnet 10.254.239.32 netmask 255.255.255.224 {
    #  range dynamic-bootp 10.254.239.40 10.254.239.60;
    #  option broadcast-address 10.254.239.31;
    #  option routers rtr-239-32-1.example.org;
    #}

    # A slightly different configuration for an internal subnet.
    #subnet 10.5.5.0 netmask 255.255.255.224 {
    #  range 10.5.5.26 10.5.5.30;
    #  option domain-name-servers ns1.internal.example.org;
    #  option domain-name "internal.example.org";
    #  option routers 10.5.5.1;
    #  option broadcast-address 10.5.5.31;
    #  default-lease-time 600;
    #  max-lease-time 7200;
    #}

    # Hosts which require special configuration options can be listed in
    # host statements.   If no address is specified, the address will be
    # allocated dynamically (if possible), but the host-specific information
    # will still come from the host declaration.

    #host passacaglia {
    #  hardware ethernet 0:0:c0:5d:bd:95;
    #  filename "vmunix.passacaglia";
    #  server-name "toccata.example.com";
    #}

    # Fixed IP addresses can also be specified for hosts.   These addresses
    # should not also be listed as being available for dynamic assignment.
    # Hosts for which fixed IP addresses have been specified can boot using
    # BOOTP or DHCP.   Hosts for which no fixed address is specified can only
    # be booted with DHCP, unless there is an address range on the subnet
    # to which a BOOTP client is connected which has the dynamic-bootp flag
    # set.
    #host fantasia {
    #  hardware ethernet 08:00:07:26:c0:a5;
    #  fixed-address fantasia.example.com;
    #}

    # You can declare a class of clients and then do address allocation
    # based on that.   The example below shows a case where all clients
    # in a certain class get addresses on the 10.17.224/24 subnet, and all
    # other clients get addresses on the 10.0.29/24 subnet.

    #class "foo" {
    #  match if substring (option vendor-class-identifier, 0, 4) = "SUNW";
    #}

    #shared-network 224-29 {
    #  subnet 10.17.224.0 netmask 255.255.255.0 {
    #    option routers rtr-224.example.org;
    #  }
    #  subnet 10.0.29.0 netmask 255.255.255.0 {
    #    option routers rtr-29.example.org;
    #  }
    #  pool {
    #    allow members of "foo";
    #    range 10.17.224.10 10.17.224.250;
    #  }
    #  pool {
    #    deny members of "foo";
    #    range 10.0.29.10 10.0.29.230;
    #  }
    #}
    class "kvm" {
        match if binary-to-ascii(16,8,":",substring(hardware, 1, 2)) = "52:54";
    }

    subnet 10.33.34.0	netmask 255.255.255.0 {
    option routers 10.33.34.1;
    option subnet-mask 255.255.255.0;
    option broadcast-address 10.33.34.255;
    option domain-name-servers 10.33.34.1;
    option time-offset 0;
    pool {
        range 10.33.34.100	10.33.34.200;
        allow members of "kvm";
    }
    default-lease-time	1209600;
    max-lease-time 1814400;
    }
# vim /etc/default/isc-dhcp-server
    # Defaults for isc-dhcp-server (sourced by /etc/init.d/isc-dhcp-server)

    # Path to dhcpd's config file (default: /etc/dhcp/dhcpd.conf).
    #DHCPDv4_CONF=/etc/dhcp/dhcpd.conf
    #DHCPDv6_CONF=/etc/dhcp/dhcpd6.conf

    # Path to dhcpd's PID file (default: /var/run/dhcpd.pid).
    #DHCPDv4_PID=/var/run/dhcpd.pid
    #DHCPDv6_PID=/var/run/dhcpd6.pid

    # Additional options to start dhcpd with.
    #	Don't use options -cf or -pf here; use DHCPD_CONF/ DHCPD_PID instead
    #OPTIONS=""

    # On what interfaces should the DHCP server (dhcpd) serve DHCP requests?
    #	Separate multiple interfaces with spaces, e.g. "eth0 eth1".
    INTERFACESv4="ens4"
    INTERFACESv6=""
现在重启服务:
# systemctl restart isc-dhcp-server
重启完毕后,所有bridged的虚拟机将得到同样的地址段的地址。
转发
转发到某网段,更改地址ens3为该网段(192.192.189.109),然后:
# iptables -t nat -A POSTROUTING -s 10.33.34.0/24 -j SNAT --to-source 192.192.189.109
开启转发:
# vim /etc/sysctl.conf
net.ipv4.ip_forward=1
安装iptables-persistent:
# apt-get install iptables-persistent
这样就打通了两个网段之间的联系。
访问网段
访问该网段,Linux下添加:
# route add -net 10.33.34.0/24 gw 192.192.189.109
Windows:
# route add 10.33.34.1 mask 255.255.255.0 192.192.189.109
But in windows it didn’t work.
Aug 16, 2018
TechnologyInstallation
iso installation.
Configuration
Login:
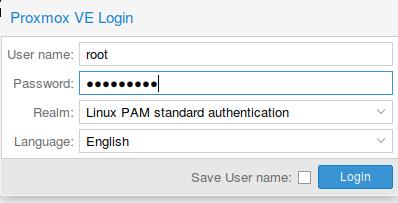 Image:
Another node:

Cluster
Initial:

Generation of the information:
 Join:
Join:
 Install system:
Command
After installation, build a cluster using CLI in following commands:
Management node:
# pvecm create mycluster
Working node, for joing:
# pvecm add 192.168.0.121
Thus you will see the cluster being created as following:
Aug 14, 2018
Technologydnsmasq for ubuntu
systemd-resolved will listen on 53 port, disable it via:
# vim /etc/systemd/resolved.conf
DNSStubListener=no
# systemctl enable dnsmasq
Disable the system-resolved.service:
# systemctl disable systemd-resolved.service
# systemctl stop systemd-resolved.service
# echo nameserver 192.168.0.15>/etc/resolv.conf
# chattr -e /etc/resolv.conf
# chattr +i /etc/resolv.conf
# ufw disable
# docker swarm leave
# docker swarm init
registry proxy issue
Enable the registry proxy will slow down the registry cached image download
speed, solved it via:
# vim config.yml

....
#proxy:
#	remoteurl: https://registry-1.docker.io
Then restart the docker registry service(the docker instance), the pulling
speed will greatly reduced.
dind Registry
registry mirror should point to a real ip, rather than 172.17.0.1, another
word, you could not use inner docker bridge address for registry usage.
Golang
Go could be directly migration from the old iso distribution.
cubic issue
Alway use a new directory for customize your new iso distribution!!!!!!
Aug 14, 2018
Technology环境准备
推荐配置:
两核以上虚拟机或物理机
4G以上内存(推荐需要8G以上)
40G以上磁盘空间
网卡x1.
系统安装
使用光盘启动系统,ubuntu-18.04.1-2018.08.14-playdocker-amd64.iso光盘里含有操作系统及运行PlayWithDocker所需的全部离线包。将此光盘刻录或使用U盘加载物理机/虚拟机,启动系统至安装界面:
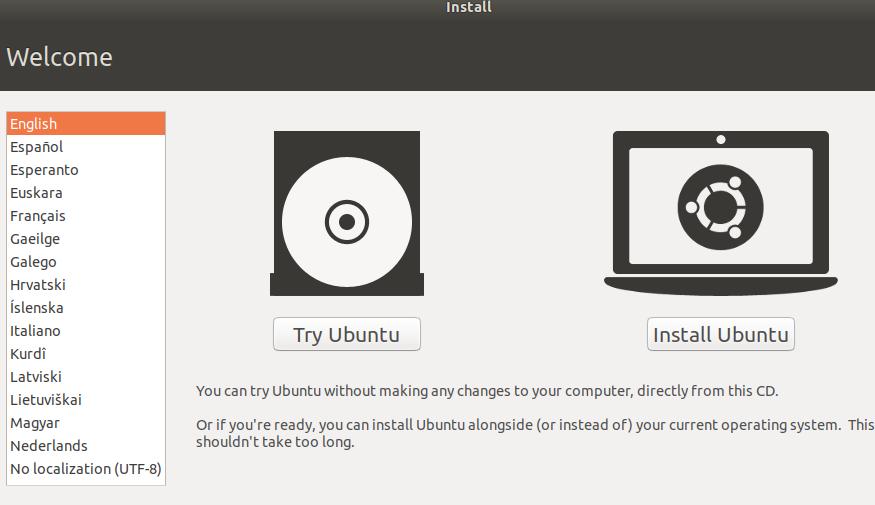
选择Install Ubuntu,进入到下一步:
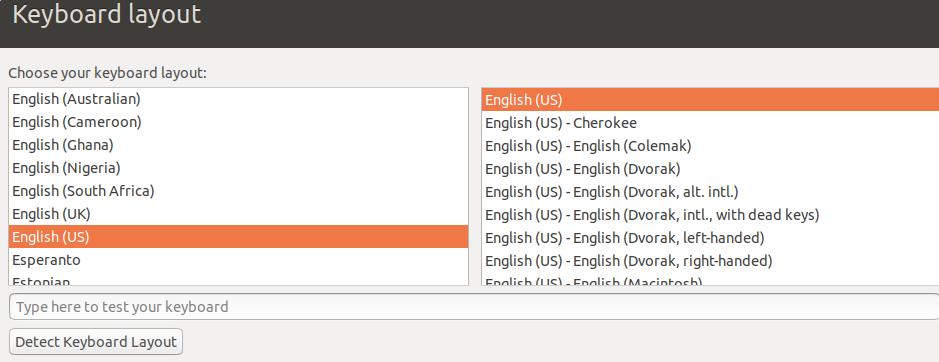
键盘布局默认不变,点击Continue,进入到下一步:
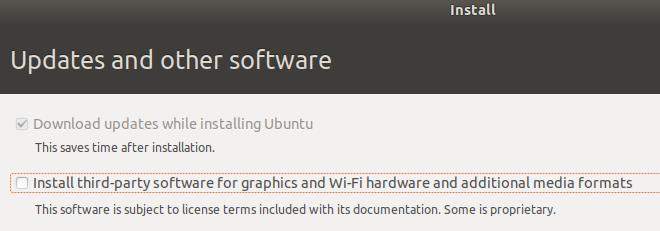
直接点击Continue到下一步:
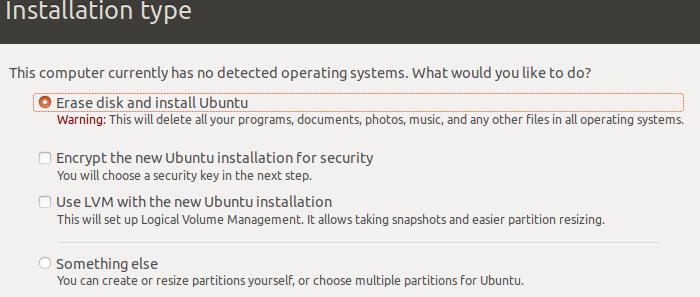
选择Erase disk and install Ubuntu后,点击Install Now进入到下一步:
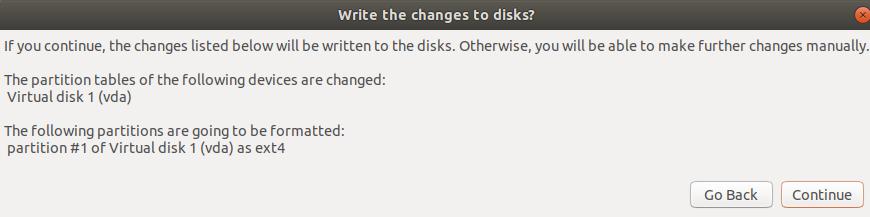
弹出的对话框中点击Continue,写入磁盘修改.
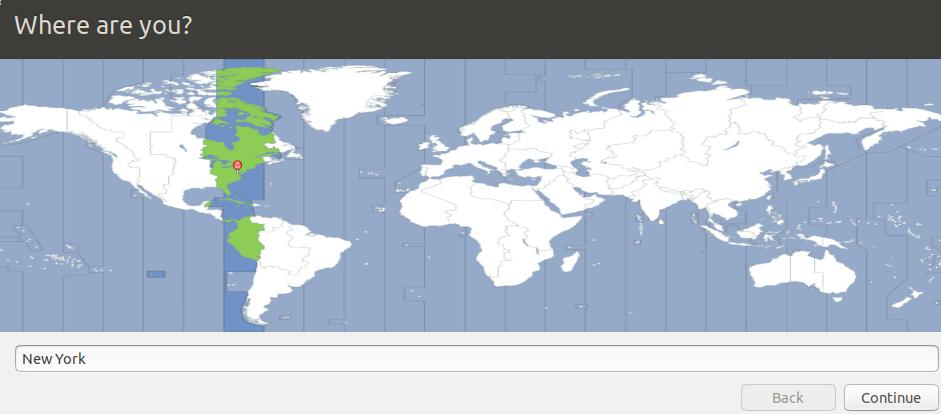
时区随便填,点击Continue到下一步:
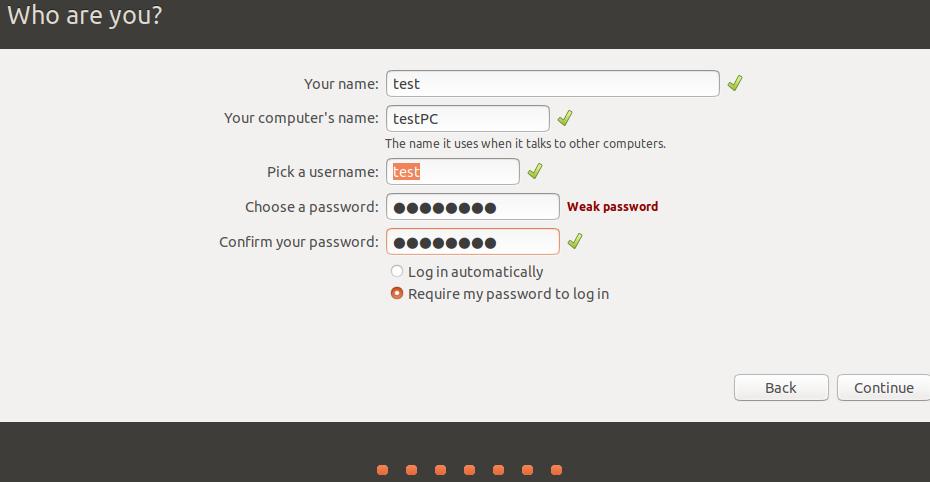
填入用户名/密码配置信息后,点击Continue进入到系统安装阶段。
系统安装需要大约10~20分钟,具体时间取决于你的硬件配置。全程无需干预。
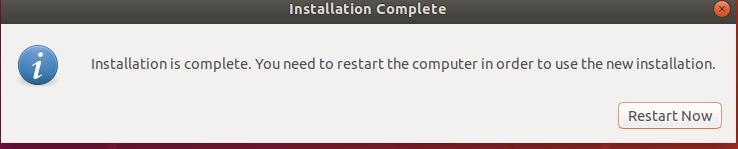
点击Restart Now,卸载ISO后重启机器,系统安装完成。
Play With Docker
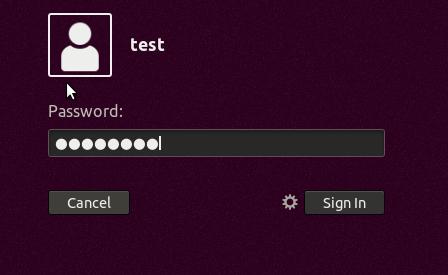
安装完毕后,登录系统:
 运行
运行terminal, 打开终端控制器:
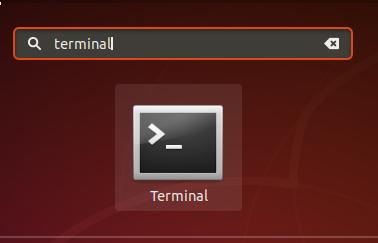
运行以下命令:
test@testPC:~$ sudo bash
[sudo] password for test:
root@testPC:~# cd /root
root@testPC:/root# ./initial.sh
运行完毕后可以通过docker ps检查所需服务的启动情况。
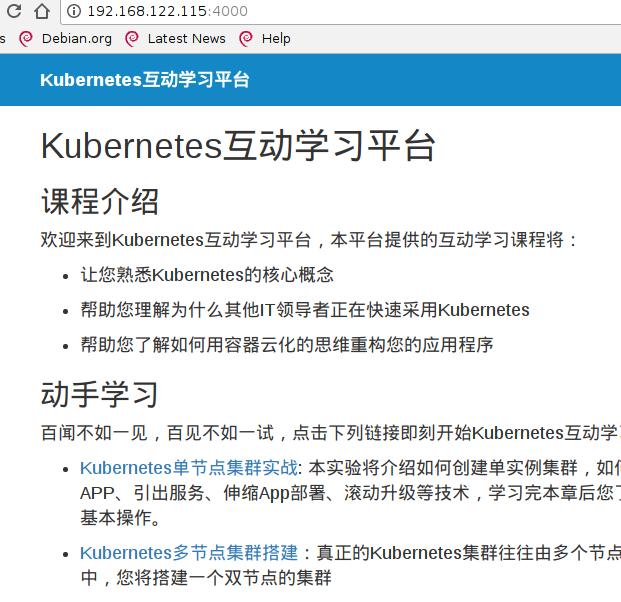
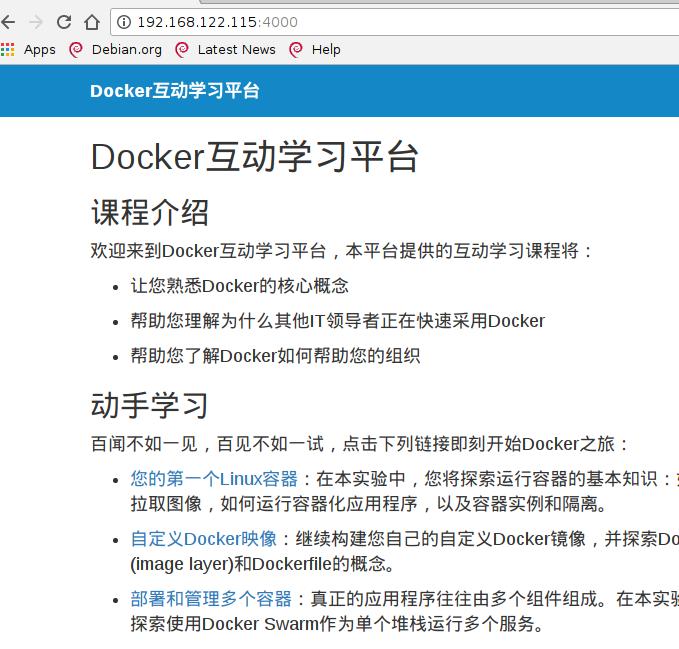
外部访问机器的4000端口,可以看到PlayWithDocker已正常运行,
推荐使用新版chrome浏览器访问:
Play With Kubernetes
安装流程和上述流程相似。使用的ISO名称为ubuntu-18.04.1-2018.07.27.pwd-desktop.amd64.iso.