Nov 15, 2018
Technology1. Portus纯净版制作
vagrant启动ubuntu14.04, 安装docker/docker-compose, 注意事项:
$ sudo apt-get purge lxc-docker-1.9.0
$ sudo apt-get install \
    linux-image-extra-$(uname -r) \
    linux-image-extra-virtual
$ sudo apt-get update
$ sudo apt-get install -y \
    apt-transport-https \
        ca-certificates \
            curl \
                software-properties-common

$ curl -fsSL https://download.docker.com/linux/ubuntu/gpg | sudo apt-key add -
$ sudo apt-key fingerprint 0EBFCD88
$ sudo add-apt-repository \
   "deb [arch=amd64] https://download.docker.com/linux/ubuntu \
      $(lsb_release -cs) \
         stable"
$ sudo apt-get update
$ sudo apt-get install -y docker-ce
$ sudo apt-get install -y libyaml-dev libpython-dev
$ sudo pip uninstall docker-py
$ sudo pip uninstall docker-compose
$ sudo pip install --upgrade --force-reinstall  docker-compose
而后用我们预先定义好的compose目录(compose.tar.gz解压到/usr/local/compose目录下), 更改IP地址与域名的映射,extra_hosts:条目,
全翻墙条件下,一条命令启动:
# cd /usr/local/compose
# docker-compose up
因为我们预先已经定义好了域名与IP的配置,我们这里定义的内网IP为192.168.33.18,
于是在有浏览器的192.168.33.1机器上,配置/etc/hosts下的DNS条目:
# vim /etc/hosts
portus.xxxx.com	192.168.33.18
打开浏览器访问https://portus.xxxx.com,第一次登录需要配置admin的邮箱及密码:

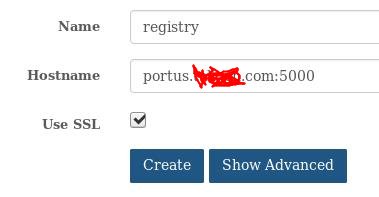
配置远端registry仓库:
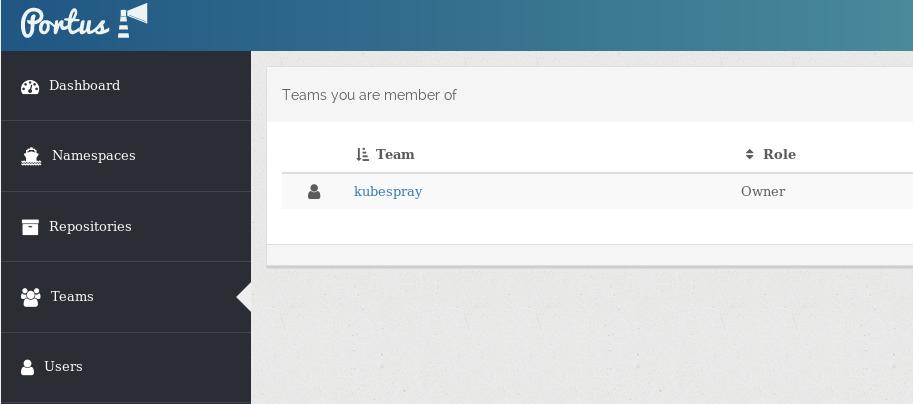
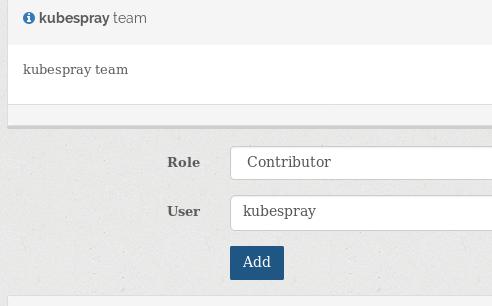
创建一个kubespray团队:
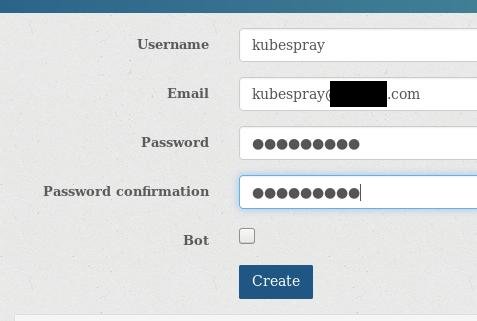
User条目中,创建一个kubespray的用户:
kubespray团队下添加kubespray用户:
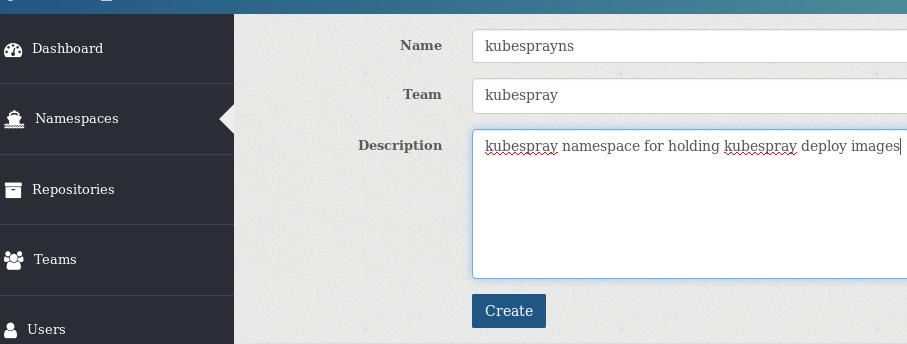
创建一个命名空间用于存放kubespray部署镜像:
此刻Dashboard上可以看到我们刚才进行的操作。而在外部则可以通过docker
login来登录到此仓库。
现在关闭docker-compose启动的容器,备份好关键目录:
# cd /usr/local/compose/
# docker-compose down
Stopping compose_nginx_1_3541e93c08a9      ... done
Stopping compose_background_1_42f1644b8fea ... done
Stopping compose_registry_1_e6eb6ee23d0a   ... done
Stopping compose_portus_1_90c30953f8b0     ... done
Stopping compose_db_1_45dc41479cee         ... done
Removing compose_nginx_1_3541e93c08a9      ... done
Removing compose_background_1_42f1644b8fea ... done
Removing compose_registry_1_e6eb6ee23d0a   ... done
Removing compose_portus_1_90c30953f8b0     ... done
Removing compose_db_1_45dc41479cee         ... done
Removing network compose_default
# cd /var/lib
# tar cJvf portus.tar.xz portus/
# ls -l -h portus.tar.xz
-rw-r--r-- 1 root root 687K Nov 15 03:49 portus.tar.xz
由上面可见,portus下现在没有任何上传的镜像及数据文件,整个目录压缩后仅1M不到的空间。
我们也需要portus运行所需要的所有镜像,使用下列命令打包成一个压缩后的镜像,
以便我们在编译ISO时使用:
# docker save $(docker images -q) -o portus_combine.tar
# ls -l -h portus_combine.tar
-rw------- 1 root root 584M Nov 15 03:58 portus_combine.tar
由章节1我们得到用于制作Portus纯净仓库的文件,
portus_combine.tar和portus.tar.xz,用于后续的部署ISO编译使用。
1.1 vagrant box引出
将上述的文件放到/home/vagrant目录, 并更改root的密码为txxxxxxr,
打包该虚拟机,以后我们将直接由vagrant box来批量执行.
# pwd
/home/vagrant
# ls
compose.tar.gz  portus_combine.tar  portus.tar.xz
打包该vagrant实例为box:
# vagrant status
Current machine states:

default                   poweroff (virtualbox)

The VM is powered off. To restart the VM, simply run `vagrant up`
# vagrant package --output portusBase.box
# ls -l -h portusBase.box
-rw-r--r-- 1 dash root 1.7G Nov 15 12:27 portusBase.box
2. kubespray容器镜像
VPS改写kubespray脚本,取回需要的容器镜像.
以下是本地镜像:
取回后的所有容器镜像,打包到/vagrant目录下:
# docker save $(docker images -q) -o kubespray_images.tar
# ls -l -h kubespray_images.tar
-rw------- 1 root root 4.9G Nov 14 20:37 kubespray_images.tar
3. Portus部署仓库制作
由纯净版的box启动虚拟机,加载上一章制作出来容器镜像。
Oct 31, 2018
TechnologyFont Preparation
Download Conky Icons by Carelli.ttf from following url:
https://github.com/antoniocarelli/conky/blob/master/Conky%20Icons%20by%20Carelli.ttf
With the downloaded ttf, do following command:
$ cp fonts/Conky\ Icons\ by\ Carelli.ttf /usr/share/fonts/TTF/
$ cd /usr/share/fonts/TTF/
$ sudo chmod 0444 Conky\ Icons\ by\ Carelli.ttf
$ sudo fc-cache
$ fc-match -a | grep -i conky
Conky Icons by Carelli.ttf: "Conky Icons by Carelli" "Regular"
Install font-awesome:
$ yaourt -S ttf-font-awesome-4 --noconfirm
Most conky configuration files use font-awesome version 4 rather than version
5, so we should install specified version 4.
Configuration File
My conky configuration file is listed under :
https://gist.githubusercontent.com/purplepalmdash/4078219891aa60923e16f4a98bd9bffb/raw/d6a5711a839dace3ce440ad6bc061691a32941bf/conky.conf
So simply download this file and run conky via:
$ cd ~ && wget github_gist/conky.conf
$ conky -c ~/conky.conf
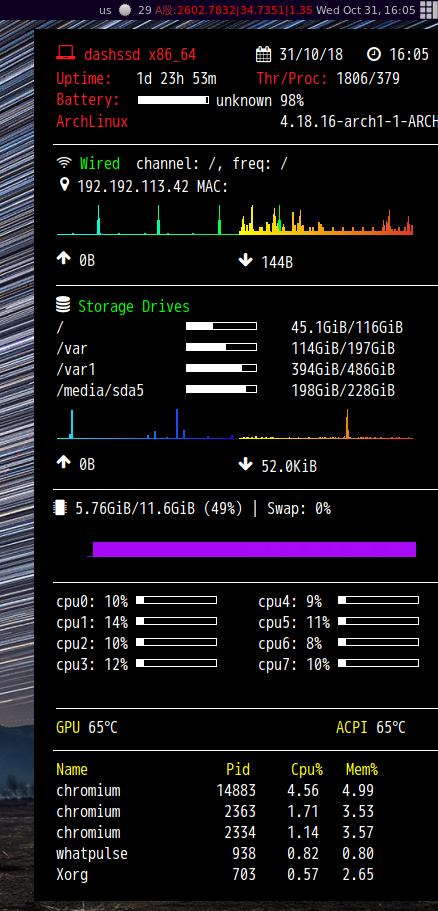
Now you will see the conky running like:
Add conky into startup file:
$ vim ~/.config/awesome/rc.lu
run_once("conky -c /home/xxxxx/.conky/conky.conf.3 &")
Transparent
In case you want to enable transparent for awesome wm, change to following
configuration:
	text_buffer_size = 32768,
	imlib_cache_size = 0,
	own_window = true,
	own_window_type = 'override',
        own_window_class = "Conky",
	own_window_hints = 'undecorated,below,sticky,skip_taskbar,skip_pager',
	own_window_transparent = true,
	border_inner_margin = 10,
	border_outer_margin = 0,
	xinerama_head = 2,
	alignment = 'top_left',
	gap_x = 1185,
	gap_y = 35,
	draw_shades = false,
	draw_outline = false,
	draw_borders = false,
	draw_graph_borders = false,
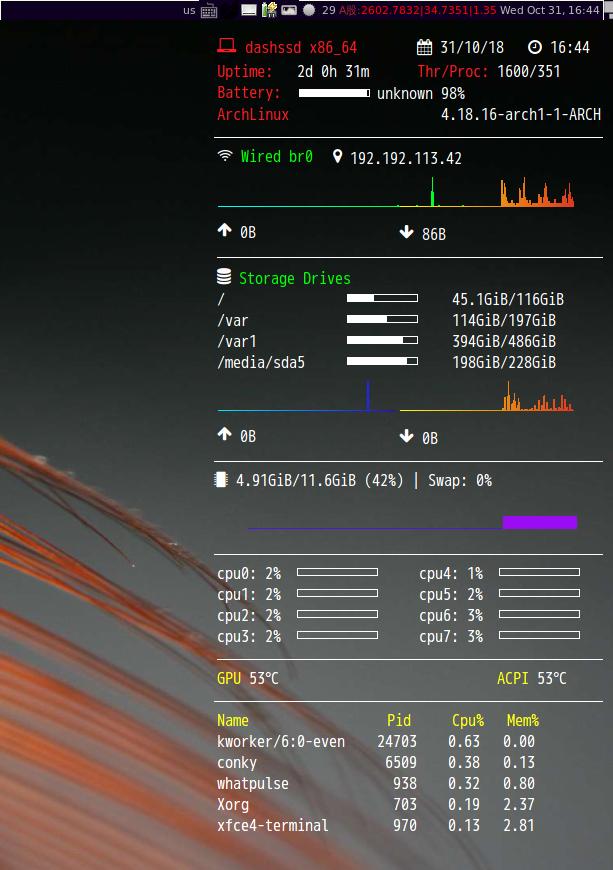
Then the result will be displayed like following:
The full configuration for transparent is listed as:
https://gist.github.com/purplepalmdash/753caaa124d9da0d58b3a7b08738d8fa
Oct 31, 2018
TechnologyWeather
We need lain for displaying weather widget on systray, so first we clone the
lain’s source code into our awesome configuration directory:
$ git clone https://github.com/lcpz/lain.git ~/.config/awesome/lain
I refered the awesome-copycats theme for displaying the weather.
$ git clone --recursive https://github.com/lcpz/awesome-copycats.git
Refers to blackburn theme:
+ local lain  = require("lain")
+
+ -- Weather
+ theme.weather = lain.widget.weather({
+     city_id = 2643743, -- placeholder (London)
+     settings = function()
+         units = math.floor(weather_now["main"]["temp"])
+         widget:set_markup(" " .. units .. " ")
+     end
+ })
Read the lain’s weather widget implementation:
$ vim lain/widget/weather.lua
 local current_call          = args.current_call  or "curl -s 'http://api.openweathermap.org/data/2.5/weather?id=%s&units=%s&lang=%s&APPID=%s'"
 local forecast_call         = args.forecast_call or "curl -s 'http://api.openweathermap.org/data/2.5/forecast/daily?id=%s&units=%s&lang=%s&cnt=%s&APPID=%s'"
We know the weather api is from openweathermap.org. We search Guangzhou:

Result:
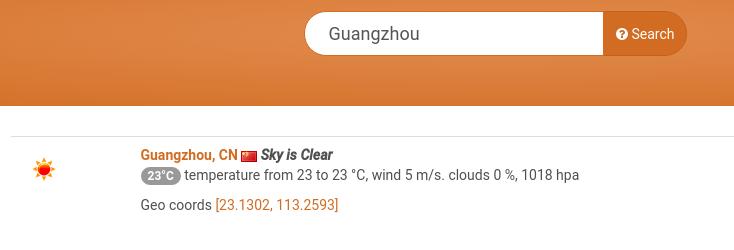
Detailed weather information for Guangzhou:
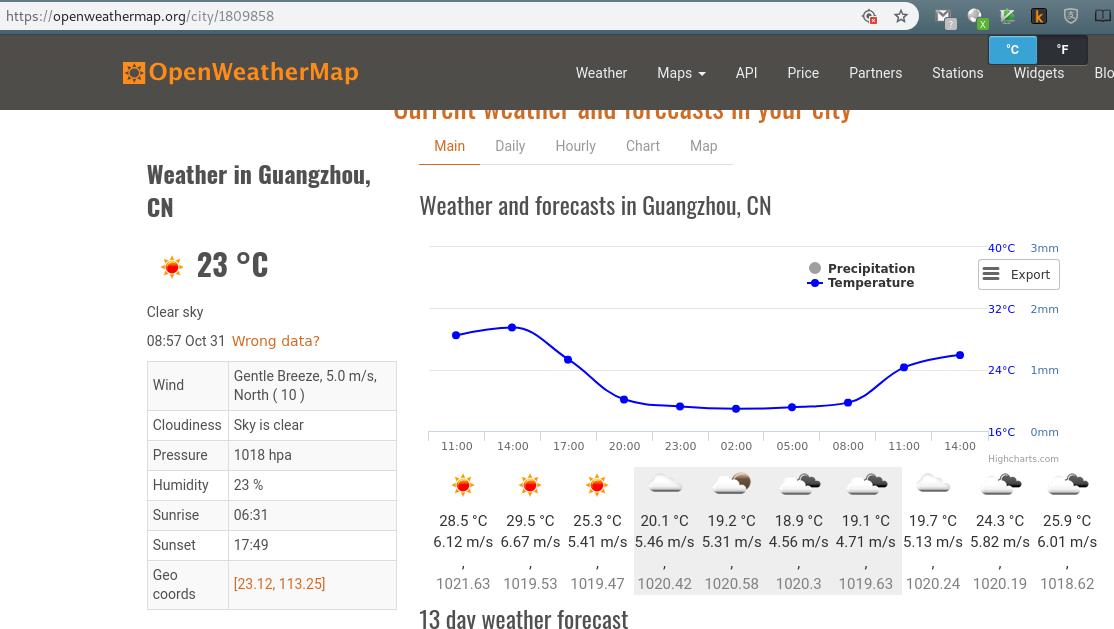
From the URL we know the id is 1809858, so we replace the 2643743 by
1809858, restart the awesome, and we got the weather widget displayed on
Awesome’s Systray.

Stock
I refered following url for writing the script and display it on awesome
systray:
http://leemeng0x61.github.io/blog/2011/03/25/awesome-%E8%84%9A%E6%9C%AC%E4%B8%AD%E5%8A%A0%E5%85%A5%E5%A4%A9%E6%B0%94/
via following command you could fetch the Shanghai Stock market value:
# curl http://hq.sinajs.cn/list=s_sh000001
var hq_str_s_sh000001="��ָ֤��,2567.9780,-0.0701,-0.00,0,0";
So our function for fetching the data is:
$ vim ~/.config/awesome/rc.lua
+ ------------------------fetchShanghaiStock-------------------------
+ -- fetchShanghaiStock(), function for fetching the A Stock of china, Shanghai.
+ -- Return value is substr of 'var hq_str_s_sh000001="上证指数,2568.0481,25.9448,1.02,1666823,15238593";'
+ -- words[2]: Current Value
+ -- words[3]: +/- Value
+ -- words[4]: +/- Value in percentage
+ function fetchShanghaiStock()
+     local url = "http://hq.sinajs.cn/list=s_sh000001"
+     local con, ret = http.request(url)
+     if con == nil then
+         print ("nil")
+         return nil
+     else
+         local words = {}
+         for word in con:gmatch('[^,]+') do
+             table.insert(words,word)
+         end
+         -- print (con)
+         -- print (words[2])
+         -- print (words[3])
+         -- print (words[4])
+         return words
+     end
+ end
We use , for separating the returned string, and we care the 2nd/3rd/4th
number, send them into an array, and return back.
Now in awesome’s configuration file we use vicious for displaying our fetched
number:
$ vim ~/.config/awesome/rc.lua
+ -- for fetching the China Shanghai Stock
+ local http = require("socket.http")
+ local vicious = require("vicious")

+ stockwidget = wibox.widget.textbox()
+     vicious.register(stockwidget, vicious.widgets.uptime,
+       function (widget, args)
+ 	local l = fetchShanghaiStock()
+ 	return '<span color="brown">A股:</span><span  color="orange">'..l[2]..'|'..l[3]..'|'..l[4]..'</span>'
+       end, 610)


        s.mytasklist, -- Middle widget
        { -- Right widgets
            layout = wibox.layout.fixed.horizontal,
            mykeyboardlayout,
            wibox.widget.systray(),
	    myweather.icon,
            myweather.widget,
+	    stockwidget,
            mytextclock,
            s.mylayoutbox,
        },
    }
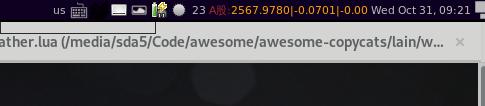
We use an uptime widget for displaying the fetched content(Calling the
fetchShanghaiStock()), now the result will be displayed like following on
awesome systray:
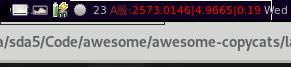
Generally when the value rise, displaying color will be red, or be green, so
we add following logic for our return value:
	local l = fetchShanghaiStock()
+	if string.match(l[4], "-") then
+	  return '<span color="brown">A股:</span><span  color="green">'..l[2]..'|'..l[3]..'|'..l[4]..'</span>'
+	else
+	  return '<span color="brown">A股:</span><span  color="red">'..l[2]..'|'..l[3]..'|'..l[4]..'</span>'
+	end
      end, 610)
Rise:
Lower(Picture to be captured):
Now we could easily view weather and stock on our awesome systray, but, after
all, it’s only systray, how could we display more data on desktop widget, just
link conky did? So next step I will investigate the awesome desktop widgets.
Todo: also you could adjust the A stock price for BitCoin, or other values.
Bitcoin price api:
{
  "USD" : {"15m" : 6302.44, "last" : 6302.44, "buy" : 6302.44, "sell" : 6302.44, "symbol" : "$"},
  "AUD" : {"15m" : 8876.47, "last" : 8876.47, "buy" : 8876.47, "sell" : 8876.47, "symbol" : "$"},
  "BRL" : {"15m" : 23295.01, "last" : 23295.01, "buy" : 23295.01, "sell" : 23295.01, "symbol" : "R$"},
  "CAD" : {"15m" : 8268.87, "last" : 8268.87, "buy" : 8268.87, "sell" : 8268.87, "symbol" : "$"},
  "CHF" : {"15m" : 6336.09, "last" : 6336.09, "buy" : 6336.09, "sell" : 6336.09, "symbol" : "CHF"},
  "CLP" : {"15m" : 4370777.09, "last" : 4370777.09, "buy" : 4370777.09, "sell" : 4370777.09, "symbol" : "$"},
  "CNY" : {"15m" : 43910.64, "last" : 43910.64, "buy" : 43910.64, "sell" : 43910.64, "symbol" : "¥"},
  "DKK" : {"15m" : 41449.62, "last" : 41449.62, "buy" : 41449.62, "sell" : 41449.62, "symbol" : "kr"},
  "EUR" : {"15m" : 5543.2, "last" : 5543.2, "buy" : 5543.2, "sell" : 5543.2, "symbol" : "€"},
  "GBP" : {"15m" : 4959.24, "last" : 4959.24, "buy" : 4959.24, "sell" : 4959.24, "symbol" : "£"},
  "HKD" : {"15m" : 49442.34, "last" : 49442.34, "buy" : 49442.34, "sell" : 49442.34, "symbol" : "$"},
  "INR" : {"15m" : 464237.87, "last" : 464237.87, "buy" : 464237.87, "sell" : 464237.87, "symbol" : "₹"},
  "ISK" : {"15m" : 764925.92, "last" : 764925.92, "buy" : 764925.92, "sell" : 764925.92, "symbol" : "kr"},
  "JPY" : {"15m" : 708620.86, "last" : 708620.86, "buy" : 708620.86, "sell" : 708620.86, "symbol" : "¥"},
  "KRW" : {"15m" : 7186217.64, "last" : 7186217.64, "buy" : 7186217.64, "sell" : 7186217.64, "symbol" : "₩"},
  "NZD" : {"15m" : 9599.02, "last" : 9599.02, "buy" : 9599.02, "sell" : 9599.02, "symbol" : "$"},
  "PLN" : {"15m" : 24064.93, "last" : 24064.93, "buy" : 24064.93, "sell" : 24064.93, "symbol" : "zł"},
  "RUB" : {"15m" : 412854.07, "last" : 412854.07, "buy" : 412854.07, "sell" : 412854.07, "symbol" : "RUB"},
  "SEK" : {"15m" : 57818.99, "last" : 57818.99, "buy" : 57818.99, "sell" : 57818.99, "symbol" : "kr"},
  "SGD" : {"15m" : 8732.86, "last" : 8732.86, "buy" : 8732.86, "sell" : 8732.86, "symbol" : "$"},
  "THB" : {"15m" : 209776.78, "last" : 209776.78, "buy" : 209776.78, "sell" : 209776.78, "symbol" : "฿"},
  "TWD" : {"15m" : 195139.36, "last" : 195139.36, "buy" : 195139.36, "sell" : 195139.36, "symbol" : "NT$"}
}%
Or CNY to USD?
Bug-Fix
In case you are offline, your stock won’t be fetched, so calling
fetchShanghaiStock() will failed, we have to change the code calling like
following:
stockwidget = wibox.widget.textbox()
    vicious.register(stockwidget, vicious.widgets.uptime,
      function (widget, args)
	local l = fetchShanghaiStock()
	if l == nil then
	  return '<span color="brown">UP:</span><span  color="red">'..args[1]..'|'..args[2]..'|'..args[3]..'</span>'
	else
	  if string.match(l[4], "-") then
	    return '<span color="brown">A股:</span><span  color="green">'..l[2]..'|'..l[3]..'|'..l[4]..'</span>'
	  else
	    return '<span color="brown">A股:</span><span  color="red">'..l[2]..'|'..l[3]..'|'..l[4]..'</span>'
	  end
        end
      end, 610)
So when no data is available, we will display the uptime data.
Oct 19, 2018
Technology系统安装
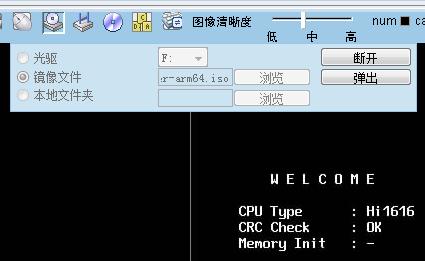
镜像为ubuntu16.04.3-server-arm64.iso, 安装盘用于安装系统,
预先需要配置为光盘启动:
安装引导界面, 选择HWE Kernel:
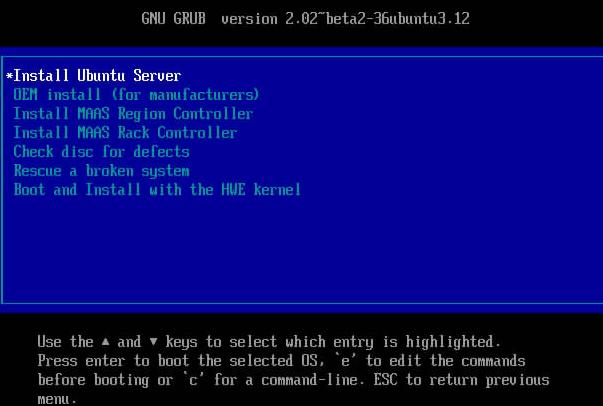
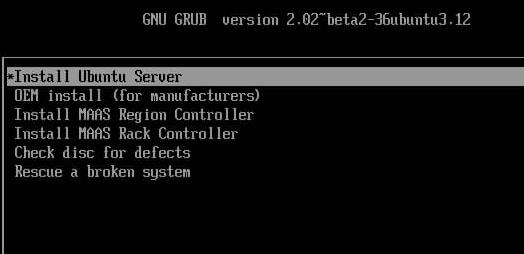
选择"Install Ubuntu Server”:
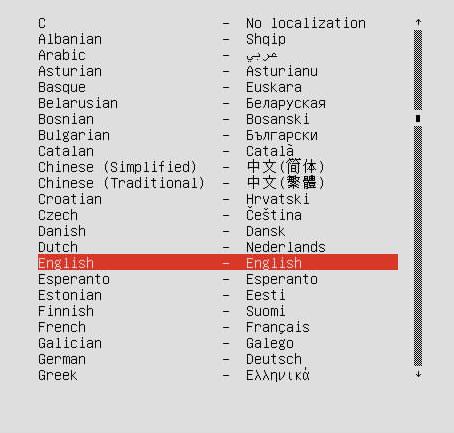
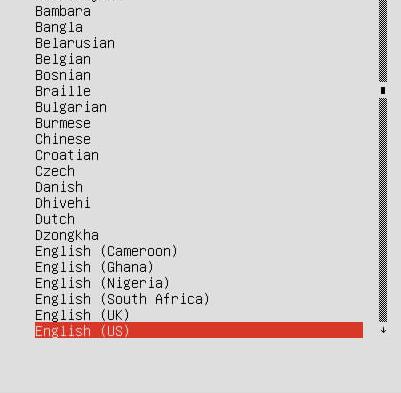
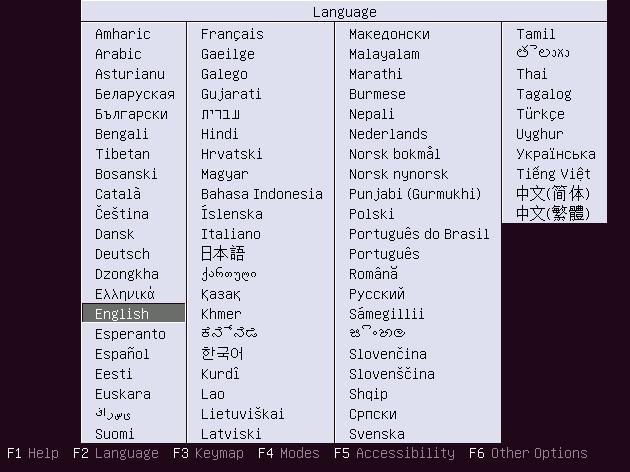
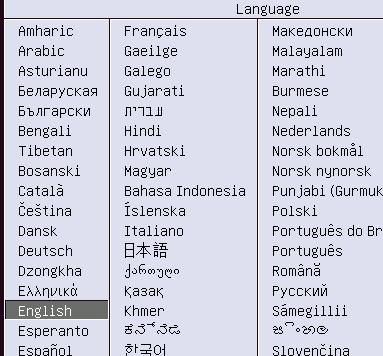
语言:
国家:

keyboard:
配置下主机名:
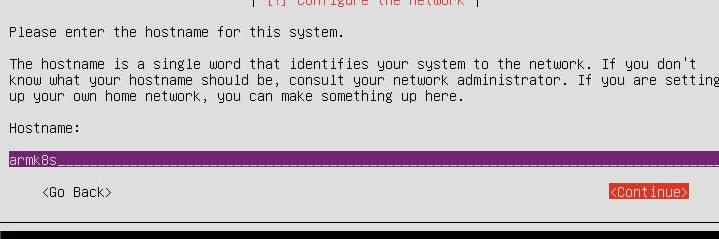
用户名/密码配置test/xxxker
之后就是一直安装,直到结束。
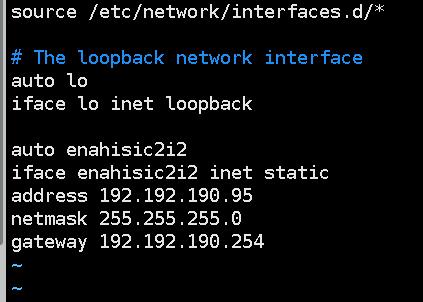
进入系统后,配置IP地址,需要手工检测网络是否联通:
Enable
root用户,且设置opensshd的root用户登录权限,而后重新启动系统供下步配置使用。
配置系统
关闭swap分区,
# swapoff -a
# vim /etc/fatab
注释掉swap分区。
# lvremove /dev/mapper/armk8s--vg-swap_1
# lvextend -l +100%FREE /dev/mapper/armk8s--vg-root
# resize2fs /dev/mapper/armk8s--vg-root
从互联网上下载整个 arm repo的mirror包,大约60G,
而后修改/etc/apt/sources.list如下:
deb http://192.192.189.128:8000/ xenial main restricted universe multiverse
deb http://192.192.189.128:8000/ xenial-security main restricted universe multiverse
deb http://192.192.189.128:8000/ xenial-updates main restricted universe multiverse
deb http://192.192.189.128:8000/ xenial-proposed main restricted universe multiverse
deb http://192.192.189.128:8000/ xenial-backports main restricted universe multiverse
现在运行apt-get update可以安装包, 例如apt-get install nethogs.
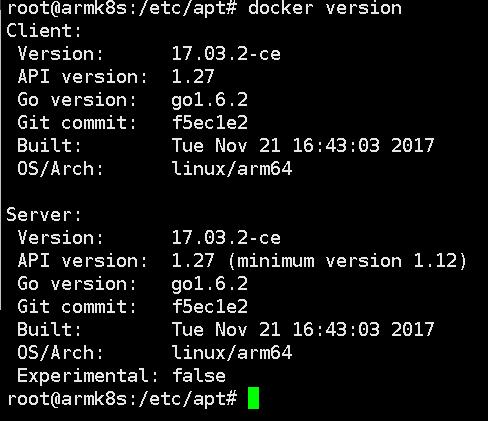
安装docker:
# apt-get install docker.io
# docker version
离线下载deb包,传送到服务器,而后运行:

镜像准备
下载所需镜像并传送到机器:
docker pull k8s.gcr.io/kube-apiserver-arm64:v1.11.2
docker pull k8s.gcr.io/kube-controller-manager-arm64:v1.11.2
docker pull k8s.gcr.io/kube-scheduler-arm64:v1.11.2
docker pull k8s.gcr.io/kube-proxy-arm64:v1.11.2
docker pull k8s.gcr.io/etcd-arm64:3.2.18
docker pull k8s.gcr.io/pause:3.1
docker pull k8s.gcr.io/coredns:1.1.3
docker pull weaveworks/weave-npc:2.4.1
docker pull weaveworks/weave-kube:2.4.1
docker pull k8s.gcr.io/kubernetes-dashboard-arm:v1.10.0
构建过程:
# kubeadm init --apiserver-advertise-address 192.192.190.95 --kubernetes-version=v1.11.2
# mkdir -p ~/.kube
# cp -i /etc/kubernetes/admin.conf ~/.kube/config
# chown $(id -u):$(id -g) /root/.kube/config
# export kubever=$(kubectl version | base64 | tr -d '\n')
# kubectl apply -f "https://cloud.weave.works/k8s/net?k8s-version=$kubever"
# wget https://raw.githubusercontent.com/kubernetes/dashboard/master/src/deploy/recommended/kubernetes-dashboard-arm.yaml
# kubectl apply -f kubernetes-dashboard-arm.yaml
# kubectl create clusterrolebinding cluster-admin-fordashboard --clusterrole=cluster-admin --user=system:serviceaccount:kube-system:kubernetes-dashboard
Monitoring:
# git clone https://github.com/kubernetes/heapster.git
# cd heapster/deploy/kube-config/influxdb
# cp heapster.yaml heapster_arm.yaml
# cp influxdb.yaml influxdb_arm.yaml
# cp grafana.yaml grafana_arm.yaml
Change from amd64 to arm64
# kubectl create -f *_arm.yaml
This monitoring will not working OK. why?
Oct 17, 2018
Technology文档目的
详细说明使用ISO离线构建Kubernetes集群的步骤。
准备
硬件:至少两台机器(物理机/虚拟机均可),其中一台用作部署服务器,推荐为2核CPU/3G内存以上配置,另一台用作Kubernetes节点,推荐为4核/8G内存以上配置。如果有更多的机器,则可以考虑都作为Kubernetes工作节点接入集群。
软件: 1604_deploy.iso(部署用ISO), 1604_node.iso(工作节点用ISO)
系统初始化安装
部署节点
插入1604_deploy.iso, 光盘启动系统, 选择English,进入到下一步:
选择Install Ubuntu Server:

一路回车,选择默认配置,进入到系统安装, 安装完系统将自动重启。
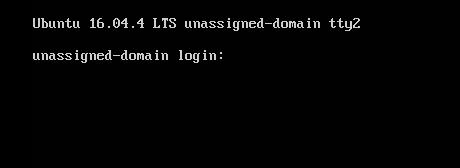
系统重启完毕后,按Alt+F2,进入到命令行终端(用户名/密码为root/thinker@1):
配置IP地址:
# vim /etc/network/interfaces
auto ens
- iface ens3 inet dhcp
+ iface ens3 inet static
+ address 192.168.122.178
+ netmask 255.255.255.0
+ gateway 192.168.122.1
+ dns-nameservers 192.168.122.1 192.168.122.178
# vim /etc/ssh/sshd_config
- PermitRootLogin prohibit-password
+ PermitRootLogin yes
# reboot
重新启动后,登入命令行,执行:
# ./initial.sh
待脚本执行完毕后,部署节点部署完毕。
工作节点
插入1604_node.iso, 光盘启动系统,选择English, 进入到下一步:
选择Install XXXX Ubuntu Work Node(Auto-part), 进入到下一步,
系统将自动安装,全程不需要人为干预:
安装完毕后,进入到命令行接口,配置IP地址:
# vim /etc/network/interfaces
auto ens3
iface ens3 inet static
address 192.168.122.179
netmask 255.255.255.0
network 192.168.122.0
broadcast 192.168.122.255
gateway 192.168.122.1
dns-nameservers 192.168.122.1 192.168.122.178
# vim /etc/hostname
node1
# reboot
重启完毕后,工作节点准备就绪, 此时运行一下apt-get update更新一下包缓存,否则部署Kubernetes时会报错.
部署Kubernetes
登入部署节点(192.168.122.178), 执行以下步骤:
# cd ansible/kubespray
# vim inventory/test/hosts.ini
这里是我们用于配置Kubernetes节点的定义文件,需要根据集群的实际配置来定制化,我们这里只配置一个单节点的工作集群,配置如下:
node1 ansible_ssh_host=192.168.122.179 ansible_user=root........
[kube-master]
node1

[etcd]
node1

[kube-node]
node1

[k8s-cluster:children]
kube-master
kube-node
现在运行以下命令自动化部署集群:
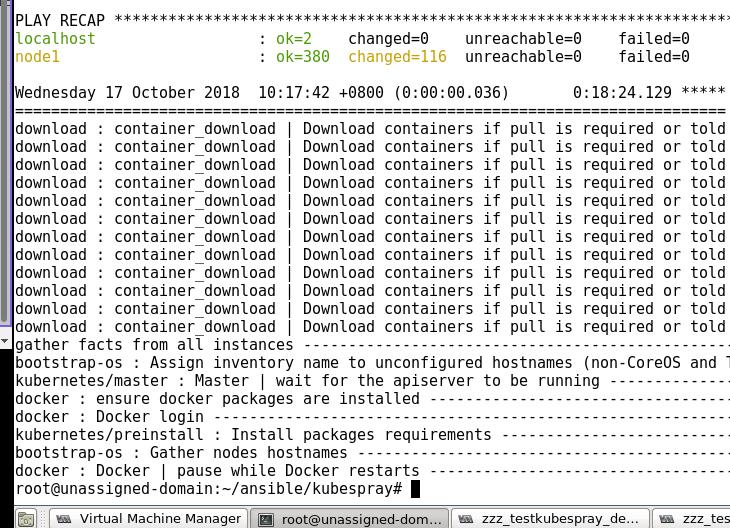
# ansible-playbook -i inventory/test/host.ini cluster.yml
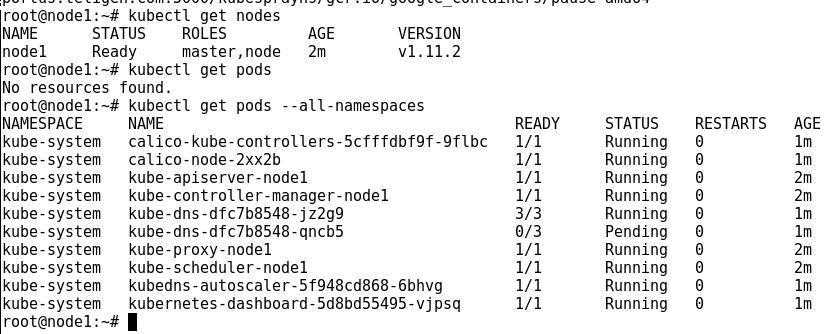
部署完毕后的截图如下:
检查kubernetes集群配置情况(工作节点上):