Jan 22, 2019
TechnologyInstall
In 4 nodes, install the latest glusterfs via:
sudo add-apt-repository -y ppa:gluster/glusterfs-5
sudo apt-get -y update
sudo apt-get -y install glusterfs-server
sudo apt-get -y install thin-provisioning-tools
See following steps for configurating the gluster in 4
nodes(10.48.129.101~104):
root@gluster-1:/home/vagrant# gluster peer status
Number of Peers: 0
root@gluster-1:/home/vagrant# gluster pool list
UUID					Hostname 	State
628ce8f2-622c-4be3-92b0-d8e5241d01b8	localhost	Connected
root@gluster-1:/home/vagrant# ifconfig eth1
eth1      Link encap:Ethernet  HWaddr 52:54:00:c8:74:01
          inet addr:10.48.129.101  Bcast:10.48.129.255  Mask:255.255.255.0
          inet6 addr: fe80::5054:ff:fec8:7401/64 Scope:Link
          UP BROADCAST RUNNING MULTICAST  MTU:1500  Metric:1
          RX packets:2456 errors:0 dropped:17 overruns:0 frame:0
          TX packets:103 errors:0 dropped:0 overruns:0 carrier:0
          collisions:0 txqueuelen:1000
          RX bytes:126151 (126.1 KB)  TX bytes:10351 (10.3 KB)

root@gluster-1:/home/vagrant# gluster peer probe 10.48.129.102
peer probe: success.
root@gluster-1:/home/vagrant# gluster peer probe 10.48.129.103
peer probe: success.
root@gluster-1:/home/vagrant# gluster peer probe 10.48.129.104
peer probe: success.
root@gluster-1:/home/vagrant# gluster peer status
Number of Peers: 3

Hostname: 10.48.129.102
Uuid: 52472b8f-b835-4038-b061-89229d825c42
State: Peer in Cluster (Connected)

Hostname: 10.48.129.103
Uuid: 46161901-954a-4ffe-9aec-a8c14ceded03
State: Peer in Cluster (Connected)

Hostname: 10.48.129.104
Uuid: a597a3ff-8c32-4a5a-b83d-1d25187afe31
State: Peer in Cluster (Connected)
After peer probe, the cluster is listed as following:
root@gluster-1:/home/vagrant# gluster peer status
Number of Peers: 3

Hostname: 10.48.129.102
Uuid: 52472b8f-b835-4038-b061-89229d825c42
State: Peer in Cluster (Connected)

Hostname: 10.48.129.103
Uuid: 46161901-954a-4ffe-9aec-a8c14ceded03
State: Peer in Cluster (Connected)

Hostname: 10.48.129.104
Uuid: a597a3ff-8c32-4a5a-b83d-1d25187afe31
State: Peer in Cluster (Connected)
root@gluster-1:/home/vagrant# gluster pool list
UUID					Hostname     	State
52472b8f-b835-4038-b061-89229d825c42	10.48.129.102	Connected
46161901-954a-4ffe-9aec-a8c14ceded03	10.48.129.103	Connected
a597a3ff-8c32-4a5a-b83d-1d25187afe31	10.48.129.104	Connected
628ce8f2-622c-4be3-92b0-d8e5241d01b8	localhost    	Connected
heketi
Download the heketi from:
# wget https://github.com/heketi/heketi/releases/download/v8.0.0/heketi-v8.0.0.linux.amd64.tar.gz
# tar xzvf heketi-v8.0.0.linux.amd64.tar.gz
# cd heketi
# cp heketi heketi-cli /usr/bin
Configuration:
# cd heketi
# cp heketi.json heketi.json.back
# vim heketi.json
# mkdir -p /etc/heketi
# cp heketi.json /etc/heketi
Your content is listed as following:
......
#修改端口,防止端口冲突
  "port": "18080",
......
#允许认证
  "use_auth": true,
......
#admin用户的key改为adminkey
      "key": "adminkey"
......
#修改执行插件为ssh,并配置ssh的所需证书,注意要能对集群中的机器免密ssh登陆,使用ssh-copy-id把pub key拷到每台glusterfs服务器上
    "executor": "ssh",
    "sshexec": {
      "keyfile": "/root/.ssh/id_rsa",
      "user": "root",
      "port": "22",
      "fstab": "/etc/fstab"
    },
......
# 定义heketi数据库文件位置
    "db": "/var/lib/heketi/heketi.db"
......
#调整日志输出级别
    "loglevel" : "warning"
Now start the heketi server via:
# heketi --config=/etc/heketi/heketi.json
Your server now is listening at localhost:18080, now use the cli for
creating the cluster and volume.
# heketi-cli --server http://localhost:18080 --user admin --secret "adminkey" cluster list
# heketi-cli --server http://localhost:18080 --user admin --secret "adminkey" cluster create
# alias heketi-cli-admin='heketi-cli --server http://localhost:18080 --user admin --secret "adminkey"'
# heketi-cli-admin node add --cluster "360e5d504ff7cc18823d580bac55711a" --management-host-name 10.48.129.101 --storage-host-name 10.48.129.101 --zone 1
# heketi-cli-admin node add --cluster "360e5d504ff7cc18823d580bac55711a" --management-host-name 10.48.129.102 --storage-host-name 10.48.129.102 --zone 1
# heketi-cli-admin node add --cluster "360e5d504ff7cc18823d580bac55711a" --management-host-name 10.48.129.103 --storage-host-name 10.48.129.103 --zone 1
# heketi-cli-admin node add --cluster "360e5d504ff7cc18823d580bac55711a" --management-host-name 10.48.129.104 --storage-host-name 10.48.129.104 --zone 1
# heketi-cli-admin --json device add --name="/dev/vdb" --node "f787daa4ff84461b11b7f7d00645dfdc"
# heketi-cli-admin --json device add --name="/dev/vdb" --node "16f738ee9822fb79c7b321c0b7ed1792"
# heketi-cli-admin --json device add --name="/dev/vdb" --node "c6b1f0ccfe1ff76a245012108c44043f"
# heketi-cli-admin --json device add --name="/dev/vdb" --node "2e631bedcb6b58c4b82bba31082531f1"
# heketi-cli-admin volume list
# heketi-cli-admin volume create --size=10
After it finishes, your volume will be created.
Jan 21, 2019
TechnologyAIM
For upgrading the offline installation of kubespray from 1604 to 1804.
Ansible
Get the ansible debs via following command:
# apt-get update
# apt-get install  install software-properties-common
# apt-add-repository ppa:ansible/ansible
# apt-get install ansible
# mkdir /root/debs && cd /var/cache
# find . | grep deb$ | xargs -I % cp % /root/debs
You should change the vagrant box’s configuration:
# vim /etc/netplan/01-netcfg.yaml
    eth0:
      dhcp4: yes
+      dhcp-identifier: mac
The vagrant file(shell provision) should be like following:
rm -f /etc/resolv.conf
ln -s /run/systemd/resolve/resolv.conf /etc/resolv.conf
echo '      nameservers:'>>/etc/netplan/50-vagrant.yaml
echo '        addresses: [10.148.129.101]'>>/etc/netplan/50-vagrant.yaml
netplan apply eth1
task Changes
Judge for OS version changes:
# vim roles/kube-deploy/tasks/main.yml
- name: Set ubuntu_version
  set_fact:
    ubuntu_version: >-
      {%- if 'bionic' in os_release.stdout -%}
      bionic
      {%- elif 'xenial' in os_release.stdout -%}
      xenial
      {%- endif -%}

# vim roles/kube-deploy/deploy-ubuntu.yml
  - name: "upload debs.tar.xz files to kube-deploy(Xenial)"
    copy:
      src: files/1604debs.tar.xz
      dest: /usr/local/
      owner: root
      group: root
      mode: 0777
    when: ubuntu_version == "xenial"

  - name: "Install ansible and python-netaddr(Xenial)"
    raw: cd /usr/local/ && tar xJvf 1604debs.tar.xz -C /usr/local/ && echo "deb [trusted=yes] file:///usr/local/static ./">/etc/apt/sources.list && apt-get u
pdate -y && apt-get install -y ansible python-netaddr && rm -f /usr/local/debs.tar.xz
    when: ubuntu_version == "xenial"

  - name: "upload debs.tar.xz files to kube-deploy(Bionic)"
    copy:
      src: files/1804debs.tar.xz
      dest: /usr/local/
      owner: root
      group: root
      mode: 0777
    when: ubuntu_version == "bionic"

  - name: "Install ansible and python-netaddr(Bionic)"
    raw: cd /usr/local/ && tar xJvf 1804debs.tar.xz -C /usr/local/ && echo "deb [trusted=yes] file:///usr/local/static ./">/etc/apt/sources.list && apt-get u
pdate -y && apt-get install -y ansible python-netaddr && rm -f /usr/local/debs.tar.xz
    when: ubuntu_version == "bionic"
Also you have to change the Vagrantfiles:
File.open('./dns.sh' ,'w') do |f|
  f.write "#!/bin/bash\n"
  f.write "sed -i '/^#VAGRANT-END/i dns-nameservers 10.148.129.101' /etc/network/interfaces\n"
  f.write "systemctl restart networking.service\n"
  #f.write "rm -f /etc/resolv.conf\n"
  #f.write "ln -s /run/systemd/resolve/resolv.conf /etc/resolv.conf\n"
  #f.write "echo '      nameservers:'>>/etc/netplan/50-vagrant.yaml\n"
  #f.write "echo '        addresses: [10.148.129.101]'>>/etc/netplan/50-vagrant.yaml\n"
  #f.write "netplan apply eth1\n"
end
Uncomment the sed/systemctl for xenial, uncomment the later 5 lines for
bionic.
You should have xenial/bionic boxs under ~/.vagrant.d/boxes.
Jan 20, 2019
TechnologyFor creating Ubuntu 18.04 vagrant box, follow the following steps:
Change grub configuration for changing to ethx naming rules:
# vim /etc/default/grub
GRUB_CMDLINE_LINUX_DEFAULT="quite"
GRUB_CMDLINE_LINUX="net.ifnames=0 biosdevname=0"
# grub-mkconfig -o /boot/grub/grub.cfg
Change the netplan rules:
# vim /etc/netplan/01-netcfg.yaml
# This file describes the network interfaces available on your system
# For more information, see netplan(5).
network:
  version: 2
  ethernets:
    eth0:
      dhcp4: yes
      dhcp-identifier: mac
Now reboot your machine, continue for later commands.
Create vagrant user and set the password, etc.
# useradd -m vagrant
# passwd vagrant
# visudo
vagrant ALL=(ALL)	NOPASSWD:ALL
Defaults:vagrant	!requiretty
# mkdir -p /home/vagrant/.ssh
# chmod 0700 /home/vagrant/.ssh/
# wget --no-check-certificate     https://raw.github.com/mitchellh/vagrant/master/keys/vagrant.pub     -O /home/vagrant/.ssh/authorized_keys
# cat /home/vagrant/.ssh/authorized_keys
# chmod 0600 /home/vagrant/.ssh/authorized_keys
# chown -R vagrant /home/vagrant/.ssh
# cp /home/test/.bashrc /home/vagrant/.bashrc
# cp /home/test/.bash_logout /home/vagrant/.bash_logout
# cp /home/test/.profile /home/vagrant/.profile
# vim /home/vagrant/.profile
add
[ -z "$BASH_VERSION" ] && exec /bin/bash -l
# chsh -s /bin/bash vagrant
Finally change the sshd configuration:
# vim /etc/ssh/sshd_config
AuthorizedKeysFile .ssh/authorized_keys
Now you could halt you machine.
Package to a box via:
$ vagrant package --base xxxx
Using the package.box , then you could mutate to libvirt or do some other
things.
For kubespray offline
Install ansible via:
# apt-get update && apt-get install -y python-pip && pip install ansible
Or use old ansible(from repository):
# apt-get update -y && apt-get install -y ansible
Better you use the ppa repository for installing ansible:
# apt-add-repository ppa:ansible/ansible
# apt-get install ansible
Generate the ssh key and use ssh-copy-id for copying the key for passwordless
login.
Download kubespray source files:
# wget  https://github.com/kubernetes-sigs/kubespray/archive/v2.8.1.tar.gz
# tar xzvf v2.8.1.tar.gz
# vim inventory/sample/host.ini
[all]
node ansible_host=192.168.33.109 ip=192.168.33.109 etcd_member_name=etcd1

[kube-master]
node

[etcd]
node

[kube-node]
node

[k8s-cluster:children]
kube-master
kube-node
# vim inventory/sample/group_vars/k8s-cluster/k8s-cluster.yml
kube_version: v1.12.4
Deploy online for:
# ansible-playbook -i inventory/sample/hosts.ini cluster.yml
Now you could get all of the deb packages and docker images.
1804 debs preparation
Generate 1804debs.tar.xz files.
### Install more necessary packages.
# apt-get install -y bind9 bind9utils ntp nfs-common nfs-kernel-server python-netaddr
# mkdir /root/static
# cd /var/cache
# find . | grep deb$ | xargs -I % cp % /root/static
# cd /root/static
# dpkg-scanpackages . /dev/null | gzip -9c > Packages.gz
# cd /root/
# tar cJvf 1804debs.tar.xz static/
Jan 18, 2019
TechnologyPrerequisites
Offline Deb packages, vagrant boxes(based on ubuntu16.04).
Put the deb packages onto the webserver and serves as a deb repository.
Steps
Get the pip cache for:
# pip download ceph-deploy
### get the ceph-deploy
# ls -l -h
total 676K
-rw-r--r-- 1 root root 113K Jan 18 01:31 ceph-deploy-2.0.1.tar.gz
-rw-r--r-- 1 root root 560K Jan 18 01:31 setuptools-40.6.3-py2.py3-none-any.whl
### Transfer to the offline node
# pip install --no-index --find-links ./ ceph-deploy
# which ceph-deploy
/usr/local/bin/ceph-deploy
Edit the host, make the deploy:
# vim /etc/hosts
.....
10.38.129.101	cephdeploy-1
# mkdir ceph-install
# cd ceph-install
# ceph-deploy new cephdeploy-1
# vim ceph.conf
[global]
....
osd pool default size = 1
osd pool default min size = 1
Edit the python files for supporting offline deployment:
# vim /usr/local/lib/python2.7/dist-packages/ceph_deploy/hosts/remotes.py
def write_sources_list(url, codename, filename='ceph.list', mode=0o644):
....
....
    #write_file(repo_path, content.encode('utf-8'), mode)
# rm -f /usr/local/lib/python2.7/dist-packages/ceph_deploy/hosts/remotes.pyc
Install ceph package:
# ceph-deploy install --repo-url=http://192.xxx.xxx.xxx/cephdeploy --gpg-url=http://192.xxx.xxx.xxx/cephdeploy/release.asc --release luminous cephdeploy-1
Initialize mon:
# ceph-deploy mon create-initial
# ceph-deploy admin cephdeploy-1
Now ceph is Ok for accessing via ceph -s.
Deploy ceph mgr:
# ceph-deploy mgr create cephdeploy-1
Using ceph-volume lvm for managing disk, so we create the lv(logical volume),
we create 3 lvs for single osd:
# pvcreate /dev/vdb
# vgcreate ceph-pool /dev/vdb
# lvcreate -n osd0.wal -L 1G ceph-pool
# lvcreate -n osd0.db -L 1G ceph-pool
# lvcreate -n osd0 -l 100%FREE ceph-pool
Create osd via:
# ceph-deploy  osd create \
    --data ceph-pool/osd0 \
    --block-db ceph-pool/osd0.db \
    --block-wal ceph-pool/osd0.wal \
    --bluestore  cephdeploy-1
Now the minimal cluster is ready for use.
rbd
Create the osd:
# ceph osd pool create test_pool 128 128 replicated
# rbd create --size 10240 test_image -p test_pool
# rbd info test_pool/test_image
# ceph osd crush tunables legacy
# rbd feature disable test_pool/test_image exclusive-lock object-map fast-diff \
deep-flatten
# rbd map test_pool/test_image
# mkfs.ext4 /dev/rbd/test_pool/test_image
# mkdir /mnt/ceph-block-device
# chmod 777 /mnt/ceph-block-device/
# mount /dev/rbd/test_pool/test_image /mnt/ceph-block-device
Using rbd-nbd for mounting:
# apt-get install rbd-nbd
# rbd-nbd map test_pool/test_image
/dev/nbd0
# mkfs.ext4 /dev/nbd0
# mount /dev/nbd0 /YourMountPoint
But for ceph-s you will see:
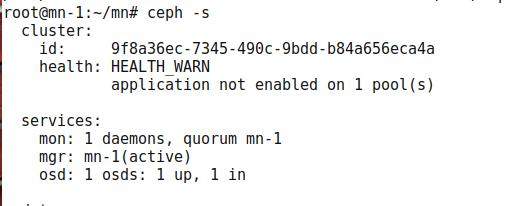
Warning:
application not enabled on 1 pool(s)
# ceph osd pool application enable test_pool rbd
# ceph -s

helath: HEALTH_OK
Enable the dashboards:
# ceph mgr module enable dashboard
Via following command you could view pool details:
# ceph osd pool ls detail
pool error
Resolve the pool error.
[root@node3 ~]# ceph osd pool delete ecpool ecpool --yes-i-really-really-mean-it
Error EPERM: pool deletion is disabled; you must first set the mon_allow_pool_delete config option to true before you can destroy a pool
[root@node1 ceph]# vi /etc/ceph/ceph.conf
[mon]
mon allow pool delete = true
[root@node1 ceph]# systemctl restart ceph-mon.target
[root@node3 ~]# ceph osd pool delete ecpool ecpool --yes-i-really-really-mean-it
pool 'ecpool' removed
Jan 14, 2019
TechnologyEnvironment
Ubuntu16.04, IPs are listed as following:
cephdeploy-1	10.28.129.101
cephdeploy-2	10.28.129.102
cephdeploy-3	10.28.129.103
cephdeploy-4	10.28.129.104
Doing via ansible play-books:
- hosts: all
  gather_facts: false
  become: True
  tasks:
    - name: "Run shell"
      shell: uptime

    - name: "Configure apt sources"
      shell: rm -f /etc/apt/sources.list && echo "deb http://mirrors.163.com/ubuntu/ xenial main restricted universe multiverse">/etc/apt/sources.list && echo "deb http://mirrors.163.com/ubuntu/ xenial-security main restricted universe multiverse">>/etc/apt/sources.list && echo "deb http://mirrors.163.com/ubuntu/ xenial-updates main restricted universe multiverse">>/etc/apt/sources.list && echo "deb http://mirrors.163.com/ubuntu/ xenial-backports main restricted universe multiverse">>/etc/apt/sources.list && echo "deb http://mirrors.163.com/ubuntu/ xenial-proposed main restricted universe multiverse">>/etc/apt/sources.list && apt-get update -y

    - name: "Add Ceph User"
      raw: useradd -d /home/cephuser -m cephuser && echo "cephuser ALL = (root) NOPASSWD:ALL" | tee /etc/sudoers.d/cephuser  && chmod 0440 /etc/sudoers.d/cephuser

    - name: "Change password"
      raw: usermod -p '$1$5RPVAd$kC4MwCLFLL2j7MBLgWv.H.' cephuser

    - name: "Add ceph repository"
      raw:  wget -q -O- 'http://mirrors.163.com/ceph/keys/release.asc' | sudo apt-key add - && echo deb http://mirrors.163.com/ceph/debian-luminous/ $(lsb_release -sc) main | sudo tee /etc/apt/sources.list.d/ceph.list

    - name: "Install python"
      shell: apt-get install -y python
The password is generated via following method:
#  openssl passwd -1 -salt 5RPVAd clear-text-passwd43
$1$5RPVAd$vgsoSANybLDepv2ETcUH7.
Ceph-Deploy
Roles for ceph cluster:
cephdeploy-1	10.28.129.101 ceph-admin
cephdeploy-2	10.28.129.102 ceph-mon
cephdeploy-3	10.28.129.103 osd-server-1
cephdeploy-4	10.28.129.104 osd-server-2
Ssh into cephdeploy-1, do following:
# apt-get install -y python-pip
# pip install ceph-deploy
Generate ssh key via and configure password-less login:
# ssh-keygen
# vim /etc/hosts
10.28.129.102	cephdeploy-2
10.28.129.103	cephdeploy-3
10.28.129.104	cephdeploy-4
# ssh-copy-id cephuser@cephdeploy-2
# ssh-copy-id cephuser@cephdeploy-3
# ssh-copy-id cephuser@cephdeploy-4
# vim ~/.ssh/config
Host cephdeploy-2
  Hostname cephdeploy-2
  User cephuser
Host cephdeploy-3
  Hostname cephdeploy-3
  User cephuser
Host cephdeploy-4
  Hostname cephdeploy-4
  User cephuser
Make ceph-deploy folder and generate configuration files:
# mkdir ~/my-cluster
# cd ~/my-cluster/
# ceph-deploy new cephdeploy-2
Modify the configuration file:
# vim ceph.conf
.......
osd pool default size = 2
osd journal size = 2000
public network = 10.28.129.0/24
cluster network = 10.28.129.0/24
Install ceph via following command:
# export CEPH_DEPLOY_REPO_URL=http://mirrors.163.com/ceph/debian-luminous/
# export CEPH_DEPLOY_GPG_URL=http://mirrors.163.com/ceph/keys/release.asc
# ceph-deploy install cephdeploy-1 cephdeploy-2 cephdeploy-3 cephdeploy-4
Create initial mon:
# ceph-deploy mon create-initial
Create osd via:
# ceph-deploy disk zap cephdeploy-3 /dev/vdb
# ceph-deploy disk zap cephdeploy-4 /dev/vdb
# ceph-deploy osd create cephdeploy-3 --data /dev/vdb
# ceph-deploy osd create cephdeploy-4 --data /dev/vdb
You could examine the osd via:
# ceph-deploy osd list cephdeploy-3
# ceph-deploy osd list cephdeploy-4
Create admin for :
# ceph-deploy admin cephdeploy-1 cephdeploy-2 cephdeploy-3 cephdeploy-4
# sudo chmod +r /etc/ceph/ceph.client.admin.keyring
Examine the ceph health via:
ceph -s
  cluster:
    id:     1674bddc-65c1-40c5-8f88-f18aef7a3d32
    health: HEALTH_WARN
            no active mgr
That’s because we lost active mgr, create one via:
# ceph-deploy mgr create cephdeploy-2:mon_mgr
# ceph -s
  cluster:
    id:     1674bddc-65c1-40c5-8f88-f18aef7a3d32
    health: HEALTH_OK
# ceph health
HEALTH_OK
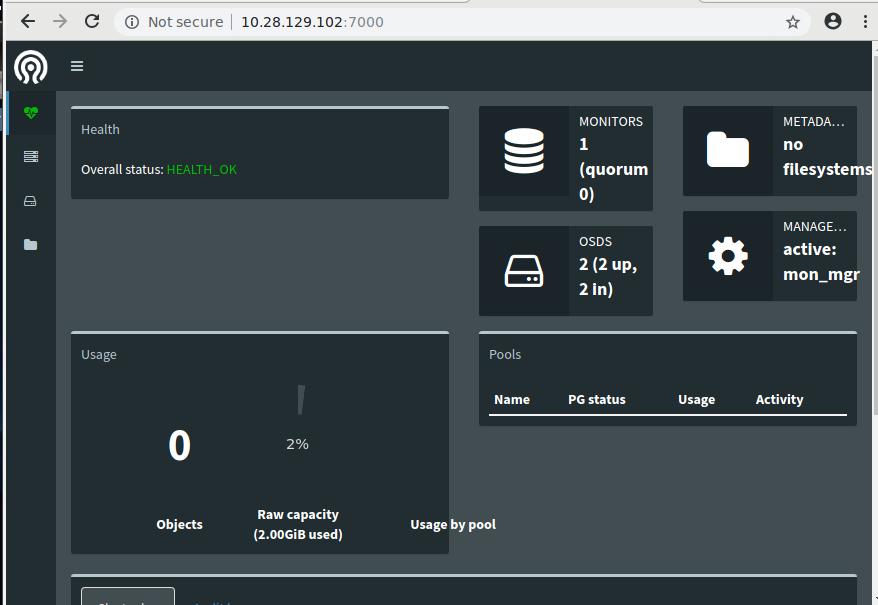
Enable the dashboard via:
# ceph mgr module enable dashboard
So you could open your browser to http://10.28.129.102:7000, you could reach
ceph dashboard.
rbd
Create and configure:
# ceph osd pool create test_pool 128 128 replicated
# ceph osd lspools
# rbd create --size 10240 test_image -p test_pool
# rbd info test_pool/test_image
# rbd feature disable test_pool/test_image exclusive-lock object-map fast-diff deep-flatten
# apt-get install rbd-nbd
# rbd-nbd map test_pool/test_image
/dev/nbd0
Or if you would not use rbd-nbd, then you could use following commands:
# ceph osd crush tunables legacy
# rbd map test_pool/test_image
