Mar 14, 2019
TechnologySystem
Install Ubuntu 18.04, 4 Core/ 4G memory, 50 G disk.
Install with basic sshd support.
Network planning:
10.192.189.0/24, no dhcp.
Network
Configure the networking via following commands:
# vim /etc/netplan/01-netcfg.yaml
network:
  version: 2
  renderer: networkd
  ethernets:
    enp1s0:
      dhcp4: no
      addresses: [10.192.189.2/24]
      gateway4: 10.192.189.1
      nameservers:
        addresses: [223.5.5.5,180.76.76.76]

# netplan --debug apply
# systemctl disable systemd-resolved.service
# systemctl stop systemd-resolved.service
# rm -f /etc/resolv.conf
# echo nameserver 223.5.5.5>/etc/resolv.conf
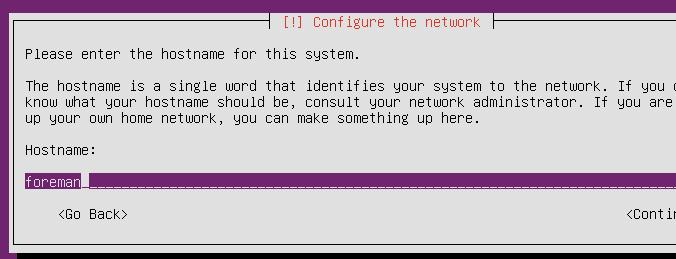
Configure the hostname:
# sudo hostnamectl set-hostname foreman.fuck.com
# echo "10.192.189.2 foreman.fuck.com" | sudo tee -a /etc/hosts
Install foreman
Install foreman via following commands:
# hostnamectl set-hostname foreman.fuck.com
# echo "10.192.189.2 foreman.fuck.com"| sudo tee -a /etc/hosts
# apt-get update
# apt-get update
# sudo apt-get install ca-certificates
# wget https://apt.puppetlabs.com/puppet5-release-bionic.deb
# sudo dpkg -i puppet5-release-bionic.deb
# rm puppet5-release-bionic.deb
# echo "deb http://deb.theforeman.org/ bionic 1.19" | sudo tee /etc/apt/sources.list.d/foreman.list
# echo "deb http://deb.theforeman.org/ plugins 1.19" | sudo tee -a /etc/apt/sources.list.d/foreman.list
# apt-get -y install ca-certificates
# wget -q https://deb.theforeman.org/pubkey.gpg -O- | sudo apt-key add -
# apt-get update
# sudo apt-get install foreman-installer
# foreman-installer
# foreman-installer  --enable-foreman-proxy  --foreman-proxy-tftp=true  --foreman-proxy-tftp-servername=10.192.189.2  --foreman-proxy-dhcp=true  --foreman-proxy-dhcp-interface=eth0  --foreman-proxy-dhcp-gateway=10.192.189.1  --foreman-proxy-dhcp-nameservers="10.192.189.2"  --foreman-proxy-dhcp-range="10.192.189.100 10.192.189.200"  --foreman-proxy-dns=true  --foreman-proxy-dns-interface=eth0  --foreman-proxy-dns-zone=fuck.com  --foreman-proxy-dns-reverse=189.192.10.in-addr.arpa  --foreman-proxy-dns-forwarders=8.8.8.8  --foreman-proxy-foreman-base-url=https://foreman.fuck.com  --foreman-proxy-oauth-consumer-key=ceqCFsvS8qrVRv8W3pb5yWNs6Prt9iZS  --foreman-proxy-oauth-consumer-secret=aYCHnyCzRXFuuy4nNXWthBKhPiNdfzJt
Refers to:

Status:
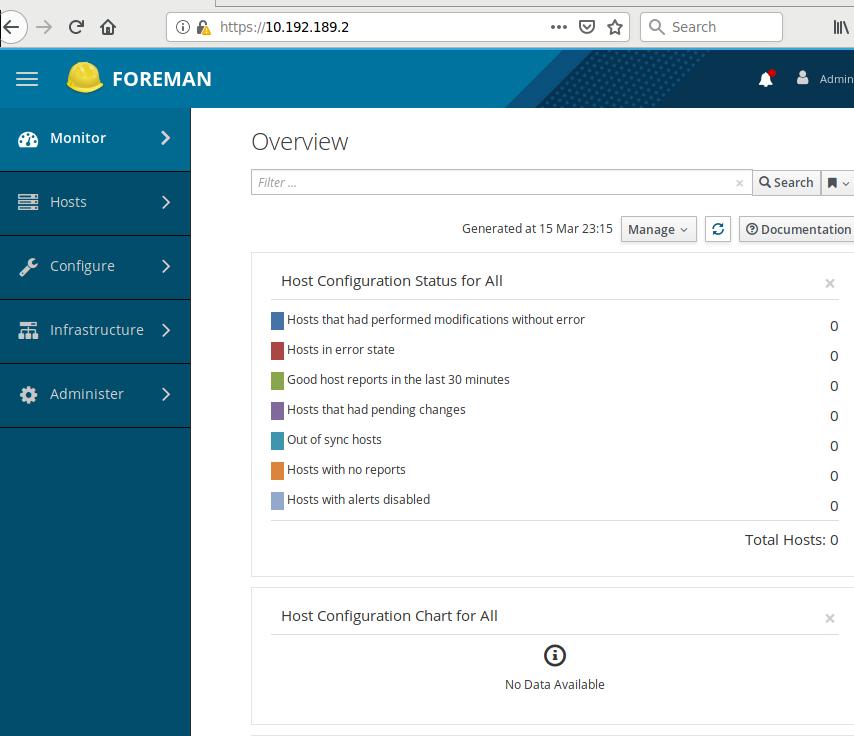
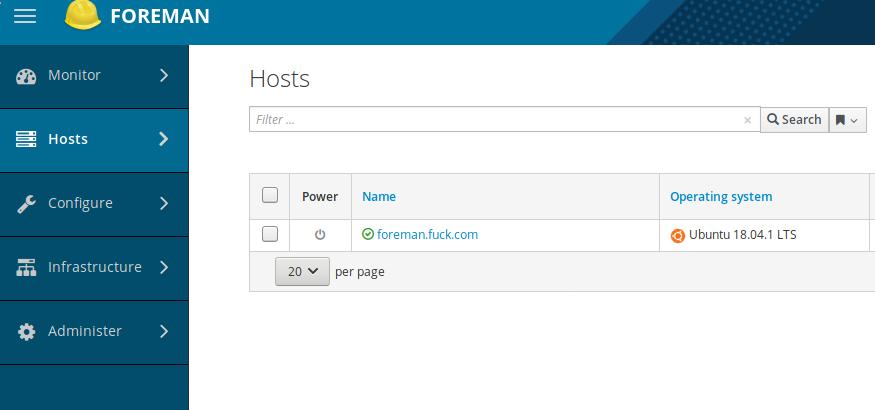
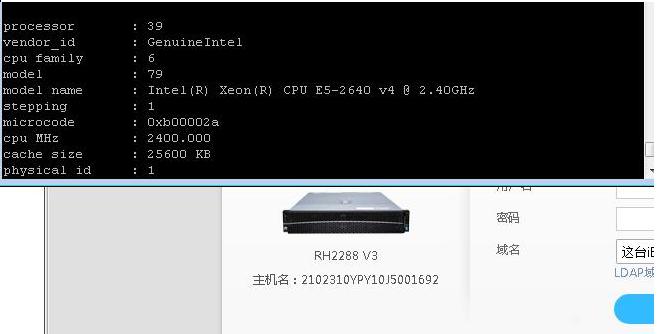
After a while, you will see the server has been detected and displayed in the
webpage:
Configuration for CentOS7
Download iso from mirror:
# wget http://mirrors.163.com/centos/7.6.1810/isos/x86_64/CentOS-7-x86_64-Minimal-1810.iso
# mount -t iso9660 ./CentOS-7-x86_64-Minimal-1810.iso /mnt
# cp -arv /mnt/* ./website
Create docker based website:
# apt-get install \
    apt-transport-https \
    ca-certificates \
    curl \
    software-properties-common
# curl -fsSL https://download.docker.com/linux/ubuntu/gpg | sudo apt-key add -
# apt-key fingerprint 0EBFCD88
# add-apt-repository \
   "deb [arch=amd64] https://download.docker.com/linux/ubuntu \
   $(lsb_release -cs) \
   stable"
# apt-get update && apt-get install -y docker-ce
# docker pull jrelva/nginx-autoindex:latest
# mkdir -p /opt/web
# docker run --name docker-nginx -p 7888:80 -d --restart=always -v /opt/web:/usr/share/nginx/html jrelva/nginx-autoindex
Host-> Installation Media, add new iso:

Host-> Operating System, Create new os:
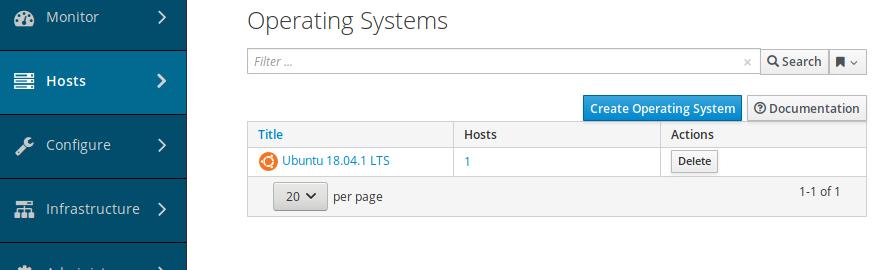
Filled the description of the new os:
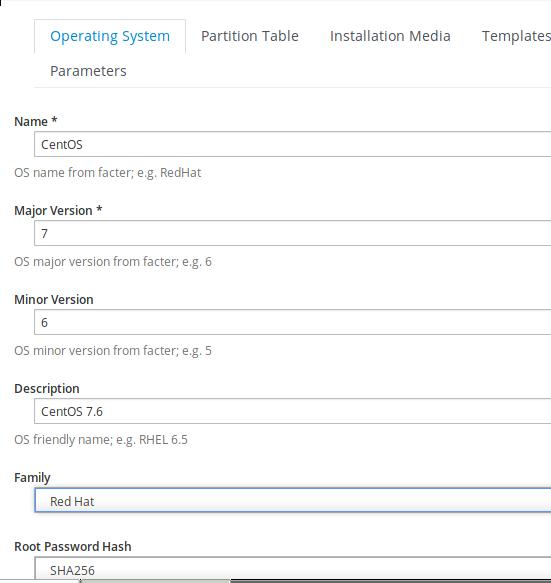
Choose x86_64:

Partition Tables we choose Kickstart default:

Associate the installation media with our centos 7.6:

Click submit, later we will choose template for provision.
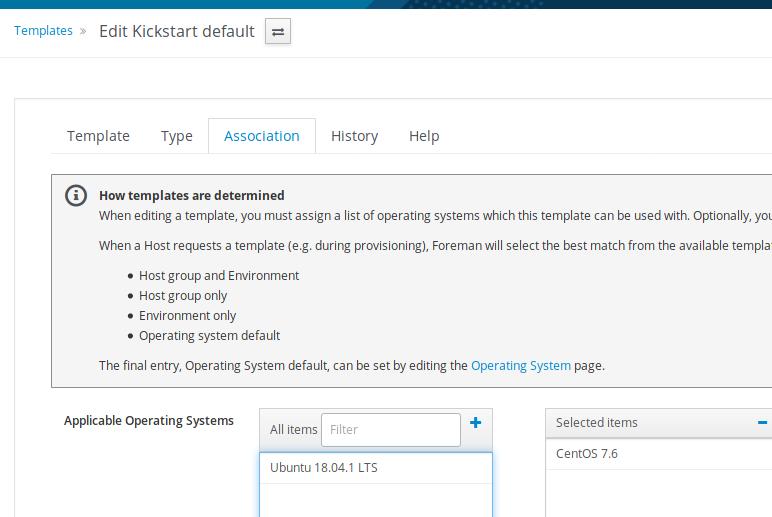
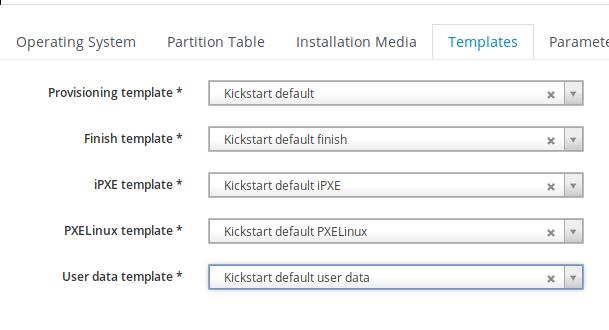
Host-> Provision Templates, choose following templates and associate with
CentOS7_x86_64:
kickstart default finish
kickstart default
kickstart default ipxe
kickstart default pxelinux
kickstart default use data
Associate with template:
Next we will configure the subnet and the foreman-proxy items.
Mar 14, 2019
TechnologyUsing systemd-networkd for configurating the usb network card,
# vim /etc/systemd/nework/10-ethusb1.link
[Match]
MACAddress=00:xx:xx:.....

[Link]
Description=USB to Ethernet Adapter
Name=ethusb1
Then configurating the ethusb1 ip address:
# vim /etc/systemd/network/10-ethusb1.network
[Match]
Name=ethusb1

[Network]
Address=192.168.0.33
Reboot the computer then you could see the ethusb1 available.
Mar 11, 2019
Technology目的
分区,以便虚拟化场合.
硬件:24块硬盘,前两块做成系统盘,其他的则是单独配置:
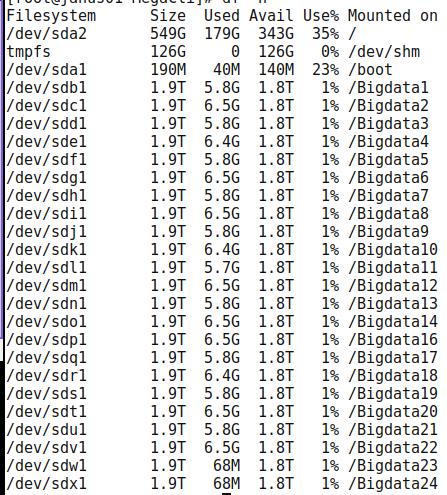
查看现有分区
使用以下命令查看当前分区的情况:
# ./MegaCli64 -PDList -aAll | more
注意记录下有关磁盘情形,如:
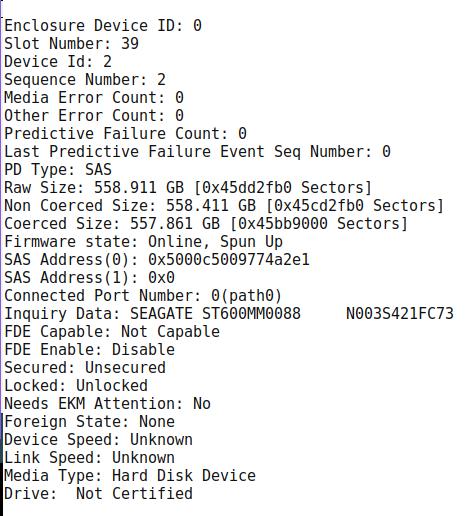
Slot
Number应该是升序的,0-23是SATA盘,38/39是SAS盘,记录下这一组数值,因为后面我们会针对这些值来分区。Slot Number是0
查看raid信息:
# ./MegaCli64 -LDInfo -Lall -aAll
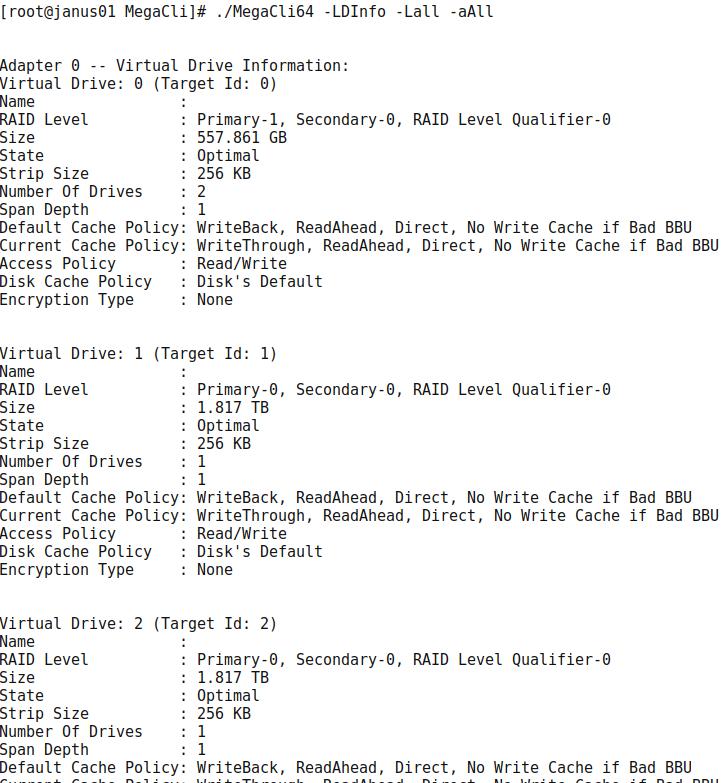
除了virtual driver 0, 其他的都需要被删除。
貌似是有问题的,先装proxmox再操作。
Raid卡配置
F2, 弹出配置:
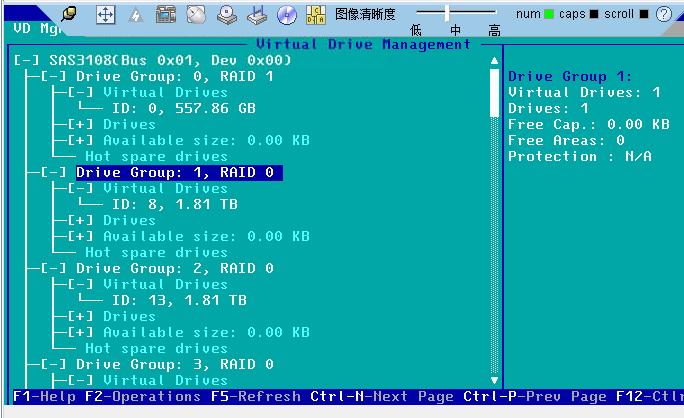
Delete Drive Group:

最后情况:
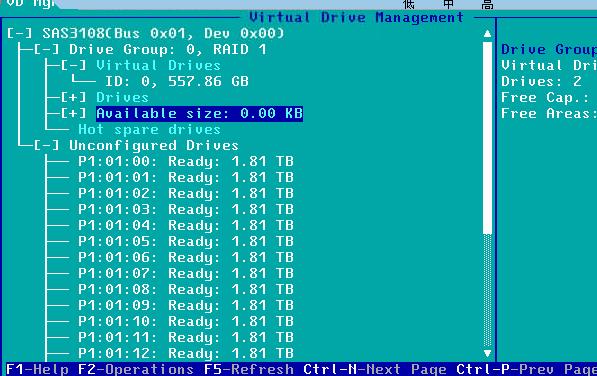
分区
脚本如下, 4组,而后为热备4个:
./MegaCli64 -CfgLdAdd -r5 [0:0,0:1,0:2,0:3,0:4] WB Direct -a0
./MegaCli64 -CfgLdAdd -r5 [0:5,0:6,0:7,0:8,0:9] WB Direct -a0
./MegaCli64 -CfgLdAdd -r5 [0:10,0:11,0:12,0:13,0:14] WB Direct -a0
./MegaCli64 -CfgLdAdd -r5 [0:15,0:16,0:17,0:18,0:19] WB Direct -a0
./MegaCli64 -PDHSP -Set [-EnclAffinity] [-nonRevertible] -PhysDrv[0:20] -a0
./MegaCli64 -PDHSP -Set [-EnclAffinity] [-nonRevertible] -PhysDrv[0:21] -a0
./MegaCli64 -PDHSP -Set [-EnclAffinity] [-nonRevertible] -PhysDrv[0:22] -a0
./MegaCli64 -PDHSP -Set [-EnclAffinity] [-nonRevertible] -PhysDrv[0:23] -a0
Mar 8, 2019
Technology服务器配置:
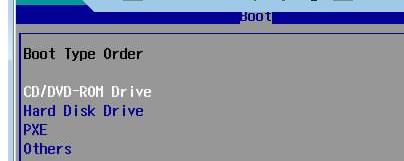
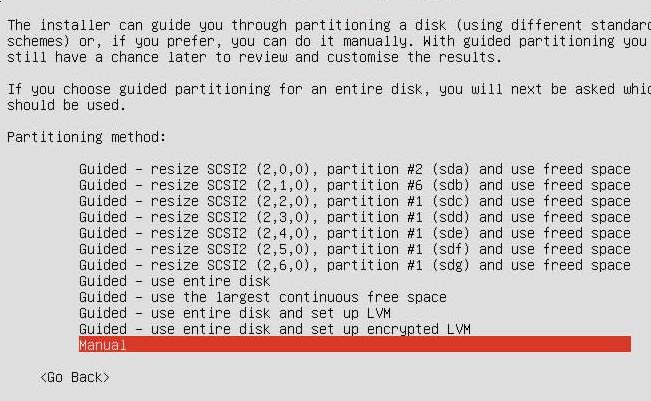
按del键进入BIOS,更改启动顺序:
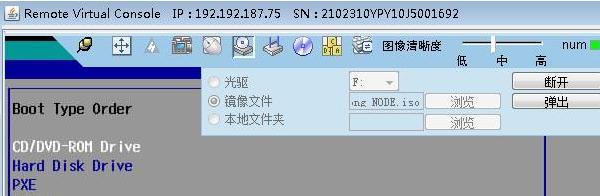
插入ISO盘:
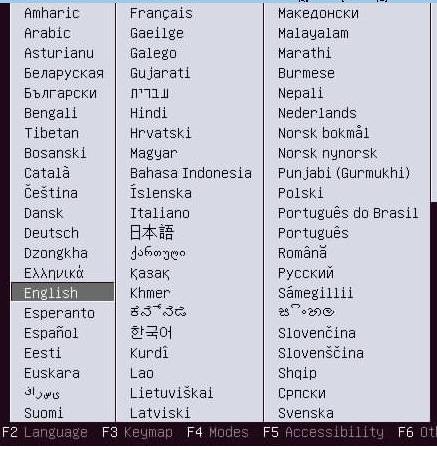
选择English,进入安装界面:
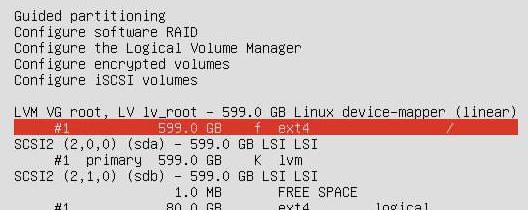
手动分区:
原有分区, sda:
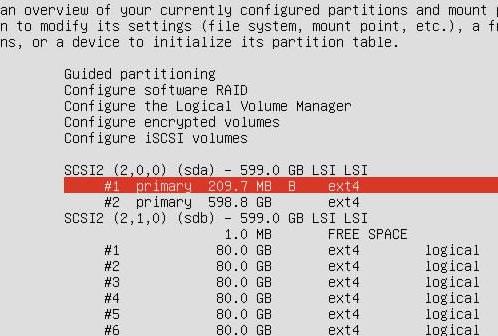
删除后创建逻辑卷:
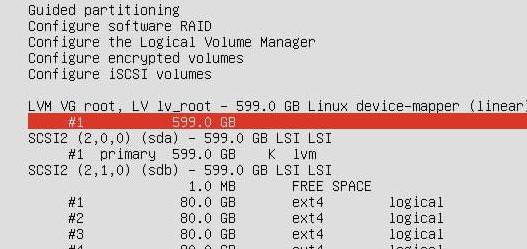
原有分区, sda:
删除后创建逻辑卷:
挂载到根分区:
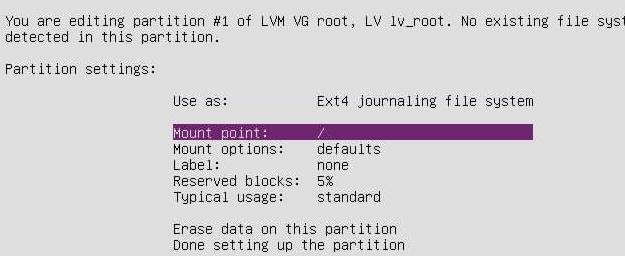
磁盘布局最后检查:
Install continue。。。。
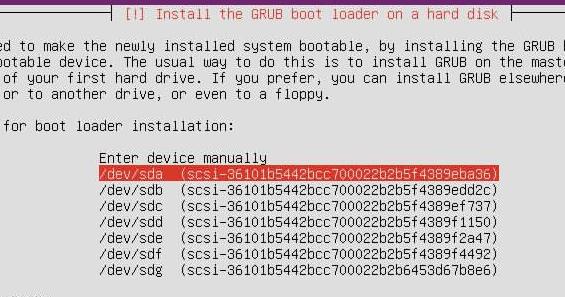
Grub配置,手动选择/dev/sda:
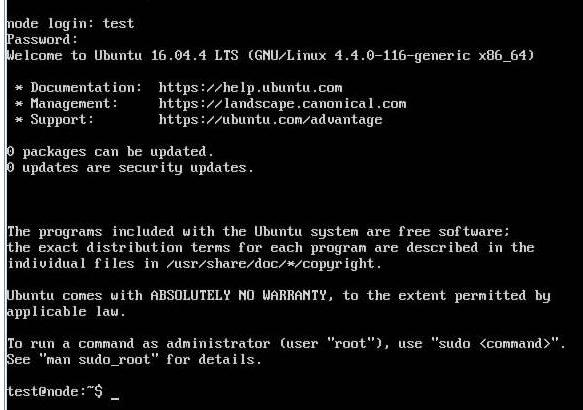
重新启动,弹出光盘:

System boot:
Feb 20, 2019
TechnologyMakeISO Server
Configure via:
# apt-get update -y
# apt-get install -y vim openssh-server
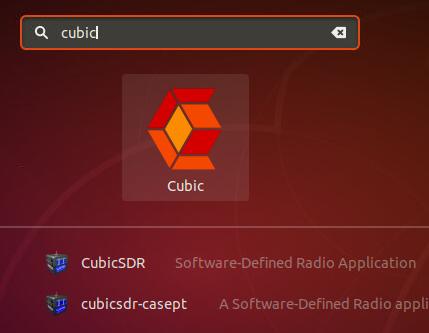
Install cubic via:
# apt-add-repository ppa:cubic-wizard/release
# apt-key adv --keyserver keyserver.ubuntu.com --recv-keys 6494C6D6997C215E
# apt-get update -y && apt-get install -y cubic
cubic make iso
Start cubic via:
Create the iso project folder:
# mkdir ~/isoproject
Slect the original disk image to customize:
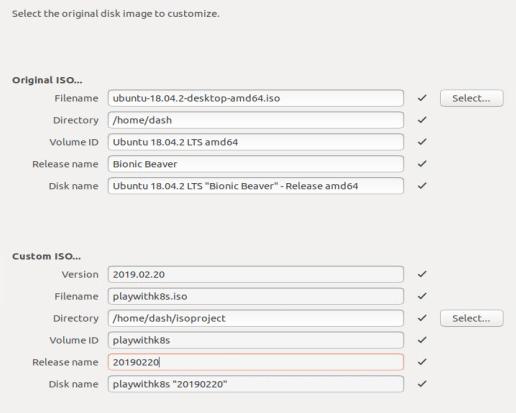
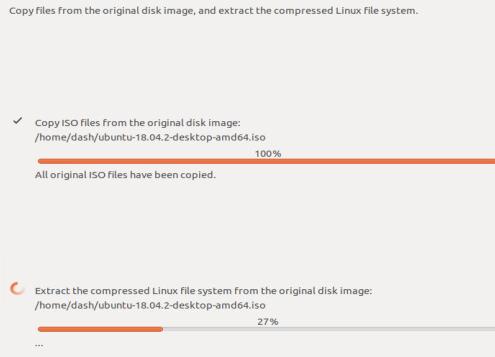
Cubic will copy the content from the origin folder to remote folder, this will
takes for some time:
In chroot terminal you could custom the cd:
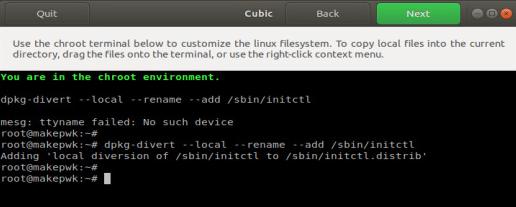
CD customize
Install docker/docker-compose
# vim /etc/apt/sources.list(Changes to 163.com)
# apt-get install -y python-pip && pip install docker-compose
# ln -s /usr/local/bin/docker-compose /usr/bin/docker-compose
# apt-get install \
    apt-transport-https \
    ca-certificates \
    curl \
    gnupg-agent \
    software-properties-common

# curl -fsSL https://download.docker.com/linux/ubuntu/gpg | sudo apt-key add -

# apt-key fingerprint 0EBFCD88
# add-apt-repository \
   "deb [arch=amd64] https://download.docker.com/linux/ubuntu \
   $(lsb_release -cs) \
   stable"
# apt-get install docker-ce docker-ce-cli containerd.io
# docker version
The current Version is :

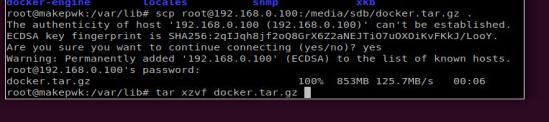
Cause we are under chroot, we don’t have server running.
We fetch the pwk ready machine’s /var/lib/docker, transfer them into our
chroot env:
We also need golang for running the pwk environment:
# apt-get install -y golang
# vim /root/.bashrc
Transfer the golang environment from the pwk ready machine:
# ls /root
 go/ Code/
systemd file:
root@test-Standard-PC-Q35-ICH9-2009:/etc/systemd/system# cat mynginx.service
[Unit]
Description=mynginx
Requires=docker.service
After=docker.service

[Service]
Restart=always
ExecStart=/usr/bin/docker start -a docker-nginx
ExecStop=/usr/bin/docker stop -t 2 docker-nginx

[Install]
WantedBy=multi-user.target

root@test-Standard-PC-Q35-ICH9-2009:/etc/systemd/system# cat playwithdockerblog.service
[Unit]
Description=playwithdockerblog
After=docker.service
Requires=docker.service

[Service]
ExecStart=/usr/bin/docker-compose -f /root/Code/play-with-kubernetes.github.io/docker-compose.yml up -d

[Install]
WantedBy=multi-user.target
root@test-Standard-PC-Q35-ICH9-2009:/etc/systemd/system# cat playwithdocker.service
[Unit]
Description=playwithdocker
After=docker.service
Requires=docker.service

[Service]
Environment=GOPATH=/root/go/
WorkingDirectory=/root/go/src/github.com/play-with-docker/play-with-docker
Type=idle
# Remove old container items
ExecStartPre=/usr/bin/docker-compose -f /root/go/src/github.com/play-with-docker/play-with-docker/docker-compose.yml down
# Compose up
ExecStart=/usr/bin/docker-compose -f /root/go/src/github.com/play-with-docker/play-with-docker/docker-compose.yml up -d

[Install]
WantedBy=multi-user.target
ToBeContinue, later I will change the static website content, and k8s image
offline, then do the iso-build.
