WorkingTipsOnGravitee

AIM

Deploy gravitee on Kubernetes cluster, and use it as cluster’s API gateway.

Ingress-Controller

Deploy nginx-ingress-controller in kubespray’s configuration is listed as following:

ingress_nginx_enabled: true
ingress_nginx_host_network: true
ingress_nginx_nodeselector:
  kubernetes.io/hostname: "tsts-2"

Specify the ingress’s entry machine is tsts-2, cause in some node we have the 80 and 443 port occupied.

Run the task:

# ansible-playbook -i inventory/kkkk/hosts.ini cluster.yml --extra-vars @kkkk-vars.yml --tags ingress-controller

Verify the ingress deployed:

# kubectl get pods -n ingress-nginx
NAME                             READY   STATUS    RESTARTS   AGE
ingress-nginx-controller-b959g   1/1     Running   0          4d16h

Helm/Charts installation

Use helm/charts for deploying the gravitee apim.

# git clone https://github.com/gravitee-io/helm-charts.git
# cd apim
# helm repo update .
# helm dependency update .

After dependency updated we will see the folder structure is listed as:

➜  apim tree 
.
├── charts
│   ├── elasticsearch-1.32.0.tgz
│   └── mongodb-replicaset-3.10.1.tgz
├── Chart.yaml
├── NOTES.txt
├── README.md
├── requirements.lock
├── requirements.yaml
├── templates
│   ├── api-autoscaler.yaml
│   ├── api-configmap.yaml
│   ├── api-deployment.yaml
│   ├── api-ingress.yaml
│   ├── api-service.yaml
│   ├── gateway-autoscaler.yaml
│   ├── gateway-configmap.yaml
│   ├── gateway-deployment.yaml
│   ├── gateway-ingress.yaml
│   ├── gateway-service.yaml
│   ├── _helpers.tpl
│   ├── ui-autoscaler.yaml
│   ├── ui-configmap.yaml
│   ├── ui-deployment.yaml
│   ├── ui-ingress.yaml
│   └── ui-service.yaml
└── values.yaml

Configure the helm/charts values:

# vim values.yml
//.................
mongo:
  rs: rs0
  rsEnabled: true
  dbhost: gravitee45-mongodb-replicaset
//.................
mongodb-replicaset:
  enabled: true
  replicas: 1
//.................
  persistentVolume:
    enabled: false
//.................

es:
//.................
  endpoints:
    - http://gravitee45-elasticsearch-client.default.svc.cluster.local:9200

//.................
elasticsearch:
  enabled: true
  cluster:
    name: "elasticsearch"

//.................
  master: 
//.................
    persistence:
      enabled: false
//.................
  data:
//.................
    persistence:
      enabled: false

//.................

api:
  enabled: true
  name: api
  logging:
    debug: false
  restartPolicy: OnFailure
  updateStrategy:
    rollingUpdate:
      maxUnavailable: 1
    type: RollingUpdate
  replicaCount: 1
  image:
    repository: graviteeio/management-api
    tag: 1.29.5
    pullPolicy: IfNotPresent
  service:
    type: ClusterIP
    externalPort: 83
    internalPort: 8083
  autoscaling:
    enabled: true
    minReplicas: 1
    maxReplicas: 1

//.....................

gateway:
  enabled: true
  type: Deployment
  name: gateway
  logging:
    debug: false
  replicaCount: 2
  # sharding_tags: 
  # tenant:
  websocket: false
  image:
    repository: graviteeio/gateway
    tag: 1.29.5
    pullPolicy: IfNotPresent
  service:
    type: ClusterIP
    externalPort: 82
    internalPort: 8082
  autoscaling:
    enabled: true
    minReplicas: 1
    maxReplicas: 1

//.......................
ui:
  enabled: true
  name: ui
  title: API Portal
  managementTitle: API Management
  documentationLink: http://docs.gravitee.io/
  scheduler:
    tasks: 10
  theme:
    name: "default"
    logo: "themes/assets/GRAVITEE_LOGO1-01.png"
    loader: "assets/gravitee_logo_anim.gif"
  portal:
    apikeyHeader: "X-Gravitee-Api-Key"
    devMode:
      enabled: false
    userCreation:
      enabled: false
    support:
      enabled: true
    rating:
      enabled: false
    analytics:
      enabled: false
      trackingId: ""
  replicaCount: 1
  image:
    repository: graviteeio/management-ui
    tag: 1.29.5
    pullPolicy: IfNotPresent
  autoscaling:
    enabled: true
    minReplicas: 1
    maxReplicas: 1
//............

Also replace all of the apim.example.com into apim.company.com.

Then install the charts via:

# helm  install --name gravitee45 .

Examine the ingress via:

# root@tsts-1:~/apim# kubectl get ingress
NAME                       HOSTS              ADDRESS          PORTS     AGE
gravitee45-apim-api        apim.company.com   10.147.191.192   80, 443   19h
gravitee45-apim-firstapi   apim.company.com   10.147.191.192   80, 443   17h
gravitee45-apim-gateway    apim.company.com   10.147.191.192   80, 443   19h
gravitee45-apim-ui         apim.company.com   10.147.191.192   80, 443   19h

Check the pods via:

root@tsts-1:~/apim# kubectl get pods
NAME                                               READY   STATUS    RESTARTS   AGE
gravitee45-apim-api-7bfd555fbb-95cqz               1/1     Running   0          19h
gravitee45-apim-gateway-5757b5d6bf-gzstz           1/1     Running   0          19h
gravitee45-apim-ui-66ddddfd7f-ssl9z                1/1     Running   0          19h
gravitee45-elasticsearch-client-77cb95bc9f-8bdt8   1/1     Running   0          19h
gravitee45-elasticsearch-client-77cb95bc9f-xjxvs   1/1     Running   0          19h
gravitee45-elasticsearch-data-0                    1/1     Running   0          19h
gravitee45-elasticsearch-data-1                    1/1     Running   0          19h
gravitee45-elasticsearch-master-0                  1/1     Running   0          19h
gravitee45-elasticsearch-master-1                  1/1     Running   0          19h
gravitee45-elasticsearch-master-2                  1/1     Running   0          19h
gravitee45-mongodb-replicaset-0                    1/1     Running   0          19h

Test api

Run a local test api like echo api in gravitee website:

# docker run -d --name echo -p 18080:8080 graviteeio/gravitee-echo-api:latest

Test via:

# curl http://xxx.xxx.xxx.xxx:18080/
{
  "headers" : {
    "Host" : "xxx.xxx.xxx.xxx:18080",
    "User-Agent" : "curl/7.52.1",
    "Accept" : "*/*"
  }

API management

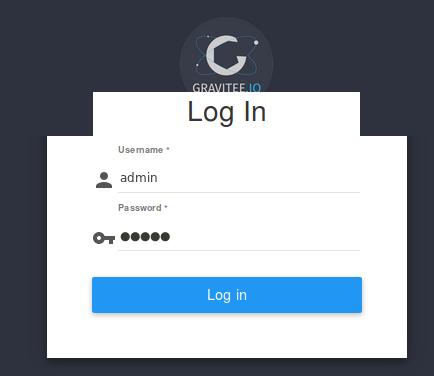
Open your browser and visit https://apim.company.com:

/images/2019_11_13_10_45_50_1020x399.jpg

Click login and login with admin/admin:

/images/2019_11_13_10_46_13_434x376.jpg

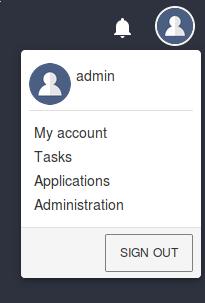
Click Administration:
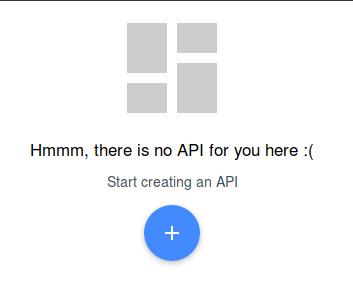
/images/2019_11_13_10_46_42_205x303.jpg

Click +:

/images/2019_11_13_10_47_35_353x306.jpg

Click ‘->` and create a new API:

/images/2019_11_13_10_48_21_462x302.jpg

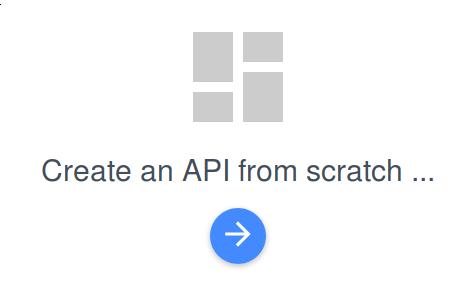
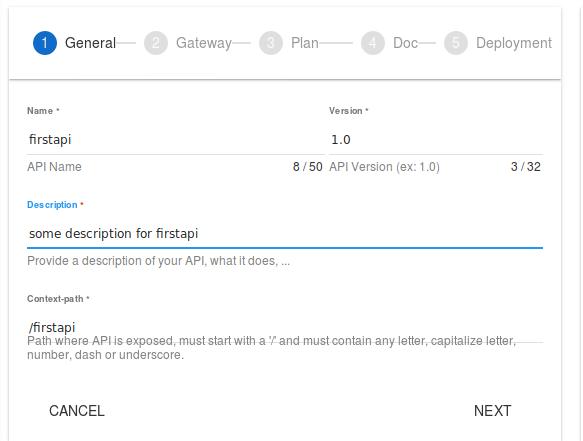
Name is firstapi, version is 1.0, write some description, context-path is /firstapi, then click NEXT:

/images/2019_11_13_10_49_31_583x441.jpg

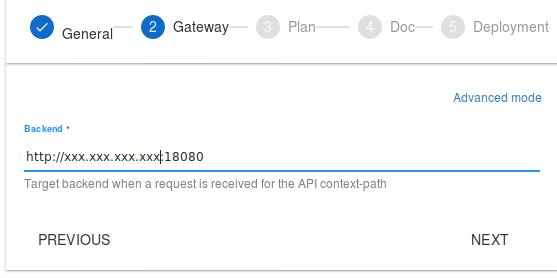
Specify the gateway to our test api, then click NEXT:

/images/2019_11_13_10_50_28_557x278.jpg

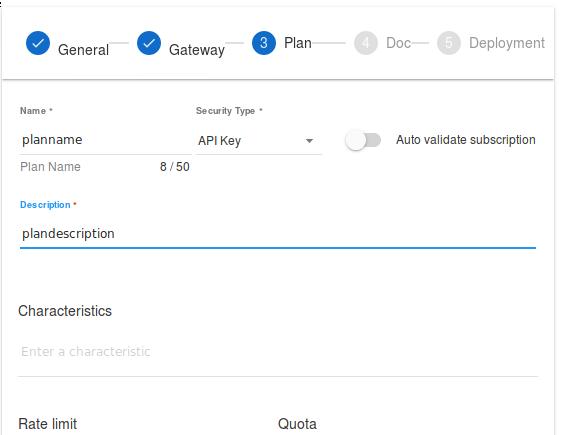
Write some description for plan, notice the security type should be API Key, you could also specify the Rate limit and Quota here, after configuration click NEXT for next step:

/images/2019_11_13_10_52_05_564x435.jpg

You could add the API documentation here, here we skip the documentation for next step, click SKIP:

/images/2019_11_13_10_53_25_556x256.jpg

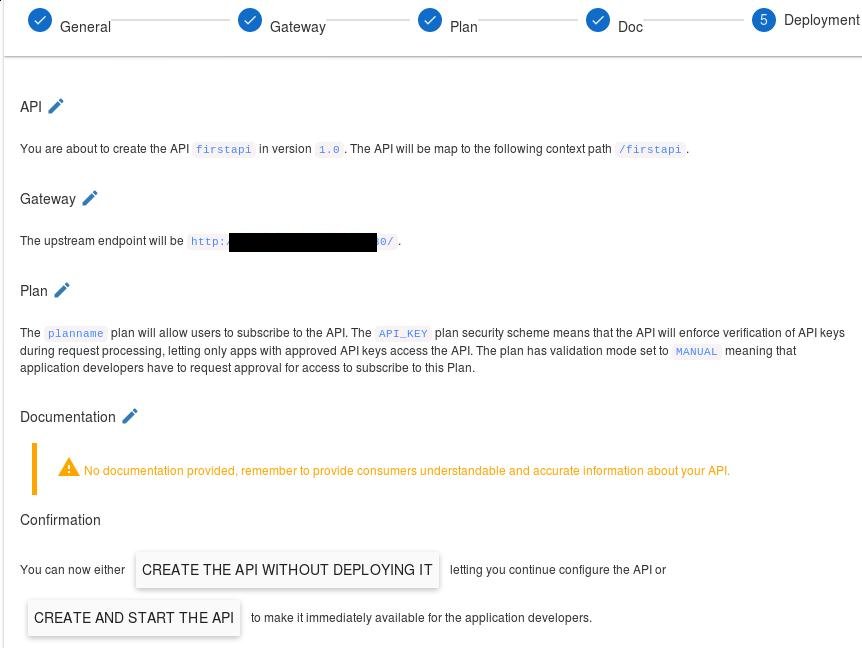
Here you could adjust the parameters, if everything is ok, we could click CREATE AND START THE API:

/images/2019_11_13_10_54_25_862x648.jpg

Confirm for CREATE:

/images/2019_11_13_10_55_38_424x156.jpg

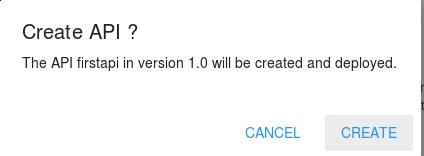
The api will be created and show like:

/images/2019_11_13_10_56_08_644x727.jpg

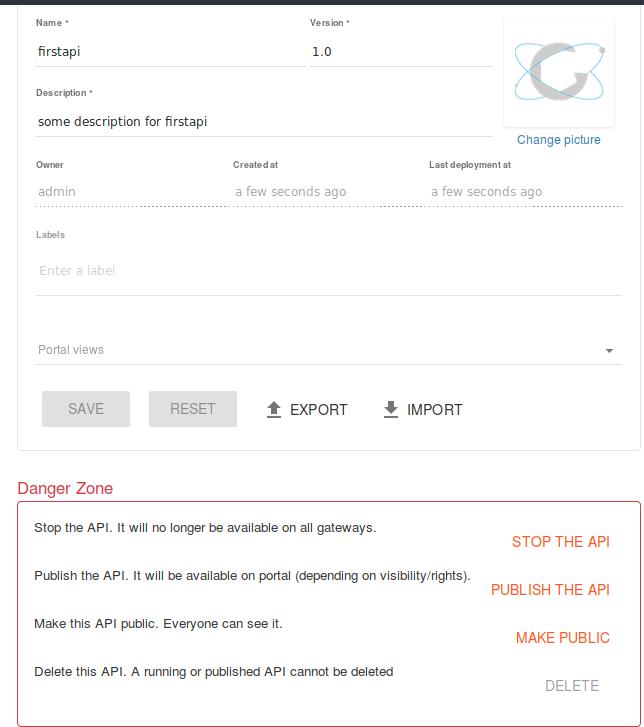
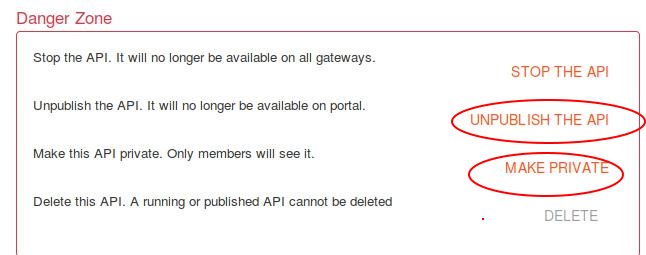
Click PUBLISH THE API and MAKE PUBLIC for plublishing this API:

/images/2019_11_13_10_56_54_646x255.jpg

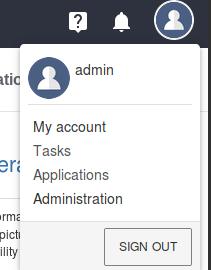
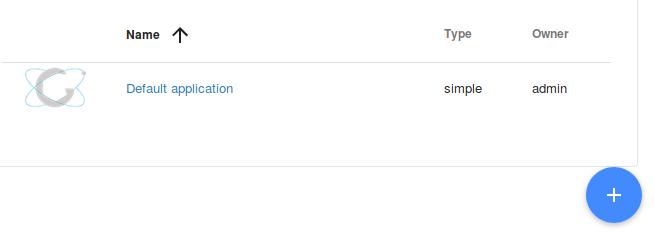
Next step we will create an API for using this API, click Applications:

/images/2019_11_13_10_58_33_211x270.jpg

Click + for adding a new application:

/images/2019_11_13_10_59_37_655x233.jpg

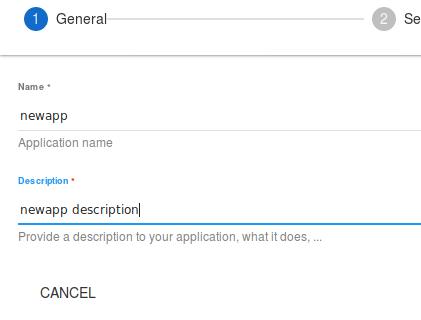
Write some description for this new app, and click NEXT for next step:

/images/2019_11_13_11_00_12_421x320.jpg

Specify webfor api type, then click NEXT:

/images/2019_11_13_11_00_44_519x360.jpg

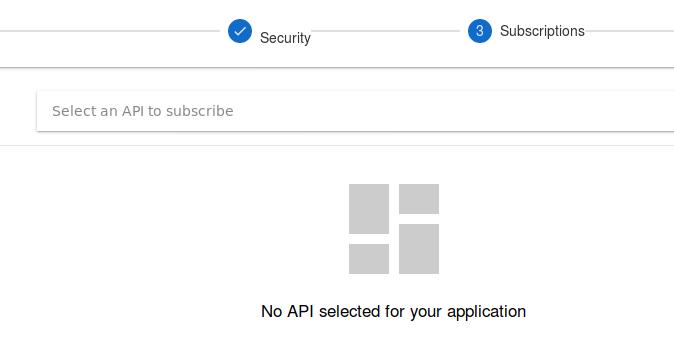
Now we subscribe to our created API in this screen:

/images/2019_11_13_11_01_24_674x343.jpg

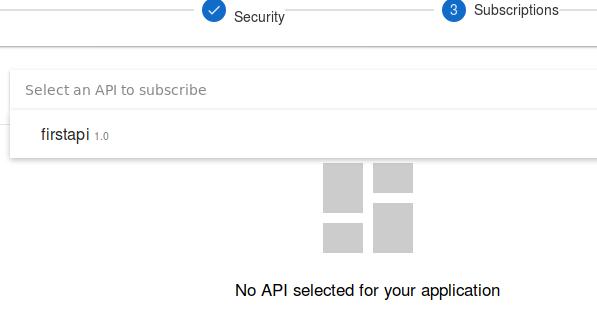
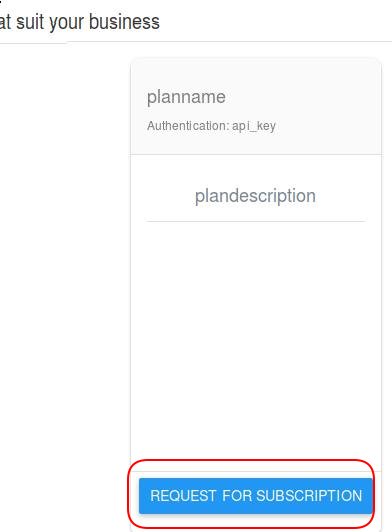
Click first api 1.0:

/images/2019_11_13_11_01_43_597x312.jpg

Click REQUEST FOR SUBSCRIPTION for subscribing to this API:

/images/2019_11_13_11_02_22_392x532.jpg

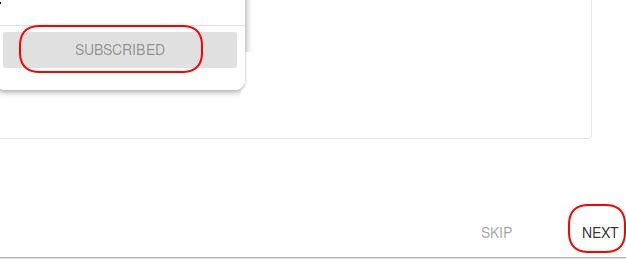
Check the SUBSCRIBED button and click NEXT:

/images/2019_11_13_11_03_38_626x259.jpg

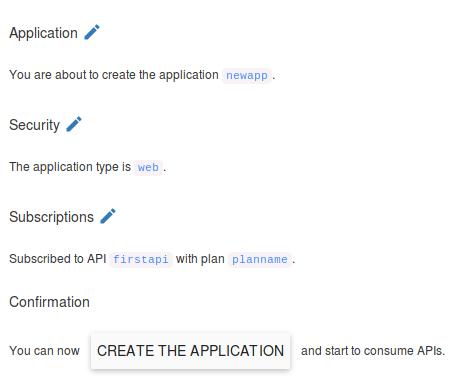
Click CREATE THE APPLICATION for the end of create app:
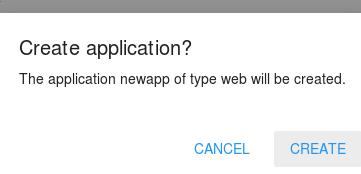
/images/2019_11_13_11_04_36_452x385.jpg

Click CREATE:

/images/2019_11_13_11_04_49_361x174.jpg

You should approve the subscription:
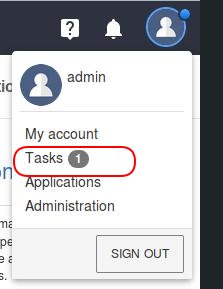
/images/2019_11_13_11_05_18_223x289.jpg

View the task:

/images/2019_11_13_11_08_16_756x256.jpg

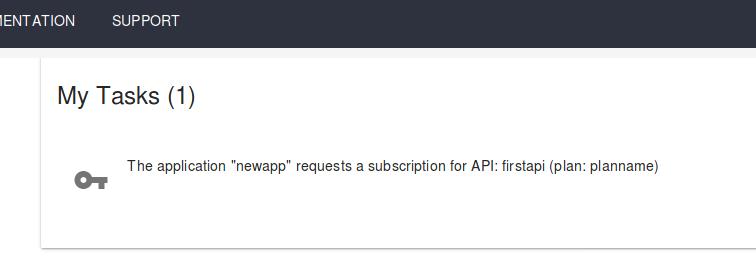
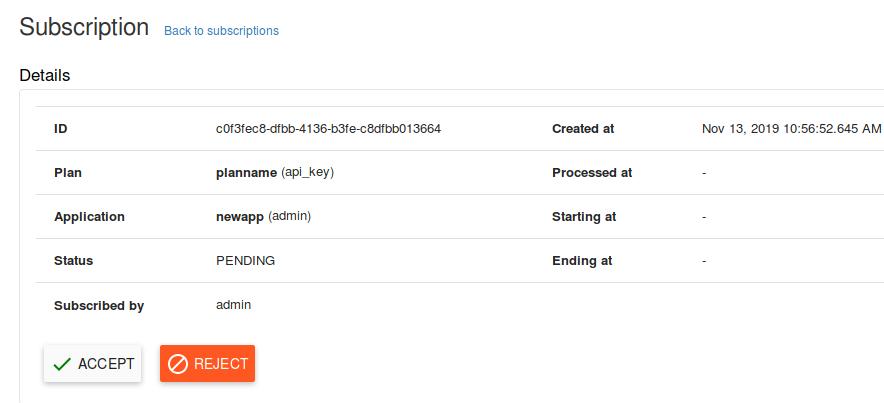
Click ACCEPT for approve the subscription:

/images/2019_11_13_11_09_16_884x403.jpg

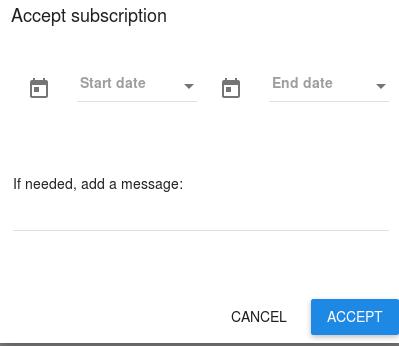
If you don’t specify the time, click CREATE:

/images/2019_11_13_11_09_32_399x346.jpg

A new API key will be generated:

/images/2019_11_13_11_10_16_643x669.jpg

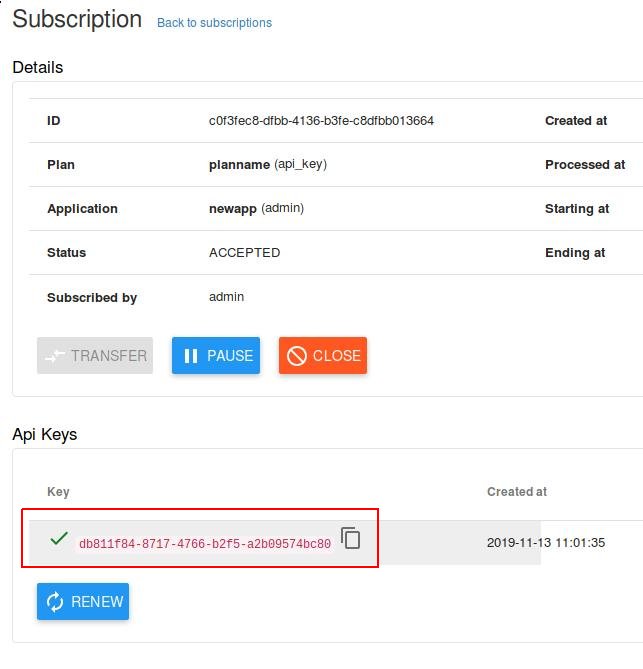
Now the API has been created and you could use the app for consuming it, record this API key: db811f84-8717-4766-b2f5-a2b09574bc80, later we will use it.

Add ingress item

Since we use a ingress controller for controlling the service exposing, we have to add a ingress item for accesing the /firstapi:

# kubectl get ingress gravitee45-apim-gateway -oyaml>firstapi.yaml

/images/2019_11_13_11_17_04_629x424.jpg

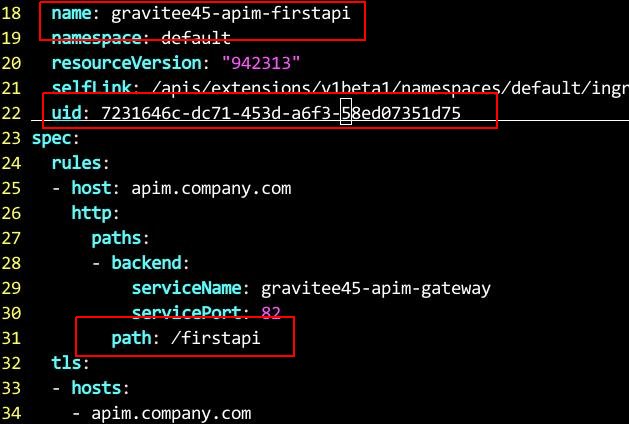
Modify the ingress path and name:

line 18, changes to gravitee45-apim-firstapi
line 22, delete uid
line 31, change to /firstapi

Create the ingress:

# kubectl apply -f firstapi.yaml
ingress.extensions/gravitee45-apim-firstapi created

Consuming API

In a node outside of the k8s cluster, do following steps:

# curl -ki -H "X-Gravitee-Api-Key: db811f84-8717-4766-b2f5-a2b09574bc80" https://apim.company.com/firstapi
HTTP/2 200
server: openresty/1.15.8.1
date: Wed, 13 Nov 2019 03:14:12 GMT
content-type: application/json
content-length: 536
vary: Accept-Encoding
x-gravitee-transaction-id: fc46603c-f4d8-4c60-8660-3cf4d8cc608d
strict-transport-security: max-age=15724800; includeSubDomains

{
  "headers" : {
    "Host" : "xxx.xxx.xxx.xxx:18080",
    "X-Request-ID" : "156ec51c42f84b52ae5d9e36b3efeeef",
    "X-Real-IP" : "10.147.191.1",
    "X-Forwarded-For" : "10.147.191.1",
    "X-Forwarded-Host" : "apim.company.com",
    "X-Forwarded-Port" : "443",
    "X-Forwarded-Proto" : "https",
    "X-Original-URI" : "/firstapi",
    "X-Scheme" : "https",
    "user-agent" : "curl/7.52.1",
    "accept" : "*/*",
    "X-Gravitee-Transaction-Id" : "fc46603c-f4d8-4c60-8660-3cf4d8cc608d",
    "accept-encoding" : "deflate, gzip"
  }

Write a script:

while true
do
curl -ki -H "X-Gravitee-Api-Key: db811f84-8717-4766-b2f5-a2b09574bc80" https://apim.company.com/firstapi
sleep 0.1
done

dashboard

View the dashboard:

/images/2019_11_13_11_26_45_990x566.jpg

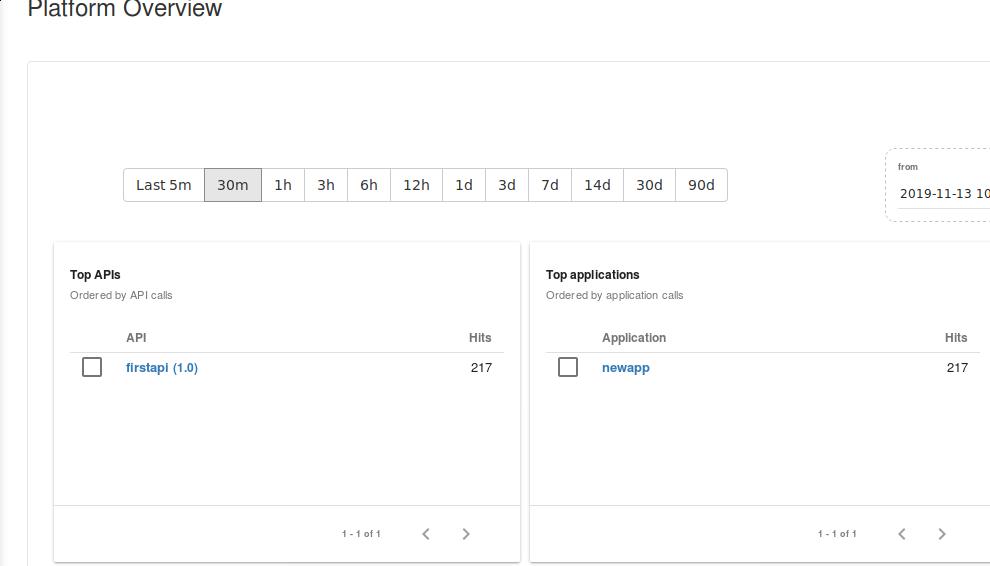
View the detailed statistics in dashboard:

/images/2019_11_13_11_28_13_811x439.jpg

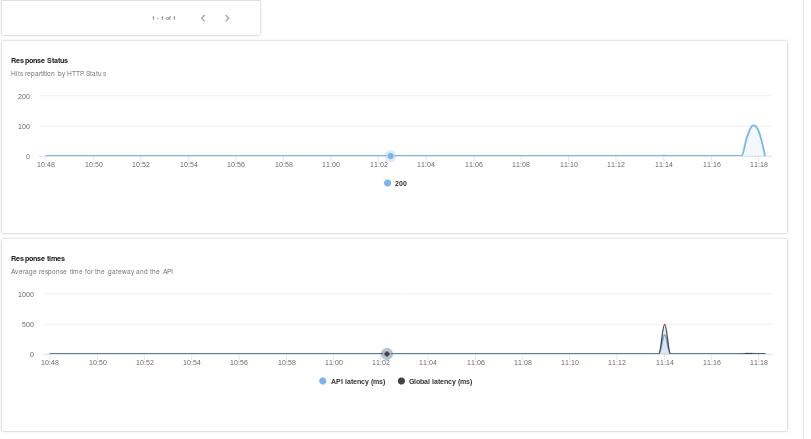
We could easily judge which application comsumes how many apis in statistics page, also we will see the status of the service in this page.

WorkingtipsOnZFSOnProxmox

Environment

2 disks(sas) raid1 as the system partition.
24 disks(SATA), each disk has 2 TB.
CPU: Intel Xeon CPU e5-2650 v3 @ 2.30GHZ.
256G memory.

Disk configuration

use MegaRAID/MegaCli for configurating the disk parameters.

Get the parameters:

# ./Megacli64 -LDInfo -LALL -aAll
Virtual Drive: 24 (Target Id: 24)
Name                :
RAID Level          : Primary-0, Secondary-0, RAID Level Qualifier-0
Size                : 1.817 TB
State               : Optimal
Strip Size          : 256 KB
Number Of Drives    : 1
Span Depth          : 1
Default Cache Policy: WriteBack, ReadAhead, Direct, No Write Cache if Bad BBU
Current Cache Policy: WriteThrough, ReadAhead, Direct, No Write Cache if Bad BBU
Access Policy       : Read/Write
Disk Cache Policy   : Disk's Default
Encryption Type     : None

Exit Code: 0x00

Notice we have the ReadAhead in Current Cache Policy, we need to turn off this parameter in order to let zfs runs fast.

# ./MegaCli64 -LDSetProp -NORA -Immediate -Lall -aAll
.....
Current Cache Policy: WriteThrough, ReadAheadNone, Direct, No Write Cache if Bad BBU
.....

Create the raidz2 vmpool via following commands:

# zpool create -f -o ashift=12 vmpool raidz2 /dev/sdb /dev/sdc /dev/sdd /dev/sde /dev/sdf /dev/sdg /dev/sdh /dev/sdi
# zpool add -f -o ashift=12 vmpool raidz2 /dev/sdj ~ /dev/sdq
# zpool add -f -o ashift=12 vmpool raidz2 /dev/sdr ~ /dev/sdy

zpool info

Get the information of zfs via following:

# zpool list
NAME     SIZE  ALLOC   FREE  EXPANDSZ   FRAG    CAP  DEDUP  HEALTH  ALTROOT
vmpool  43.5T   132G  43.4T         -     0%     0%  1.00x  ONLINE  -
# zfs list
NAME                     USED  AVAIL  REFER  MOUNTPOINT
vmpool                  93.6G  29.9T   205K  /vmpool
vmpool/base-100-disk-1  8.17G  29.9T  8.17G  -
vmpool/vm-101-disk-1    45.3G  29.9T  45.3G  -
vmpool/vm-102-disk-1    40.1G  29.9T  40.1G  -

Adding the zfs pool into the proxmox on GUI, ignore the steps because it’s too simple.

CICDForRong

Steps

Download iso and install debian:

# axel http://mirrors.163.com/debian-cd/10.1.0/amd64/iso-cd/debian-10.1.0-amd64-netinst.iso
# Create qemu virtual machine. 8-Core, 9G Memory

After installation:

$ su root
# apt-get install -y vim sudo net-tools usermode
# sudo apt-get install -y gnupg2 gnupg1 gnupg
# vim /etc/apt/sources.list
deb http://mirrors.163.com/debian/ buster main
deb http://security.debian.org/debian-security buster/updates main
deb http://mirrors.163.com/debian/ buster-updates main
# apt-get update -y
# su -
# usermod -aG sudo dash

Gitlab

Configure the repository file like following:

# vim /etc/apt/sources.list
deb http://mirrors.163.com/debian/ buster main non-free contrib
deb http://security.debian.org/debian-security buster/updates main non-free contrib
deb http://mirrors.163.com/debian/ buster-updates main non-free contrib
deb http://mirrors.163.com/debian/ buster-backports main non-free contrib

### GitLab 12.0.8
deb http://fasttrack.debian.net/debian/ buster-fasttrack main contrib
deb http://fasttrack.debian.net/debian/ buster-backports main contrib 
deb https://deb.debian.org/debian buster-backports contrib main
# Eventually the packages in this repo will be moved to one of the previous two repos
deb https://people.debian.org/~praveen/gitlab buster-backports contrib main

signature:

# wget https://people.debian.org/~praveen/gitlab/praveen.key.asc
# wget http://fasttrack.debian.net/fasttrack-archive-key.asc
# apt-key add praveen.key.asc
# apt-key add fasttrack-archive-key.asc

Install via:

# apt -t buster-backports install gitlab

Install failed because it requires gitlab-shell 9.3.0 while the repository didn’t provide this one. Install gitlab-ce instead:

# sudo apt-get purge gitlab
# sudo apt-get purge gitlab-common
# wget https://packages.gitlab.com/gpg.key
# sudo apt-key add gpg.key 
# sudo vim /etc/apt/sources.list
deb http://mirrors.tuna.tsinghua.edu.cn/gitlab-ce/debian buster main
# sudo apt-get update -y
# sudo apt-get install -y gitlab-ce

Configure the gitlab-ce:

# sudo vim /etc/gitlab/gitlab.rb
external_url 'http://cicd.cicdforrong.ai'
# export LC_ALL=en_US.UTF-8
# export LANG=en_US.utf8
# sudo gitlab-ctl reconfigure

Configure the port(nginx/unicorn):

# vi /etc/gitlab/gitlab.rb
nginx['listen_port'] = 82 #默认值即80端口 nginx['listen_port'] = nil
# vi /var/opt/gitlab/nginx/conf/gitlab-http.conf
listen *:82; #默认值listen *:80;
# vi /etc/gitlab/gitlab.rb
unicorn['port'] = 8082#原值unicorn['port'] = 8080
# vim /var/opt/gitlab/gitlab-rails/etc/unicorn.rb
listen "127.0.0.1:8082", :tcp_nopush => true
#原值listen "127.0.0.1:8080", :tcp_nopush => true

Reconfigure and restart the gitlab service:

# gitlab-ctl reconfigure
# gitlab-ctl restart

Visit gitlab

Edit the /etc/hosts for adding following items:

# vim /etc/hosts
192.168.122.90	cicd.cicdforrong.ai

Now visit the http://cicd.cicdforrong.ai you could get the page for change username/password.

Install docker(for gitlab-runner)

Steps:

#  sudo apt-get install     apt-transport-https     ca-certificates     curl     gnupg2     software-properties-common
#  curl -fsSL https://download.docker.com/linux/debian/gpg | sudo apt-key add -
#  apt-key fingerprint 0EBFCD88
#  add-apt-repository    "deb [arch=amd64] https://download.docker.com/linux/debian \
   $(lsb_release -cs) \
   stable"
#  apt-get update
#  apt-get install docker-ce docker-ce-cli containerd.io

WorkingTipsOnKubesprayDIND

vagrant machine

Create a vagrant machine with 8-core/10G memory:

vagrant init generic/ubuntu1604
vagrant up
vagrant ssh

steps

Prepare the environment:

sudo apt-get update -y
sudo apt-get install -y python-pip git python3-pip
git clone xxxxxxx/kubespray
cd kubespray
export LC_ALL="en_US.UTF-8"
pip install -r requirements.txt 
pip3 install ruamel.yaml
sudo apt-get install     apt-transport-https     ca-certificates     curl     gnupg-agent     software-properties-common
sudo apt-key fingerprint 0EBFCD88
sudo add-apt-repository    "deb [arch=amd64] https://download.docker.com/linux/ubuntu \
   $(lsb_release -cs) \
   stable"
sudo apt-get update -y &&  sudo apt-get install docker-ce docker-ce-cli containerd.io -y
cd contrib/dind
pip install -r requirements.txt

Deploy the dind cluster:

sudo /home/vagrant/.local/bin//ansible-playbook -i hosts dind-cluster.yaml
rm -f inventory/local-dind/hosts.yml 
sudo CONFIG_FILE=${INVENTORY_DIR}/hosts.yml /tmp/kubespray.dind.inventory_builder.sh
sudo chown -R vagrant /home/vagrant/.ansible/
sudo docker exec kube-node1 apt-get install -y iputils-ping
/home/vagrant/.local/bin//ansible-playbook --become -e ansible_ssh_user=ubuntu -i ${INVENTORY_DIR}/hosts.yml cluster.yml --extra-vars @contrib/dind/kubespray-dind.yaml

EnableIPMIMonitoringOnArm64Server

Add iso repository

Use installation iso as repository:

# mount -t iso9660 -o loop ubuntu180402_arm64.iso /mnt
# vim /etc/apt/sources.list
deb [trusted=yes] file:///mnt bionic main contrib
# apt-get update -y
# apt-cache search | grep ipmi
freeipmi-common - GNU implementation of the IPMI protocol - common files
freeipmi-tools - GNU implementation of the IPMI protocol - tools
libfreeipmi16 - GNU IPMI - libraries
libipmiconsole2 - GNU IPMI - Serial-over-Lan library
libipmidetect0 - GNU IPMI - IPMI node detection library
maas - "Metal as a Service" is a physical cloud and IPAM
libopenipmi0 - Intelligent Platform Management Interface - runtime
openipmi - Intelligent Platform Management Interface (for servers)

ipmi

Install two packages:

# apt-get install -y openipmi freeipmi-tools

Build netdata

Using a docker instance on vps for building netdata:

# docker run -it ubuntu:bionic-20190424 /bin/bash
# cat /etc/issue

# apt-get update -y
# apt-get install -y vim build-essential