Mar 13, 2020
Technology前言
最近因为武汉肺炎的原因一直宅在家里,刷什么值得买的时候看到了一个玩mac mini server的哥们写的用superset可视化武汉肺炎的文章,照着做了一遍,将具体的步骤都写在了下面。后续做实际项目的BI内容可视化的时候可以用来参考。
该文章中也有少许操作步骤方面的错误,做的时候经常会卡在那里半天。当然如果按照下面记录的步骤来进行的话,这些问题应该不会出现。
环境
涉及到的硬件、操作系统、软件等的情况列举如下:
KVM虚拟机,4核,3G内存, 200G硬盘
Ubuntu18.04.3 x86_64
docker/docker-compose
搭建superset
通过 docker启动superset, 启动后监听 8088 端口:
# sudo docker run -d --name superset -p 8088:8088 amancevice/superset
初始化数据库:
# sudo docker run -d --name superset -p 8088:8088 amancevice/superset
cf39f0c9e6a1232796cfe9012d110d6dd50613a8e2022873c963974eb74c18ba
root@node:/mnt2# docker exec -it superset superset-init
Username [admin]:
User first name [admin]:
User last name [user]:
Email [admin@fab.org]:
Password:
Repeat for confirmation:
现在可以用admin用户及刚才创建的密码登录superset界面了:
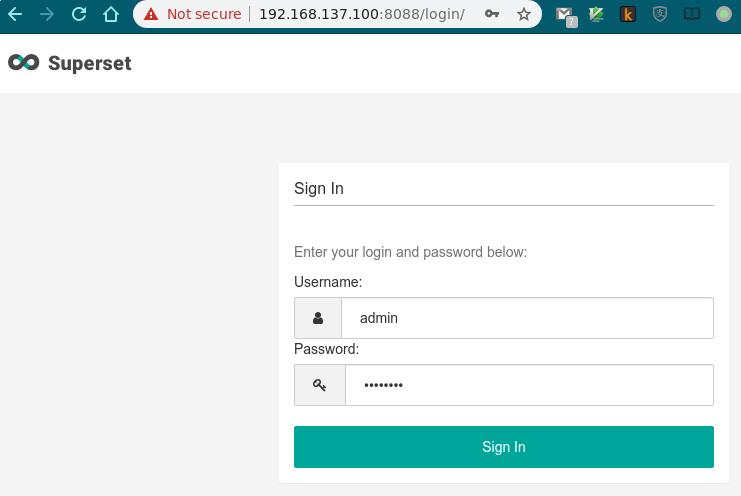
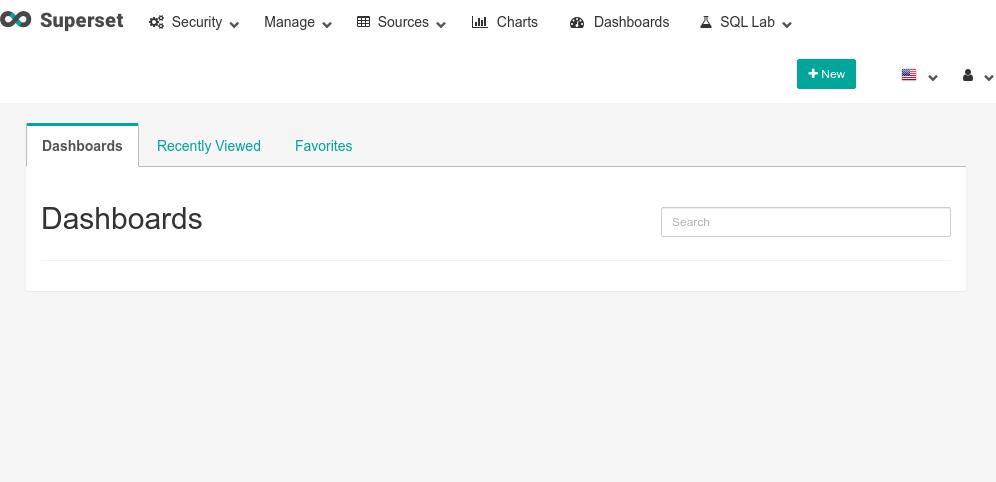
登录后界面如下:
准备数据
肺炎的数据从以下页面取得:
https://github.com/canghailan/Wuhan-2019-nCoV
点击下面链接中数据接口里的csv,将csv文件下载到本地:
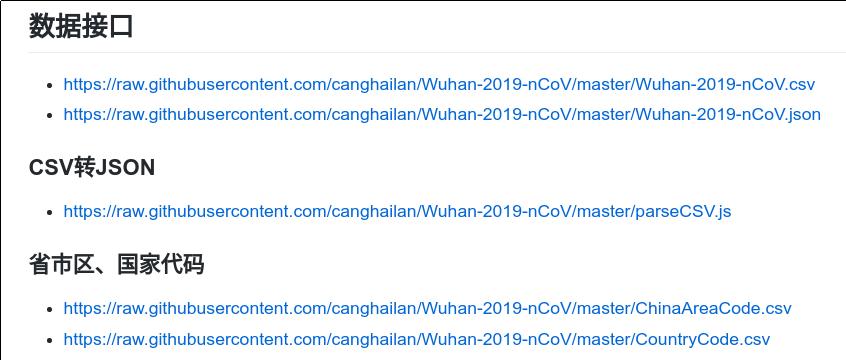
csv文件可以方便的用libreoffice或者excel打开,后面我们将用libreoffice对数据做一点点更改以支持superset中的地图显示。
手动建立省份代码csv文件( province.csv ), 这个文件是ISO3316标准下的中国省份代码,因为superset的地图中需要使用该标准下的代码:
编码,城市
北京市,CN-11
天津市,CN-12
河北省,CN-13
山西省,CN-14
内蒙古自治区,CN-15
辽宁省,CN-21
吉林省,CN-22
黑龙江省,CN-23
上海市,CN-31
江苏省,CN-32
浙江省,CN-33
安徽省,CN-34
福建省,CN-35
江西省,CN-36
山东省,CN-37
河南省,CN-41
湖北省,CN-42
湖南省,CN-43
广东省,CN-44
广西壮族自治区,CN-45
海南省,CN-46
重庆市,CN-50
四川省,CN-51
贵州省,CN-52
云南省,CN-53
西藏自治区,CN-54
陕西省,CN-61
甘肃省,CN-62
青海省,CN-63
宁夏回族自治区,CN-64
新疆维吾尔自治区,CN-65
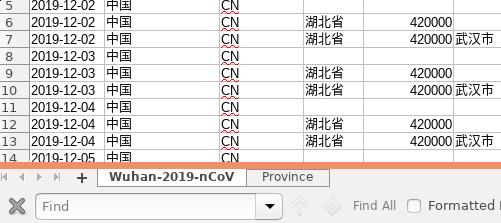
在libreoffice中打开两个csv文件后,在Wuhan-2019-nCov 的工作空间里新建一个tab将 province.csv内容全盘复制进来, 并将此tab命名为 province:
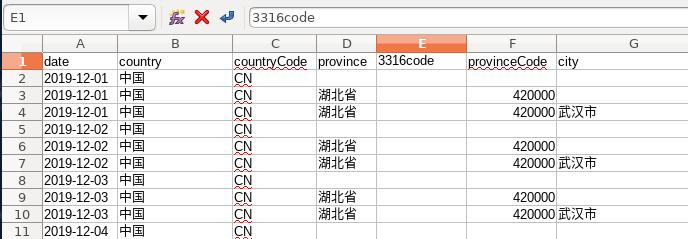
接下来我们使用vlookup用来将ISO3316的省份代码插入到Wuhan-2019-nCov表中, 首先在province栏后新建一栏,命名为3316code:
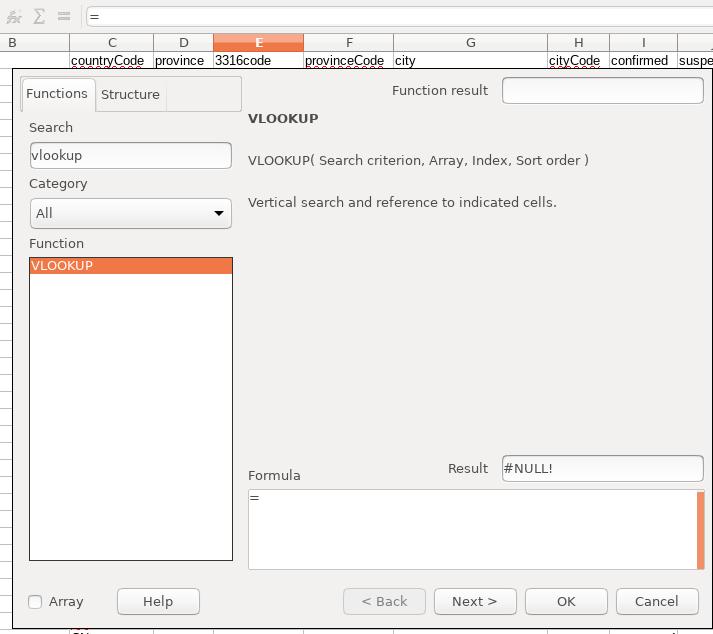
此栏目现在是空的,我们需要用函数将其批量替换为省份对应的代码,如,湖北省 -> CN-41, 首先选中E中的第一个空白栏,而后点击fx按钮,在弹出的函数选择框中输入 vookup 后,启动函数编辑器:
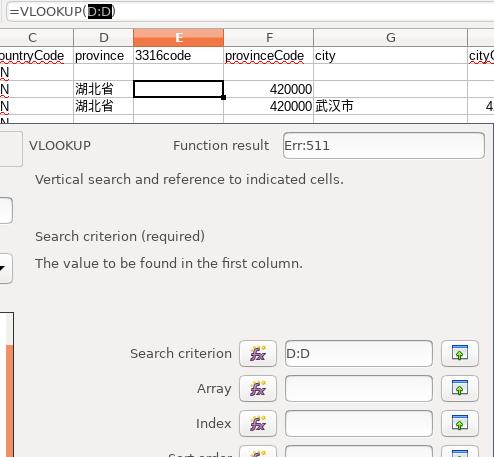
点击 Next 后进入到函数参数输入界面, 首先配置搜索条件, 在Search criterion中填入D:D, libreoffice里将自动选择D全栏, 代表搜索省份中所有的条目:
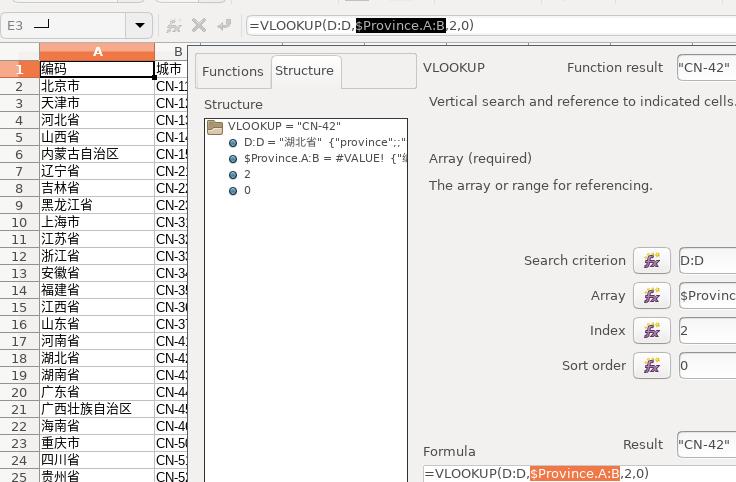
选中Array后,鼠标点击切换到 Province 表, 选中A/B全栏, 或者直接输入 $Province.A:B,匹配:
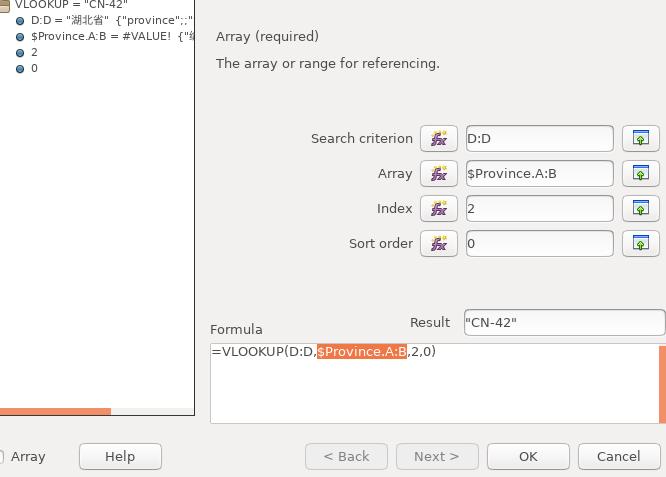
Index 输入数值2, 代表从匹配变量一栏开始需要匹配的数据为第2栏,而 Sort order则输入0后,可以看到输出结果为 CN-42, 代表已经匹配成功:
点击 OK 后,点击函数将其扩展到以下几行,观察结果:
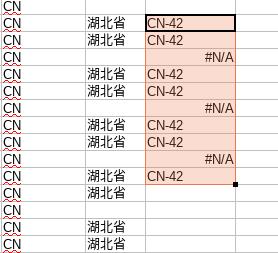
可以看到有 #N/A 的错误输出结果,我们需要修改函数忽略掉此输出:

修改函数为 IFERROR(VLOOKUP(D:D, $Province.A:B,2,0),"")之后,查看结果:
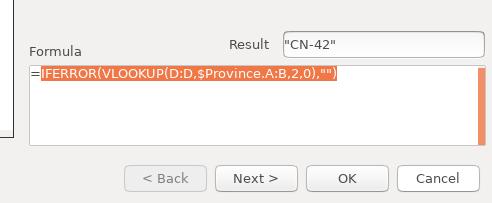
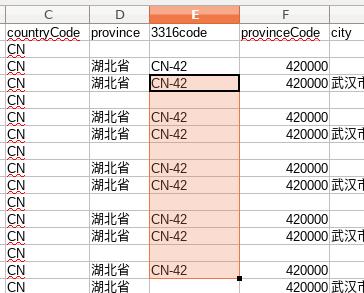
结果显示正常:
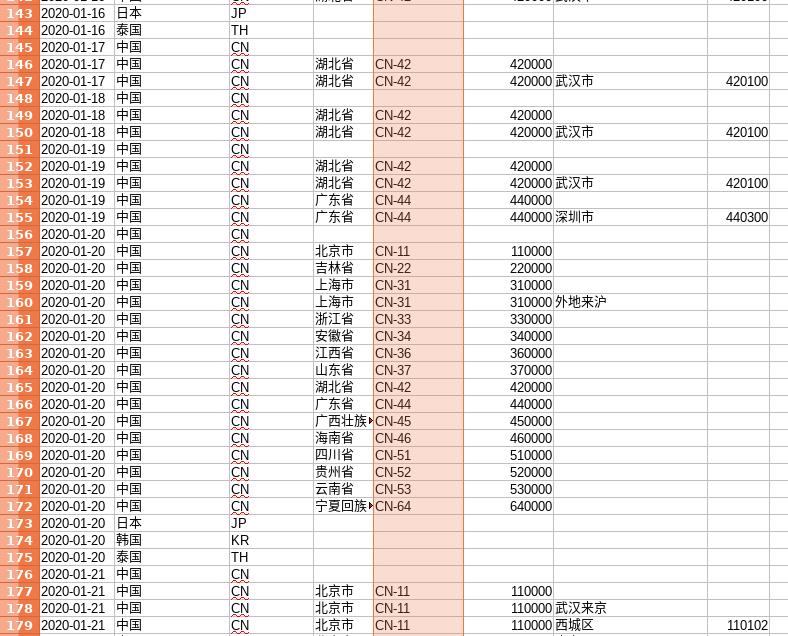
接下来将此函数应用到全列, 选中一个已经应用公式的条目后,如E30, 按住shift键,鼠标一直拉到E的最后一行后,点最后一个元素,选中全列,而后按Ctrl+D,将公式应用到全列,如:
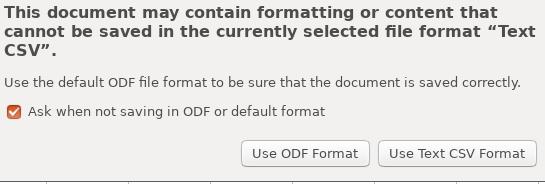
现在保存此csv文件,命名为 nCovForSuperset.csv后退出, 注意要选择 Use Text CSV Format 。
至此,数据准备完毕。
建立数据源
用sqlite3建立一个 假 的数据文件:
# sqlite3 test.db
SQLite version 3.22.0 2018-01-22 18:45:57
Enter ".help" for usage hints.
sqlite> .quit
# ls
nCovForSuperset.csv  province.csv  test.db  Wuhan-2019-nCoV.csv
我们将 此 test.db文件拷贝到容器中, 并通过root用户改变其文件权限:
# docker cp test.db superset:/home/superset/
# docker exec -it  --workdir /root --user root superset chmod 777 /home/superset/test.db
在Superset界面中点击 Sources -> Database, 后,进入到配置数据库的界面:
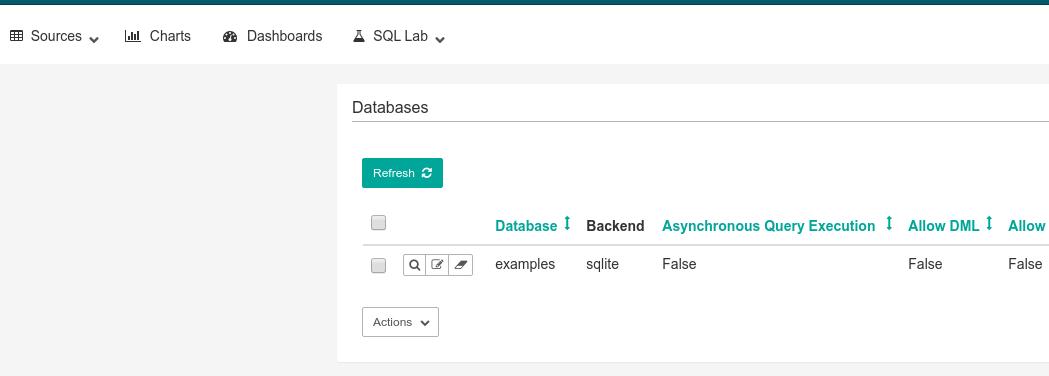
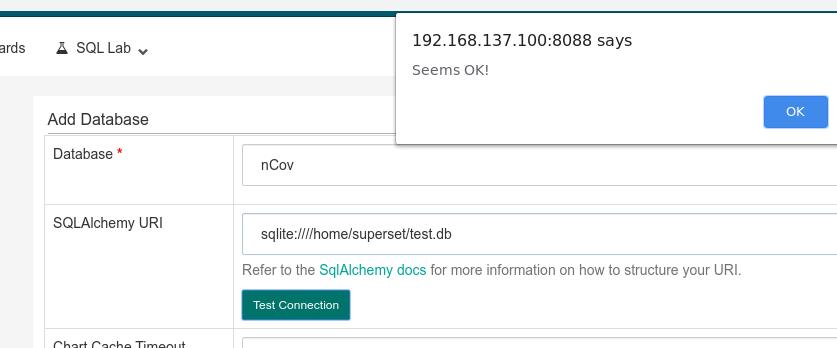
点击 + 号,新加一个数据库, 输入数据库名,及数据库所在的URI,此例子中为 sqlite:////home/superset/test.db:
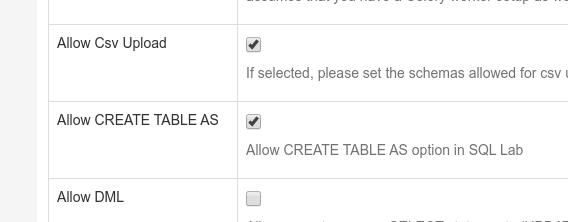
勾选 Allow Csv Upload 及 Allow CREATE TABLE AS:
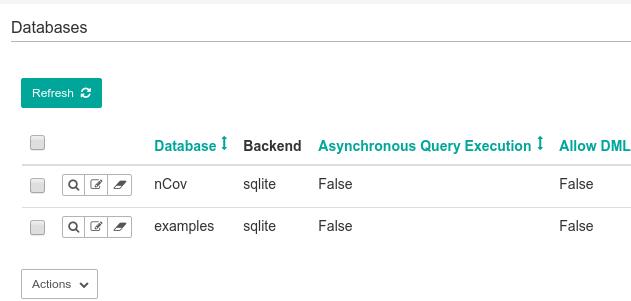
之后点击 Save, 可以看到数据库已经被建立起来:
上传刚才编辑好的CSV文件:
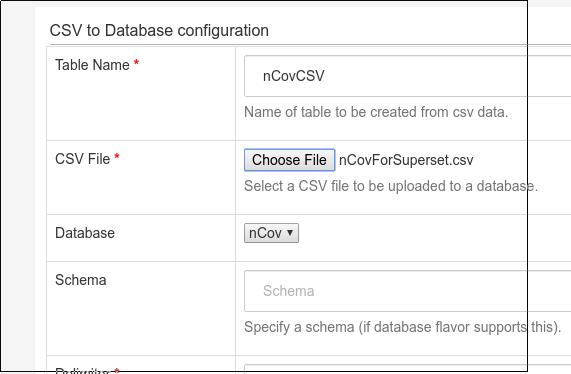
会报出出错,提示因权限问题无法上传此CSV文件:

手动建立目录并改变其权限:
# docker exec -it  --workdir /root --user root superset mkdir -p /usr/local/lib/python3.6/site-packages/superset/app
# docker exec -it  --workdir /root --user root superset chmod 777 -R /usr/local/lib/python3.6/site-packages/superset/app
上传成功后可以看到Tables中有了新的文件:
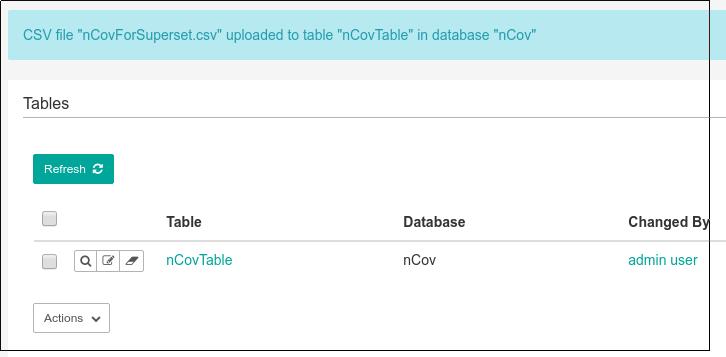
更改tables属性
CSV上传后,大部分的字段(数据) 并没有被确定为准确的类型,superset需要从这些数据中知道哪些是数据,哪些是时间,哪些又可以被归类,为此我们需要编辑此Table中的数据:
点击Edit Table 进入编辑界面,首先更改Detail中的 Offset为8,代表时区与UTC差别为8:
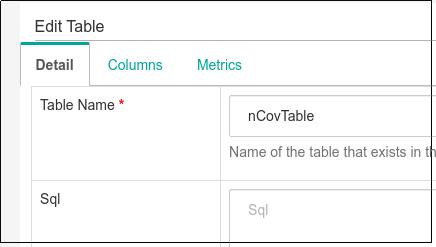
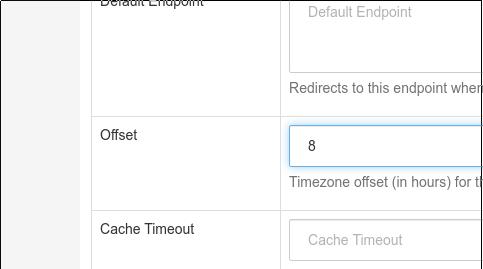
而后开始编辑 Columns, 相关属性说明: groupable 代表是否可以分组; filterable 代表是否可以分类; is temporal 代表是否是时间参数。我们需要把date的type设置为timestamp, 并选取其 is temporal 属性,其他的所有字段的 groupable 及 filterable 都勾上:
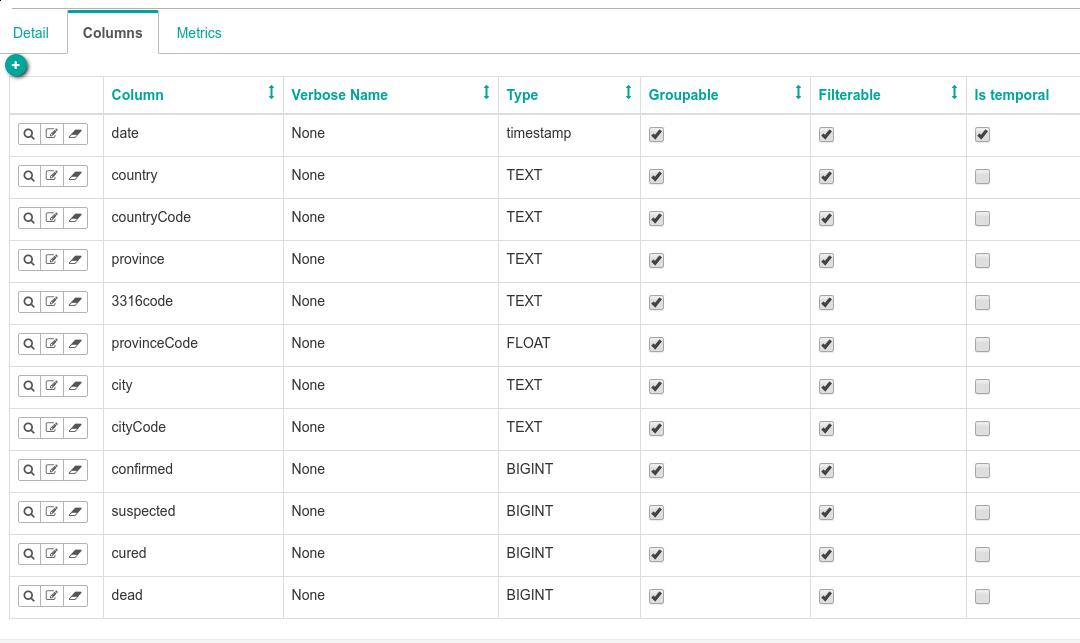
Metrics一栏暂时不做任何设置,至此数据已经清晰化,下一步进入数据分析环节.
数据分析
点击 Sources -> Tables ,选中我们刚才上传的CSV文件建立的表后,进入到数据可视化编辑界面,初次进入时界面是完全空白的,我们需要在这里添加相关图表。
中国地图
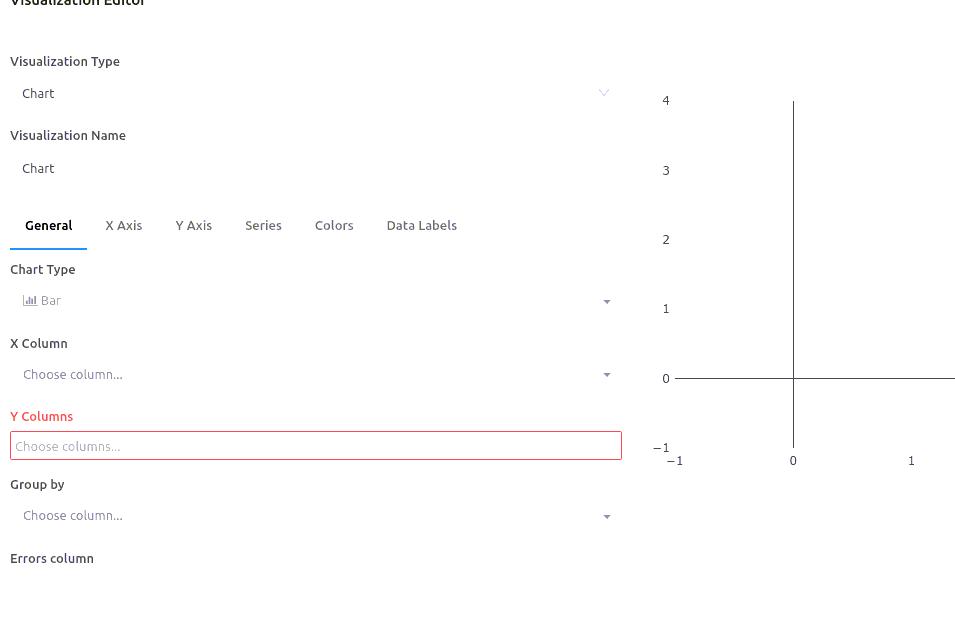
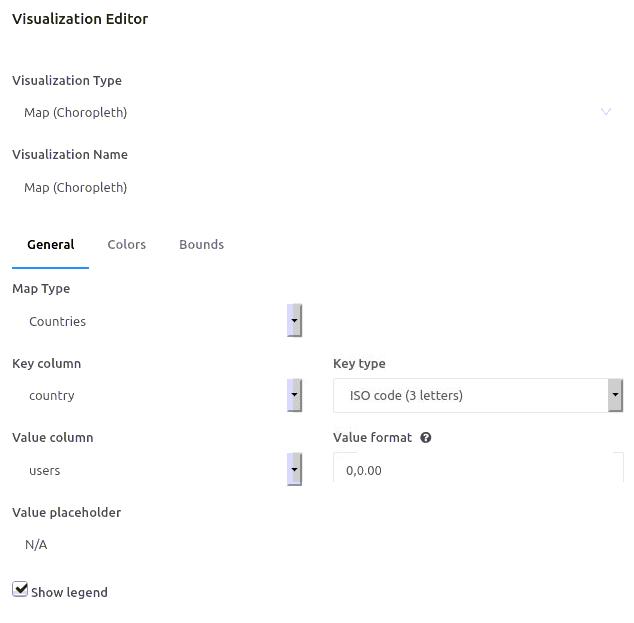
点击 Visualization Type, 选择 Country Map:
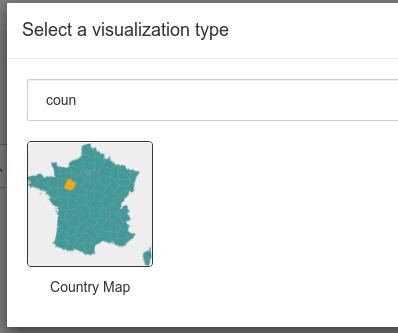
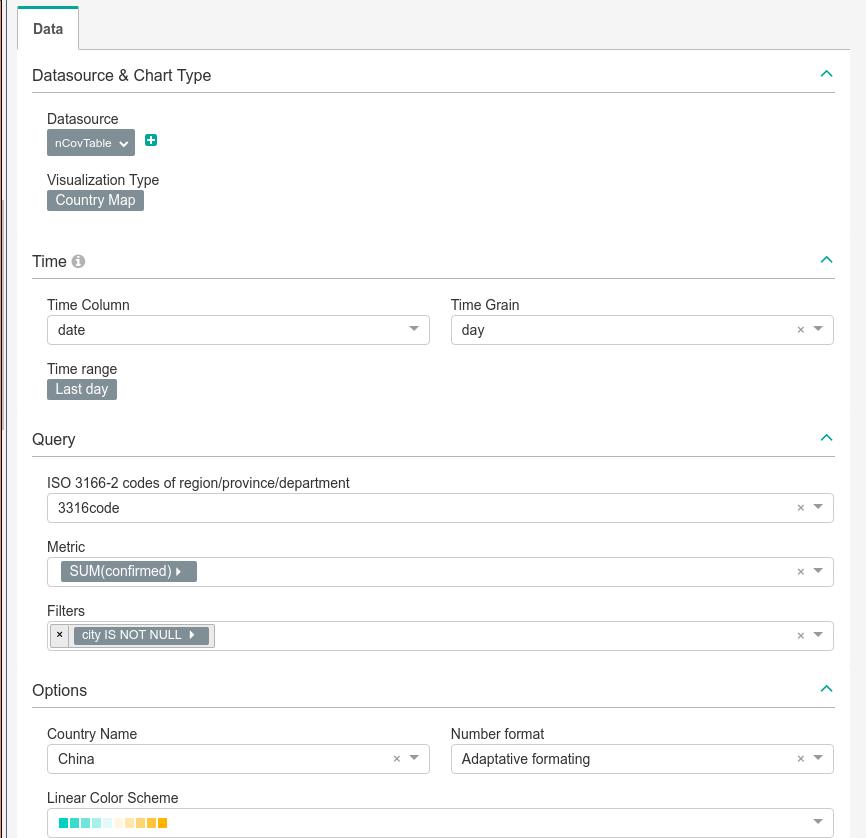
选择为以下值时候,运行 Run Query:
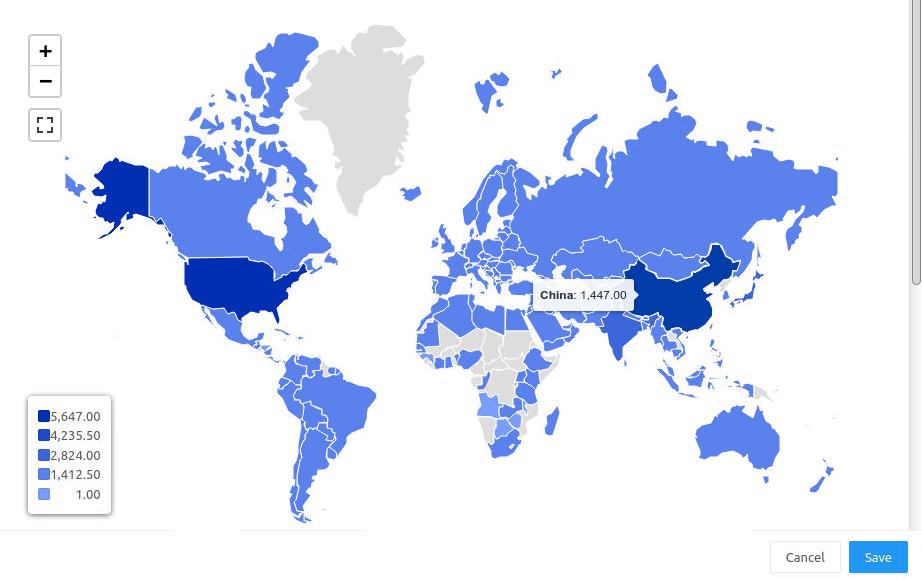
结果如下,比如,选择甘肃,可以看到累计的确诊人数为127人:
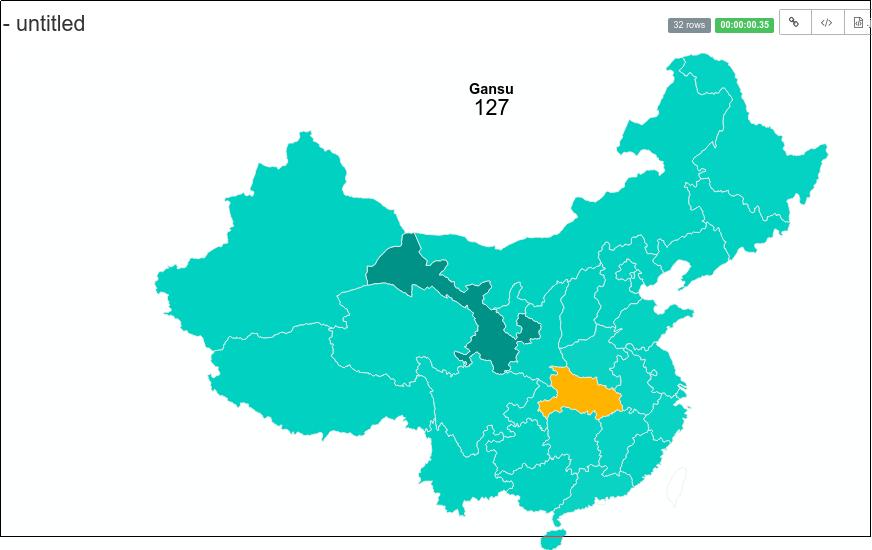
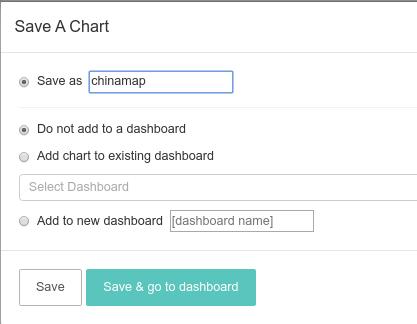
编辑完后,点击save即可保存,我们保存为chinamap:
时间线地图
建立一个类型为 Line Charts的图表,数据类型如下:
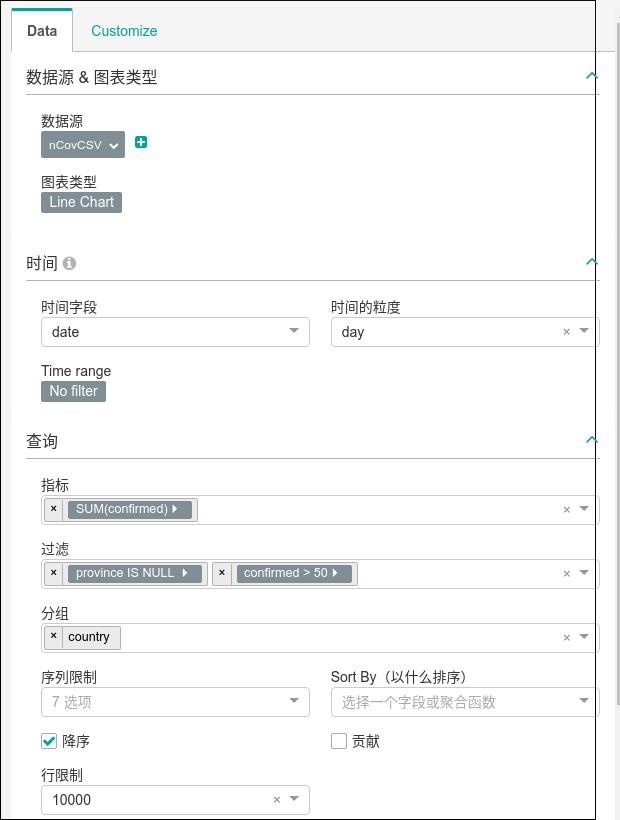
结果如下:
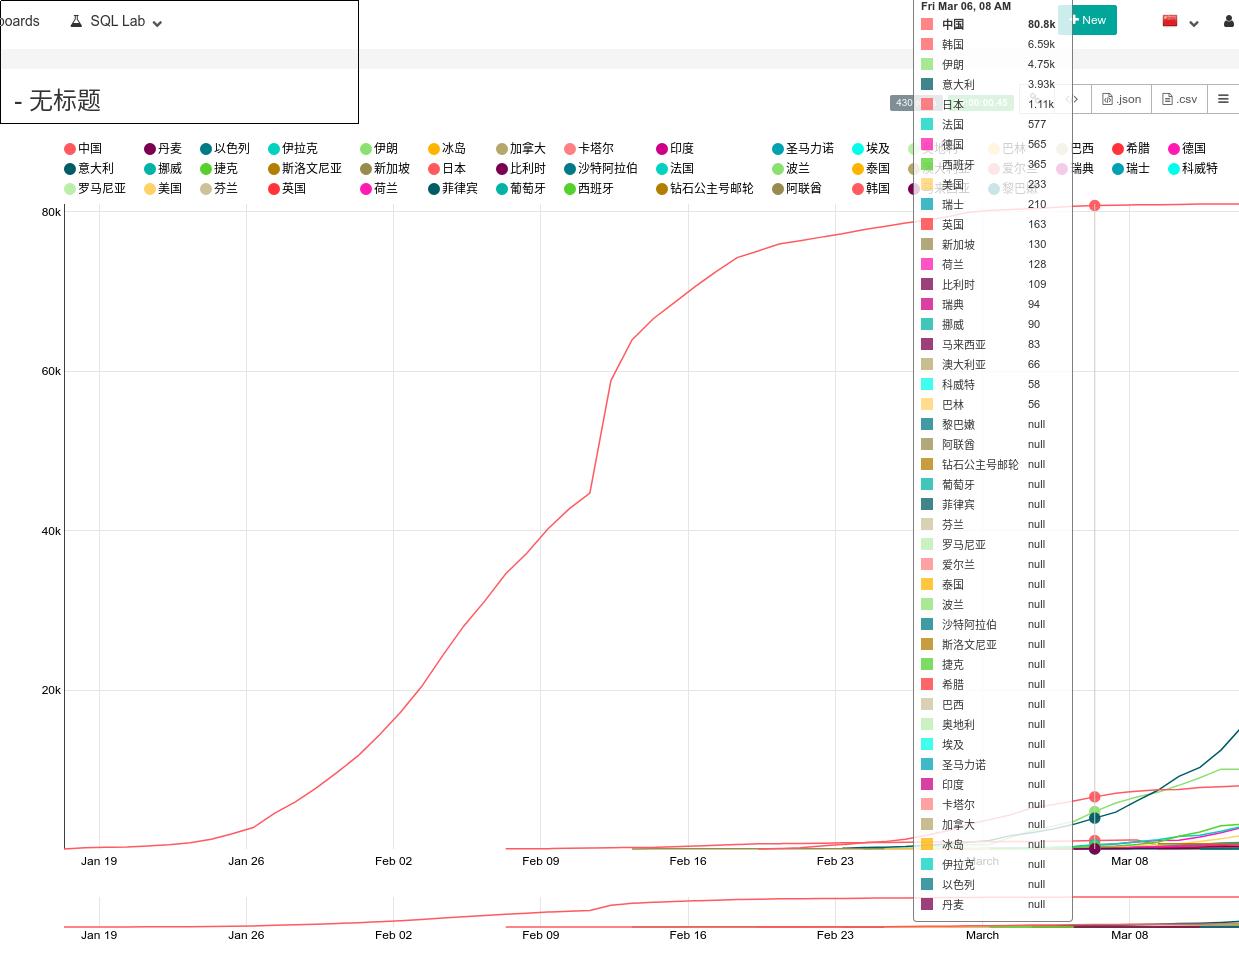
保存名称为 Trend.
sunburst类型
数据类型如下:
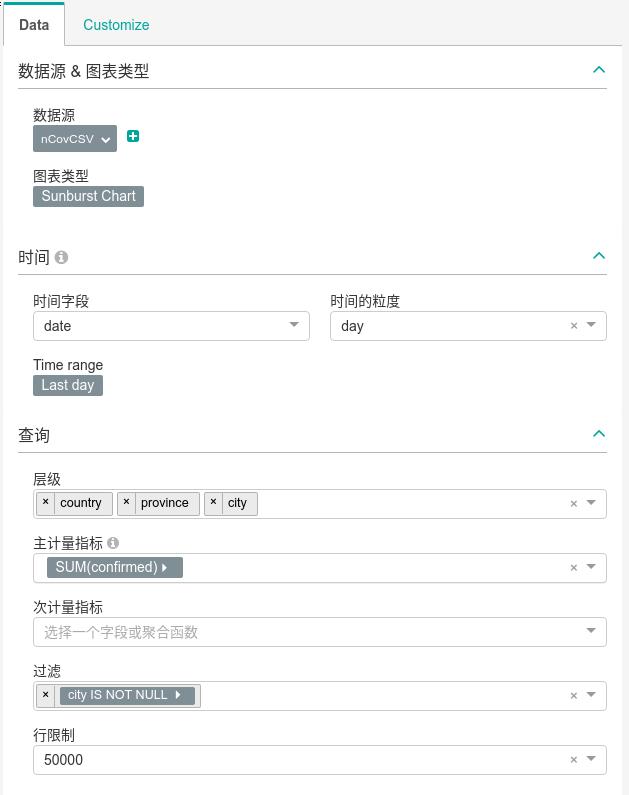
结果:
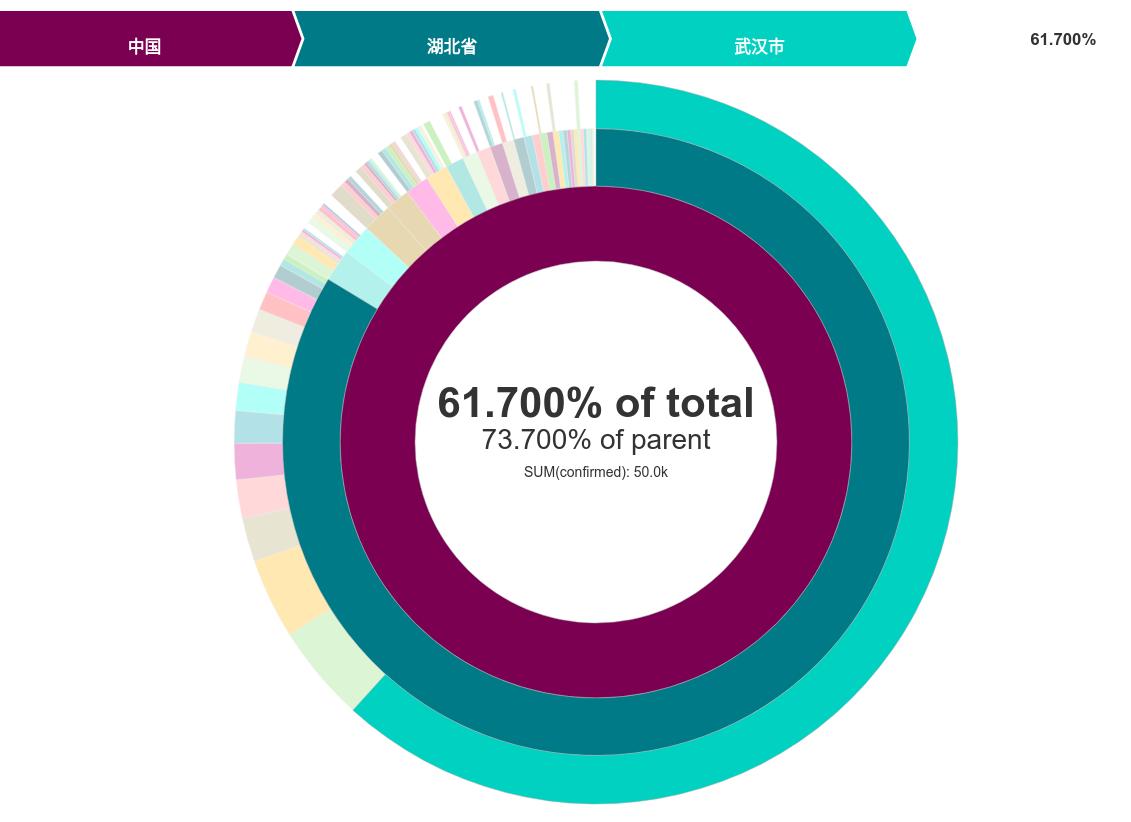
保存名称为 SunburstChina
ForceDirected类型
数据定义如下:
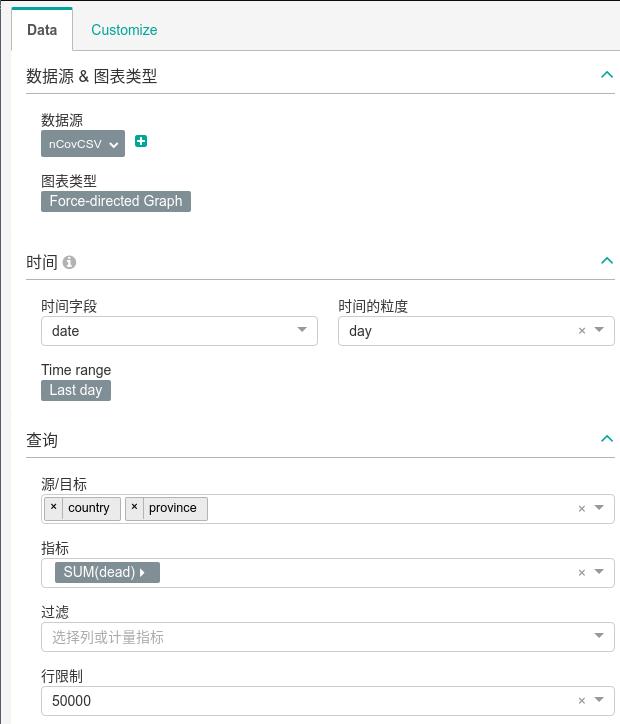
结果:

保存名称为: totalDead.
至此所有的单图表创建完毕.
Dashboard
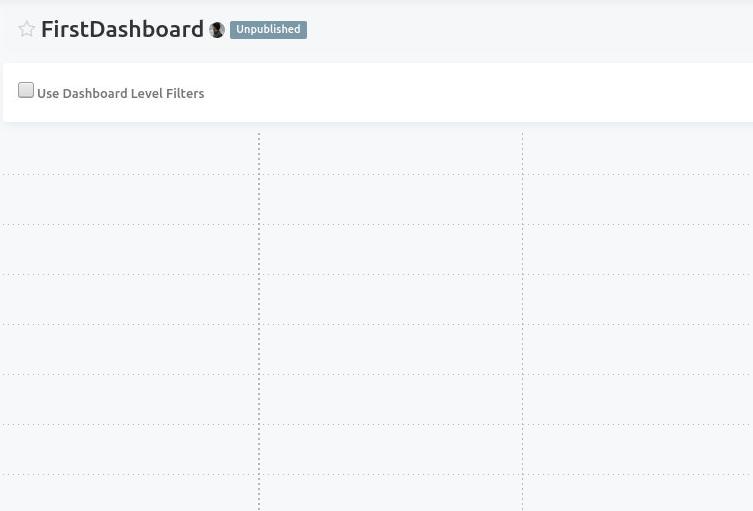
增加一个Dashboard:
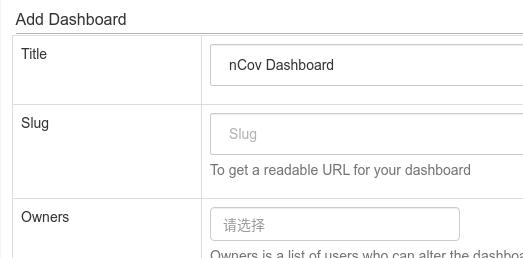
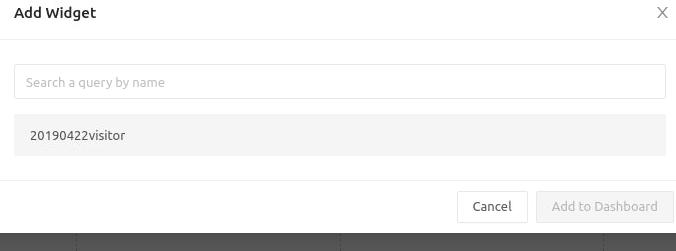
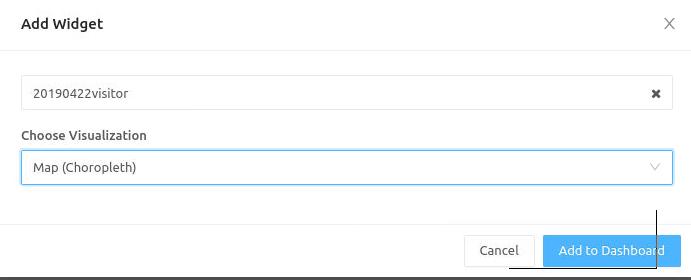
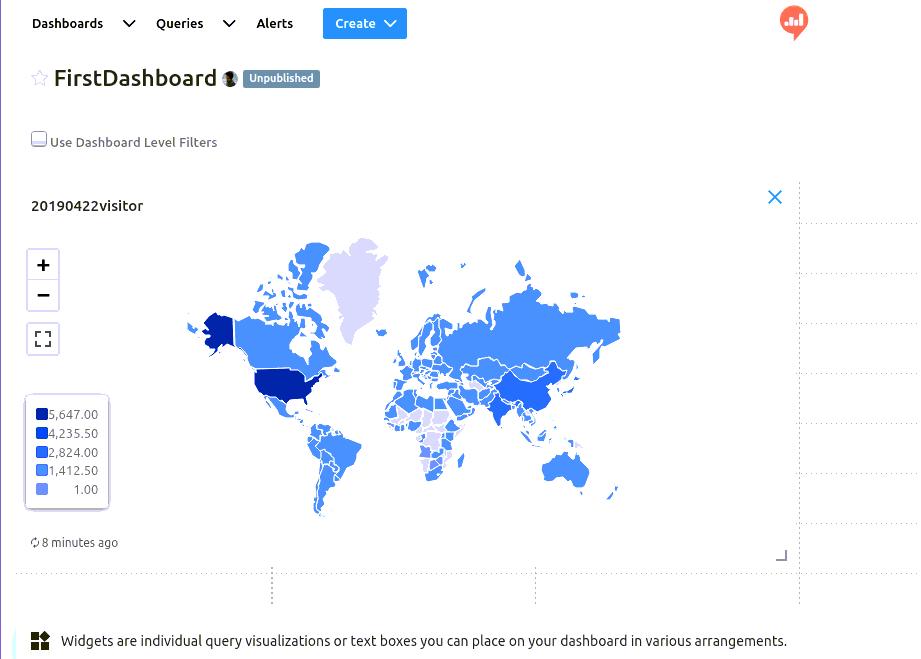
点击Edit,添加对应的图表到该dashboard上即可:
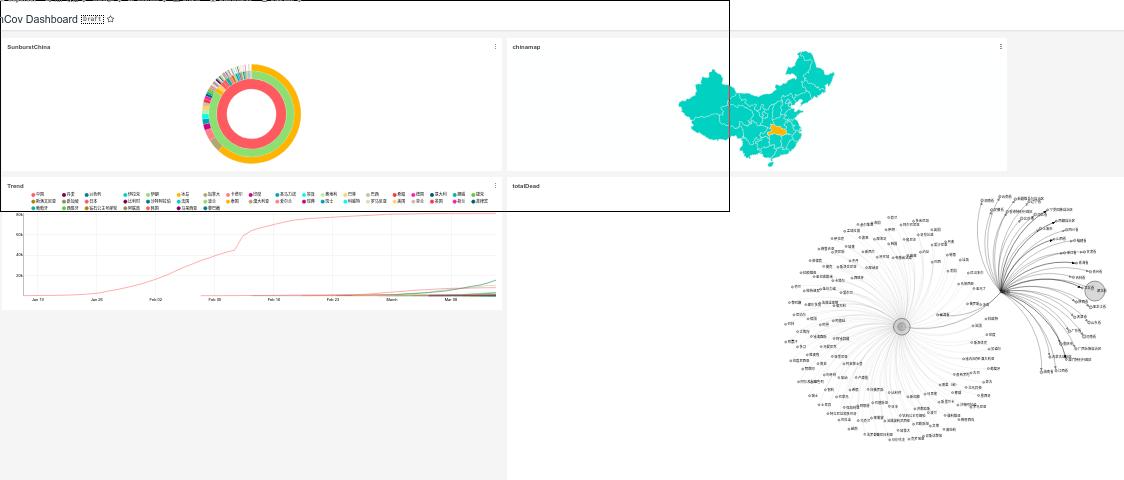
至此,可视化完毕,可以探索更多的样例做出更多的可视化效果。
Feb 29, 2020
LinuxTips1. docker exec with root
Via following commands:
$ sudo docker exec -it --workdir /root --user root 1e61b0cce4f2 bash
2. vncserver for ubuntu18.04
Install xfce4 and tigervnc-server:
# sudo apt-get install -y tigervnc-standalone-server tigervnc-common xfce4
But now you won’t access the vnc desktop, cause the default setting is only listening on 127.0.0.1:
# netstat -anp | grep 5901
tcp        0      0 127.0.0.1:5901          0.0.0.0:*               LISTEN      59902/Xtigervnc
tcp6       0      0 ::1:5901                :::*                    LISTEN      59902/Xtigervnc
Edit the vnc.conf file add set the listening port not to localhost, then setup
the xstartup files:
# sudo vim /etc/vnc.conf
Default: $localhost = "no";  # Otherwise

# sudo vim ~/.vnc/xstartup
    #!/bin/sh
    unset SESSION_MANAGER
    unset DBUS_SESSION_BUS_ADDRESS
    exec startxfce4
# vncserver
Now open your favorate vnc viewer for connecting the remote desktop.
3. bundle use aliyun
Via following:
# bundle config 'mirror.https://rubygems.org' 'https://ruby.taobao.org'
4. netplan bridge setting
Via following:
# vim /etc/netplan/01-netcfg.yaml
# This file describes the network interfaces available on your system
# For more information, see netplan(5).
#
network:
  version: 2
  renderer: networkd
  ethernets:
    enakkkc2i2:
      dhcp4: no
  bridges:
    br0:
      dhcp4: no
      addresses: [ 192.168.190.167/24 ]
      gateway4: 192.168.190.254
      nameservers:
          addresses:
              - "192.168.190.254"
      interfaces:
        - enakkkc2i2
#network:
#  version: 2
#  renderer: networkd
#  ethernets:
#    enakkkc2i2:
#      addresses: [ 192.168.190.167/24 ]
#      gateway4: 192.168.190.254
#      nameservers:
#          addresses:
#              - "192.168.190.254"
5. shrink lvm volume(not for xfs)
CentOS7 installation with root only 50GB, shrink:
umount /dev/mapper/centos-home
lvreduce -L 200G /dev/mapper/centos-home
Mount back your home partition as you're done with it.

Then just extend your root volume.

lvextend -t -r -l+100%FREE /dev/mapper/centos-root
-t is test, if it's ok just run the command a second time without -t
6. dd times
It takes around 8 hours to copy to img files.
➜  ~ sudo dd if=/dev/sdc | gzip -c > /media/sda/kylin_fuck.img
1953525167+0 records in
1953525167+0 records out
1000204885504 bytes (1.0 TB, 932 GiB) copied, 28336.5 s, 35.3 MB/s
➜  ~ python
Python 2.7.17 (default, Nov  7 2019, 10:07:09)
[GCC 7.4.0] on linux2
Type "help", "copyright", "credits" or "license" for more information.
>>> 28336/60
472
>>>
And its size if not so large:
➜  ~ ls -l -h /media/sda/kylin_fuck.img
-rw-r--r-- 1 dash dash 4.3G 3月  18 01:48 /media/sda/kylin_fuck.img
7. alpine china repository
Fuck the GFW:
# sed -i 's/dl-cdn.alpinelinux.org/mirrors.ustc.edu.cn/g' /etc/apk/repositories
8. metrci-server always restart
for cpu/memory is low(vm cases), enlarge them:
metrics_server_cpu: 400m
metrics_server_memory: 350Mi
metrics_server_memory_per_node: 40Mi
metrics_server_min_cluster_size: 5
addon_resizer_limits_cpu: 200m
addon_resizer_limits_memory: 600Mi
addon_resizer_requests_cpu: 50m
addon_resizer_requests_memory: 500Mi
9. ssh passwordless configuration
Configure ssh login without input password:
Check that your Centos machine has:

RSAAuthentication yes
PubkeyAuthentication yes
in sshd_config

and ensure that you have proper permission on the centos machine's ~/.ssh/ directory.

chmod 700 ~/.ssh/
chmod 600 ~/.ssh/*
should do the trick.
10. Tasksmax limitation
The TasksMax Systemd/Linux feature can cause various operational issues related to creating new processes including failures starting containers and failures setting up iptables rules for running containers. Customers affected by this issue will observe that the Docker daemon is unable to create more processes than the TasksMax configured limit.
Refers to :
https://success.docker.com/article/how-to-reserve-resource-temporarily-unavailable-errors-due-to-tasksmax-setting
systemctl set-property docker.service TasksMax=infinity
systemctl daemon-reload
systemctl restart docker
11. bluetooth for verveBuds 115
On Archlinux, do following:
# sudo pacman -S alsa-utils alsa-plugins alsa-tools bluez bluez-utils bluez-libs
pulseaudio blueman bluez-hid2hci pulseaudio-bluetooth audacious
# vim /etc/pulse/default.pa (Add following lines)
load-module module-switch-on-connect
# vim /etc/pulse/system.pa (Add following lines)
load-module module-bluetooth-policy
load-module module-bluetooth-discovery
Restart the bluetooth service:
# systemctl restart bluetooth
# pluseaudio -k
# pluseaudio --start
Blueman setup:
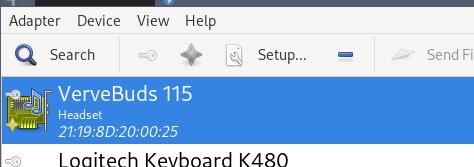
In audacious, select the output for pulseaudio.
12. untaint kube-master
via :
kubectl taint nodes --all node-role.kubernetes.io/master-
13. docker-compose down one svc
Via:
# docker-compose rm -f -s -v ui
# docker-compose up -d
14. es logs
via:
# curl http://172.18.0.5:9200/_cat/indices
yellow open ko-log-2020.04  FQxfXJ0ASXid36DN_TiziA 1 1   0 0    283b    283b
yellow open ououojjj-2020.4 oBcDjztES_C1JFHhMK23JQ 1 1 830 0 312.3kb 312.3kb
$ curl http://172.18.0.5:9200/ko-log-2020.04/_count?pretty
{
  "count" : 0,
  "_shards" : {
    "total" : 1,
    "successful" : 1,
    "skipped" : 0,
    "failed" : 0
  }
}
15. include ansible roles
via:
---
- import_playbook: 0_preinstall/init.yml

- import_playbook: 1_k8s/cluster.yml

- import_playbook: 2_addons/addons.yml
16. pool define in virsh
via following commands:
sudo virsh pool-define-as nvme --type dir --target /media/nvme
sudo virsh pool-start nvme
sudo virsh pool-autostart nvme
20. 20.04 vagrant issue
Should install ifupdown for letting vagrant working.
21. write inventory
            with open('/tmp/clusterinventory.yaml', 'w+') as f:
                f.write( str(self.project.inventory_obj.parse_resource()) )
Error log:
Traceback (most recent call last):
  File "/opt/kubeOperator-api/apps/kubeops_api/models/deploy.py", line 62, in start
    result = self.on_install(extra_vars)
  File "/opt/kubeOperator-api/apps/kubeops_api/models/deploy.py", line 169, in on_install
    return self.run_playbooks(extra_vars)
  File "/opt/kubeOperator-api/apps/kubeops_api/models/deploy.py", line 271, in run_playbooks
    _result = playbook.execute(extra_vars=extra_vars)
  File "/opt/kubeOperator-api/apps/ansible_api/models/playbook.py", line 272, in execute
    result = execution.start()
  File "/opt/kubeOperator-api/apps/ansible_api/models/playbook.py", line 339, in start
    result = runner.run(self.playbook.playbook_path, extra_vars=extra_vars)
  File "/opt/kubeOperator-api/apps/ansible_api/ansible/runner.py", line 248, in run
    self.variable_manager._extra_vars = extra_vars
AttributeError: can't set attribute
22. Duplicated machine
Via following commands we could re-generate the machine id:
rm -f /etc/machine-id
dbus-uuidgen --ensure=/etc/machine-id
rm /var/lib/dbus/machine-id
dbus-uuidgen --ensure
23. Rename files with special characters
rename.sh like following, could rename with the files with 1.mp4, 2.mp4, etc:
var=1
for file in *.mp4
do
	echo "$file"
	echo $var
	mv "$file" $var.mp4
	let "var=var+1"
done
24. tips on kubeoperator package management
Edit file apps/kubeops_api/models/package.py, comment the start container
issue:
line 67 - 71 should be commented
thus you will get your package management online.
25. ss for listening
without netstat, using ss for listening:
# sudo ss -tunlp
25.1. docker-regsitry issue
registry v2.6 depends on musl, install it via:
# apt-get install -y musl
26. ps output wide
via :
# ps -efww
27. install source code pro font
via following script:
#!/usr/bin/env bash
cd Downloads
wget https://github.com/adobe-fonts/source-code-pro/archive/2.030R-ro/1.050R-it.zip
if [ ! -d "~/.fonts" ] ; then
    mkdir ~/.fonts
fi
unzip 1.050R-it.zip
cp source-code-pro-*-it/OTF/*.otf ~/.fonts/
rm -rf source-code-pro*
rm 1.050R-it.zip
cd ~/
fc-cache -f -v
28. Install puppeteer problem
Via:
sudo npm install -g puppeteer --unsafe-perm=true
29. css for layout
Via:
iPadCSS控制横屏/竖屏布局(Landscape/PortraitModes)
30. git tag and push
Via:
 git tag -a v0.4.2 -m "v0.4.2 for ansible v2.9.6"
 git show v0.4.2
 git push origin master --tags
31. indesign
Adobe indesign for creating pdf could get good effects.
32. Tips On rpi ubuntu18.04.4
Via following for getting the packages:
# sudo su
# systemctl stop apt-daily.timer;systemctl disable apt-daily.timer ; systemctl stop apt-daily-upgrade.timer ; systemctl disable apt-daily-upgrade.timer; systemctl stop apt-daily.service;  systemctl mask apt-daily.service; systemctl daemon-reload
# sudo lsof /var/lib/dpkg/lock
# sudo lsof /var/lib/apt/lists/lock
# sudo lsof /var/cache/apt/archives/lock
# sudo kill -9 PID
33. Change default python in ubuntu18.04
# apt-get install python3.7
# update-alternatives --install /usr/bin/python3 python3 /usr/bin/python3.6 1
# update-alternatives --install /usr/bin/python3 python3 /usr/bin/python3.7 2
# update-alternatives --config python3
There are 2 choices for the alternative python3 (providing /usr/bin/python3).

  Selection    Path                Priority   Status
------------------------------------------------------------
* 0            /usr/bin/python3.7   2         auto mode
  1            /usr/bin/python3.6   1         manual mode
  2            /usr/bin/python3.7   2         manual mode
Press <enter> to keep the current choice[*], or type selection number: 2
# update-alternatives --install /usr/bin/python python /usr/bin/python3 10
# python3
Python 3.7.5 (default, Nov  7 2019, 10:50:52)
[GCC 8.3.0] on linux
Type "help", "copyright", "credits" or "license" for more information.
>>>
# python
Python 3.7.5 (default, Nov  7 2019, 10:50:52)
[GCC 8.3.0] on linux
Type "help", "copyright", "credits" or "license" for more information.
>>> quit()
Install correspoding packages:
# apt-get install python3.7-dev python3.7-venv libpython3.7 libpython3.7-dev libpython3.7-dbg
34. upgrade to latest nodejs
Via following methods:
# cnpm install -g n
# n latest
Then you could use ng new Angular8ClientCrud.
# npm install -g @angular/cli
35. python venv
Ubuntu 18.04 install and configure via:
# apt-get install -y python3-virtualenv
# python3 -m venv piya_venv
# source piya_venv/bin/activate
(piya_venv) root@build:~/Code/piya# which python
/root/Code/piya/piya_venv/bin/python
36. nvm
Install nvm via:
$ yaourt nvm
Then
$ echo 'source /usr/share/nvm/init-nvm.sh' >> ~/.zshrc
$ which nvm
...
$ nvm install 10.18.0
then you have nodejs 10.18.0 version.
37. npm install priviledge
Run npm install as root, do following:
$ npm install -g --unsafe-perm
38. dnsmasq leases file
In /var/lib/misc/dnsmasq.leases file, you could see all of the leased ip address.
39. docker pull(other arch)
via:
# docker pull centos:7@sha256:aogwuoguwougowuoguwoeguowugouwg
40. boomaga on archlinux
Install cups and cups-pdf then building:
# sudo pacman -S cups cups-pdf
# sudo systemctl enable org.cups.cupsd.service
# sudo systemctl start org.cups.cupsd.service
# yaourt boomaga
After this time’s yaourt boomaga will be system-wide available.
41. zip with password
via:
# zip -re aaa.zip aaa/
42. vncserver listen only on local
start vncserver via:
alias vncserver='vncserver -localhost'
vncserver
43. nvm tips
Sometips:
→ nvm ls
         v4.5.0
->       v5.9.0
         system
node -> stable (-> v5.9.0) (default)
stable -> 5.9 (-> v5.9.0) (default)
iojs -> N/A (default)
# nvm use v4.5.0
# nvm current
system
# node -v
44. helm tips
helm install from local directory (helm v3):
helm install --generate-name cilium --namespace kube-system --set global.etcd.enabled=true --set global.etcd.managed=true
45. Install hwe
Via following command:
# sudo apt-get install -y linux-generic-hwe-18.04
46. xz and write to sd
via following command:
# xz -d < bone-debian-10.3-iot-armhf-2020-04-06-4gb.img.xz - | dd of=/dev/sdb
47. pikvm 思路
首先是有rpi 3b ,后面买了hdmid dongle和teensy 2.0.
开始玩pikvm后:
- v4l udev调试, 平安
- arduino它用的pro micro, 卒
- platformio更改为teensy,编译不通过,卒
- 看代码发现依赖的HID-Project库不支持teensy,卒
- 看HID-Project说支持HoodLoader2的Uno,希望燃起
- platformio编译uno,卒
- platformio中引入自定义board HoodLoader2atmega16u2, 希望燃起
- 无USB PID/VID,编译终止,卒
9, 强行传入PID/VID, 希望燃起
- TimerOne库不支持atmega16u2, 卒
- 强行定义Timer1管脚,希望燃起
- 编译通过。未上板验证。
接下来:
- 刷HoodLoader2
- 连接RPI+Uno
- 调试(是否可刷入?Timer0是否正常?USB是否被识别?)
问题重重,风险重重
48. Redirect usb to virtualbox
Added via following command:
sudo usermod -aG vboxusers dash
49. Install latest virtualbox
echo "deb https://download.virtualbox.org/virtualbox/debian $(lsb_release -cs) contrib" | sudo tee /etc/apt/sources.list.d/virtualbox.list
Issue:
/root/.platformio/packages/tool-avrdude/avrdude: error while loading shared libraries: /usr/lib/libtinfo.so.5: file too short
Solved by:
sudo ln -s /usr/lib64/libtinfo.so.6 /usr/lib64/libtinfo.so
51. build pkg(Arch)
Via followinig command:
$ cd ~/builds && yaourt -G pkgname && cd $pkgname && makepkg
52. diff/patch
via following commands:
 cd kvmd-1.82-x86
 rm -f ../x86.patch
 diff -Naru ../kvmd-1.82 . > ../x86.patch
 cp -r kvmd-1.82 test
 cd test
 patch -s -p0 < ../x86.patch
53. centos 76 ssh too slow
Edit the /etc/ssh/sshd_config, for:
GSSAPIAuthentication no
UseDNS	no
54. Create md0 in arm64
Via following commands:
# cat /proc/mdstat
# lsblk -o NAME,SIZE,FSTYPE,TYPE,MOUNTPOINT
NAME                SIZE FSTYPE      TYPE MOUNTPOINT
sda               557.9G             disk
├─sda1              512M vfat        part /boot/efi
└─sda2            557.4G LVM2_member part
  ├─vgnode-root   556.4G xfs         lvm  /
  └─vgnode-swap_1   980M swap        lvm
sdb                 3.3T             disk
└─sdb1              3.3T ext4        part
sdc                 3.3T             disk
└─sdc1              3.3T ext4        part
sdd                 3.3T             disk
└─sdd1              3.3T ext4        part
sde                 3.3T             disk
└─sde1              3.3T ext4        part
sdf                 3.3T             disk
└─sdf1              3.3T ext4        part
sdg                 3.3T             disk
└─sdg1              3.3T ext4        part
# parted /dev/sdc
GNU Parted 3.3
Using /dev/sdc
Welcome to GNU Parted! Type 'help' to view a list of commands.
(parted) p
Model: AVAGO HW-SAS3508 (scsi)
Disk /dev/sdc: 3598GB
Sector size (logical/physical): 512B/4096B
Partition Table: gpt
Disk Flags:

Number  Start   End     Size    File system  Name     Flags
 1      1049kB  3598GB  3598GB  ext4         logical  msftdata

(parted) rm 1
(parted) q
Information: You may need to update /etc/fstab.
# parted /dev/sdb
# parted /dev/sdd
# parted /dev/sdf
# parted /dev/sdg
# parted /dev/sde
# lsblk -o NAME,SIZE,FSTYPE,TYPE,MOUNTPOINT
NAME                SIZE FSTYPE      TYPE MOUNTPOINT
sda               557.9G             disk
├─sda1              512M vfat        part /boot/efi
└─sda2            557.4G LVM2_member part
  ├─vgnode-root   556.4G xfs         lvm  /
  └─vgnode-swap_1   980M swap        lvm
sdb                 3.3T             disk
sdc                 3.3T             disk
sdd                 3.3T             disk
sde                 3.3T             disk
sdf                 3.3T             disk
sdg                 3.3T             disk
# mdadm --create --verbose /dev/md0 --level=0 --raid-devices=6 /dev/sdb /dev/sdc /dev/sdd /dev/sde /dev/sdf /dev/sdg
# cat /proc/mdstat
Personalities : [linear] [multipath] [raid0] [raid1] [raid6] [raid5] [raid4] [raid10]
md0 : active raid0 sdg[5] sdf[4] sde[3] sdd[2] sdc[1] sdb[0]
      21078902784 blocks super 1.2 512k chunks

unused devices: <none>
# mkfs.ext4 -F /dev/md0
# mkdir -p /media/md0
# mount /dev/md0 /media/md0
# df -h -x devtmpfs -x tmpfs
# sudo mdadm --detail --scan | sudo tee -a /etc/mdadm/mdadm.conf
# echo '/dev/md0 /mnt/md0 ext4 defaults,nofail,discard 0 0' | sudo tee -a /etc/fstab
55. Nvidia Xorg Howto
Install nvidia from pacman, or nvidia-lts is also ok.
via lspci to detect the graphic card’s BusID:
$ lspci | egrep 'VGA|3D'
00:02.0 VGA compatible controller: Intel Corporation UHD Graphics 630 (Mobile)
01:00.0 VGA compatible controller: NVIDIA Corporation GP106M [GeForce GTX 1060 Mobile] (rev a1)
Edit the xorg.conf file:
$ sudo vim /etc/X11/xorg.conf
Section "Module"                                                      #可能没有,自行添加
    load "modesetting"
EndSection

Section "Device"
    Identifier     "Device0"
    Driver         "nvidia"
    VendorName     "NVIDIA Corporation"
    BusID          "1:0:0"                           #此处填刚刚查询到的BusID
    Option         "AllowEmptyInitialConfiguration"
EndSection
Edit the mkinitcpio.conf:
$ sudo vim /etc/mkinitcpio.conf
MODULES=(intel_agp i915 nvidia nvidia_modeset nvidia_uvm  nvidia_drm)
$ sudo mkinitcpio -P
$ sudo vim /etc/default/grub
GRUB_CMDLINE_LINUX_DEFAULT="loglevel=3 quiet nvidia-drm.modeset=1"
$ sudo grub-mkconfig -o /boot/grub/grub.cfg
$ sudo vim /etc/modprobe.d/nouveau_blacklist.conf
blacklist nouveau
56. go speedup
Via following command, fast:
go env -w GO111MODULE=on
go env -w GOPROXY=https://goproxy.cn,direct
57. dnsmasq leased ip addr
Via cat following files:
/var/lib/misc/dnsmasq.leases
58. lxd cluster
via following commands:
# root@arm-a1:/home/test/focal_desktop# lxd init
Would you like to use LXD clustering? (yes/no) [default=no]: yes
What name should be used to identify this node in the cluster? [default=arm-a1]:
What IP address or DNS name should be used to reach this node? [default=192.192.190.163]:
Are you joining an existing cluster? (yes/no) [default=no]: ys
Invalid input, try again.

Are you joining an existing cluster? (yes/no) [default=no]: yes
IP address or FQDN of an existing cluster node: 192.192.190.165
Cluster fingerprint: 4ce809765a307ee90593495413f0dc919f30b6709e5d9a16275fac8e66b407c5
You can validate this fingerprint by running "lxc info" locally on an existing node.
Is this the correct fingerprint? (yes/no) [default=no]: yes
Cluster trust password:
All existing data is lost when joining a cluster, continue? (yes/no) [default=no] yes
Choose "source" property for storage pool "local":
Would you like a YAML "lxd init" preseed to be printed? (yes/no) [default=no]:
root@arm-a1:/home/test/focal_desktop#
59. lxc issue
for installing kubernetes in lxc, should not change the conntrack parameters!:
kube_proxy_conntrack_max: 0
kube_proxy_conntrack_max_per_core: 0
60. svn working tips
In intra-net working like:
$ export LC_ALL=zh_CN.UTF-8
$ svn co --username=xxxx --password=xxxx123 https://192.192.xxx.xxx/svn/trunk/xxxx/cloud
$ cd cloud
$ svn add xxxx.zip yyyy.zip
$ svn ci -m "Added new release files in 20200925"
$  svn add --force * --auto-props --parents --depth infinity -q
$ svm commit -m 'Adding more file'
61. pdf to png
via following command you could convert pdf to pngs and cut its margin:
pdftoppm Rong.pdf B2 -png -x 110 -y 65 -W 1050 -H 1500
62. Manually update time
Via:
ntpd -s -d
63. Manually delete journal
Manually delete journals thus the size if under 100M:
# journalctl --vacuum-size=100M
Clean logs before 2 weeks:
# journalctl --vacuum-time=2weeks
64. Specify ssh exchange method
issue:
no matching key exchange method found. Their offer: diffie-hellman-group1-sha1 while accessing the TEA shell from ssh client
Solution:
# ssh -oKexAlgorithms=+diffie-hellman-group1-sha1 root@xxx.xxx.xxx.xx
65. vxlan tips
Via:
  ip link add vxlan0 type vxlan id 1 group 239.1.1.1 dstport 4789 dev enp130s0f1
 bridge fdb append to 00:00:00:00:00:00 dst 192.192.xxx.xx7 dev vxlan0
 bridge fdb append to 00:00:00:00:00:00 dst 192.192.xxx.xx9 dev vxlan0
ip addr add 10.0.0.7/24 dev vxlan0
brctl addbr br-kkk
ip link set br-kkk up
brctl addif br-kkk vxlan0
66. Repair 127 server’s disk
Centos7, /dev/mapper/cl-root, repair via using a livecd bootup the server then in terminal input:
$ sudo xfs_repair -L /dev/mapper/cl-root
67. vxlan
Via:
ip link add vxlan0 type vxlan id 42 dstport 4789 local 192.192.ddd.ddd dev br0 group 224.1.1.1
ip link add br-vxlan0 type bridge
ip link set vxlan0 master br-vxlan0
ip link add vrf0 type vrf table 10
ip link set br-vxlan0 master vrf0
ip link set vxlan0 up
ip link set br-vxlan0 up
ip link set vrf0 up
68. rc.local in centos7
Via following method you could make /etc/rc.local working:
chmod +x /etc/rc.d/rc.local
systemctl enable rc-local
systemctl start rc-local
systemctl status rc-local
69. archlinux byobu issue
When running byobu we got following issues:
tmux: need UTF-8 locale (LC_CTYPE) but have ANSI_X3.4-1968
solved via:
# sudo vim /etc/locale.gen
# locale-gen
# sudo localectl set-locale LANG=en_CA.UTF-8
### 69.1. Enable sidebar toc of MPE
Setting the Markdown Preview Enhanced setting:
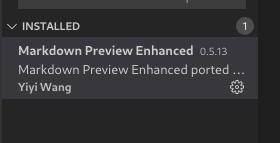

Then you could get the sidebar toc
### 70. Remove docker service(manually)
via:
rm -f /etc/systemd/system/multi-user.target.wants/docker.service
### 71. undo last commit
git undo last commitment via:
git reset –soft HEAD~1
### 72. delete tmp files:
Via find :
find ./ -type f ( -name ‘*.swp’ -o -name ‘~’ -o -name ‘.bak’ -o -name ‘.netrwhist’ ) -delete
### 73. vncviewer without passwd
Generate password:
$ vncpasswd
Using password file /home/user/.vnc/passwd
Password:
Verify:
Would you like to enter a view-only password (y/n)? n
Login with password file:
vncviewer -passwd ~/.vnc/passwd 10.137.149.2:2
### 74. DPMS
Display Power Management Signaling, disable it via:
xset -dpms
Query it via:
xset q
Re-enable it via:
xset +dpms
### 75. ufw open port
via:
$ sudo ufw allow from any to any port 10000 proto tcp
### 76. windows route via net
via:
route -p add 10.17.18.0 MASK 255.255.255.0 192.192.189.128
### 77. view timestamp of pem
via :
openssl x509 -enddate -noout -in keys/admin.pem
notAfter=Feb 11 02:06:00 2020 GMT
### 78. ia32 support
ia32 support in bionic:
$ sudo dpkg –add-architecture i386
$ sudo apt update
$ sudo apt install libc6:i386
### 79. user run docker
via:
sudo usermod -aG docker dash
sudo systemctl restart docker
#relogin dash
### 80. CentOS8 repo
edit centos8 repo using cdrom:
[InstallMedia-BaseOS]
name=CentOS Linux 8 - BaseOS
metadata_expire=-1
gpgcheck=1
enabled=1
baseurl=file:///opt/BaseOS/
gpgkey=file:///etc/pki/rpm-gpg/RPM-GPG-KEY-centosofficial
[InstallMedia-AppStream]
name=CentOS Linux 8 - AppStream
metadata_expire=-1
gpgcheck=1
enabled=1
baseurl=file:///opt/AppStream/
gpgkey=file:///etc/pki/rpm-gpg/RPM-GPG-KEY-centosofficial
### 81. kubeadm 签名问题
查看签名所剩时间并重新更新签名时间:
kubeadm alpha certs check-expiration
kubeadm alpha certs renew all=kubeadm –config=kubeadm-config.yaml
kubeadm alpha certs check-expiration
### 82. kubelet auto approve
via adding:
–rotate-certificates –rotate-server-certificates
my kubelet.config
Environment="KUBELET_ARGS=–rotate-certificates –rotate-server-certificates –cert-dir=/var/lib/kubelet/pki –logtostderr=true –v=3”
### 83. kubeadm check timeout
via:
kubeadm alpha certs check-expiration
### 84. sync time
syn time via ssh :
ssh -o “StrictHostKeyChecking=no” -i .rong/deploy.key root@10.137.149.232 date -s @( date -u +"%s" )
### 85. limit conn per ip via ufw
via following commands:
vim /etc/ufw/before.rules
End required lines
Limit to 5 concurrent connections on port 80 per IP
-A ufw-before-input -p tcp –syn –dport 80 -m connlimit –connlimit-above 5 -j DROP
Limit to 10 connections on port 80 per 3 seconds per IP
-A ufw-before-input -p tcp –dport 80 -i eth0 -m state –state NEW -m recent –set
-A ufw-before-input -p tcp –dport 80 -i eth0 -m state –state NEW -m recent –update –seconds 3 –hitcount 10 -j DROP
allow all on loopback
ufw allow 3333/tcp
ufw enable
### 86. ss setup
via:
docker run -d -p 9000:9000 -p 9000:9000/udp –name ss-libev –restart=always -v /etc/shadowsocks-libev:/etc/shadowsocks-libev teddysun/shadowsocks-libev
ufw allow 9000/udp
ufw allow 9000/tcp
### 87. ufw security vps
via:
sudo ufw default deny outgoing
sudo ufw default deny incoming
sudo ufw allow out 53
sudo ufw allow out http
sudo ufw allow out https
…..
examine:
ufw status verbose
My configuration is:
in: 9345, 22
out: 9345, 80 , 443, 53
### 88. check serve(vm or not)
via dmidecode:
$ sudo dmidecode -s system-manufacturer
Hasee Computer
$ sudo dmidecode -s system-product-name
GJ5CN64
### 89. vagrant mutate box
Before:
vagrant box list
bento/centos-7.6 (virtualbox, 201907.24.0)
generic/ubuntu1804 (virtualbox, 0)
vagrant mutate generic/ubuntu1804 libvirt
After:
vagrant box list
bento/centos-7.6 (virtualbox, 201907.24.0)
generic/ubuntu1804 (libvirt, 0)
generic/ubuntu1804 (virtualbox, 0)
### 90. docker in china
via:
{
“registry-mirrors”: [
“https://docker.mirrors.ustc.edu.cn”,
“http://hub-mirror.c.163.com”
],
“max-concurrent-downloads”: 10,
“log-driver”: “json-file”,
“log-level”: “warn”,
“log-opts”: {
“max-size”: “10m”,
“max-file”: “3”
},
“data-root”: “/var/lib/docker”
}
### 91. Use aliyun for installing docker-ce
via:
step 1: 安装必要的一些系统工具
sudo apt-get update
sudo apt-get -y install apt-transport-https ca-certificates curl software-properties-common
step 2: 安装GPG证书
curl -fsSL https://mirrors.aliyun.com/docker-ce/linux/ubuntu/gpg | sudo apt-key add -
Step 3: 写入软件源信息
sudo add-apt-repository “deb [arch=amd64] https://mirrors.aliyun.com/docker-ce/linux/ubuntu $(lsb_release -cs) stable”
Step 4: 更新并安装Docker-CE
sudo apt-get -y update
sudo apt-get -y install docker-ce
### 92. use aliyun for install docker-ce on rhel7
via:
vi /etc/yum/pluginconf.d/subscription-manager.conf
enabled=0
vi /etc/yum.repos.d/Centos7.repo
[base]
name=CentOS-$releasever - Base - 163.com
#mirrorlist=http://mirrorlist.centos.org/?release=$releasever&arch=$basearch&repo=os
baseurl=http://mirrors.163.com/centos/7/os/$basearch/
gpgcheck=1
gpgkey=http://mirrors.163.com/centos/RPM-GPG-KEY-CentOS-7
#released updates
[updates]
name=CentOS-$releasever - Updates - 163.com
#mirrorlist=http://mirrorlist.centos.org/?release=$releasever&arch=$basearch&repo=updates
baseurl=http://mirrors.163.com/centos/7/updates/$basearch/
gpgcheck=1
gpgkey=http://mirrors.163.com/centos/RPM-GPG-KEY-CentOS-7
#additional packages that may be useful
[extras]
name=CentOS-$releasever - Extras - 163.com
#mirrorlist=http://mirrorlist.centos.org/?release=$releasever&arch=$basearch&repo=extras
baseurl=http://mirrors.163.com/centos/7/extras/$basearch/
gpgcheck=1
gpgkey=http://mirrors.163.com/centos/RPM-GPG-KEY-CentOS-7
#additional packages that extend functionality of existing packages
[centosplus]
name=CentOS-$releasever - Plus - 163.com
baseurl=http://mirrors.163.com/centos/7/centosplus/$basearch/
gpgcheck=1
enabled=0
gpgkey=http://mirrors.163.com/centos/RPM-GPG-KEY-CentOS-7
sudo yum install -y yum-utils device-mapper-persistent-data lvm2
sudo yum makecache fast
sudo yum -y install docker-ce
###  93. gem sources
Use china repository:
gem sources –add https://mirrors.tuna.tsinghua.edu.cn/rubygems/ –remove https://rubygems.org/
Examine via:
gem sources -l
*** CURRENT SOURCES ***
https://mirrors.tuna.tsinghua.edu.cn/rubygems/
### 94. zip with folder
via:
zip -r archivename.zip directory_name
### 95. helm issues
For repository has been changed:
mkdir tmp
cd tmp/
helm pull incubator/sparkoperator
ls
sparkoperator-0.8.6.tgz
Transfer the tgz to k8s system, install via:
tar xzvf sparkoperator-0.8.6.tgz
cd sparkoperator
helm install –namespace spark-operator –set enableBatchScheduler=true –set enableWebhook=true .
kubectl get pods –all-namespaces
kubectl get pods -n spark-operator
NAME READY STATUS RESTARTS AGE
brown-joey-sparkoperator-87868577f-68cts 0/1 ContainerCreating 0 67s
brown-joey-sparkoperator-webhook-init-85ndb 0/1 ErrImagePull 0 67s
### 96. codeblock in mardkown preview enhanced
换行:
F1 => Markdown Preview Enhanced : Customize CSS
Then, in the style.less:
.markdown-preview.markdown-preview {
pre, code {
white-space: pre-wrap;
}
}
should enable wrapping for code blocks.
### 97. startup timeout
problem:
A start Job is running for sys-devices-virtual-mis-vmbus\x21hv_kvp.devices
via:
systemctl disable hv-kvp-daemon.service
### 98. landscape info
via following command we could get landscape info:
landscape-sysinfo
System load: 1.48 Temperature: 66.7 C
Usage of /: 8.9% of 27.91GB Processes: 134
Memory usage: 7% Users logged in: 1
Swap usage: 0% IPv4 address for eth0: 192.168.1.191
6178707df429ac1cc84f27a300e54265b6bad107
