Nov 9, 2020
Technology今天来看看如何使用Angular CLI集成Clarity。
Clarity是什么?官方介绍如下:
Project Clarity是一个开源的设计系统,它汇集了UX准则,HTML/CSS框架和Angular 2组件。 Clarity适用于设计人员和开发人员。
1. 先决条件
本指南需要Angular CLI全局安装, 使用以下命令安装最新版本的angular:
$ npm install -g @angular/cli@latest
2. 创建新项目
现在ng命令应当是可用的, 我们使用ng new命令来创建一个新的Angular CLI项目:
$ ng new myclarity
在弹出的选项中默认回车接受预设选项,此命令运行完毕后我们将得到一个myclarity的目录, 进入到此目录下运行ng serve,我们将得到标准的angular项目预览页.
$ cd myclarity
$ ng serve
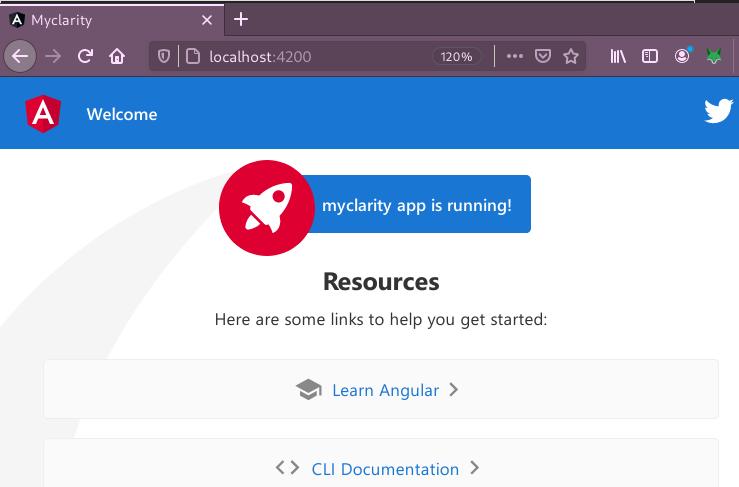
3. 安装Clarity依赖
要使用Clarity,我们需要使用npm命令安装包及其依赖:
$ npm install @clr/core @clr/icons @clr/angular @clr/ui @webcomponents/webcomponentsjs --save
$ npm install --save-dev clarity-ui
$ npm install --save-dev clarity-icons
4. 添加脚本及样式
添加以下条目到angular.json文件的scripts及styles部分:
"styles": [
      "node_modules/@clr/icons/clr-icons.min.css",
      "node_modules/@clr/ui/clr-ui.min.css",
      ... any other styles
],
"scripts": [
  ... any existing scripts
  "node_modules/@webcomponents/webcomponentsjs/custom-elements-es5-adapter.js",
  "node_modules/@webcomponents/webcomponentsjs/webcomponents-bundle.js",
  "node_modules/@clr/icons/clr-icons.min.js"
]
更改完毕后的angular.json文件(共有4处需要修改)看起来应当是:

5. 添加Angular模块
到现在为止,包依赖都被安装并配置好了,我们可以开始进入到Angular AppModule来配置Clarity模块,配置完模块后我们就可以在应用中使用Clarity。
打开src/app/app.module.ts文件,在文件头部添加以下依赖:
import { NgModule } from '@angular/core';
import { BrowserModule } from "@angular/platform-browser";
import { BrowserAnimationsModule } from "@angular/platform-browser/animations";
import { ClarityModule } from "@clr/angular";
import { AppComponent } from './app.component';
这将告诉TypeScript从clarity-angular包中加载模块。要使用包我们需要在@NgModule的import变量中添加以下行:
  imports: [
    BrowserModule,
    BrowserAnimationsModule,
    ClarityModule
  ],
到现在为止,基础配置已经完成。运行ng serve将看到app显示已经运行。
6. 使用Clarity
6.1 生成UI模块及组件
Clarity是一个相当高级的框架,可以快速创建出完整的用户界面。现在我们开始设定一些UI元素。
为了快速创建出UI目录结构,我们使用ng generate命令,或者简写的ng g命令:
# 创建ui模块
$ ng g m ui
CREATE src/app/ui/ui.module.ts (188 bytes)

# 创建layout(布局)组件
$  ng g c ui/layout -is -it  --skipTests=true
CREATE src/app/ui/layout/layout.component.ts (265 bytes)
UPDATE src/app/ui/ui.module.ts (264 bytes)

# 创建header, sidebar及main view 组件
$ ng g c ui/layout/header -is -it --skipTests=true
CREATE src/app/ui/layout/header/header.component.ts (265 bytes)
UPDATE src/app/ui/ui.module.ts (349 bytes)
$ ng g c ui/layout/sidebar -is -it --skipTests=true
CREATE src/app/ui/layout/sidebar/sidebar.component.ts (268 bytes)
UPDATE src/app/ui/ui.module.ts (438 bytes)
$ ng g c ui/layout/main -is -it --skipTests=true
CREATE src/app/ui/layout/main/main.component.ts (259 bytes)
UPDATE src/app/ui/ui.module.ts (515 bytes)
上述命令ng g使用的参数含义如下:
-is 使用inline样式替代独立的CSS文件。
-it 使用inline模板替代独立的html文件。
--skipTests=true 不生成用于测试的spec文件。
当前创建出的目录架构如下:
$ tree src/app/ui
src/app/ui
├── layout
│   ├── header
│   │   └── header.component.ts
│   ├── layout.component.ts
│   ├── main
│   │   └── main.component.ts
│   └── sidebar
│       └── sidebar.component.ts
└── ui.module.ts

4 directories, 5 files
要在app中使用刚才这些创建的模块我们需要在AppModule中引入UiModule, 编辑src/app/app.module.ts,添加以下的import声明语句:
import { UiModule } from './ui/ui.module';
在@NgModule部分的imports数组中添加UiModule。
因为我们需要在UiModule中使用Clarity,我们同样需要在ui的相关文件下添加它们。打开src/app/ui/ui.module.ts文件,添加以下import声明:
import { ClarityModule } from "@clr/angular";
import { BrowserAnimationsModule } from "@angular/platform-browser/animations";
在@NgModule部分的imports数组中添加ClarityModule。
最后需要在UiModule中添加一个exports数组,将LayoutModule导出,因为我们需要在AppComponent中使用它。
  imports: [
    CommonModule,
    ClarityModule
  ],
    exports: [
    LayoutComponent,
  ]
UiModule现在看起来是这样的:
import { NgModule } from '@angular/core';
import { CommonModule } from '@angular/common';
import { LayoutComponent } from './layout/layout.component';
import { HeaderComponent } from './layout/header/header.component';
import { SidebarComponent } from './layout/sidebar/sidebar.component';
import { MainComponent } from './layout/main/main.component';

import { ClarityModule } from "@clr/angular";
import { BrowserAnimationsModule } from "@angular/platform-browser/animations";

@NgModule({
  declarations: [LayoutComponent, HeaderComponent, SidebarComponent, MainComponent],
  imports: [
    CommonModule,
    ClarityModule
  ],
    exports: [
    LayoutComponent,
  ]
})
export class UiModule { }
6.2 撰写并创建UI组件
6.2.1 AppComponent
我们一开始来更新AppComponent的模板文件,打开src/app/app.component.html文件,将内容替换为:
<app-layout>
  <h1>{{title}}</h1>
</app-layout>
这里我们通过选择app-layout引用了LayoutComponent.
6.2.2 LayoutComponent
打开src/app/ui/layout/layout.component.ts文件,替换template部分为以下内容:
   <div class="main-container">
    <app-header></app-header>
    <app-main>
      <ng-content></ng-content>
    </app-main>
  </div>
我们在div main-container中包装了我们的内容,引用了HeaderComponent和MainComponent, 在MainComponent中,我们包含了app内容,使用的是ng-content组件。
打开src/app/ui/layout/header/header.component.ts文件,更新模板:
   <header class="header-1">
    <div class="branding">
      <a class="nav-link">
        <clr-icon shape="shield"></clr-icon>
        <span class="title">Angular CLI</span>
      </a>
    </div>
    <div class="header-nav">
      <a class="active nav-link nav-icon">
        <clr-icon shape="home"></clr-icon>
      </a>
      <a class=" nav-link nav-icon">
        <clr-icon shape="cog"></clr-icon>
      </a>
    </div>
    <form class="search">
      <label for="search_input">
        <input id="search_input" type="text" placeholder="Search for keywords...">
      </label>
    </form>
    <div class="header-actions">
      <clr-dropdown class="dropdown bottom-right">
        <button class="nav-icon" clrDropdownToggle>
          <clr-icon shape="user"></clr-icon>
          <clr-icon shape="caret down"></clr-icon>
        </button>
        <div class="dropdown-menu">
          <a clrDropdownItem>About</a>
          <a clrDropdownItem>Preferences</a>
          <a clrDropdownItem>Log out</a>
        </div>
      </clr-dropdown>
    </div>
  </header>
  <nav class="subnav">
    <ul class="nav">
      <li class="nav-item">
        <a class="nav-link active" href="#">Dashboard</a>
      </li>
      <li class="nav-item">
        <a class="nav-link" href="#">Projects</a>
      </li>
      <li class="nav-item">
        <a class="nav-link" href="#">Reports</a>
      </li>
      <li class="nav-item">
        <a class="nav-link" href="#">Users</a>
      </li>
    </ul>
  </nav>
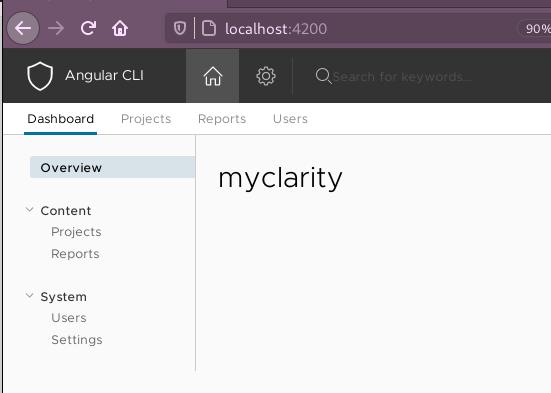
代码有点长,我们解释如下:
- 定义了一个
header-1的头. - branding由icon和title构成。
- 两个header icon, Home/Settings。
- search box,placeholder文字。
- user icon, 含有3个item的下拉列表。
- sub navigation,含有4个链接。
6.2.4 MainComponent
差不多快完成了,我们打开src/app/ui/layout/main/main.component.ts更新以下模板内容:
  <div class="content-container">
    <div class="content-area">
      <ng-content></ng-content>
    </div>
    <app-sidebar class="sidenav"></app-sidebar>
  </div>
在这个组件中我们将sidebar及内容模块封装在div中,该div名为content-container.
在接下来的app-sidebar选择器中我们创建了另一个div,名为content-area, 这是app的主要内容所展示的地方,我们使用内建的ng-content组件用于包装它。
最后一步了! 我们打开src/ap/ui/layout/sidebar/sidebar.component.ts文件,更新以下模板:
    <nav>
    <section class="sidenav-content">
      <a class="nav-link active">Overview</a>
      <section class="nav-group collapsible">
        <input id="tabexample1" type="checkbox">
        <label for="tabexample1">Content</label>
        <ul class="nav-list">
          <li><a class="nav-link">Projects</a></li>
          <li><a class="nav-link">Reports</a></li>
        </ul>
      </section>
      <section class="nav-group collapsible">
        <input id="tabexample2" type="checkbox">
        <label for="tabexample2">System</label>
        <ul class="nav-list">
          <li><a class="nav-link">Users</a></li>
          <li><a class="nav-link">Settings</a></li>
        </ul>
      </section>
    </section>
  </nav>
到现在为止clarity驱动的UI应该已经就绪,效果如下图:
7. 随便玩
7.1 添加导航页面
添加pages模块及导航分页:
$ ng g m pages
$ ng g c pages/dashboard -is -it --skipTests=true
$ ng g c pages/posts -is -it --skipTests=true
$ ng g c pages/settings -is -it --skipTests=true
$ ng g c pages/todos -is -it --skipTests=true
$ ng g c pages/users -is -it --skipTests=true
查看当前目录结构:
$ tree src/app
src/app
├── app.component.css
├── app.component.html
├── app.component.spec.ts
├── app.component.ts
├── app.module.ts
├── pages
│   ├── dashboard
│   │   └── dashboard.component.ts
│   ├── pages.module.ts
│   ├── posts
│   │   └── posts.component.ts
│   ├── settings
│   │   └── settings.component.ts
│   ├── todos
│   │   └── todos.component.ts
│   └── users
│       └── users.component.ts
└── ui
    ├── layout
    │   ├── header
    │   │   └── header.component.ts
    │   ├── layout.component.ts
    │   ├── main
    │   │   └── main.component.ts
    │   └── sidebar
    │       └── sidebar.component.ts
    └── ui.module.ts
7.2 路由
创建路由:
$ ng generate module app-routing --flat --module=app
修改生成的文件,添加导航:
$ vim src/app/app-routing.module.ts
const routes: Routes = [
  {
    path: '',
    children: [
      { path: '', redirectTo: '/dashboard', pathMatch: 'full' },
      { path: 'dashboard', component: DashboardComponent },
      { path: 'posts', component: PostsComponent },
      { path: 'settings', component: SettingsComponent },
      { path: 'todos', component: TodosComponent },
      { path: 'users', component: UsersComponent },
    ]
  }
];

@NgModule({
  imports: [
    RouterModule.forRoot(routes),
  ],
  exports: [
    RouterModule,
  ],
})
export class AppRoutingModule { }
7.3 打通导航(UI)
src/app/ui/ui.module.ts中引入RouterModule:
import { RouterModule } from '@angular/router';

  imports: [
    CommonModule,
    RouterModule,
    ClarityModule,
7.4 更改各页面
更改 src/app/pages/dashboard/dashboard.component.ts.
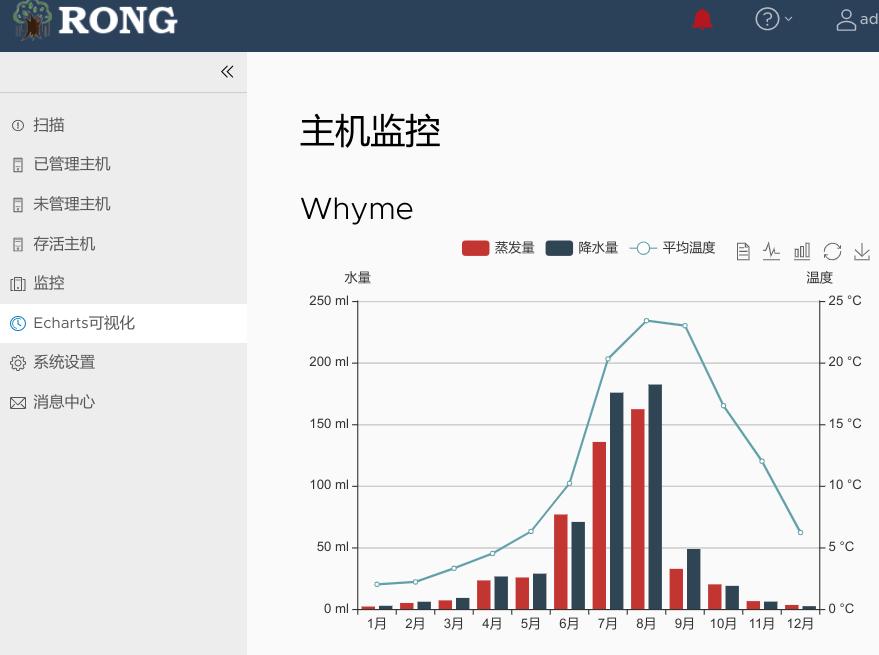
8. 添加echarts
安装angular对echarts的支持:
$  cnpm install echarts -S
$  cnpm install ngx-echarts -S
$  cnpm install resize-observer-polyfill -S
引入echarts:
$ vim src/app/app.module.ts
import * as echarts from 'echarts';
import { NgxEchartsModule } from 'ngx-echarts';


  imports: [
    BrowserModule,
    NgxEchartsModule.forRoot({
      echarts
    }),
添加服务:
$ ng generate service app

CREATE src/app/app.service.spec.ts (342 bytes)
CREATE src/app/app.service.ts (132 bytes)
Oct 29, 2020
TechnologyBuilding
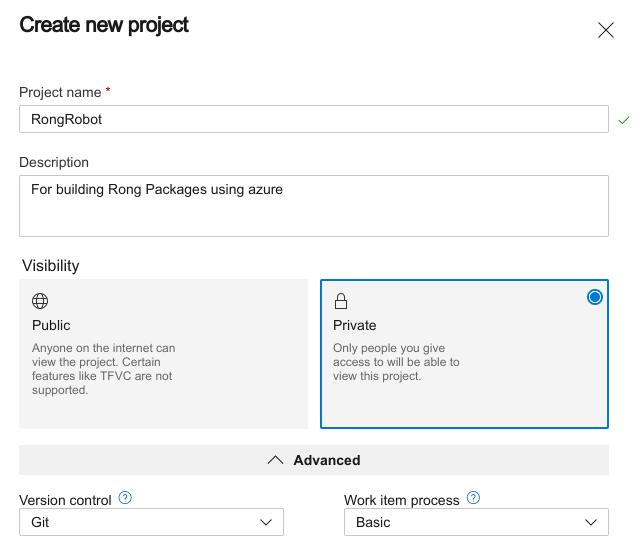
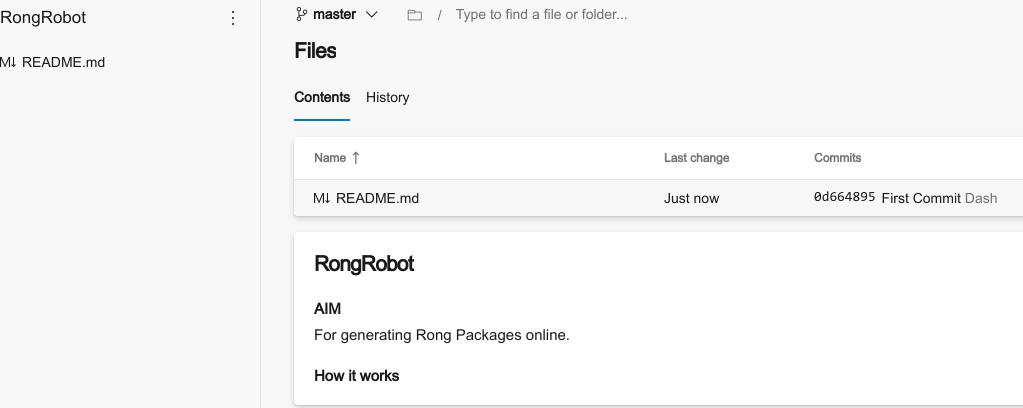
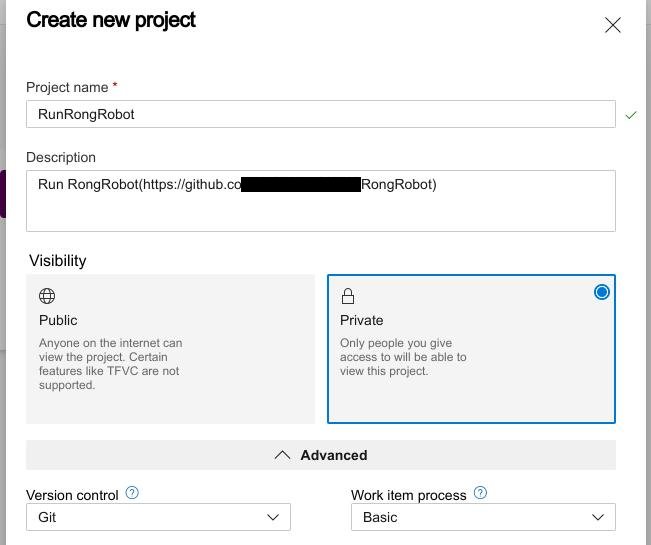
In Azure Devops, Create new project:
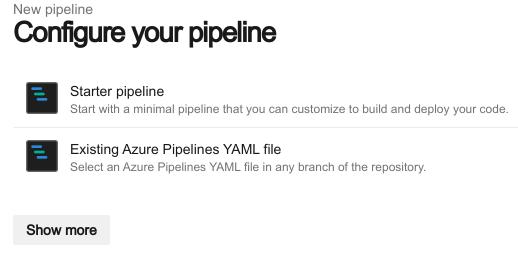
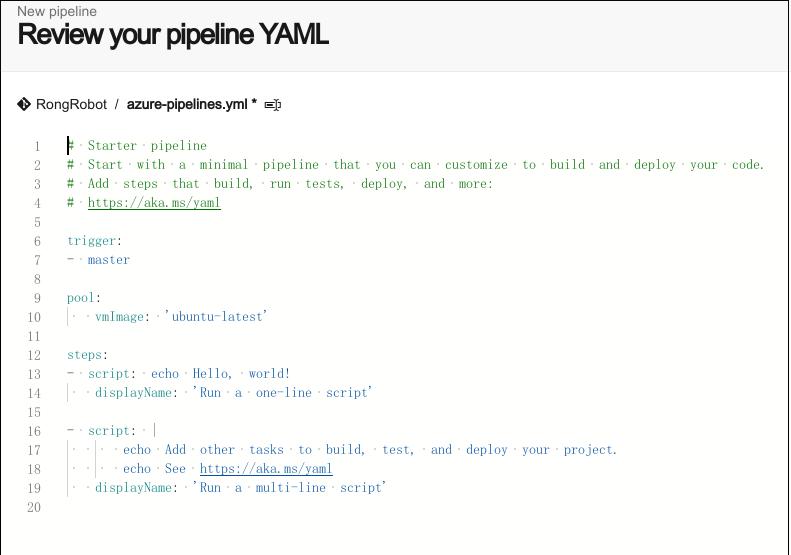
Create pipeline:

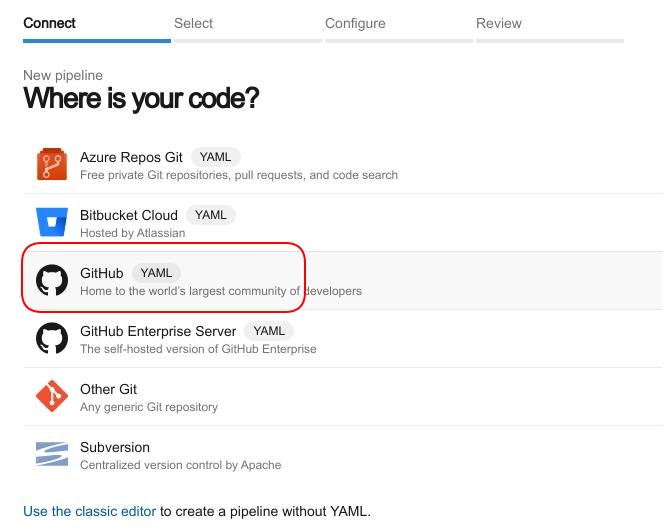
Select code for GitHub:
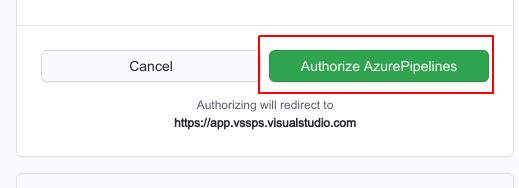
Authorized AzurePipeLines:
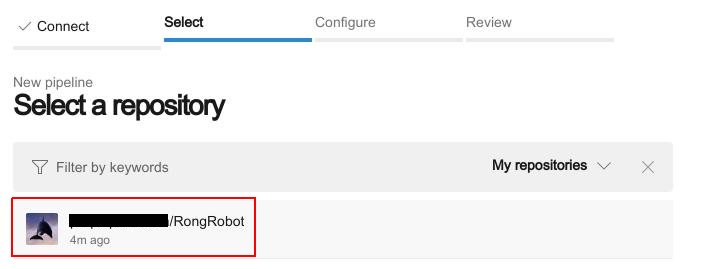
Select Repository:
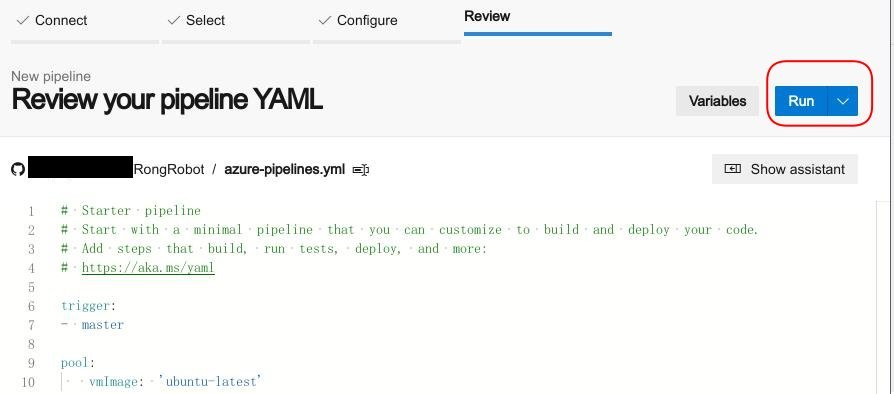
Click Run:
View Status:
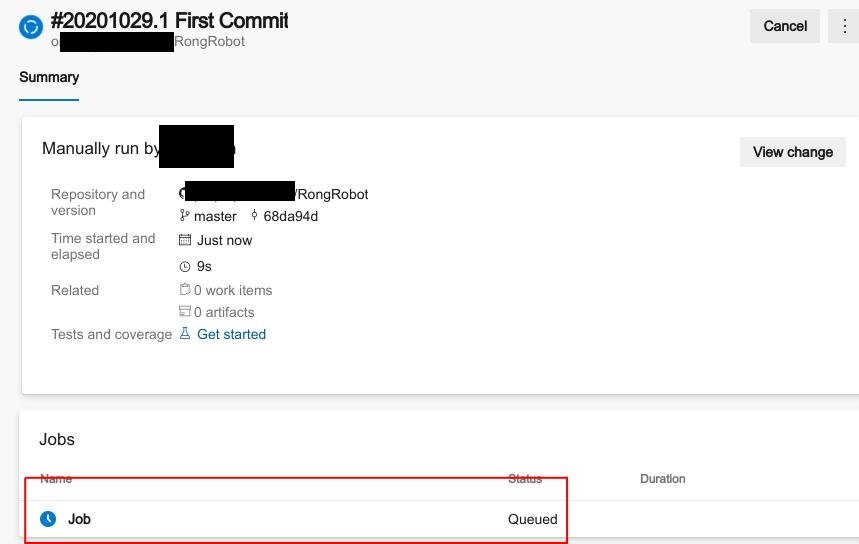
Running Status:
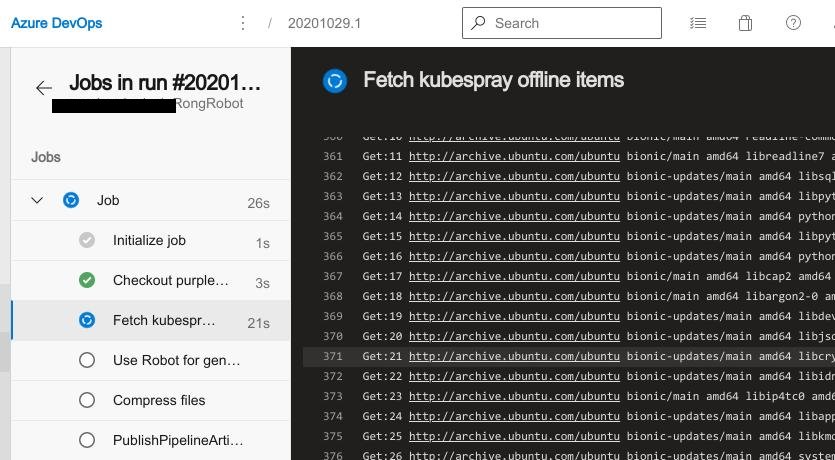
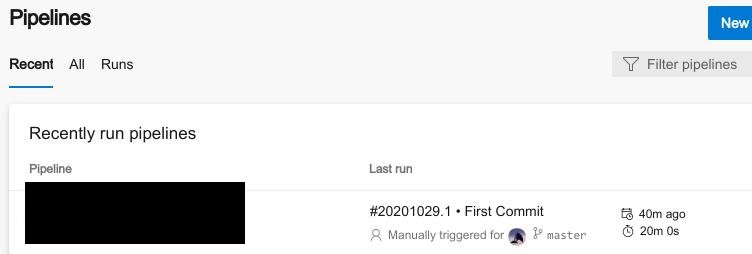
Check Result:
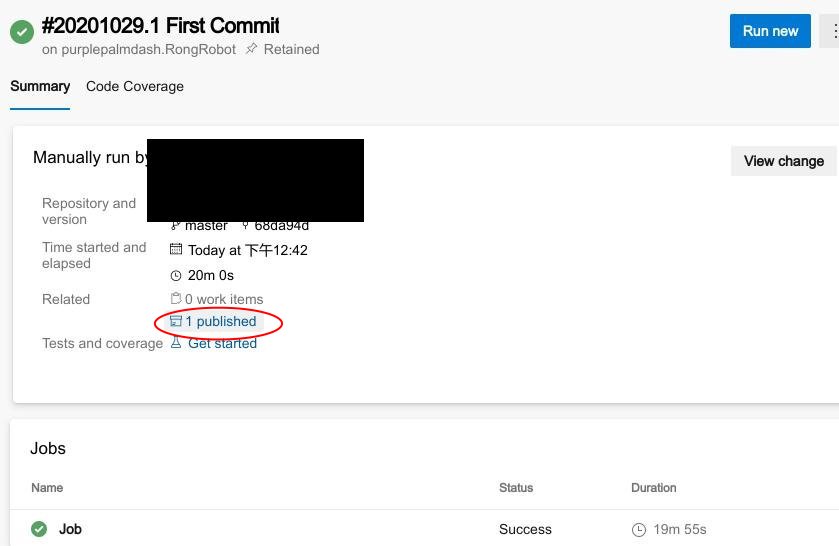
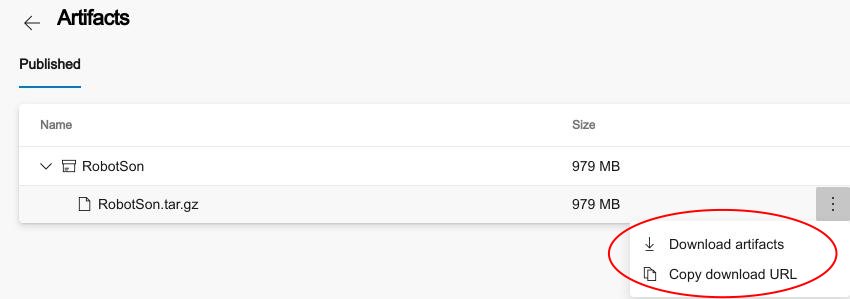
Check Artifacts:
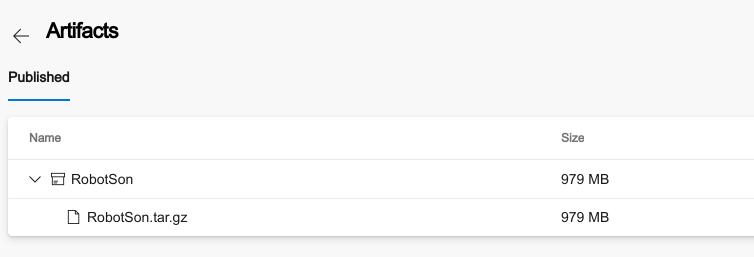
Download Artifacts:
Patching
Static file Patching
After download:
 $ ls *
RobotSon.tar.gz

data:
docker

release:
calicoctl  cni-plugins-linux-amd64-v0.8.7.tgz  kubeadm-v1.19.3-amd64  kubectl-v1.19.3-amd64  kubelet-v1.19.3-amd64
zip docker.tar.gz(place in pre-rong/rong_static/for_master0/docker.tar.gz)
$ cd data
$ tar czf docker.tar.gz docker/
Copy releases folder to folder(pre-rong/rong_static/for_cluster/)
$  ls pre-rong/rong_static/for_cluster/
calicoctl  cni-plugins-linux-amd64-v0.8.7.tgz  docker  gpg  kubeadm-v1.18.8-amd64  kubectl-v1.18.8-amd64  kubelet-v1.18.8-amd64  netdata-v1.22.1.gz.run
Code Patching
下载patch文件:
# git clone https://github.com/kubernetes-sigs/kubespray.git
# cd kubespray
# git checkout tags/v2.xx.0 -b xxxx
# git apply --check ../patch
检查是否有错
v1.19(master)需要exclude以下两个文件
# git apply  /root/patch --exclude=roles/kubernetes-apps/helm/templates/tiller-clusterrolebinding.yml.j2 --exclude=roles/remove-node/remove-etcd-node/tasks/main.yml
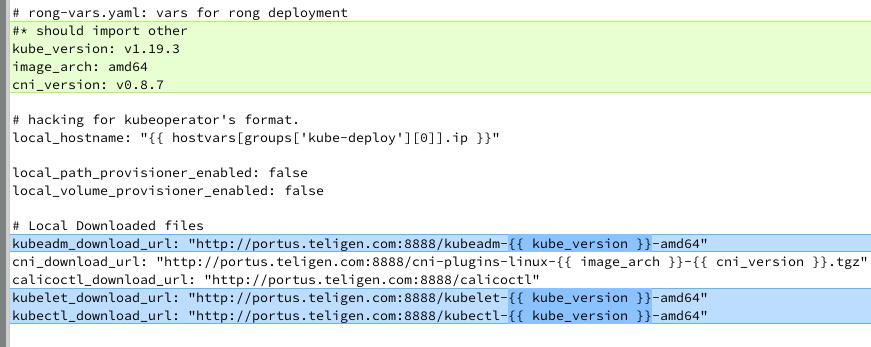
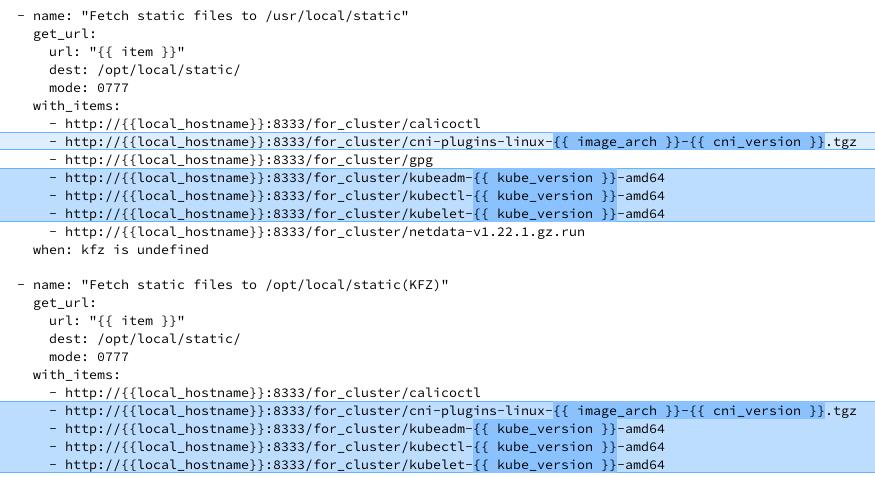
部署框架内少量修改
rong-vars.yml:

rong/1_preinstall/role/preinstall/task/main.yml:
Oct 29, 2020
TechnologyRONG代码架构现状
制作patch前确保Kubespray代码中目录中的软链接确实存在,而不是因为cp被替换成了实体文件。
v2.14.0上制作patch
# git clone https://github.com/kubernetes-sigs/kubespray.git
# git checkout tags/v2.14.0 -b 2140
此时检出的是v2.14.0的未修改的代码。
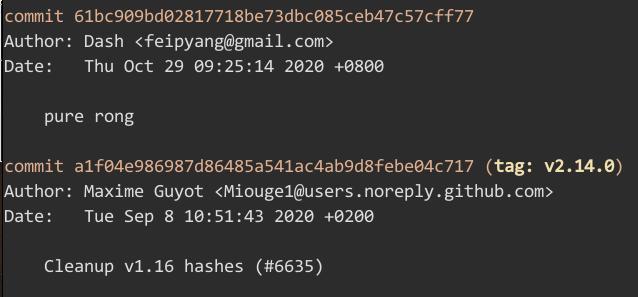
该目录下替换成3_k8s下的代码,注意去掉部署时生成的中间文件。而后commit更改。
制作patch文件:
git diff a1f04e f0c9b1>patch1
Apply patch
切换回master分支,或者直接在新目录下checkout一个新的工作目录:
# git apply --check ../patch
error: 打补丁失败:roles/kubernetes-apps/helm/templates/tiller-clusterrolebinding.yml.j2:3
error: roles/kubernetes-apps/helm/templates/tiller-clusterrolebinding.yml.j2:补丁未应用
error: 打补丁失败:roles/remove-node/remove-etcd-node/tasks/main.yml:21
error: roles/remove-node/remove-etcd-node/tasks/main.yml:补丁未应用
这是因为新分支(master)对比于v2.14.0在上述提及的文件中有更改,此时我们需要在apply的时候忽略掉这些更改:
git apply /root/patch --exclude=roles/kubernetes-apps/helm/templates/tiller-clusterrolebinding.yml.j2 --exclude=roles/remove-node/remove-etcd-node/tasks/main.yml
此时更改完毕后可以看到新版本的代码中已经添加了我们在旧分支上做的代码变更。
对于有冲突的文件,需要手动解决冲突。
Example
Git patch in different branch:
# git clone https://github.com/kubernetes-sigs/kubespray.git
# git checkout tags/v2.14.0 -b 2140
 (2140) $ git apply ../../patch
 (2140 !*%) $ vim roles/container-engine/docker/tasks/main.yml
 (2140 !*%) $ git checkout master
error: 您对下列文件的本地修改将被检出操作覆盖:
	roles/kubernetes-apps/helm/templates/tiller-clusterrolebinding.yml.j2
	roles/kubernetes/preinstall/tasks/0020-verify-settings.yml
	roles/remove-node/remove-etcd-node/tasks/main.yml
请在切换分支前提交或贮藏您的修改。
正在终止
(2140 !*%) $ git add .                                                                                                                        1 ↵
(2140 !+) $ git commit -m "modified in 2.14.0"
[2140 2d87573d] modified in 2.14.0
 19 files changed, 504 insertions(+), 427 deletions(-)
 delete mode 100644 contrib/packaging/rpm/kubespray.spec
 create mode 100644 inventory/sample/hosts.ini
 rewrite roles/bootstrap-os/tasks/main.yml (99%)
 create mode 100644 roles/bootstrap-os/tasks/main_kfz.yml
 copy roles/bootstrap-os/tasks/{main.yml => main_main.yml} (99%)
 rewrite roles/container-engine/docker/tasks/main.yml (99%)
 create mode 100644 roles/container-engine/docker/tasks/main_kfz.yml
 copy roles/container-engine/docker/tasks/{main.yml => main_main.yml} (92%)
dash@archnvme:/media/sda/git/pure/kubespray (2140) $ git checkout master
切换到分支 'master'
您的分支与上游分支 'origin/master' 一致。
 (master) $ ls
ansible.cfg          code-of-conduct.md  Dockerfile       index.html  logo         OWNERS_ALIASES             remove-node.yml   scale.yml          setup.py             Vagrantfile
ansible_version.yml  _config.yml         docs             inventory   Makefile     README.md                  requirements.txt  scripts            test-infra
cluster.yml          contrib             extra_playbooks  library     mitogen.yml  recover-control-plane.yml  reset.yml         SECURITY_CONTACTS  tests
CNAME                CONTRIBUTING.md     facts.yml        LICENSE     OWNERS       RELEASE.md                 roles             setup.cfg          upgrade-cluster.yml
(master) $ git apply ../../patch --exclude=roles/kubernetes-apps/helm/templates/tiller-clusterrolebinding.yml.j2 --exclude=roles/remove-node/remove-etcd-node/tasks/main.yml
(master !*%) $ git checkout 2140
error: 您对下列文件的本地修改将被检出操作覆盖:
	cluster.yml
	roles/bootstrap-os/tasks/main.yml
	roles/container-engine/docker/meta/main.yml
	roles/container-engine/docker/tasks/main.yml
	roles/container-engine/docker/tasks/pre-upgrade.yml
	roles/container-engine/docker/templates/docker-options.conf.j2
	roles/container-engine/docker/templates/docker.service.j2
	roles/kubernetes/node/tasks/kubelet.yml
	roles/kubernetes/preinstall/tasks/0020-verify-settings.yml
	roles/kubernetes/preinstall/tasks/0080-system-configurations.yml
	roles/kubernetes/preinstall/tasks/main.yml
请在切换分支前提交或贮藏您的修改。
error: 工作区中下列未跟踪的文件将会因为检出操作而被覆盖:
	inventory/sample/hosts.ini
	roles/bootstrap-os/tasks/main_kfz.yml
	roles/bootstrap-os/tasks/main_main.yml
	roles/container-engine/docker/tasks/main_kfz.yml
	roles/container-engine/docker/tasks/main_main.yml
请在切换分支前移动或删除。
正在终止
(master !*%) $ git add .                                                                                                                      1 ↵
(master !+) $ git commit -m "apply in master"
[master a5941286] apply in master
 17 files changed, 502 insertions(+), 426 deletions(-)
 delete mode 100644 contrib/packaging/rpm/kubespray.spec
 create mode 100644 inventory/sample/hosts.ini
 rewrite roles/bootstrap-os/tasks/main.yml (99%)
 create mode 100644 roles/bootstrap-os/tasks/main_kfz.yml
 copy roles/bootstrap-os/tasks/{main.yml => main_main.yml} (99%)
 rewrite roles/container-engine/docker/tasks/main.yml (99%)
 create mode 100644 roles/container-engine/docker/tasks/main_kfz.yml
 copy roles/container-engine/docker/tasks/{main.yml => main_main.yml} (92%)
 (master) $ git checkout 2140
切换到分支 '2140'
 (2140) $ git checkout master
切换到分支 'master'
您的分支领先 'origin/master' 共 1 个提交。
  (使用 "git push" 来发布您的本地提交)
(master) $ pwd
/media/sda/git/pure/kubespray
