LinuxTips12
Feb 13, 2021Technology
1. vagrant-libvirt
vagrant 2.2.14版中的一个包依赖BUG导致几乎所有的插件都没法装。解决方案是回归到旧版本的vagrant后安装vagrant-libvirt:
$ sudo pacman -U /var/cache/pacman/pkg/vagrant-2.2.10-2-x86_64.pkg.tar.zst
$ vagrant --version
Vagrant 2.2.10
Install vagrant-libvirt via:
$ vagrant plugin install vagrant-libvirt  --plugin-clean-sources --plugin-source  https://mirrors.tuna.tsinghua.edu.cn/rubygems/ --debug
$ vagrant plugin install vagrant-mutate  --plugin-clean-sources --plugin-source  https://mirrors.tuna.tsinghua.edu.cn/rubygems/ --debug
Examine the installed vagrant plugins:
$ vagrant plugin list
vagrant-libvirt (0.3.0, global)
vagrant-mutate (1.2.0, global)
2. Ignore PKG globally
For ignoring some package in archlinux’s pacman upgrade, do following:
$ sudo vim /etc/pacman.conf
IgnorePkg   = vagrant
Then in next pacman -Syu --noconfirm we will ignore vagrant.
3. Enable dmesg
Enable dmesg for normal user:
# sudo sysctl kernel.dmesg_restrict=0
4. docker.io启动panic
现象: systemctl restart docker报错无法启动,查看原因怀疑是containerd问题,
# journalctl -xeu containerd>kkkk.txt
# cat kkkk.txt
在输出的日志中发现invalid page type: xx: xx问题,此时直接apt-get purge掉所有和docker/containerd相关的包,而后删除/var/lib/containerd目录, 问题得以解决。
5. System Installation Time
Detect the system installation time via:
# ls -lact --full-time /etc |tail
6. disable fedora initial-setup
via:
# systemctl stop initial-setup && systemctl disable initial-setup
7. python3’s SimpleHTTPServer
via:
$ python3 -m http.server 8888
8. curl and tar xzvf
via:
curl www.xxxxx.com/kkk.tar.gz | tar xzvf
9. On install scrot
Missing libgiblib.so.1:
$ find /usr -name libgiblib.so.1 Find this file in the location
/usr/local/lib/libgiblib.so.1
 $ cat /etc/ld.so.conf View the current library load path to see if this file is included
include ld.so.conf.d/*.conf
 $ echo "/usr/local/lib" >> /etc/ld.so.conf Add library path
 $ ldconfig After loading the library file, scrot is used normally.
 $ scrot --help View scrot help
Usage : scrot [OPTIONS]... [FILE]
  Where FILE is the target file for the screenshot.
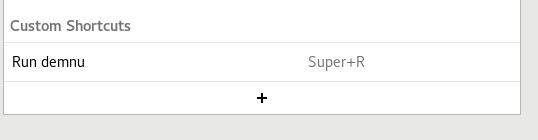
10. gnome 3 add hotkey
Via adding hotkey system->settings:
11. Install awesome on centos7
via:
#
# Copy and paste the lines below to install the 64-bit EL 7.x set.
#
BOOTSTRAP_TAR="bootstrap-el7-trunk-x86_64-20200724.tar.gz"
BOOTSTRAP_SHA="478d2e30f150712a851f8f4bcff7f60026f65c9e"

# Download the bootstrap kit to the current directory.
curl -O https://pkgsrc.joyent.com/packages/Linux/el7/bootstrap/${BOOTSTRAP_TAR}

# Verify the SHA1 checksum.
echo "${BOOTSTRAP_SHA}  ${BOOTSTRAP_TAR}" >check-shasum
sha1sum -c check-shasum

# Verify PGP signature.  This step is optional, and requires gpg.
curl -O https://pkgsrc.joyent.com/packages/Linux/el7/bootstrap/${BOOTSTRAP_TAR}.asc
curl -sS https://pkgsrc.joyent.com/pgp/56AAACAF.asc | gpg2 --import
gpg2 --verify ${BOOTSTRAP_TAR}{.asc,}

# Install bootstrap kit to /usr/pkg
sudo tar -zxpf ${BOOTSTRAP_TAR} -C /

## Add paths
#$ PATH=/usr/pkg/sbin:/usr/pkg/bin:$PATH
#$ MANPATH=/usr/pkg/man:$MANPATH
Then use pkgin for installing awesome:
# pkgin -y install awesome
12. Install rdesktop/smplayer
Install rdesktop/smplayer in centos7:
sudo rpm --import http://li.nux.ro/download/nux/RPM-GPG-KEY-nux.ro
sudo rpm -Uvh http://li.nux.ro/download/nux/dextop/el7/x86_64/nux-dextop-release-0-1.el7.nux.noarch.rpm
sudo yum install rdesktop
13. rsync centos 7 repo
via:
# rsync -vrt rsync://rsync.mirrors.ustc.edu.cn/repo/centos/7/updates/x86_64/ .
14. knoppix ssh
Start sshd via:
# /etc/init.d/ssh start
# passwd root
15. rpm belongs to which repo
via :
$ repoquery -i rpmname
16. sftp with port
via:
sftp -oPort=port_number host_name
17. lxc proxy
forwarding from host to lxc containers via:
lxc config device add mycontainer myport80 proxy listen=tcp:0.0.0.0:80 connect=tcp:127.0.0.1:80
18. lxc mount device(sda)
via:
  lxc config device add teledb-node-test1  myrawdisk unix-block source=/dev/vda
  lxc config device add teledb-node2  myrawdisk unix-block source=/dev/vda
19. lxc add config dynamically
via:
 lxc config set mycontainer raw.lxc="lxc.cgroup.devices.allow = c 10 237" raw.lxc="lxc.cgroup.devices.allow = b 7 *"
$ lxc config show mycontainer
...
raw.lxc: lxc.cgroup.devices.allow = b 7 *
...
$
20.vim 中文乱码
Set following in ~/.vimrc:
set fileencodings=utf-8,gb2312,gb18030,gbk,ucs-bom,cp936,latin1
set enc=utf8
set fencs=utf8,gbk,gb2312,gb18030
21. lxc set static ip
via:
# lxc stop gitlabinstance
# lxc network attach lxdbr0 gitlabinstance eth0 eth0
# lxc config device set gitlabinstance eth0 ipv4.address 10.222.125.125
# lxc start gitlabinstance
22. lxc set directoy
add directory to running lxc instance:
lxc config device add Solr4StandAlone sdb disk source=/var/lib/lxc/Solr4StandAlone/rootfs/data path=mnt/ssd/solr_data
23. lxc set priviledge
For mkdir in external disk:
lxc config set lxc105PERF security.privileged=true
24. set multiple parameters
via:
printf 'lxc.cgroup.devices.allow = c 10 237\nlxc.cgroup.devices.allow = b 7 *' | lxc config set mycontainer raw.lxc -
25. limit lxcbr0 dhcp range
via:
lxc network set lxdbr0 ipv4.dhcp.ranges 10.0.8.2-10.0.8.200
26. lxc profile issues
solved via:
lxc exec mycontainer -- sudo --user ubuntu --login
27. lxc set ulimit
via:
lxc config set mycontainer limits.kernel.nofile 200000
lxc restart mycontainer
28. snap disable lxd
via;
# snap disable lxd
29. find which command
via:
yum whatprovides lsb_release
30. get public ip
via:
$ curl 'https://api.ipify.org?format=json'
{"ip":"144.34.187.48"}
31. downgrader qemu in ArchLinux
Install yay for replacing yaourt, yaourt is too old and will be removed from my tools:
$ git clone https://aur.archlinux.org/yay-git.git
$ cd yay-git
$ maekpkg -si
$ yay -S downgrader-git
$ downgrader qemu
$ qemu-system-x86_64 --version
QEMU emulator version 5.2.0
Copyright (c) 2003-2020 Fabrice Bellard and the QEMU Project developers
$ sudo vim /etc/pacman.conf
IgnorePkg   = qemu
32. snap set proxy
via:
snap set system proxy.http="http://<proxy_addr>:<proxy_port>"
snap set system proxy.https="http://<proxy_addr>:<proxy_port>"
33. lxc start vm
Specify vm’s cpus and memory limits:
lxc init a4e0a3e72f3b ubuntu1804
lxc config device override ubuntu1804 root size=15GB
lxc config set ubuntu1804 limits.cpu 4
lxc config set ubuntu1804 limits.memory 16GB
echo -n '-device vfio-pci,host=40:00.0' | lxc config set ubuntu1804 raw.qemu -
lxc start ubuntu1804
34. lxc set proxy
via:
 lxc config set core.proxy_https http://xxx.xxx.xxx.xx:8118
  lxc config set core.proxy_http http://xxx.xxx.xxx.xx:8118
35. lxc start vm
via followinig commands:
lxc launch images:centos/8 centos --vm
lxc launch images:centos/8 centos --vm --config limits.cpu=4 --config limits.memory=16GB
lxc launch images:ubuntu/bionic ubuntu1804 --vm
vfio items(not ok):
echo -n '-device vfio-pci,host=0000:3e:00.0,id=hostdev0' | lxc config set king4 raw.qemu -
36. lxd spice connection
via:
# remote-viewer spice+unix:///var/snap/lxd/common/lxd/logs/win10/qemu.spice
Forward via socat:
# socat TCP-LISTEN:9777,reuseaddr,fork UNIX-CLIENT:/var/snap/lxd/common/lxd/logs/win10/qemu.spice
access via:
# remote-viewer spice://localhost:9777
37. undo commit
via:
git reset HEAD~
38. zerotier-one issue
In ArchLinux, cause the default tun won’t load at startup, it fails on start, modified via:
# vim /etc/modprobe.d/modprobe.conf
options tun
Save and restart the service, now zero-tier works properly.
39. ssh via jump
Reverse ssh tunnel via(xxx.xxx.xxx.xxx is my own public ip):
ssh -o GatewayPorts=true -fNTR *:4381:localhost:22 -p 12222 root@xxx.xxx.xxx.xxx
After ssh forwardinig to local, ssh via jump. :
ssh -J root@192.168.1.2 -p4381 ctyun@localhost
40. fake usb
via:
sudo modprobe dummy_hcd
 sudo modprobe g_mass_storage file=/media/sda5/16G.img idVendor=0x1d6b idProduct=0x0104 iManufacturer=Myself iProduct=VirtualBlockDevice iSerialNumber=123
Then you could directly use this usb disk .
41. sed remove last line
via:
# sed '$d' kkk.txt
42. run qemu in centos7
via:
/usr/libexec/qemu-kvm -net nic -net user,hostfwd=tcp::2228-:22 -hda ./ubutu200420200630.img -boot d -m 2048 --enable-kvm -vga virtio
Then we could login with ssh -p2228 root@localhost for login into vm, in vm
using 10.0.2.X for operations.
43. lxd cluster mode
edge01 initialization process:
# lxd init
Would you like to use LXD clustering? (yes/no) [default=no]: yes
What name should be used to identify this node in the cluster? [default=edge1]:
What IP address or DNS name should be used to reach this node? [default=192.168.100.208]:
Are you joining an existing cluster? (yes/no) [default=no]:
Setup password authentication on the cluster? (yes/no) [default=no]: yes
Trust password for new clients:
Again:
Do you want to configure a new local storage pool? (yes/no) [default=yes]:
Name of the storage backend to use (zfs, btrfs, dir, lvm) [default=zfs]:
Create a new ZFS pool? (yes/no) [default=yes]:
Would you like to use an existing empty block device (e.g. a disk or partition)? (yes/no) [default=no]:
Size in GB of the new loop device (1GB minimum) [default=30GB]:
Do you want to configure a new remote storage pool? (yes/no) [default=no]:
Would you like to connect to a MAAS server? (yes/no) [default=no]:
Would you like to configure LXD to use an existing bridge or host interface? (yes/no) [default=no]: yes
Name of the existing bridge or host interface: eth0
Would you like stale cached images to be updated automatically? (yes/no) [default=yes]
Would you like a YAML "lxd init" preseed to be printed? (yes/no) [default=no]:
44. apt proxy via sock5
via:
Acquire::http::proxy "socks5h://server:port";
45. proxy related
via:
https://gist.github.com/lanceliao/75c368f16238ae4c741d
https://github.com/fanchangyong/blog/issues/22
https://www.shangyexinzhi.com/article/485648.html
https://thenewstack.io/the-use-case-for-kubernetes-at-the-edge/
https://blog.ismisv.com/2015/09/raspberry-pi-as-a-fucking-gfw-gateway/
https://www.youtube.com/watch?v=cB8fNytQXTY
https://www.aularon.com/linux/transparent-proxy-via-another-computer/
https://www.cnblogs.com/develon/p/11830726.html
46. Disable ipv6
in ubuntu, via:
# sudo vim /etc/default/grub
GRUB_CMDLINE_LINUX_DEFAULT="quiet splash ipv6.disable=1"
GRUB_CMDLINE_LINUX="ipv6.disable=1"
# sudo update-grub
47. snap install failed
Tested via:
curl https://api.snapcraft.io/api/v1/snaps/sections
48. Completely disable nvidia card
In archlinux, via:
$ sudo systemctl enable nvidia-xrun-pm
49. recover sudo
via:
chown root:root /usr/bin/sudo && chmod 4755 /usr/bin/sudo
Solved problem:
sudo: /usr/bin/sudo must be owned by uid 0 and have the setuid bit set
50 sway in archlinux
via:
add LIBSEAT_BACKEND=logind to my /etc/environment
useradd -m xxxx
sudo passwd xxxx
Then login with xxxx
sway
51. keep mosue moving
via:
sudo snap install keep-presence

Then run it:

keep-presence --seconds 30
52. k8s profile for lxd
via:
name: k8s
config:
  boot.autostart: "true"
  linux.kernel_modules: ip_vs,ip_vs_rr,ip_vs_wrr,ip_vs_sh,ip_tables,ip6_tables,netlink_diag,nf_nat,overlay,br_netfilter
  raw.lxc: |
    lxc.apparmor.profile=unconfined
    lxc.mount.auto=proc:rw sys:rw cgroup:rw
    lxc.cgroup.devices.allow=a
    lxc.cap.drop=
  security.nesting: "true"
  security.privileged: "true"
description: ""
devices:
  aadisable:
    path: /sys/module/nf_conntrack/parameters/hashsize
    source: /sys/module/nf_conntrack/parameters/hashsize
    type: disk
  #aadisable1:
  #  path: /sys/module/apparmor/parameters/enabled
  #  source: /dev/null
  #  type: disk
  aadisable2:
    path: /dev/kmsg
    source: /dev/kmsg
    type: disk
  aadisable3:
    path: /sys/fs/bpf
    source: /sys/fs/bpf
    type: disk
53. dnscrypt-proxy issue
Changing the dnscrypt-proxy after ccp 100years birthday, I have to change the proxy port from 1080(sslocal) to 2x1xx(v2ray)
54. lxd use external ceph
via:
snap set lxd ceph.external=true
systemctl reload snap.lxd.daemon
55. gucamole xrdp issue
via:
cd /tmp/
curl -Lo 'freerdp2libplugins.zip' 'https://community.bitnami.com/uploads/default/original/3X/b/9/b9c8a1945544603988ffd12e0bc2b9377d1653e2.zip'
unzip freerdp2libplugins.zip
sudo mv freerdp2 /usr/lib/x86_64-linux-gnu/
56. python missing
When building android, meet: /usr/bin/env: python: No such file or directory
solved via:
# sudo apt-get install python-is-python3
57. ubuntu18.04.5 python2 default
via:
update-alternatives --install /usr/bin/python python /usr/bin/python2 10
then we could build android.
58. /var/log/journal too big
shrink via:
# journalctl --vacuum-size=100M
59. XMind
Install xmind on archlinux via:
$ yay xmind
8 aur/xmind 3.7.9+8update9-1 (+30 0.03) (Installed)
#  vim /usr/share/xmind/XMind/XMind.ini
-vm
/usr/lib/jvm/java-8-openjdk/jre/bin
-configuration
.....
Then we could use XMind.
60. Android building
Problem:
....
No DEX files specified
...
via:
$ make clean-apache-xml
$ make apache-xml
Then:
# make clean-ims-common && make ims-common && make apache-xml && m -j12 iso_img
61. Install fcitx5
Replace fcitx4 with fcitx5 with:
$ sudo pacman -R fcitx-configtool fcitx-googlepinyin fcitx-libpinyin fcitx-qt4 fcitx-qt5
$ sudo pacman -S fcitx5
$ sudo pacman -S fcitx5-chinese-addons
$ sudo pacman -S fcitx5-qt fcitx5-gtk
$ sudo pacman -S fcitx5-configtool
62. hostapd
In shida box:
# git clone https://github.com/lwfinger/rtl8188eu.git
# cd rtl8188eu
# make all
# sudo make install
63. driver in anbox
Added lxc device via:
lxc-device -n android add /dev/ashmem
64. PRoot working Tips
Install termux from F-droid, then:
pkg install proot
pkg install proot-distro
proot-distro install archlinux
65. Check if android booted
via:
# getprop sys.boot_completed
67. Overwrite cmd for docker
via:
# docker run [other options] --entrypoint '/bin/sh' $IMAGE -c 'npm link gulp gulp-sass gulp-sourcemaps'
68. update python for ubuntu18.04
via:
# update-alternatives --config python
69. gdm vs lightdm
Changing from ubuntu:
sudo dpkg-reconfigure gdm3
70. Start anbox in ubuntu
exited in ubuntu18.04, solved via:
export EGL_PLATFORM=x11
anbox.appmgr
71. rsync ignore directory
via:
rsync -av --progress aic-cg/ /root/fenxi/ --exclude workdir

(aic-cg)  ----->  /root/fenxi
source   ---->   dest
72. redsocks iptables issue
On Ubuntu18.04, solved via:
rm /usr/sbin/iptables
ln -s /usr/sbin/iptables-legacy /usr/sbin/iptables
73. dd write xz to rpi
Via:
xz -d < /home/dash/Downloads/ubuntu-20.04.3-preinstalled-server-arm64+raspi.img.xz - | dd of=/dev/sdb && sync
74. virsh console
via:
virsh ttyconsole vuserv
Enable grub output via:
#  vim /etc/default/grub
GRUB_DISTRIBUTOR=`lsb_release -i -s 2> /dev/null || echo Debian`
GRUB_TERMINAL_INPUT="console serial"
GRUB_TERMINAL_OUTPUT="gfxterm serial"
GRUB_SERIAL_COMMAND="serial --unit=0 --speed=115200"
GRUB_CMDLINE_LINUX_DEFAULT="console=tty0 console=ttyS0,115200 maybe-ubiquity"
GRUB_CMDLINE_LINUX=""
# update-grub2
75. logcat
view only crash logs:
logcat -b crash
76. lxc enter container
via:
lxc-attach -n Name -- command
77. apt-fast
via:
sudo add-apt-repository ppa:apt-fast/stable
sudo apt-get update
sudo apt-get -y install apt-fast
78. adb tips
list all of the connected devices:
adb devices
connect to specific device via:
adb -s 192.168.1.41:5555 shell
79. anbox/redroid preparation
related kernel modules should be inserted:
sudo modprobe ashmem_linux
sudo modprobe binder_linux devices=binder,hwbinder,vndbinder
examine via:
root@vp1:/home/dash# grep binder /proc/filesystems
nodev	binder
root@vp1:/home/dash# grep ashmem /proc/misc
121 ashmem
80. pipewire
Install and enable via:
$ sudo pacman install -y pipewire
$ systemctl --user enable pipewire pipewire-pulse pipewire-media-session
$ systemctl --user restart pipewire pipewire-pulse pipewire-media-session