Apr 29, 2021
Technology1. 文档目的
文档旨在针对在CentOS 7操作系统上安装、配置及运行LXD提供最佳实践。
2. 环境准备
基于快速验证的目的,本文档基于虚拟机搭建,验证机配置如下:
- 操作系统:
CentOS Linux release 7.6.1810 (Core) , 最小化安装 - 硬件配置: 36核心,246GB内存, 500G磁盘分区
- 软件配置:
- 网络配置: 192.168.100.10/24, 网关192.168.100.1
访问方式(这里提供如何从办公网络直达验证机)
3. 环境搭建
离线情况下,配置内网源后,执行以下命令安装:
# yum install -y snapd net-tools vim
# systemctl enable --now snapd.socket
解压离线安装文件:
# tar xzvf lxcimages.tar.gz ; tar xzvf snap.tar.gz
进入到snap目录下安装snap:
# snap ack core_10958.assert ; snap ack core18_1997.assert; snap ack lxd_20211.assert
# snap install core_10958.snap; snap install core18_1997.snap; snap install lxd_20211.snap
更改内核参数后,重启机器:
$ grubby --args="user_namespace.enable=1" --update-kernel="$(grubby --default-kernel)"
$ grubby --args="namespace.unpriv_enable=1" --update-kernel="$(grubby --default-kernel)"
$ sudo sh -c 'echo "user.max_user_namespaces=3883" > /etc/sysctl.d/99-userns.conf'
# reboot
创建snap目录并添加运行权限:
# ln -s /var/lib/snapd/snap /snap
# usermod -a -G lxd roo
# newgrp lxd
# id
uid=0(root) gid=994(lxd) groups=994(lxd),0(root)
此时需要退出终端后重新登录终端,方可使用lxc相关命令.
初始化lxd环境:
[root@lxdpaas ~]# lxd init
Would you like to use LXD clustering? (yes/no) [default=no]:
Do you want to configure a new storage pool? (yes/no) [default=yes]:
Name of the new storage pool [default=default]:
Name of the storage backend to use (btrfs, dir, lvm, ceph) [default=btrfs]: dir
Would you like to connect to a MAAS server? (yes/no) [default=no]:
Would you like to create a new local network bridge? (yes/no) [default=yes]:
What should the new bridge be called? [default=lxdbr0]:
What IPv4 address should be used? (CIDR subnet notation, “auto” or “none”) [default=auto]:
What IPv6 address should be used? (CIDR subnet notation, “auto” or “none”) [default=auto]:
Would you like the LXD server to be available over the network? (yes/no) [default=no]:
Would you like stale cached images to be updated automatically? (yes/no) [default=yes]
Would you like a YAML "lxd init" preseed to be printed? (yes/no) [default=no]:
此时应无任何镜像,接下来手动导入镜像:
# cd lxcimages
# lxc image  import meta-50030de846c046680faf34f7dc3e60284e31f5aab38dfd19c94a2fd1bf895d0c.tar.xz 50030de846c046680faf34f7dc3e60284e31f5aab38dfd19c94a2fd1bf895d0c.squashfs --alias centos7
Image imported with fingerprint: 50030de846c046680faf34f7dc3e60284e31f5aab38dfd19c94a2fd1bf895d0c
# lxc image list
+---------+--------------+--------+----------------------------------+--------------+-----------+---------+------------------------------+
|  ALIAS  | FINGERPRINT  | PUBLIC |           DESCRIPTION            | ARCHITECTURE |   TYPE    |  SIZE   |         UPLOAD DATE          |
+---------+--------------+--------+----------------------------------+--------------+-----------+---------+------------------------------+
| centos7 | 50030de846c0 | no     | Centos 7 x86_64 (20210428_07:08) | x86_64       | CONTAINER | 83.46MB | Apr 29, 2021 at 4:53am (UTC) |
+---------+--------------+--------+----------------------------------+--------------+-----------+---------+------------------------------+
4. lxc操作实练
启动一个lxc 实例:
# lxc launch centos7 db1
Creating db1
Starting db1
进入运行中的实例:
# lxc exec db1 bash
[root@db1 ~]# cat /etc/redhat-release
CentOS Linux release 7.9.2009 (Core)
启动第二个名为db2的实例:
[root@lxdpaas lxcimages]# lxc launch centos7 db2
Creating db2
Starting db2
[root@lxdpaas lxcimages]# lxc exec db2 bash
[root@db2 ~]#
查看运行中的容器实例:
# lxc ls
+------+---------+-----------------------+----------------------------------------------+-----------+-----------+
| NAME |  STATE  |         IPV4          |                     IPV6                     |   TYPE    | SNAPSHOTS |
+------+---------+-----------------------+----------------------------------------------+-----------+-----------+
| db1  | RUNNING | 10.159.107.72 (eth0)  | fd42:45a:636c:6e69:216:3eff:fe81:347e (eth0) | CONTAINER | 0         |
+------+---------+-----------------------+----------------------------------------------+-----------+-----------+
| db2  | RUNNING | 10.159.107.125 (eth0) | fd42:45a:636c:6e69:216:3eff:fe53:754 (eth0)  | CONTAINER | 0         |
+------+---------+-----------------------+----------------------------------------------+-----------+-----------+
停止/删除运行中的容器:
[root@lxdpaas lxcimages]# lxc stop db1
[root@lxdpaas lxcimages]# lxc stop db2
[root@lxdpaas lxcimages]# lxc delete db1
[root@lxdpaas lxcimages]# lxc delete db2
[root@lxdpaas lxcimages]# lxc ls
+------+-------+------+------+------+-----------+
| NAME | STATE | IPV4 | IPV6 | TYPE | SNAPSHOTS |
+------+-------+------+------+------+-----------+
定制化:
# lxc launch c75dhclient k2
# lxc exec k2 /bin/bash
dhclient eth0
vi /etc/yum.repos.d/kkk.repo
yum makecache
yum install -y vim net-tools
exit
# lxc ls | grep k2
| k2   | RUNNING | 10.159.107.248 (eth0) | fd42:45a:636c:6e69:216:3eff:fea0:2c33 (eth0) | CONTAINER | 0         |
导出当前镜像:
[root@lxdpaas ~]# mkdir export
[root@lxdpaas ~]# cd export/
[root@lxdpaas export]# lxc stop k2
[root@lxdpaas export]# lxc publish k2 --alias centos75withvim
Instance published with fingerprint: 7301c7d85d4d56ebcae117aa79cf88868c4821dedb22e641fe66d05cab6599f2
[root@lxdpaas export]# lxc image list
+-----------------+--------------+--------+----------------------------------+--------------+-----------+----------+------------------------------+
|      ALIAS      | FINGERPRINT  | PUBLIC |           DESCRIPTION            | ARCHITECTURE |   TYPE    |   SIZE   |         UPLOAD DATE          |
+-----------------+--------------+--------+----------------------------------+--------------+-----------+----------+------------------------------+
| c75dhclient     | 3a063c11b987 | no     |                                  | x86_64       | CONTAINER | 381.84MB | Apr 29, 2021 at 8:06am (UTC) |
+-----------------+--------------+--------+----------------------------------+--------------+-----------+----------+------------------------------+
| centos7         | 50030de846c0 | no     | Centos 7 x86_64 (20210428_07:08) | x86_64       | CONTAINER | 83.46MB  | Apr 29, 2021 at 4:53am (UTC) |
+-----------------+--------------+--------+----------------------------------+--------------+-----------+----------+------------------------------+
| centos75withvim | 7301c7d85d4d | no     |                                  | x86_64       | CONTAINER | 420.72MB | Apr 29, 2021 at 8:23am (UTC) |
+-----------------+--------------+--------+----------------------------------+--------------+-----------+----------+------------------------------+
[root@lxdpaas export]# lxc image export centos75withvim .
Image exported successfully!
[root@lxdpaas export]# ls
7301c7d85d4d56ebcae117aa79cf88868c4821dedb22e641fe66d05cab6599f2.tar.gz
测试:
# lxc launch centos75withvim test1
Creating test1
Starting test1
[root@lxdpaas export]# lxc exec test1 /bin/bash
[root@base ~]# dhclient eth0
[root@base ~]# which vim
/usr/bin/vim
[root@base ~]# which ifconfig
/usr/sbin/ifconfig
有关数据库的更改:
 yum install -y mariadb-server
 systemctl enable mariadb
5. 资源隔离
制作benchmark容器:
$ lxc launch centos7 bench -c security.privileged=true

	# yum install -y epel-release; yum install -y stress
	# yum install which
	# which stress
        # shutdown -h now
$ lxc publish bench --alias bench
$ lxc launch bench k1
$ lxc exec k1 /bin/bash
    stress --cpu 5
此时可以看到,宿主机上的5个cpu跑满:

设置CPU限制:
# lxc config set bench limits.cpu 2
即便容器中的进程未变,但是主机上可以看到,只有两个CPU跑满:

对内存的使用规则是同样的。
z. 定制化
为了适配用户习惯,做了以下修改:
# yum install -y mate-desktop xrdp mate* gnome-terminal firefox wqy* evince
# echo mate-session>/root/.Xclients
# chmod 777 /root/.Xclients
# systemctl start xrdp
# systemctl enable xrdp
外部需要做iptables转发:
$ sudo iptables -D FORWARD -o virbr0 -j REJECT --reject-with icmp-port-unreachable
$ sudo iptables -D FORWARD -i virbr0 -j REJECT --reject-with icmp-port-unreachable
$ sudo iptables -t nat -A PREROUTING -p tcp --dport 13389 -j DNAT --to-destination  192.168.100.10:3389
$ sudo iptables -t nat -A POSTROUTING -p tcp -d 192.168.100.10 --dport 3389 -j SNAT --to-source 10.50.208.147
外部的centos7机器上,因为升级了内核的关系,需要用如下命令开始运行:
lxc launch images:centos/7 blah -c security.privileged=true
当前制作的centos7.5容器似乎不能满足lxc的功能?
Apr 27, 2021
Technology1. 目的
将Ubuntu18.04.1操作系统(arm64)完全运行在内存中。
2. 准备材料
Ubuntu 18.04.1 arm64安装iso.
arm64服务器/libvirtd/virt-manager.(在没有实体服务器的情况下,可以用虚拟机来模拟测试).
3. 步骤
最小化安装Ubuntu 18.04.1 操作系统, 根分区最好包含所有分区(all in one)。
安装完毕操作系统后,定制自己需要的软件包及准备环境后,删除所有的临时文件,尽量瘦身系统。这是因为内存定制化后,所有的文件在启动时将被加载到内存!全新安装的ubuntu大约占据约1.5GB的磁盘空间。
以下为定制为RAM启动的流程:
步骤一:
更改/etc/fstab文件内容,首先备份该文件:
# cp /etc/fstab /etc/fstab.bak
编辑/etc/fstab文件内容,找到标识根分区(/)的行,更改为以下内容(下为示例):
#/dev/mapper/ubuntu--vg-root /               ext4    errors=remount-ro 0       1
none / tmpfs defaults 0 0
步骤二:
更改initramfs中的local脚本内容, initramfs 包含的工具和脚本,在正式的根文件系统的初始化脚本 init 启动之前,就被挂载并完成相应的初始化工作。我们需要提前将磁盘根分区中的内容拷贝入tmpfs中,以便在/etc/fstab开始执行的时候找寻到正确的分区.
首先备份/usr/share/initramfs-tools/scripts/local文件:
# cp /usr/share/initramfs-tools/scripts/local /usr/share/initramfs-tools/scripts/local.bak
编辑local文件,更改其Mount root部分的处理逻辑(约204行左右内容):
	# FIXME This has no error checking
	# Mount root
	#mount ${roflag} ${FSTYPE:+-t ${FSTYPE} }${ROOTFLAGS} ${ROOT} ${rootmnt}
	# Start of ramboottmp
        mkdir /ramboottmp
        mount ${roflag} -t ${FSTYPE} ${ROOTFLAGS} ${ROOT} /ramboottmp
        mount -t tmpfs -o size=100% none ${rootmnt}
        cd ${rootmnt}
        cp -rfa /ramboottmp/* ${rootmnt}
        umount /ramboottmp
        ### End of ramboottmp
保存该文件后,重新编译initramfs:
# mkinitramfs -o /boot/initrd.img-ramboot
编译成功后,将local文件替换会原来的版本:
# cp -f /usr/share/initramfs-tools/scripts/local.bak /usr/share/initramfs-tools/scripts/local
步骤三:
更改grub,以使用刚才编译出的initrd.img-ramboot来启动操作系统:
更改第一启动项中的/initrd行,替换为:
# chmod +w /boot/grub/grub.cfg
# vim /boot/grub/grub.cfg
.....
.....
        linux	/boot/vmlinuz-4.15.0-29-generic root=/dev/mapper/ubuntu--vg-root ro
	initrd	/boot/initrd.img-ramboot
......
......
# chmod -w /boot/grub/grub.cfg
步骤四:
重启,重启时选择第一启动项,此时根分区会整体被加载到tmpfs中。
4. 性能对比测试
测试环境定义:
- aarch64 4核
- 64 GB 内存
- 100 GB 磁盘分区
- Ubuntu 18.04.1 LTS
- 内核版本: 4.15.0-29-generic
- fio版本: fio-3.1
所有测试样例均在ramdisk主机及传统主机上运行并对比.
4.1 fio 4k随机读写
测试命令如下:
# fio --name TEST --eta-newline=5s --filename=fio-tempfile.dat --rw=randrw --size=500m --io_size=10g --blocksize=4k --ioengine=libaio --fsync=1 --iodepth=1 --numjobs=1 --runtime=60 --group_reporting
| 指标 | 内存型主机 | 传统主机 |
|---|
| READ bw | bw=513MiB/s (538MB/s) | bw=85.0KiB/s (87.0kB/s) |
| READ io | io=5133MiB (5382MB) | io=5104KiB (5226kB) |
| READ iops | IOPS=131k | IOPS=21 |
| WRITE bw | bw=510MiB/s (535MB/s) | bw=88.1KiB/s (90.2kB/s) |
| WRITE io | io=5107MiB (5355MB) | io=5288KiB (5415kB) |
| WRITE iops | IOPS=131k | IOPS=22 |
测试显示:4K随机读写的带宽对比,内存型主机是传统主机的约6000倍,读IOPS/写IOPS,内存型主机是传统主机的约6000倍。
4.2 fio 4k顺序读写
测试命令如下:
# fio --name TEST --eta-newline=5s --filename=fio-tempfile.dat --rw=rw --size=500m --io_size=10g --blocksize=4k --ioengine=libaio --fsync=1 --iodepth=1 --numjobs=1 --runtime=60 --group_reporting
| 指标 | 内存型主机 | 传统主机 |
|---|
| READ bw | bw=640MiB/s (671MB/s) | bw=73.2KiB/s (75.0kB/s) |
| READ io | io=5133MiB (5382MB) | io=4396KiB (4502kB) |
| READ iops | IOPS=164k | IOPS=18 |
| WRITE bw | bw=637MiB/s (668MB/s) | bw=76.8KiB/s (78.6kB/s) |
| WRITE io | io=5107MiB (5355MB) | io=4608KiB (4719kB) |
| WRITE iops | IOPS=163k | IOPS=19 |
测试显示:4K顺序读写的带宽对比,内存型主机是传统主机的约9000倍,读IOPS/写IOPS,内存型主机是传统主机的约9000倍。
Apr 24, 2021
Technology环境准备
via:
x11docker --desktop --home --pulseaudio x11docker/lxde-wine
环境截图
PlayOnLinux:
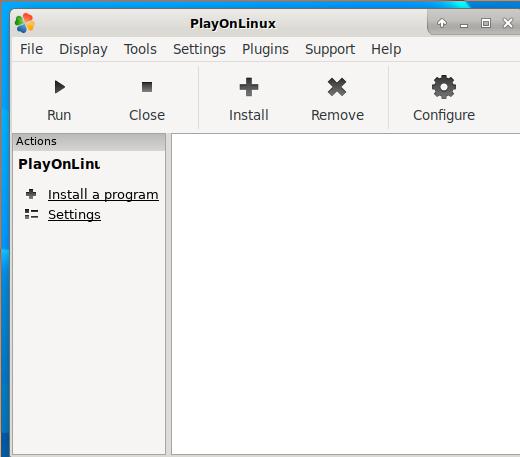
软件列表:
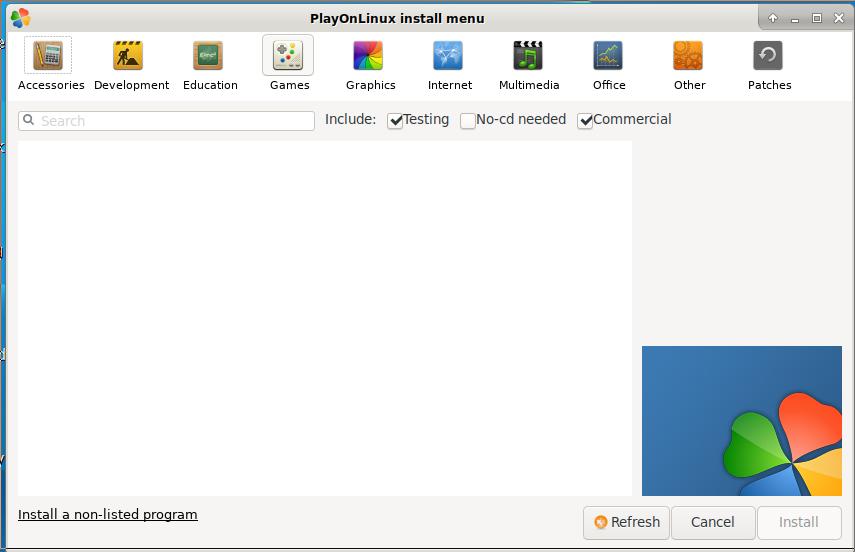
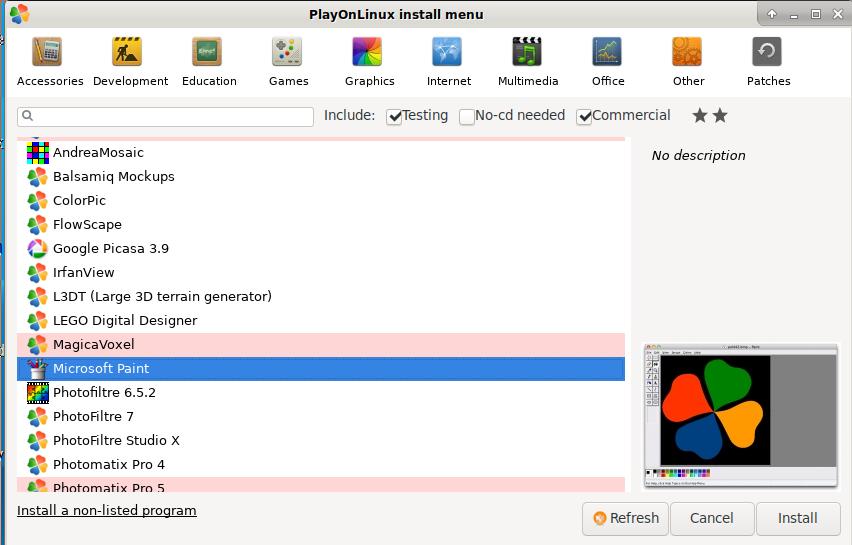
选择“微软绘图”:
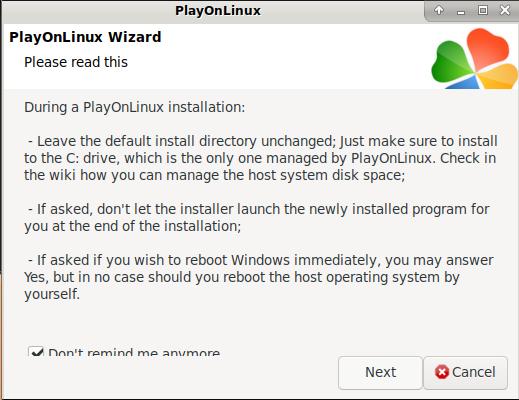
安装界面:
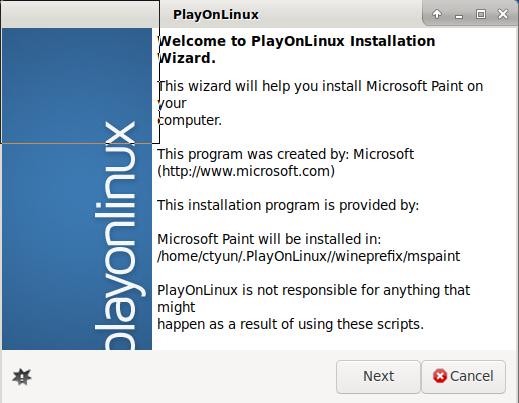
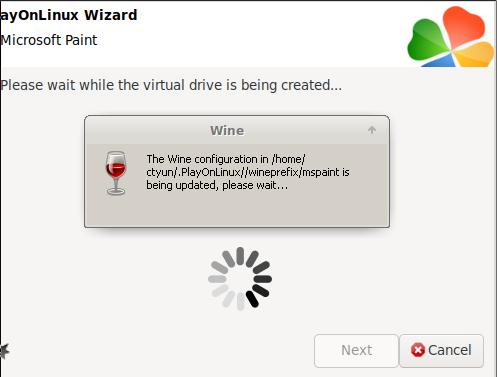
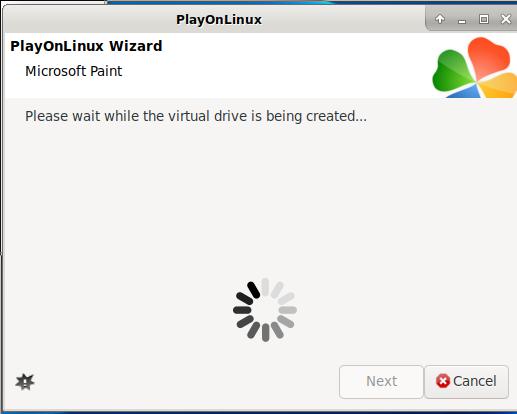
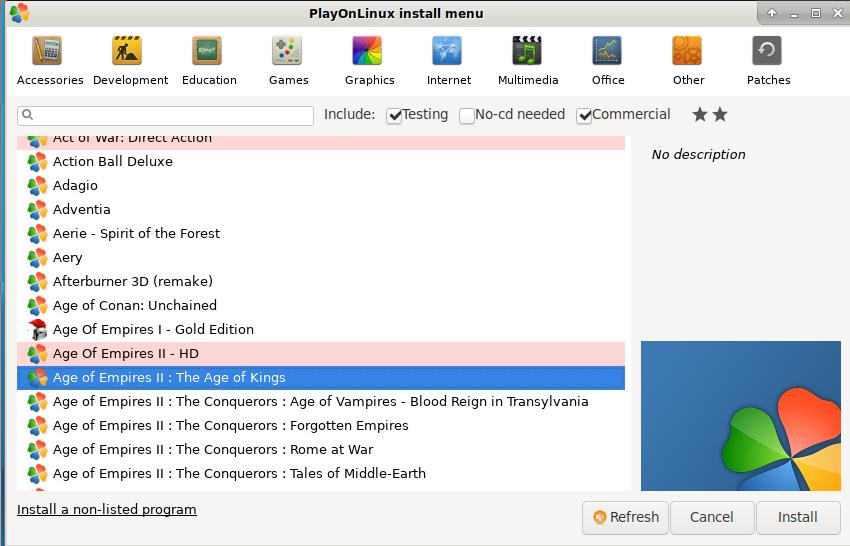
Age Of Empires:
Apr 20, 2021
Technology制作Windows镜像
CentOS7上以以下方式启动虚拟机:
/usr/libexec/qemu-kvm -enable-kvm \
        -machine q35 -smp sockets=1,cores=1,threads=2 -m 2048 \
        -usb -device usb-kbd -device usb-tablet -rtc base=localtime \
        -net nic,model=virtio -net user,hostfwd=tcp::4444-:4444 \
        -drive file=hdd.img,media=disk,if=virtio \
        -drive file=/home/docker/win/cn_windows_10_consumer_editions_version_2004_x64_dvd.iso,media=cdrom \
        -drive file=/home/docker/win/virtio-win-0.1.141.iso,media=cdrom
用qemu提示的vnc端口访问该运行中的实例:
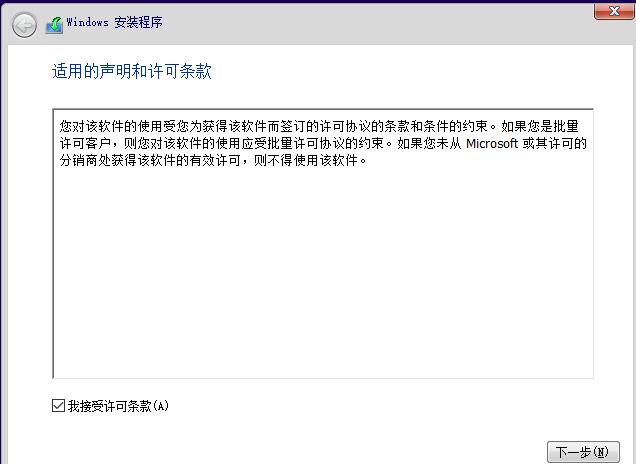
选择自定义安装:

需加载驱动程序:
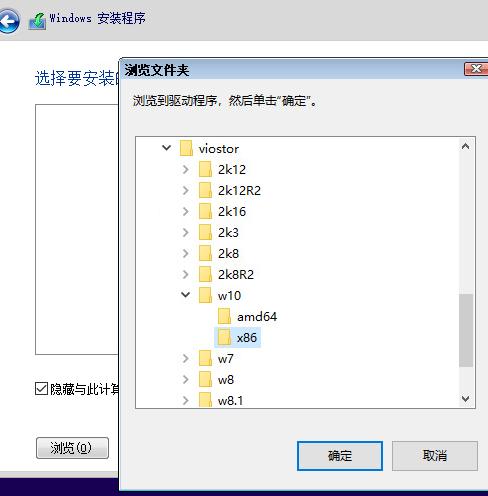
选择好后的驱动:

忽略警告,继续:
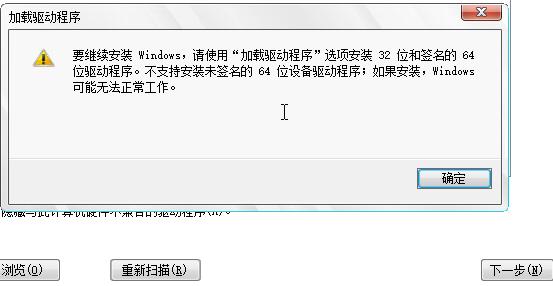
继续安装直到安装完毕。

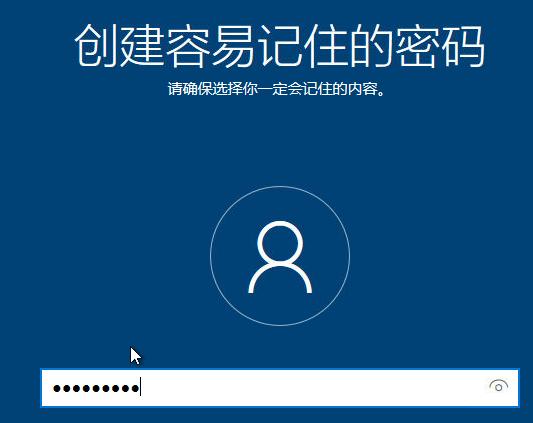
密码:
更新驱动程序:

选中E:\后更新:
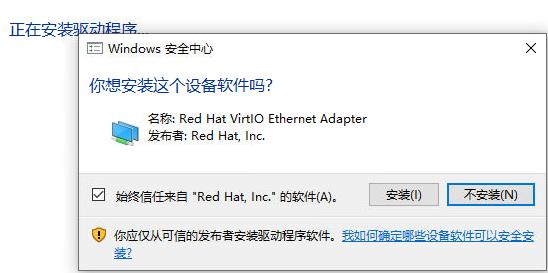
此时关闭vm, 并创建一个overlay的image并使用该image启动一次vm:
$ qemu-img create -b hdd.img -f qcow2 snapshot.img
$ /usr/libexec/qemu-kvm -enable-kvm \
        -machine q35 -smp sockets=1,cores=1,threads=2 -m 2048 \
        -usb -device usb-kbd -device usb-tablet -rtc base=localtime \
        -net nic,model=virtio -net user,hostfwd=tcp::4444-:4444 \
        -drive file=snapshot.img,media=disk,if=virtio \
        -monitor stdio
在qemu终端内, 保存当前的状态后关机:
(qemu) savevm windows
Then type quit to stop VM:

(qemu) quit
因为有save后的状态,因而如果我们能保证容器内的qemu与容器外的qemu是同一版本的话,则可以快速恢复。
编译容器镜像
$ mv hdd.img snapshot.img image
$ cd image
$ docker build -t windows/win10qemu:20210420 .
在Centos7系列的操作系统上,因为宿主机的qemu版本与容器中的qemu版本差异,导致无法启动,需做以下修改:
# vim entrypoint.sh
....

  qemu-system-x86_64 -enable-kvm \
    -machine q35 -smp sockets=1,cores=1,threads=2 -m 2048 \
    -usb -device usb-kbd -device usb-tablet -rtc base=localtime \
    -net nic,model=virtio -net user,hostfwd=tcp::4444-:4444 \
    -drive file=snapshot.img,media=disk,if=virtio &
...
# vim Dockerfile
FROM windows/win10qemu:20210420
COPY entrypoint.sh /
# docker build -t win/win10new:latest .
运行容器:
# docker run -it --rm --privileged -p 4444:4444 -p 5915:5900 win/win10new:latest
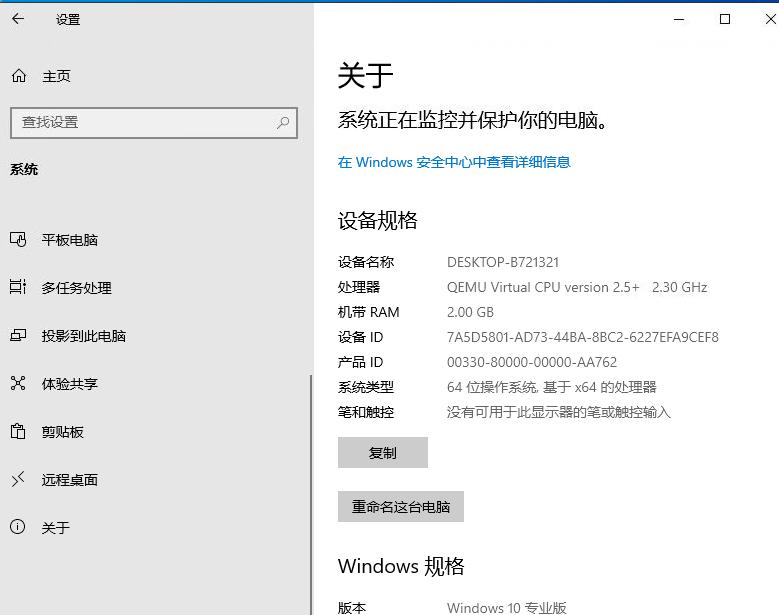
打开vnc软件开始访问5915端口可以看到Windows桌面:
K8s中运行
由容器镜像创建出pod负载,service暴露即可。
Apr 19, 2021
Technology1. 先决条件
各工作节点上需要保证内核为指定版本,并安装对应的kernel-ml-devel/kernel-ml-headers/gcc依赖包.
# uname -a
Linux worker2 4.19.12-1.el7.elrepo.x86_64 #1 SMP Fri Dec 21 11:06:36 EST 2018 x86_64 x86_64 x86_64 GNU/Linux
# rpm -e --nodeps kernel-headers
# yum install -y kernel-ml-devel kernel-ml-headers gcc
手动安装Nvidia驱动:
# ./NVIDIA-Linux-x86_64-460.32.03.run
Verifying archive integrity... OK
Uncompressing NVIDIA Accelerated Graphics Driver for Linux-x86_64 460.32.03...........
..........................................................
..........................................................
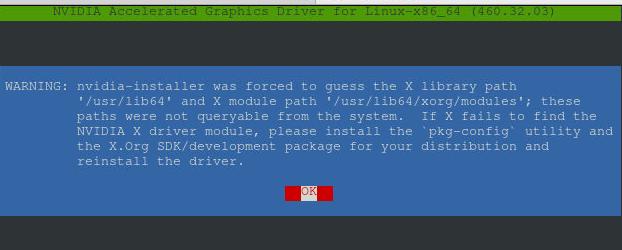
忽略该报错:
选择NO, 忽略安装32位兼容包:

按OK结束安装:

检查驱动是否安装成功:
# nvidia-smi
Mon Apr 19 04:55:13 2021
+-----------------------------------------------------------------------------+
| NVIDIA-SMI 460.32.03    Driver Version: 460.32.03    CUDA Version: 11.2     |
|-------------------------------+----------------------+----------------------+
| GPU  Name        Persistence-M| Bus-Id        Disp.A | Volatile Uncorr. ECC |
| Fan  Temp  Perf  Pwr:Usage/Cap|         Memory-Usage | GPU-Util  Compute M. |
|                               |                      |               MIG M. |
|===============================+======================+======================|
|   0  Tesla V100-PCIE...  Off  | 00000000:00:08.0 Off |                  Off |
| N/A   31C    P0    36W / 250W |      0MiB / 32510MiB |      0%      Default |
|                               |                      |                  N/A |
+-------------------------------+----------------------+----------------------+
|   1  Tesla V100-PCIE...  Off  | 00000000:00:0A.0 Off |                  Off |
| N/A   31C    P0    35W / 250W |      0MiB / 32510MiB |      0%      Default |
|                               |                      |                  N/A |
+-------------------------------+----------------------+----------------------+

+-----------------------------------------------------------------------------+
| Processes:                                                                  |
|  GPU   GI   CI        PID   Type   Process name                  GPU Memory |
|        ID   ID                                                   Usage      |
|=============================================================================|
|  No running processes found                                                 |
+-----------------------------------------------------------------------------+
2. ccse改动
2.1 创建新的离线库:
引入nvidia-docker2相关的离线包并更新k8s-offline-pkgs仓库:
# cd k8s-offline-pkgs/
# tar xzvf /root/nvidiadocker.tar.gz -C .
libnvidia-container-tools-1.3.3-1.x86_64.rpm
nvidia-docker2-2.5.0-1.noarch.rpm
libnvidia-container1-1.3.3-1.x86_64.rpm
nvidia-container-toolkit-1.4.2-2.x86_64.rpm
nvidia-container-runtime-3.4.2-1.x86_64.rpm
# createrepo .
Ccse console节点上替换离线包:
[root@first x86_64]# pwd
/dcos/app/console/backend/webapps/repo/x86_64
[root@first x86_64]# mv k8s-offline-pkgs/ k8s-offline-pkgs.back
[root@first x86_64]# scp -r docker@10.168.100.1:/home/docker/k8s-offline-pkgs .
Ccse代码改动, 仅添加nvidia-docker2的安装:
# vi /dcos/app/console/kubeadm-playbook/roles/util/docker/tasks/install.yml

  - name: <安装docker><install-docker> 安装 docker (ccse源)
    shell: yum install -y docker-ce nvidia-docker2 --disablerepo=\* --enablerepo=ccse-k8s,ccse-centos7-base
    when: "yum_repo == 'ccse'"
# vi /dcos/app/console/kubeadm-playbook/roles/util/docker/templates/daemon.json.j2
    {
    {% if custom_image_repository != '' %}{{ docker_insecure_registry_mirrors | indent(2,true) }}{% endif %}
      "storage-driver": "{{ docker_storage_driver }}",
      "graph": "{{ hosts_datadir_map[inventory_hostname] }}/docker",
      "log-driver": "json-file",
      "log-opts": {
                "max-size": "1g"
            },
      "default-runtime": "nvidia",
      "runtimes": {
          "nvidia": {
              "path": "/usr/bin/nvidia-container-runtime",
              "runtimeArgs": []
          }
      }
    }
3. 验证
相关包位于10.50.208.145的/home/docker目录下的nvidiadockerclassic.tar:
# ls /home/docker/nvidiadockerclassic.tar  -l -h
-rw-r--r-- 1 root root 187M Apr 19 17:49 /home/docker/nvidiadockerclassic.tar
3.1 镜像准备
部署完毕后, ccse console节点上上传准备镜像:
# tar xvf nvidiadockerclassic.tar
nvidiadockerclassic/
nvidiadockerclassic/nvidia-device-plugin.yml
nvidiadockerclassic/k8sdeviceplugin.tar
# cd nvidiadockerclassic
# docker load<k8sdeviceplugin.tar
# docker tag nvcr.io/nvidia/k8s-device-plugin:v0.9.0 10.168.100.144:8021/nvcr.io/nvidia/k8s-device-plugin:v0.9.0
# docker push 10.168.100.144:8021/nvcr.io/nvidia/k8s-device-plugin:v0.9.0
3.2 插件安装及验证
master节点上create nvidia-device-plugin.yml文件:
# kubectl create -f nvidia-device-plugin.yml
验证device-plugin安装成功:
# kubectl  get po -A | grep device
kube-system   nvidia-device-plugin-daemonset-9mhq7           1/1     Running   0          19s
kube-system   nvidia-device-plugin-daemonset-m7txq           1/1     Running   0          19s
# kubectl logs nvidia-device-plugin-daemonset-9mhq7 -n kube-system
2021/04/19 09:53:23 Loading NVML
2021/04/19 09:53:23 Starting FS watcher.
2021/04/19 09:53:23 Starting OS watcher.
2021/04/19 09:53:23 Retreiving plugins.
2021/04/19 09:53:23 Starting GRPC server for 'nvidia.com/gpu'
2021/04/19 09:53:23 Starting to serve 'nvidia.com/gpu' on /var/lib/kubelet/device-plugins/nvidia-gpu.sock
2021/04/19 09:53:23 Registered device plugin for 'nvidia.com/gpu' with Kubelet
测试:
# kubectl create -f test.yml
# kubectl  get po -o wide
NAME             READY   STATUS    RESTARTS   AGE   IP               NODE             NOMINATED NODE   READINESS GATES
dcgmproftester   1/1     Running   0          19s   172.26.189.204   10.168.100.184   <none>           <none>
# nvidia-smi
Mon Apr 19 05:54:55 2021
+-----------------------------------------------------------------------------+
| NVIDIA-SMI 460.32.03    Driver Version: 460.32.03    CUDA Version: 11.2     |
|-------------------------------+----------------------+----------------------+
| GPU  Name        Persistence-M| Bus-Id        Disp.A | Volatile Uncorr. ECC |
| Fan  Temp  Perf  Pwr:Usage/Cap|         Memory-Usage | GPU-Util  Compute M. |
|                               |                      |               MIG M. |
|===============================+======================+======================|
|   0  Tesla V100-PCIE...  Off  | 00000000:00:09.0 Off |                  Off |
| N/A   56C    P0   218W / 250W |    493MiB / 32510MiB |     88%      Default |
|                               |                      |                  N/A |
+-------------------------------+----------------------+----------------------+

+-----------------------------------------------------------------------------+
| Processes:                                                                  |
|  GPU   GI   CI        PID   Type   Process name                  GPU Memory |
|        ID   ID                                                   Usage      |
|=============================================================================|
|    0   N/A  N/A     14182      C   /usr/bin/dcgmproftester11         489MiB |
+-----------------------------------------------------------------------------+


