Aug 5, 2021
Technology目标
系统化说明如何在vdi设备和idv设备上开启sddm的nested模式下Multiseat登录支持。
环境准备
vdi设备信息如下:
Intel(R) Celeron(R) CPU  J1900  @ 1.99GHz
# free -m
              总计         已用        空闲      共享    缓冲/缓存    可用
内存:        3826         487        1676         317        1662        2758
交换:           0           0           0
# df -h
文件系统        容量  已用  可用 已用% 挂载点
udev            1.9G     0  1.9G    0% /dev
tmpfs           383M  872K  382M    1% /run
/dev/sda5        27G  5.1G   21G   20% /
# cat /etc/issue
Ubuntu 18.04.5 LTS \n \l
#  uname -a
Linux xxxx 5.3.0-24-generic #26~18.04.2-Ubuntu SMP Tue Nov 26 12:34:22 UTC 2019 x86_64 x86_64 x86_64 GNU/Linux
安装必要的包:
# sudo apt-get update -y
# sudo apt-get upgrade -y
# sudo apt-get install -y sddm xfce4 unzip autoconf automake libtool pkg-config build-essential
# sudo apt-get install -y x11proto-dev xserver-xorg-dev libxcb-util-dev libxcb-icccm4-dev libxcb-image0-dev libxcb-shm0-dev libxcb-randr0-dev vim cmake cmake-extras extra-cmake-modules libpam-dev libxcb-xkb-dev qt5-default libqt5qml5 qt5-qmltooling-plugins qtdeclarative5-dev qttools5-dev xutils-dev
编译相关包
编译xf86-video-nested:
$ git clone https://github.com/smemc/xf86-video-nested.git
$ cd xf86-video-nested
$ ./autogen.sh
$ ./configure --prefix=/usr
$ make -j2
$ sudo make install
编译sddm-nested:
$ git clone https://github.com/purplepalmdash/sddm-nested-multiseat.git
$ cd sddm-nested
$ mkdir build && cd build
$ cmake -DCMAKE_INSTALL_PREFIX=/usr       -DCMAKE_BUILD_TYPE=Release        -Wno-dev ..
$ make -j2
$ sudo make install
$ sudo install -v -dm755 -o sddm -g sddm /var/lib/sddm
$ sddm --example-config > sddm.example.conf
$ sudo cp -v  sddm.example.conf /etc/sddm.conf
生成配置文件:
cat > /etc/pam.d/sddm << "EOF" &&
# Begin /etc/pam.d/sddm

auth     requisite      pam_nologin.so
auth     required       pam_env.so

auth     required       pam_succeed_if.so uid >= 1000 quiet
auth     include        common-auth

account  include        common-account
password include        common-password

session  required       pam_limits.so
session  include        common-session

# End /etc/pam.d/sddm
EOF

cat > /etc/pam.d/sddm-autologin << "EOF" &&
# Begin /etc/pam.d/sddm-autologin

auth     requisite      pam_nologin.so
auth     required       pam_env.so

auth     required       pam_succeed_if.so uid >= 1000 quiet
auth     required       pam_permit.so

account  include        common-account

password required       pam_deny.so

session  required       pam_limits.so
session  include        common-session

# End /etc/pam.d/sddm-autologin
EOF

cat > /etc/pam.d/sddm-greeter << "EOF"
# Begin /etc/pam.d/sddm-greeter

auth     required       pam_env.so
auth     required       pam_permit.so

account  required       pam_permit.so
password required       pam_deny.so
session  required       pam_unix.so
-session optional       pam_systemd.so

# End /etc/pam.d/sddm-greeter
EOF
配置分屏
定义出Intel显卡的输出口:
# vim  /etc/X11/xorg.conf.d/20-intel.conf
Section "Device"
   Identifier  "Intel Graphics"
   Driver      "intel"
   Option      "AccelMethod"  "sna"
   Option      "TearFree"    "true"
   Option      "DRI"    "3"
   Option      "Monitor-VGA" "VGA"
   Option      "Monitor-HDMI2" "HDMI2"
EndSection
定义出显示器配置:
Section "Monitor"
	Identifier	"VGA"
EndSection

Section "Monitor"
	Identifier	"HDMI2"
	Option		"Position"	"1920 0"
	Option		"PreferredMode"	"1920x1080"
EndSection

Section "Screen"
	Identifier	"VGA"
	Monitor		"VGA"
	SubSection "Display"
		Depth	24
		Modes	"1920x1080"
	EndSubSection
EndSection

Section "Screen"
	Identifier	"HDMI2"
	Monitor		"HDMI2"
	SubSection "Display"
		Depth	24
		Modes	"1920x1080"
	EndSubSection
EndSection

Section "ServerLayout"
	Identifier	"L1"
	Screen		"VGA"	0 0
	Screen		"HDMI2"		1920 0
	Option		"BlankTime"	"0"
	Option		"StandbyTime"	"0"
	Option		"SuspendTime"	"0"
	Option		"OffTime"	"0"
EndSection


Section "ServerFlags"
    Option        "BlankTime"    "0"
    Option        "StandbyTime"    "0"
    Option        "SuspendTime"    "0"
    Option        "OffTime"    "0"
EndSection

Section "Extensions"
    Option        "DPMS"    "Disable"
EndSection
定义出seat1和seat2的配置:
# vim /etc/X11/seat1.conf
Section "Module"
    Load        "shadow"
    Load        "fb"
EndSection

Section "Device"
    Identifier    "seat1"
    Driver        "nested"
EndSection

Section "Screen"
    Identifier    "Screen1"
    Device        "seat1"
    DefaultDepth    24
    SubSection "Display"
        Depth 24
        #Modes "3840x2160"
        Modes "1920x1080"
    EndSubSection
    Option        "Origin"    "1920 0"
EndSection

Section "ServerLayout"
    Identifier    "Nested"
    Screen        "Screen1"
    Option        "AllowEmptyInput"    "true"
    Option        "BlankTime"    "0"
    Option        "StandbyTime"    "0"
    Option        "SuspendTime"    "0"
    Option        "OffTime"    "0"
EndSection

Section "ServerFlags"
        Option "BlankTime" "0"
        Option "StandbyTime" "0"
        Option "SuspendTime" "0"
        Option "OffTime" "0"
EndSection
# vim /etc/X11/seat2.conf
Section "Module"
    Load        "shadow"
    Load        "fb"
EndSection

Section "Device"
    Identifier    "seat2"
    Driver        "nested"
EndSection

Section "Screen"
    Identifier    "Screen1"
    Device        "seat2"
    DefaultDepth    24
    SubSection "Display"
        Depth 24
        Modes "1920x1080"
    EndSubSection
    Option        "Origin"    "0 0"
EndSection

Section "ServerLayout"
    Identifier    "Nested"
    Screen        "Screen1"
    Option        "AllowEmptyInput"    "true"
    Option        "BlankTime"    "0"
    Option        "StandbyTime"    "0"
    Option        "SuspendTime"    "0"
    Option        "OffTime"    "0"
EndSection

Section "ServerFlags"
        Option "BlankTime" "0"
        Option "StandbyTime" "0"
        Option "SuspendTime" "0"
        Option "OffTime" "0"
EndSection
定义出USB口与seat的映射关系(注意前置的口USB编号与机箱后部的USB编号的对应关系):
# vim /etc/udev/rules.d/70-seat.rules
SUBSYSTEM=="input", DEVPATH=="/devices/pci0000:00/0000:00:14.0/usb1/1-1/*", TAG+="seat",  ENV{ID_SEAT}="seat2", TAG+="master-of-seat", PROGRAM="/usr/bin/sed -n 's/.*startseat=\([^ ]*\).*/\1/p' /proc/cmdline", RESULT=="true"
SUBSYSTEM=="input", DEVPATH=="/devices/pci0000:00/0000:00:14.0/usb1/1-4/*", TAG+="seat",  ENV{ID_SEAT}="seat2", TAG+="master-of-seat", PROGRAM="/usr/bin/sed -n 's/.*startseat=\([^ ]*\).*/\1/p' /proc/cmdline", RESULT=="true"
SUBSYSTEM=="input", ATTRS{name}=="Power Button", TAG+="seat",  ENV{ID_SEAT}="seat2", TAG+="master-of-seat", PROGRAM="/usr/bin/sed -n 's/.*startseat=\([^ ]*\).*/\1/p' /proc/cmdline", RESULT=="true"
#SUBSYSTEM=="input", DEVPATH=="/devices/pci0000:00/0000:00:14.0/usb1/1-9/*", TAG+="seat",  ENV{ID_SEAT}="seat1", TAG+="master-of-seat", PROGRAM="/usr/bin/sed -n 's/.*startseat=\([^ ]*\).*/\1/p' /proc/cmdline", RESULT=="true"

SUBSYSTEM=="input", DEVPATH=="/devices/pci0000:00/0000:00:14.0/usb1/1-2/*", TAG+="seat",  ENV{ID_SEAT}="seat1", TAG+="master-of-seat", PROGRAM="/usr/bin/sed -n 's/.*startseat=\([^ ]*\).*/\1/p' /proc/cmdline", RESULT=="true"
#SUBSYSTEM=="input", DEVPATH=="/devices/pci0000:00/0000:00:14.0/usb1/1-6/*", TAG+="seat",  ENV{ID_SEAT}="seat1", TAG+="master-of-seat", PROGRAM="/usr/bin/sed -n 's/.*startseat=\([^ ]*\).*/\1/p' /proc/cmdline", RESULT=="true"
SUBSYSTEM=="input", ATTRS{name}=="Sleep Button", TAG+="seat",  ENV{ID_SEAT}="seat1", TAG+="master-of-seat", PROGRAM="/usr/bin/sed -n 's/.*startseat=\([^ ]*\).*/\1/p' /proc/cmdline", RESULT=="true"
开启multi-seat:
# vim /etc/default/grub
.....
GRUB_CMDLINE_LINUX_DEFAULT="quiet splash startseat=true"
GRUB_CMDLINE_LINUX="startseat=true"
....
# update-grub2
重启后验证:
# cat /proc/cmdline
BOOT_IMAGE=/boot/vmlinuz-5.3.0-24-generic root=UUID=50368a13-e1d7-4699-8b3b-b5ffc1d148e6 ro startseat=true quiet splash startseat=true vt.handoff=1
配置多用户登录
创建两个用户seat1和seat2:
# useradd -m seat1
# useradd -m seat2
# passwd seat1
# passwd seat2
配置其自动登录([AutoLogin]内只保留如下所示部分):
# cat /etc/sddm.conf | more
[Autologin]
# Whether sddm should automatically log back into sessions when they exit
# Whether sddm should automatically log back into sessions when they exit
Relogin=false,false
SeatName=seat1,seat2
#Session=awesome,awesome
Session=xfce,xfce
User=seat1,seat2
....
Awesome自启动项
在awesome的情景下,我们配置其登录方式为:
# su seat1
$ /bin/bash
$ mkdir -p ~/.config/awesome
$ cp /etc/xdg/awesome/rc.lua ~//.config/awesome
$ vim ~/.config/awesome/autorun.sh

$ vim ~/.config/awesome/autorun.sh
    #!/usr/bin/env bash

    function run {
      if ! pgrep -f $1 ;
      then
        $@&
      fi
    }
    run sleep3 && /opt/ctg/CtyunClouddeskUniversal/CtyunClouddeskUniversal
$ vim ~/.config/awesome/rc.lua
最后一行添加:
awful.spawn.with_shell("~/.config/awesome/autorun.sh")
$ chmod 777 ~/.config/awesome/autorun.sh
$ rm -rf /tmp/awesome/
$ cp -r ~/.config/awesome /tmp
$ exit
exit
$ exit
# su seat2
$ /bin/bash
$ cp -r /tmp/awesome/ ~/.config/
$ chmod 777 ~/.config/awesome/autorun.sh
$ exit
exit
$ exit
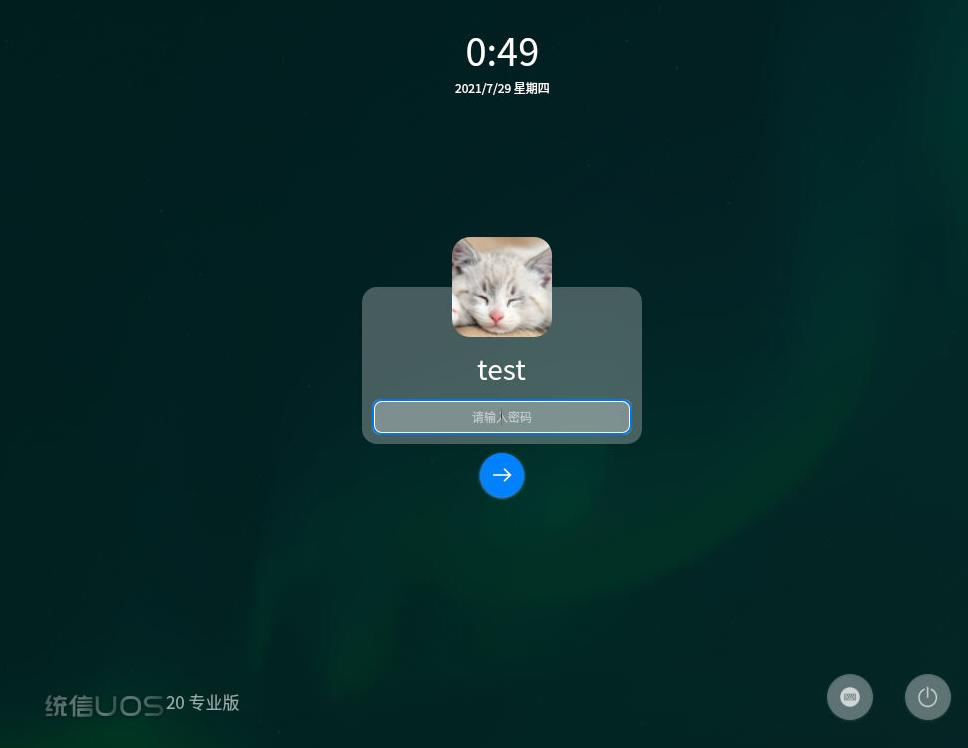
现在重启后即可看到结果,其结果表现为,两路显示独立输出且进入到idv登录前界面。
Jul 21, 2021
Technology环境
两台虚拟机用来模拟现实环境中的双节点(可以拓展到多节点)场景下的物理机器关机导致的LXD容器的迁移情况。
机器配置(以mig2为例):
root@mig2:/home/test# cat /etc/issue
Ubuntu 20.04.2 LTS \n \l
root@mig2:/home/test# free -g
              total        used        free      shared  buff/cache   available
Mem:              9           0           8           0           0           9
Swap:             0           0           0
root@mig2:/home/test# lxd --version
4.0.7
步骤
mig1节点上初始化:
root@mig1:/home/test# lxd init
Would you like to use LXD clustering? (yes/no) [default=no]: yes
What IP address or DNS name should be used to reach this node? [default=192.168.89.11]:
Are you joining an existing cluster? (yes/no) [default=no]: no
What name should be used to identify this node in the cluster? [default=mig1]:
Setup password authentication on the cluster? (yes/no) [default=no]: yes
Trust password for new clients:
Again:
Do you want to configure a new local storage pool? (yes/no) [default=yes]:
Name of the storage backend to use (lvm, zfs, btrfs, dir) [default=zfs]:
Create a new ZFS pool? (yes/no) [default=yes]:
Would you like to use an existing empty block device (e.g. a disk or partition)? (yes/no) [default=no]:
Size in GB of the new loop device (1GB minimum) [default=30GB]:
Do you want to configure a new remote storage pool? (yes/no) [default=no]:
Would you like to connect to a MAAS server? (yes/no) [default=no]:
Would you like to configure LXD to use an existing bridge or host interface? (yes/no) [default=no]:
Would you like to create a new Fan overlay network? (yes/no) [default=yes]:
What subnet should be used as the Fan underlay? [default=auto]:
Would you like stale cached images to be updated automatically? (yes/no) [default=yes]
Would you like a YAML "lxd init" preseed to be printed? (yes/no) [default=no]:
mig2节点加入集群:
root@mig2:/home/test# lxd init
Would you like to use LXD clustering? (yes/no) [default=no]: yes
What IP address or DNS name should be used to reach this node? [default=192.168.89.12]:
Are you joining an existing cluster? (yes/no) [default=no]: yes
Do you have a join token? (yes/no) [default=no]: no
What name should be used to identify this node in the cluster? [default=mig2]:
IP address or FQDN of an existing cluster node: 192.168.89.11
Cluster fingerprint: 75ee6a1962985e0262d6bea9f95d554f197719cca19820671856280fe0d2e28b
You can validate this fingerprint by running "lxc info" locally on an existing node.
Is this the correct fingerprint? (yes/no) [default=no]: yes
Cluster trust password:
All existing data is lost when joining a cluster, continue? (yes/no) [default=no] yes
Choose "zfs.pool_name" property for storage pool "local":
Choose "size" property for storage pool "local": 30GB
Choose "source" property for storage pool "local":
Would you like a YAML "lxd init" preseed to be printed? (yes/no) [default=no]:
root@mig2:/home/test#
创建成功后,检查cluster情况:
# root@mig2:/home/test# lxc cluster list
To start your first instance, try: lxc launch ubuntu:18.04

+------+----------------------------+----------+--------+-------------------+--------------+
| NAME |            URL             | DATABASE | STATE  |      MESSAGE      | ARCHITECTURE |
+------+----------------------------+----------+--------+-------------------+--------------+
| mig1 | https://192.168.89.11:8443 | YES      | ONLINE | Fully operational | x86_64       |
+------+----------------------------+----------+--------+-------------------+--------------+
| mig2 | https://192.168.89.12:8443 | YES      | ONLINE | Fully operational | x86_64       |
+------+----------------------------+----------+--------+-------------------+--------------+
Jul 7, 2021
TechnologyInstall sway via:
$ sudo pacman -S sway alacritty
Logout and type sway in terminal, here we encounter Nvidia issue:
$ sway
sway/main.c:100Proprietary Nvidia driver are NOT supported. Use Nouveau. To launch ....
$ sway --my-next-gpu-wont-be-nvidia
Could not connect to socket /run/seated.sock: No such file or directory
$ echo LIBSEAT_BACKEND=logind >> /etc/environment
$ sway --my-next-gpu-wont-be-nvidia 2>&1 | tee start.log
sway/main.c: 202 unable to drop root
$ sudo useradd -m dash1
$ sudo passwd dash1
$ exit
Login with the newly created dash1 and re-test
Install gdm and change to opensource nvidia driver:
$ sudo pacman -S gdm
$ sudo rm -f /etc/modprobe.d/nouveau_blacklist.conf
$ sudo vim /etc/mkinitcpio.conf
MODULES=(... nouveau ...)

$ sudo  mkinitcpio -p linux
Jul 6, 2021
Technologysteps
default seat:
# loginctl seat-status seat0>seat0.txt
# cat seat0.txt
seat0
	Sessions: *1
	 Devices:
		  ├─/sys/devices/LNXSYSTM:00/LNXPWRBN:00/input/input1
		  │ input:input1 "Power Button"
		  ├─/sys/devices/LNXSYSTM:00/LNXSYBUS:00/PNP0A08:00/LNXVIDEO:00/input/input14
		  │ input:input14 "Video Bus"
		  ├─/sys/devices/LNXSYSTM:00/LNXSYBUS:00/PNP0C0C:00/input/input0
		  │ input:input0 "Power Button"
		  ├─/sys/devices/pci0000:00/0000:00:02.0/drm/card0
		  │ [MASTER] drm:card0
		  │ ├─/sys/devices/pci0000:00/0000:00:02.0/drm/card0/card0-DP-1
		  │ │ [MASTER] drm:card0-DP-1
		  │ ├─/sys/devices/pci0000:00/0000:00:02.0/drm/card0/card0-HDMI-A-1
		  │ │ [MASTER] drm:card0-HDMI-A-1
		  │ ├─/sys/devices/pci0000:00/0000:00:02.0/drm/card0/card0-HDMI-A-2
		  │ │ [MASTER] drm:card0-HDMI-A-2
		  │ └─/sys/devices/pci0000:00/0000:00:02.0/drm/card0/card0-eDP-1
		  │   [MASTER] drm:card0-eDP-1
		  │   └─/sys/devices/pci0000:00/0000:00:02.0/drm/card0/card0-eDP-1/intel_backlight
		  │     backlight:intel_backlight
		  ├─/sys/devices/pci0000:00/0000:00:02.0/graphics/fb0
		  │ graphics:fb0 "i915drmfb"
		  ├─/sys/devices/pci0000:00/0000:00:03.0/sound/card1
		  │ sound:card1 "HDMI"
		  │ ├─/sys/devices/pci0000:00/0000:00:03.0/sound/card1/input16
		  │ │ input:input16 "HDA Intel HDMI HDMI/DP,pcm=3"
		  │ ├─/sys/devices/pci0000:00/0000:00:03.0/sound/card1/input17
		  │ │ input:input17 "HDA Intel HDMI HDMI/DP,pcm=7"
		  │ ├─/sys/devices/pci0000:00/0000:00:03.0/sound/card1/input18
		  │ │ input:input18 "HDA Intel HDMI HDMI/DP,pcm=8"
		  │ ├─/sys/devices/pci0000:00/0000:00:03.0/sound/card1/input19
		  │ │ input:input19 "HDA Intel HDMI HDMI/DP,pcm=9"
		  │ └─/sys/devices/pci0000:00/0000:00:03.0/sound/card1/input20
		  │   input:input20 "HDA Intel HDMI HDMI/DP,pcm=10"
		  ├─/sys/devices/pci0000:00/0000:00:14.0/usb2
		  │ usb:usb2
		  │ └─/sys/devices/pci0000:00/0000:00:14.0/usb2/2-3
		  │   usb:2-3
		  │   └─/sys/devices/pci0000:00/0000:00:14.0/usb2/2-3/2-3:1.2/0003:046D:C52B.0003/0003:046D:404D.0004/input/input15
		  │     input:input15 "Logitech K400 Plus"
		  │     ├─/sys/devices/pci0000:00/0000:00:14.0/usb2/2-3/2-3:1.2/0003:046D:C52B.0003/0003:046D:404D.0004/input/input15/input15::capslock
		  │     │ leds:input15::capslock
		  │     ├─/sys/devices/pci0000:00/0000:00:14.0/usb2/2-3/2-3:1.2/0003:046D:C52B.0003/0003:046D:404D.0004/input/input15/input15::compose
		  │     │ leds:input15::compose
		  │     ├─/sys/devices/pci0000:00/0000:00:14.0/usb2/2-3/2-3:1.2/0003:046D:C52B.0003/0003:046D:404D.0004/input/input15/input15::kana
		  │     │ leds:input15::kana
		  │     ├─/sys/devices/pci0000:00/0000:00:14.0/usb2/2-3/2-3:1.2/0003:046D:C52B.0003/0003:046D:404D.0004/input/input15/input15::numlock
		  │     │ leds:input15::numlock
		  │     └─/sys/devices/pci0000:00/0000:00:14.0/usb2/2-3/2-3:1.2/0003:046D:C52B.0003/0003:046D:404D.0004/input/input15/input15::scrolllock
		  │       leds:input15::scrolllock
		  ├─/sys/devices/pci0000:00/0000:00:14.0/usb3
		  │ usb:usb3
		  ├─/sys/devices/pci0000:00/0000:00:1b.0/sound/card0
		  │ sound:card0 "PCH"
		  │ └─/sys/devices/pci0000:00/0000:00:1b.0/sound/card0/input8
		  │   input:input8 "HDA Intel PCH Headphone"
		  ├─/sys/devices/pci0000:00/0000:00:1d.0/usb1
		  │ usb:usb1
		  │ └─/sys/devices/pci0000:00/0000:00:1d.0/usb1/1-1
		  │   usb:1-1
		  └─/sys/devices/platform/pcspkr/input/input7
		    input:input7 "PC Speaker"
找寻对应的口:
/sys/devices/pci0000:00/0000:00:02.0/drm/card0/card0-eDP-1
/sys/devices/pci0000:00/0000:00:14.0/usb2/2-2/2-2.3

/sys/devices/pci0000:00/0000:00:14.0/usb2/2-3

/sys/devices/pci0000:00/0000:00:02.0/drm/card0/card0-HDMI-A-1
Attach:
# loginctl attach seat1  /sys/devices/pci0000:00/0000:00:02.0/drm/card0/card0-eDP-1
# loginctl attach seat1  /sys/devices/pci0000:00/0000:00:14.0/usb2/2-2/2-2.3
➜  ~ loginctl seat-status seat1
seat1
	 Devices:
		  ├─/sys/devices/pci0000:00/0000:00:02.0/drm/card0/card0-eDP-1
		  │ [MASTER] drm:card0-eDP-1
		  │ └─/sys/devices/pci0000:00/0000:00:02.0/drm/card0/card0-eDP-1/intel_backlight
		  │   backlight:intel_backlight
		  └─/sys/devices/pci0000:00/0000:00:14.0/usb2/2-2/2-2.3
		    usb:2-2.3
		    ├─/sys/devices/pci0000:00/0000:00:14.0/usb2/2-2/2-2.3/2-2.3:1.0/0003:1A81:2019.0005/input/input10
		    │ input:input10 "G-Tech Fuhlen SM680 Mechanical Keyboard"
		    │ ├─/sys/devices/pci0000:00/0000:00:14.0/usb2/2-2/2-2.3/2-2.3:1.0/0003:1A81:2019.0005/input/input10/input10::capslock
		    │ │ leds:input10::capslock
		    │ ├─/sys/devices/pci0000:00/0000:00:14.0/usb2/2-2/2-2.3/2-2.3:1.0/0003:1A81:2019.0005/input/input10/input10::compose
		    │ │ leds:input10::compose
		    │ ├─/sys/devices/pci0000:00/0000:00:14.0/usb2/2-2/2-2.3/2-2.3:1.0/0003:1A81:2019.0005/input/input10/input10::kana
		    │ │ leds:input10::kana
		    │ ├─/sys/devices/pci0000:00/0000:00:14.0/usb2/2-2/2-2.3/2-2.3:1.0/0003:1A81:2019.0005/input/input10/input10::numlock
		    │ │ leds:input10::numlock
		    │ └─/sys/devices/pci0000:00/0000:00:14.0/usb2/2-2/2-2.3/2-2.3:1.0/0003:1A81:2019.0005/input/input10/input10::scrolllock
		    │   leds:input10::scrolllock
		    ├─/sys/devices/pci0000:00/0000:00:14.0/usb2/2-2/2-2.3/2-2.3:1.1/0003:1A81:2019.0006/input/input11
		    │ input:input11 "G-Tech Fuhlen SM680 Mechanical Keyboard Mouse"
		    ├─/sys/devices/pci0000:00/0000:00:14.0/usb2/2-2/2-2.3/2-2.3:1.1/0003:1A81:2019.0006/input/input12
		    │ input:input12 "G-Tech Fuhlen SM680 Mechanical Keyboard"
		    ├─/sys/devices/pci0000:00/0000:00:14.0/usb2/2-2/2-2.3/2-2.3:1.1/0003:1A81:2019.0006/input/input13
		    │ input:input13 "G-Tech Fuhlen SM680 Mechanical Keyboard Consumer Control"
		    ├─/sys/devices/pci0000:00/0000:00:14.0/usb2/2-2/2-2.3/2-2.3:1.1/0003:1A81:2019.0006/input/input14
		    │ input:input14 "G-Tech Fuhlen SM680 Mechanical Keyboard System Control"
		    ├─/sys/devices/pci0000:00/0000:00:14.0/usb2/2-2/2-2.3/2-2.3:1.2/0003:1A81:2019.0007/input/input16
		    │ input:input16 "G-Tech Fuhlen SM680 Mechanical Keyboard"
		    └─/sys/devices/pci0000:00/0000:00:14.0/usb2/2-2/2-2.3/2-2.3:1.3/0003:1A81:2019.0008/input/input17
		      input:input17 "G-Tech Fuhlen SM680 Mechanical Keyboard"
Verify:
➜  ~ ls -l  /etc/udev/rules.d/
total 12
-rw-r--r-- 1 root root  76 Jul  6 06:22 72-seat-drm-pci-0000_00_02_0.rules
-rw-r--r-- 1 root root  86 Jul  6 06:23 72-seat-usb-pci-0000_00_14_0-usb-0_2_3.rules
-rw-r--r-- 1 root root 432 Aug 10  2020 99-kvmd.rules.pacsave
Disable lxdm and testing:
# systemctl disable lxdm
Removed /etc/systemd/system/display-manager.service.
# reboot


