Aug 23, 2021
TechnologyHardware & OS
Refers to:
https://www.h3c.com/en/Support/Resource_Center/EN/Severs/Catalog/Optional_Parts/GPU/Technical_Documents/Install/User_Guide/H3C_XG310_GPU_UG-5W100/
# cat /etc/issue
Ubuntu 20.04.1 LTS \n \l

# uname -a
Linux xxxxxxxxxxxxxxxxxx 5.4.48+ #1 SMP Wed Feb 3 10:57:04 CST 2021 x86_64 x86_64 x86_64 GNU/Linux
CPU and memory:
# cat /proc/cpuinfo
...
processor       : 95
vendor_id       : GenuineIntel
cpu family      : 6
model           : 85
 model name      : Intel(R) Xeon(R) Gold 6248R CPU @ 3.00GHz
...
# free -g
              total        used        free      shared  buff/cache   available
Mem:            503           3         496           0           3         497
Swap:             1           0           1
Steps
Steps:
# mkdir IntelAndroid
# tar xzvf xxxxxxxxxxxx.tar.gz
Aug 17, 2021
Technology硬件配置
2核2G, 虚拟机,
其磁盘文件为openwrt-21.02.0-rc3-x86-64-generic-ext4-combined.img.
网络配置
隔离网络:

NAT网络:
启动完毕后,安装以下opkg包:
# opkg install redsocks
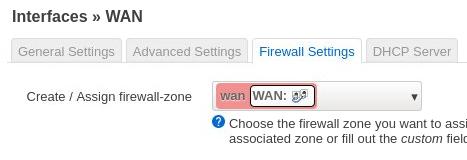
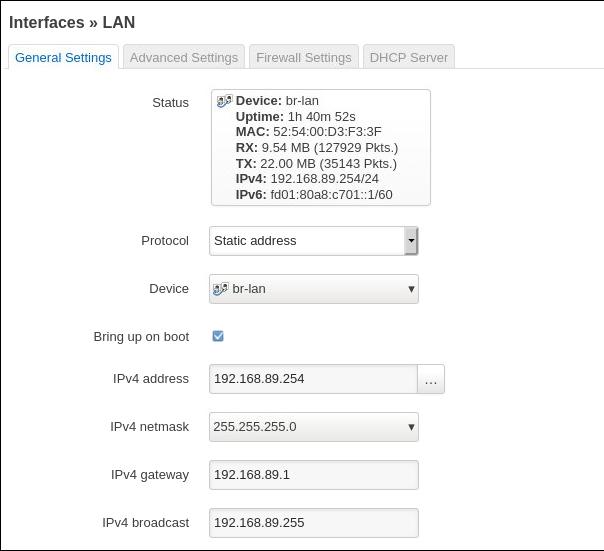
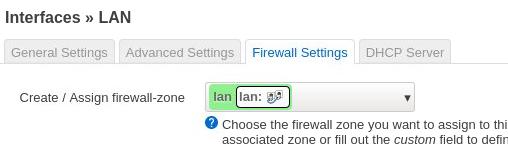
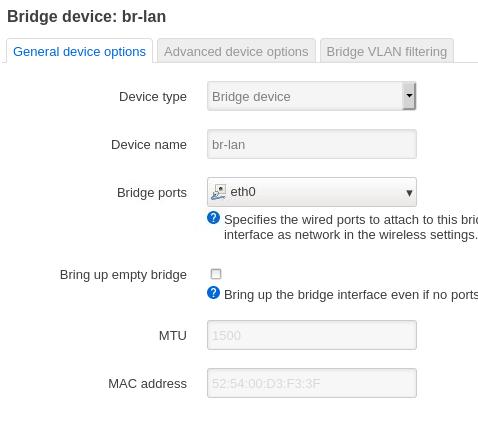
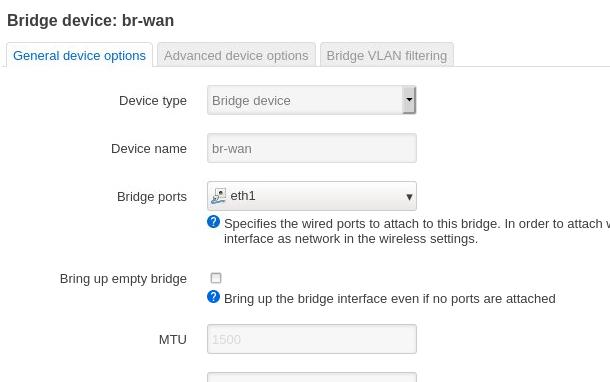
OpenWRT中配置:
Wan:

LAN:
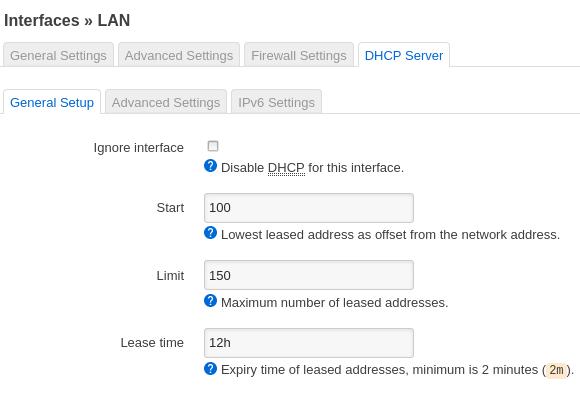
Enable dhcp server:
Devices:
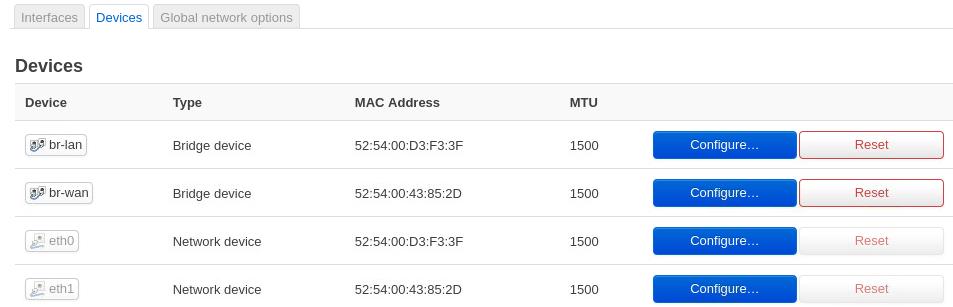
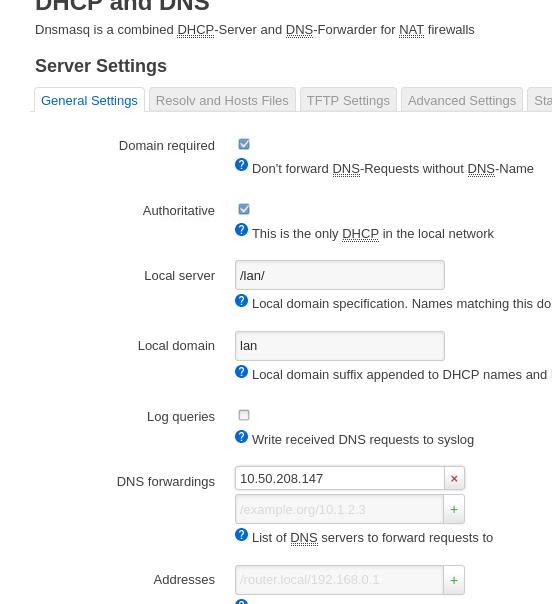
DNS:
redsocks items
/etc/redsocks.conf:
base {
        // debug: connection progress & client list on SIGUSR1
        log_debug = off;

        // info: start and end of client session
        log_info = on;

        /* possible `log' values are:
         *   stderr
         *   "file:/path/to/file"
         *   syslog:FACILITY  facility is any of "daemon", "local0"..."local7"
         */
        // log = stderr;
        // log = "file:/path/to/file";
        log = "syslog:local7";

        // detach from console
        daemon = on;

        /* Change uid, gid and root directory, these options require root
         * privilegies on startup.
         * Note, your chroot may requre /etc/localtime if you write log to syslog.
         * Log is opened before chroot & uid changing.
         */
        // user = nobody;
        // group = nobody;
        // chroot = "/var/chroot";

        /* possible `redirector' values are:
         *   iptables   - for Linux
         *   ipf        - for FreeBSD
         *   pf         - for OpenBSD
         *   generic    - some generic redirector that MAY work
         */
        redirector = iptables;
}

redsocks {
        /* `local_ip' defaults to 127.0.0.1 for security reasons,
         * use 0.0.0.0 if you want to listen on every interface.
         * `local_*' are used as port to redirect to.
         */
        local_ip = 192.168.89.254;
        local_port = 12345;

        // listen() queue length. Default value is SOMAXCONN and it should be
        // good enough for most of us.
        // listenq = 128; // SOMAXCONN equals 128 on my Linux box.

        // `max_accept_backoff` is a delay to retry `accept()` after accept
        // failure (e.g. due to lack of file descriptors). It's measured in
        // milliseconds and maximal value is 65535. `min_accept_backoff` is
        // used as initial backoff value and as a damper for `accept() after
        // close()` logic.
        // min_accept_backoff = 100;
        // max_accept_backoff = 60000;

        // `ip' and `port' are IP and tcp-port of proxy-server
        // You can also use hostname instead of IP, only one (random)
        // address of multihomed host will be used.
        ip = 10.50.208.147;
        port = 8118;


        // known types: socks4, socks5, http-connect, http-relay
        type = socks5;

        // login = "foobar";
        // password = "baz";
}

redudp {
        // `local_ip' should not be 0.0.0.0 as it's also used for outgoing
        // packets that are sent as replies - and it should be fixed
        // if we want NAT to work properly.
        local_ip = 127.0.0.1;
        local_port = 10053;
        // `ip' and `port' of socks5 proxy server.
        ip = 10.0.0.1;
       port = 1080;
        login = username;
        password = pazzw0rd;

        // redsocks knows about two options while redirecting UDP packets at
        // linux: TPROXY and REDIRECT.  TPROXY requires more complex routing
        // configuration and fresh kernel (>= 2.6.37 according to squid
        // developers[1]) but has hack-free way to get original destination
        // address, REDIRECT is easier to configure, but requires `dest_ip` and
        // `dest_port` to be set, limiting packet redirection to single
        // destination.
        // [1] http://wiki.squid-cache.org/Features/Tproxy4
        dest_ip = 8.8.8.8;
        dest_port = 53;

        udp_timeout = 30;
        udp_timeout_stream = 180;
}

dnstc {
        // fake and really dumb DNS server that returns "truncated answer" to
        // every query via UDP, RFC-compliant resolver should repeat same query
        // via TCP in this case.
        local_ip = 127.0.0.1;
        local_port = 5300;
}

// you can add more `redsocks' and `redudp' sections if you need.
/etc/init.d/redsocks content:
##### /etc/init.d/redsocks######
#!/bin/sh /etc/rc.common
# Copyright (C) 2007 OpenWrt.org

START=90

# check if configuration exists
[ -e "/etc/redsocks.conf" ] || exit 0

start() {
        if [ -e "/var/run/redsocks.pid" ]; then
                echo "redsocks is already running"
                exit 0
        fi

        /bin/echo -n "running redsocks ..."

        # startup the safety-wrapper for the daemon
        /usr/sbin/redsocks -p /var/run/redsocks.pid

        /bin/echo " done"
}

stop() {
        if [ ! -e "/var/run/redsocks.pid" ]; then
                echo "redsocks is not running"
                exit 0
        fi

        /bin/echo -n "stopping redsocks ..."

        # kill the process
        /bin/kill $(cat /var/run/redsocks.pid)
        rm /var/run/redsocks.pid

        echo " done"
}
Iptables rules:
iptables -t nat -N REDSOCKS
# Ignore LANs IP address
iptables -t nat -A REDSOCKS -d 0.0.0.0/8 -j RETURN
iptables -t nat -A REDSOCKS -d 10.0.0.0/8 -j RETURN
iptables -t nat -A REDSOCKS -d 127.0.0.0/8 -j RETURN
iptables -t nat -A REDSOCKS -d 169.254.0.0/16 -j RETURN
iptables -t nat -A REDSOCKS -d 172.16.0.0/12 -j RETURN
iptables -t nat -A REDSOCKS -d 192.168.0.0/16 -j RETURN
iptables -t nat -A REDSOCKS -d 224.0.0.0/4 -j RETURN
iptables -t nat -A REDSOCKS -d 240.0.0.0/4 -j RETURN
# Anything else should be redirected to redsocks's local port
iptables -t nat -A REDSOCKS -p tcp -j REDIRECT --to-ports 12345
iptables -t nat -I zone_lan_prerouting -j REDSOCKS
Then with a reverse proxy you could cross gfw.
Reverse connect:
Internet machine(with 53 as its dns server):
ssh -o GatewayPorts=true -f -N -T -R *:18888:localhost:18888 docker@10.xxxxx
ssh -o GatewayPorts=true -f -N -T -R *:8118:10.10.3.19:1080 docker@10.xxxxxx
sudo socat tcp-listen:18888,reuseaddr,fork udp:127.0.0.1:53
Intranet machine:
socat -T15 udp4-recvfrom:53,bind=10.xxx.xxx.xx,fork tcp:localhost:18888
Aug 13, 2021
TechnologyVM Prepration
Download qcow2 from gitlab(arch built), then start a vm.
Update the mirrorlist from https://archlinux.org/mirrorlist/
Steps
Install yay:
$ sudo pacman -Sy git fakeroot vim pacman-mirrorlist
$ sudo pacman -Sy base-devel
$ cd /opt
$ sudo git clone https://aur.archlinux.org/yay-git.git
$ sudo chown -R  arch:arch ./yay-git/
$ cd yay-git
$ makepkg -si
Install linux-mainline:
$ yay linux-mainline
Aug 11, 2021
Technologyflash
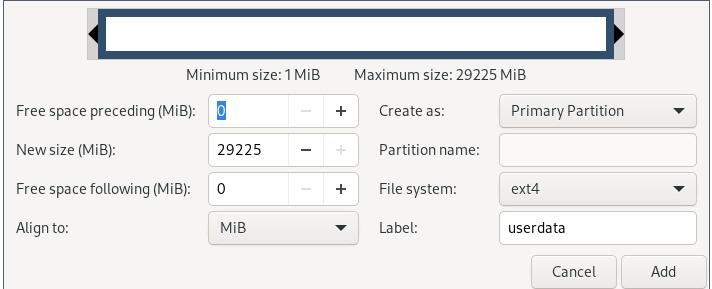
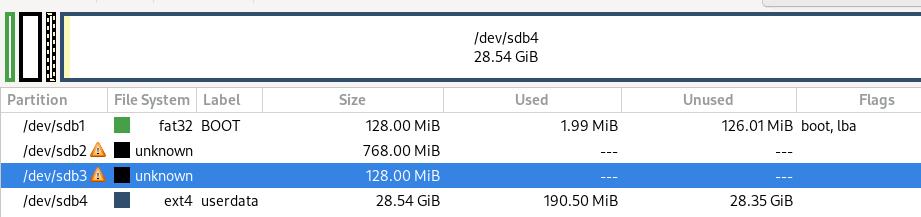
Create a new partition:
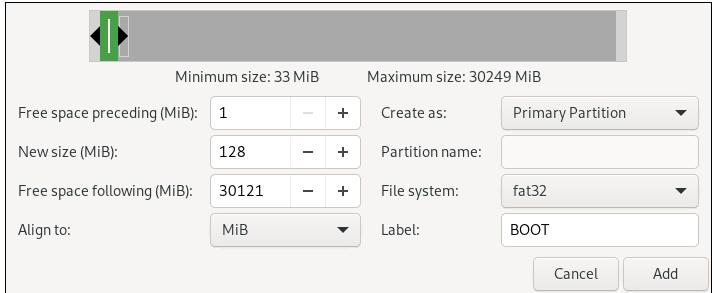
Create new unkown partitions, then a userdata partition:
Layout:
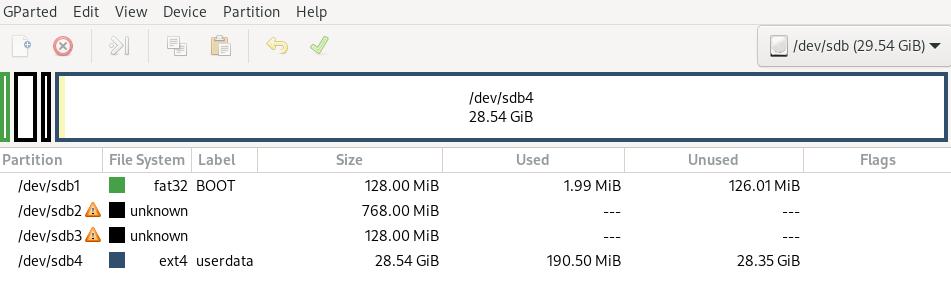
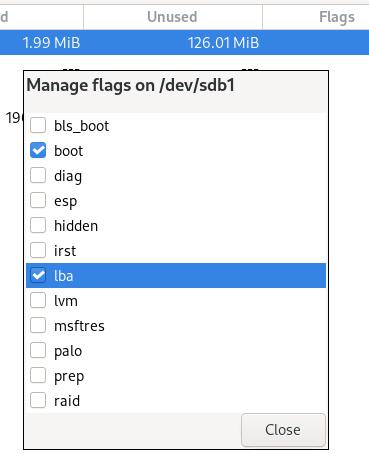
p1: 128MB for boot (fat32, boot & lba)
p2: 768MB for /system
p3: 128MB for /vendor
p4: remainings for /data (ext4)
Manage flags:
Final layout:
Write steps
Write via following steps:
➜  ~ cd rpi4
➜  rpi4 ls
bcm2711-rpi-4-b.dtb  boot  ramdisk.img  system.img  vc4-kms-v3d-pi4.dtbo  vendor.img  zImage
➜  rpi4 sudo dd if=system.img of=/dev/sdb2 bs=1M
768+0 records in
768+0 records out
805306368 bytes (805 MB, 768 MiB) copied, 12.812 s, 62.9 MB/s
➜  rpi4 sudo dd if=vendor.img of=/dev/sdb3 bs=1M
128+0 records in
128+0 records out
134217728 bytes (134 MB, 128 MiB) copied, 2.25087 s, 59.6 MB/s
➜  rpi4 sudo mount /dev/sdb1 /mnt
➜  rpi4 sudo cp boot/* /mnt
➜  rpi4 sudo cp zImage bcm2711-rpi-4-b.dtb ramdisk.img /mnt
➜  rpi4 sudo mkdir /mnt/overlays
➜  rpi4 sudo cp vc4-kms-v3d-pi4.dtbo /mnt/overlays
➜  rpi4 sudo sync
Aug 10, 2021
TechnologyWorkingSteps
Operation steps:
# adb connect 192.168.1.113
already connected to 192.168.1.113:5555
# adb shell
rpi4:/
Or:
# adb root
restarting adbd as root
# adb shell
rpi4:/ # ls
acct boot       charger data          dev  init.environ.rc      init.usb.rc      mnt proc             res    sepolicy system     vendor_service_contexts
apex bugreports config  debug_ramdisk etc  init.rc              init.zygote32.rc odm product          sbin   storage  ueventd.rc
bin  cache      d       default.prop  init init.usb.configfs.rc lost+found       oem product_services sdcard sys      vendor
rpi4:/ # exit
OR:
adb remount
remount succeeded
➜  Downloads adb shell
rpi4:/ # cd /system/bin/
rpi4:/system/bin # touch fff
rpi4:/system/bin # rm fff
rpi4:/system/bin #
Shutdown the phone:
sudo adb shell reboot -p
