Sep 15, 2021
TechnologySys Info
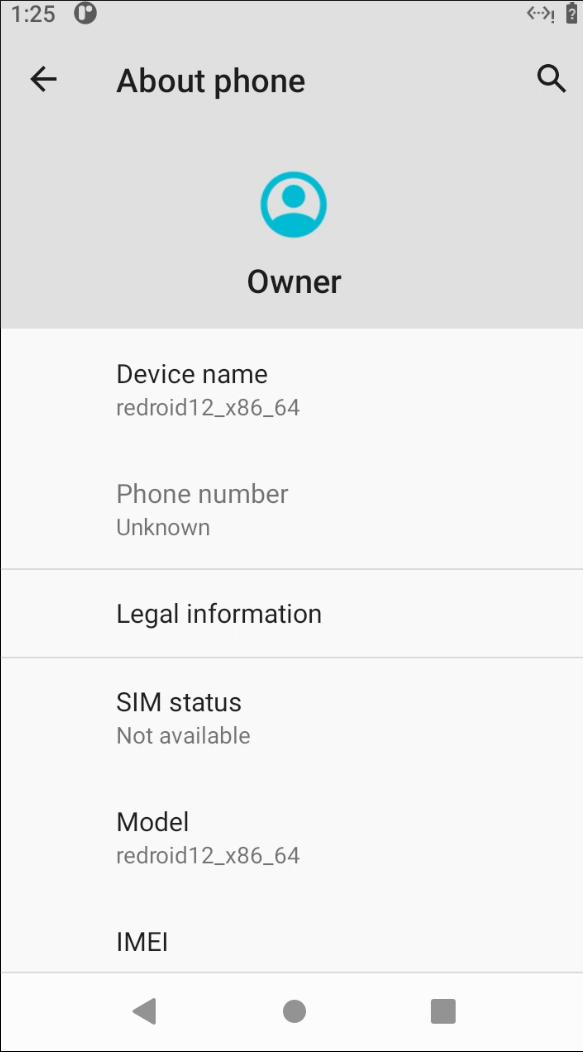
idv hardware, Ubuntu 18.04 server:
Intel(R) Core(TM) i5-8265UC CPU @ 1.60GHz
16 G Memory
256 G nvme ssd
dash@redroid:~$ cat /etc/issue
Ubuntu 18.04.5 LTS \n \l
dash@redroid:~$ uname -r
4.15.0-156-generic
Kernel Preparation
Kernel module preparation:
$ sudo apt-get upgrade -y
$ sudo reboot
$ sudo apt-get install -y dkms linux-headers-generic
$ mkdir Code
$ cd Code && git clone https://github.com/remote-android/redroid-modules.git
$ cd redroid-modules/
$ sudo cp redroid.conf /etc/modprobe.d/
$ sudo cp 99-redroid.rules /lib/udev/rules.d/
$ sudo cp -rT ashmem/ /usr/src/redroid-ashmem-1
$ sudo cp -rT binder /usr/src/redroid-binder-1
$ sudo dkms install redroid-ashmem/1
$ sudo dkms install redroid-binder/1
Check via:
dash@redroid:~$ grep binder /proc/filesystems
nodev	binder
dash@redroid:~$ grep ashmem /proc/misc
 55 ashmem
Docker
Install docker via:
$ sudo apt-get install -y docker.io
$ sudo systemctl start docker
$ sudo systemctl enable docker
Prepare the image via docker pull xxxx:
$ docker images
REPOSITORY        TAG            IMAGE ID       CREATED       SIZE
redroid/redroid   12.0.0-amd64   3000c3e2a297   5 weeks ago   1.52GB
redroid/redroid   9.0.0-latest   a38ac26defd9   5 weeks ago   1.55GB
Start Android Docker
Start 2 android docker session via:
docker  run -itd --rm --memory-swappiness=0 --privileged     --pull always     -v ~/data:/data     -p 5555:5555     redroid/redroid:9.0.0-latest
docker run -itd --rm --memory-swappiness=0 --privileged     --pull always     -v ~/data1:/data -p 5556:5555 redroid/redroid:12.0.0-amd64
Connect(Archlinux client):
$ yay scrcpy
$ adb connect 192.168.1.119:5555
$ adb connect 192.168.1.119:5556
$ scrcpy --serial 192.168.1.119:5555
$ scrcpy --serial 192.168.1.119:5556

Sep 9, 2021
Technology目的
透传sg1卡给虚拟机,同时支撑多个环境。
环境
物理机: 192.168.89.108, 待开辟虚拟机192.168.89.23~27.
[root@intel ~]# cat /etc/redhat-release
CentOS Linux release 7.9.2009 (Core)
[root@intel ~]# uname -a
Linux intel 4.14.105-6477750+ #1 SMP Mon May 17 10:31:49 CST 2021 x86_64 x86_64 x86_64 GNU/Linux
需透传的卡信息(8086:4907):
[root@intel ~]# lspci -nn | grep -i vga
0000:05:00.0 VGA compatible controller [0300]: ASPEED Technology, Inc. ASPEED Graphics Family [1a03:2000] (rev 41)
0000:b3:00.0 VGA compatible controller [0300]: Intel Corporation Device [8086:4907] (rev 01)
0000:b8:00.0 VGA compatible controller [0300]: Intel Corporation Device [8086:4907] (rev 01)
0000:bd:00.0 VGA compatible controller [0300]: Intel Corporation Device [8086:4907] (rev 01)
0000:c2:00.0 VGA compatible controller [0300]: Intel Corporation Device [8086:4907] (rev 01)
开启vfio
修改内核参数并重启:
# vim /etc/default/grub
...
GRUB_CMDLINE_LINUX="crashkernel=auto rhgb quiet i915.force_probe=* modprobe.blacklist=ast,snd_hda_intel i915.enable_guc=2 intel_iommu=on vfio-pci.ids=8086:4907"
...
修改modprobe.d规则:
vim /etc/modprobe.d/vfio.conf
options vfio-pci ids=8086:4907
更新grub:
grub2-mkconfig -o /boot/efi/EFI/centos/grub.cfg
### 配置网桥
安装:
yum install -y bridge-utils
### Ubuntu20.04 changes
Switch back to Ubuntu20.04 then do following:
$ sudo vim /etc/modprobe.d/vfio.conf
$ sudo systemctl set-default multi-user
Created symlink /etc/systemd/system/default.target → /lib/systemd/system/multi-user.target.
$ sudo reboot
Change the
$ sudo vim /etc/initramfs-tools/scripts/init-top/vfio.sh
#!/bin/sh

PREREQ=""

prereqs()
{
   echo "$PREREQ"
}

case $1 in
prereqs)
   prereqs
   exit 0
   ;;
esac

for dev in 0000:b3:00.0 0000:b8:00.0 0000:bd:00.0 0000:c2:00.0
do
 echo "vfio-pci" > /sys/bus/pci/devices/$dev/driver_override
 echo "$dev" > /sys/bus/pci/drivers/vfio-pci/bind
done

exit 0


$ sudo chmod +x /etc/initramfs-tools/scripts/init-top/vfio.sh
$ sudo vim /etc/initramfs-tools/modules
  And add the following lines:
  options kvm ignore_msrs=1
  vfio
  vfio_iommu_type1
  vfio_pci
  vfio_virqfd
Update the initramfs:
# update-initramfs -c -k all
Examine the vfio driver usage(before vfio):
lspci -v -s 0000:b8:00.0
0000:b8:00.0 VGA compatible controller: Intel Corporation Device 4907 (rev 01) (prog-if 00 [VGA controller])
	Subsystem: Hangzhou H3C Technologies Co., Ltd. Device 4000
	Flags: bus master, fast devsel, latency 0, IRQ 892, NUMA node 1
	Memory at e7000000 (64-bit, non-prefetchable) [size=16M]
	Memory at 386c00000000 (64-bit, prefetchable) [size=8G]
	Expansion ROM at e8000000 [disabled] [size=2M]
	Capabilities: [40] Vendor Specific Information: Len=0c <?>
	Capabilities: [70] Express Endpoint, MSI 00
	Capabilities: [ac] MSI: Enable+ Count=1/1 Maskable+ 64bit+
	Capabilities: [d0] Power Management version 3
	Capabilities: [100] Latency Tolerance Reporting
	Kernel driver in use: i915
	Kernel modules: i915
Sep 2, 2021
TechnologyReferences
Refers to :
https://github.com/elliott-wen/anbox-direct-gpu-access
This project could run android in lxc, with a modified UI for accessing the android UI.
Environment
Hardware and OS information is listed as:
# cat /proc/cpuinfo | grep 'model name'
model name	: Intel(R) Core(TM) i5-8265UC CPU @ 1.60GHz
$ free -m
              total        used        free      shared  buff/cache   available
Mem:          15765         336       14602         182         826       14960
Swap:          4095           0        4095
$ cat /etc/issue
Ubuntu 18.04.5 LTS \n \l
Steps
Initialize the environment via:
$ sudo apt-get install -y
$ sudo apt-get upgrade -y
$ sudo apt-get install -y lubuntu-desktop
$ sudo apt-get install lxc  uidmap dkms
$ sudo usermod --add-subuids 100000-165536 dash
$ sudo usermod --add-subgids 100000-165536 dash
$ sudo chmod +x $HOME
$ cd ~/.config/
$ mkdir lxc
$ cd lxc/
$ vim default.conf
lxc.net.0.type = veth
lxc.net.0.link = lxcbr0
lxc.net.0.flags = up
lxc.net.0.hwaddr = 00:16:3e:xx:xx:xx
lxc.idmap = u 0 100000 65536
lxc.idmap = g 0 100000 65536
$ sudo vim /etc/lxc/lxc-usernet
  # USERNAME TYPE BRIDGE COUNT
  dash	veth lxcbr0 10
$ git clone https://github.com/anbox/anbox-modules.git
$ cd anbox-modules
$  ./INSTALL.sh
$ sudo reboot
$ mkdir -p /home/dash/emugui/disk
$ mkdir -p /home/dash/emugui/disk/data
$ mkdir -p /home/dash/emugui/disk/cache
$ git clone https://github.com/elliott-wen/anbox-direct-gpu-access.git
$ cd anbox-direct-gpu-access
$ sudo apt-get install -y clang libxcb1-devel libx11-xcb-dev libxcb-xinput-dev libxcb-present-dev libxcb-dri3-dev libxcb-icccm4-dev libpulse-dev
$ ./build.sh
$ cd ~/.local/share/lxc
$ lxc-create -t busybox -n android
$ cd android
$ mv rootfs/ rootfs.back
$ tar xvf ~/rootfs.tar -C .
$ sudo /home/dash/anbox-direct-gpu-access-master/nsexex -b ~/.local/share/lxc/android/rootfs 0 100000 65536
$ mv config config.back
$ vim config
The config file for lxc is listed as:
# Template used to create this container: /usr/share/lxc/templates/lxc-busybox
# Parameters passed to the template:
# Template script checksum (SHA-1): 21abc1440b73cdb95d96d5459b27c3a87df9976f
# For additional config options, please look at lxc.container.conf(5)
lxc.include = /etc/lxc/default.conf
lxc.idmap = u 0 100000 65536
lxc.idmap = g 0 100000 65536
#lxc.rootfs.path = dir:/home/elliott/.local/share/lxc/android/rootfs
lxc.rootfs.path = dir:/home/dash/.local/share/lxc/android/rootfs
lxc.mount.entry = /home/dash/emugui/disk/data data none bind,optional 0 0
lxc.mount.entry = /home/dash/emugui/disk/cache cache none bind,optional 0 0
lxc.mount.entry = /dev/dri/card0 dev/dri/card0 none bind,optional,create=file 0 0
lxc.mount.entry = /dev/dri/renderD128 dev/dri/renderD128 none bind,optional,create=file 0 0
lxc.mount.entry = /dev/binder dev/binder none bind,optional,create=file 0 0
lxc.mount.entry = /dev/uinput dev/uinput none bind,optional,create=file 0 0
lxc.mount.entry = /dev/ashmem dev/ashmem none bind,optional,create=file 0 0
lxc.mount.entry = /tmp/android-dbus host none bind,optional,create=dir 0 0
lxc.mount.entry = /tmp/android-dbus/input dev/input none bind,optional,create=dir 0 0
lxc.mount.entry = /dev/fuse dev/fuse none bind,optional,create=file 0 0
lxc.signal.halt = SIGUSR1
lxc.signal.reboot = SIGTERM
lxc.uts.name = "android"
lxc.tty.max = 0
lxc.pty.max = 1024
lxc.tty.dir = ""
lxc.net.0.type="veth"
lxc.net.0.flags="up"
lxc.net.0.link="lxcbr0"


# When using LXC with apparmor, uncomment the next line to run unconfined:
lxc.apparmor.profile = unconfined
lxc.mount.auto = proc:mixed sys:mixed cgroup:mixed
lxc.autodev = 1
lxc.environment = PATH=/system/bin:/system/sbin:/system/xbin:/bin
lxc.init.cmd=/init
Change the mode for dev files:
sudo chmod 0600 -R /dev/binder /dev/ashmem /dev/dri/*
Then start the lxc instance via:
lxc-start -F -n android
adb connection
Install adb via:
# sudo apt-get install -y adb
# adb root
# adb connect 10.0.3.174
# adb  shell
# adb push ~/F-Droid.apk
# adb push ..... ....
Stop the intance:
# lxc -stop -n android -k
Aug 31, 2021
Technology目的
将闲置的RPI变为一个AP,有线转无线,用于快速连接网络开发。
准备材料
下载2021-05-07-raspios-buster-armhf-lite.zip, 解压并写入SD卡,之后用SD卡启动RPI3, 默认用户名及密码是pi/raspberry, 写入后使用rpi-config扩充文件系统:
pi@raspberrypi:~ $ uname -a
Linux raspberrypi 5.10.52-v7+ #1441 SMP Tue Aug 3 18:10:09 BST 2021 armv7l GNU/Linux
pi@raspberrypi:~ $ cat /etc/issue
Raspbian GNU/Linux 10 \n \l
步骤
更改为tsinghua的源以加速:
# 编辑 `/etc/apt/sources.list` 文件,删除原文件所有内容,用以下内容取代:
deb http://mirrors.tuna.tsinghua.edu.cn/raspbian/raspbian/ buster main non-free contrib rpi
deb-src http://mirrors.tuna.tsinghua.edu.cn/raspbian/raspbian/ buster main non-free contrib rpi

# 编辑 `/etc/apt/sources.list.d/raspi.list` 文件,删除原文件所有内容,用以下内容取代:
deb http://mirrors.tuna.tsinghua.edu.cn/raspberrypi/ buster main ui
下载hostapd及dhcp服务器:
# sudo apt-get update -y
# sudo apt-get upgrade -y
# sudo apt-get install hostapd isc-dhcp-server iptables-persistent
配置DHCP服务器:
$ sudo vim /etc/dhcp/dhcpd.conf
找到以下行(这里需要注释掉默认的选项):
option domain-name "example.org";
option domain-name-servers ns1.example.org, ns2.example.org;
替换为:
#option domain-name "example.org";
#option domain-name-servers ns1.example.org, ns2.example.org;
找到以下行(这里是激活authoritative选项):
# If this DHCP server is the official DHCP server for the local
# network, the authoritative directive should be uncommented.
#authoritative;
替换为:
# If this DHCP server is the official DHCP server for the local
# network, the authoritative directive should be uncommented.
authoritative;
在文件的末尾添加以下定义:
subnet 172.16.42.0 netmask 255.255.255.0 {
	range 172.16.42.10 172.16.42.50;
	option broadcast-address 172.16.42.255;
	option routers 172.16.42.1;
	default-lease-time 600;
	max-lease-time 7200;
	option domain-name "local";
	option domain-name-servers 8.8.8.8, 8.8.4.4;
}
现在保存后退出。
现在编辑isc-dhcp-server的默认定义文件,配置其监听的端口:
# sudo vim /etc/default/isc-dhcp-server
.....
INTERFACESv4="wlan0"
INTERFACESv6="wlan0"
编辑wlan0的静态地址(这里我们顺便设置了eth0的静态地址):
# sudo vim /etc/network/interfaces
auto wlan0
iface wlan0 inet static
  address 172.16.42.1
  netmask 255.255.255.0
auto eth0
iface eth0 inet static
  address 192.168.1.117
  netmask 255.255.255.0
  gateway 192.168.1.33
配置hostapd:
# sudo vim /etc/hostapd/hostapd.conf
country_code=US
interface=wlan0
driver=nl80211
ssid=Pi_AP
country_code=US
hw_mode=g
channel=6
macaddr_acl=0
auth_algs=1
ignore_broadcast_ssid=0
wpa=2
wpa_passphrase=xxxxxxxxxxxx
wpa_key_mgmt=WPA-PSK
wpa_pairwise=CCMP
wpa_group_rekey=86400
ieee80211n=1
wme_enabled=1
配置hostapd的默认配置文件:
# sudo vim /etc/default/hostapd
Find the line #DAEMON_CONF="" and edit it so it says DAEMON_CONF="/etc/hostapd/hostapd.conf"
配置NAT(网络地址转换) :
# sudo vim /etc/sysctl.conf

pi@raspberrypi:~ $ cat /etc/sysctl.conf  | grep ip_forward
net.ipv4.ip_forward=1
最后保存iptables:
sudo iptables -t nat -S
sudo iptables -S
sudo sh -c "iptables-save > /etc/iptables/rules.v4"
iptables-persistent会在启动的时候自动载入保存的规则。
如此则可以将RPi3作为一个无线接入点来使用。
Aug 26, 2021
Technology步骤
Install CentOS 7.4 :

With route:
[root@intelandroid ctctest]# ip route
default via 192.168.91.254 dev enp61s0f0 proto static metric 100
192.168.89.0/24 dev enp61s0f0 proto kernel scope link src 192.168.89.108 metric 100
192.168.91.254 dev enp61s0f0 proto static scope link metric 100
[root@intelandroid ctctest]# ip addr
1: lo: <LOOPBACK,UP,LOWER_UP> mtu 65536 qdisc noqueue state UNKNOWN qlen 1
    link/loopback 00:00:00:00:00:00 brd 00:00:00:00:00:00
    inet 127.0.0.1/8 scope host lo
       valid_lft forever preferred_lft forever
    inet6 ::1/128 scope host
       valid_lft forever preferred_lft forever
2: enp61s0f0: <BROADCAST,MULTICAST,UP,LOWER_UP> mtu 1500 qdisc mq portid 3cd2e55e05da state UP qlen 1000
    link/ether 3c:d2:e5:5e:05:da brd ff:ff:ff:ff:ff:ff
    inet 192.168.89.108/24 brd 192.168.89.255 scope global enp61s0f0
       valid_lft forever preferred_lft forever
    inet6 fe80::1e1f:7e4d:5f9f:a2ab/64 scope link
       valid_lft forever preferred_lft forever
Update grub:
# vim /etc/default/grub
...
GRUB_CMDLINE_LINUX="crashkernel=auto rd.lvm.lv=centos/root rhgb quiet modprobe.blacklist=ast"
...
# grub2-mkconfig -o /boot/efi/EFI/centos/grub.cfg
# reboot
After reboot, check ast module is not loaded:
# lsmod | grep ast
Should be nothing here.


