AndroidInAosp11AVDWorkingTips
Dec 23, 2021Technology
0. 目的
本文目的是为了记录如何在基于aosp11的avd开启redroid容器实例。
1. 准备aosp源码并运行avd
下载tsinghua的repo用于同步代码, 由于repo需要使用python3来同步代码,故需要安装python-is-python3包:
$ curl https://mirrors.tuna.tsinghua.edu.cn/git/git-repo -o repo
$ chmod a+x repo
$ sudo apt-get install -y python-is-python3
repo的运行过程中会尝试访问官方的git源更新自己,指定使用tuna的镜像源进行更新:
$ vim ~/.bashrc
export REPO_URL='https://mirrors.tuna.tsinghua.edu.cn/git/git-repo'
创建目录并开始同步代码(具体时间取决于网络状态), 如果需要同步别的分支的源码,可以参考这里(https://source.android.com/setup/start/build-numbers#source-code-tags-and-builds):
$ mkdir aosp11
$ cd aosp11
$ repo init -u https://mirrors.tuna.tsinghua.edu.cn/git/AOSP/platform/manifest -b android-11.0.0_r48
$ repo sync -j8
安装需要的依赖:
$ sudo apt-get install -y libncurses5
$ sudo apt-get install openjdk-8-jdk
$ sudo apt-get install git-core gnupg flex bison gperf build-essential zip curl zlib1g-dev gcc-multilib g++-multilib libc6-dev-i386 lib32ncurses5-dev x11proto-core-dev libx11-dev lib32z-dev ccache libgl1-mesa-dev libxml2-utils xsltproc unzip
更改aosp11源代码,在build/target/product/AndroidProducts.mk中加入关于编译时lunch的选项并开始编译:
COMMON_LUNCH_CHOICES := \
.......
     sdk_phone_x86_64-userdebug \
开始编译源码:
$ m -j120
看到下面类似的画面代表编译成功:

在当前目录下运行emulator可以直接打开模拟器:
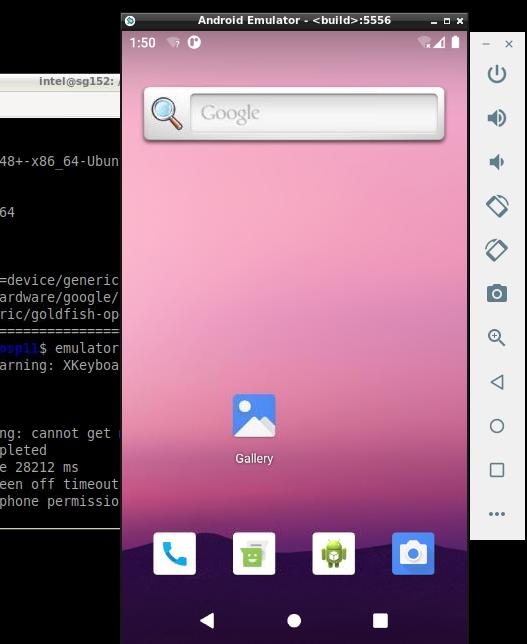
指定分区大小及内存大小:
$ emulator -partition-size 61240 -qemu -cpu host -m 16535M
登入模拟器shell的方法:
$ adb root
$ adb shell
generic_x86_64:/ # exit
2. 编译aosp 11内核并集成至avd
上传内核参数检测脚本以获取当前内核运行docker缺失参数:
$ adb push check-config.sh /data
check-config.sh: 1 file pushed. 1.4 MB/s (11990 bytes in 0.008s)
$ adb shell
generic_x86_64:/ # chmod 777 /data/check-config.sh
generic_x86_64:/ # /data/check-config.sh
类似如下:
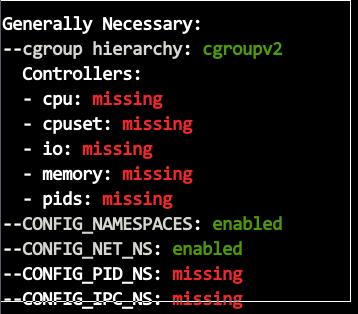
主机上获取内核树:
$BRANCH=common-android11-5.4-lts
$ROOTDIR=AVD-kernel-$BRANCH
$mkdir $ROOTDIR && cd $ROOTDIR
$which repo
$repo init --depth=1 -u https://android.googlesource.com/kernel/manifest -b $BRANCH && repo sync --force-sync --no-clone-bundle --no-tags -j$(nproc)
$ ls
build  common  common-modules  hikey-modules  kernel  prebuilts  prebuilts-master  repo  tools
配置内核:
$ BUILD_CONFIG=common-modules/virtual-device/build.config.goldfish.x86_64 \
FRAGMENT_CONFIG=common/arch/x86/configs/gki_defconfig \
build/config.sh
将出现以下界面:
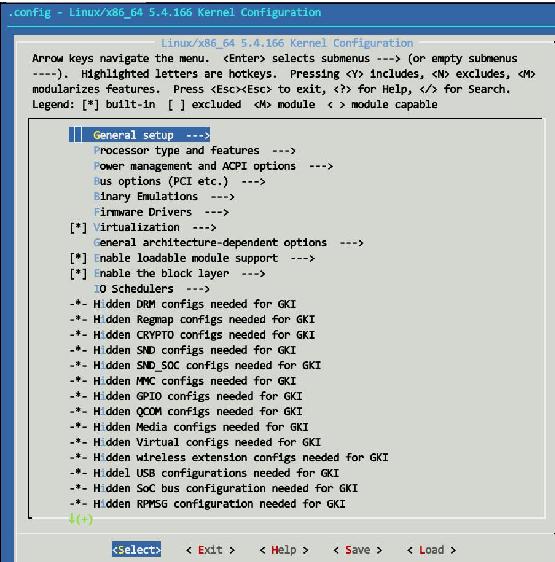
按照前面内核检测时docker所缺失参数的情况,依次打开所需开启的内核选项.
Generic setup -> POSIX Message Queues
Generic setup -> Controller Group support -> PIDs controller
Generic setup -> Controller Group support -> Device controller
Generic setup -> Controller Group support -> CPU controller -> Group sheduling for SCHED_OTHER
Generic setup -> Controller Group support -> CPU controller -> CPU bandwidth provisioning for FAIR-GROUP_SCHED
Generic setup -> Controller Group support -> CPU controller -> Group sheduling for SCHED_RR/FIFO
Generic setup -> Controller Group support -> Perf controller
Generic setup -> Namespaces support -> User namespace
Generic setup -> Namespaces support -> PID namespace
Networking support -> Networking options -> Network packet filtering framework (Netfilter) -> Bridged IP/ARP packets fiiltering
Networking support -> Networking options -> Network packet filtering framework (Netfilter) -> IP virtual server support
Networking support -> Networking options -> Network packet filtering framework (Netfilter) -> Core Netfilter configuration ->  "addrtype" address type match support
Networking support -> Networking options -> Network packet filtering framework (Netfilter) -> Core Netfilter configuration ->  "control group" address type match support
Networking support -> Networking options -> Network packet filtering framework (Netfilter) -> Core Netfilter configuration ->  "control group" address type match support
File Systems -> Overlay filesystem support
其中Overlay filesystems suppport的配置如下:

编译内核:
$ BUILD_CONFIG=common-modules/virtual-device/build.config.goldfish.x86_64 \
build/build.sh -j$(nproc)
拷贝内核及内核模块至安卓源码树下并重新编译安卓镜像:
$ cd prebuilts/qemu-kernel/x86_64/
$ mv 5.4 5.4back
$ mkdir -p 5.4/ko
$ cp /media/sdb/aosp11kernel/AVD-kernel-common-android11-5.4-lts/out/android11-5.4/dist/bzImage kernel-qemu2
$ cp /media/sdb/aosp11kernel/AVD-kernel-common-android11-5.4-lts/out/android11-5.4/dist/*.ko ./ko
$ cd ../../../../
$ m -j80
$ emulator
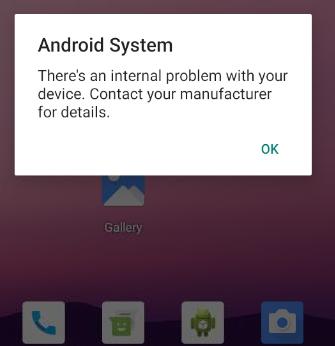
重新启动后的界面中启动会出现报错,点OK忽略:
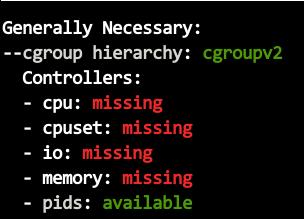
重新检测后,大部分参数会就绪,cgroupv2下的某些参数会显示红色,但不妨碍使用:
3. aosp11更改/合并docker
下载docker-20.10.8二进制版本并解压到aosp源码下:
$ wget https://download.docker.com/linux/static/stable/x86_64/docker-20.10.8.tgz
// 切换到安卓源码下
$ cd prebuilts
$ tar xzvf ~/docker-20.10.8.tgz -C .
添加docker打包到system.img中的方式如下,将docker二进制文件添加到/system/bin中以便开箱即用:
$ vim  ./build/make/target/board/generic_x86_64/device.mk
// 文件末尾添加
PRODUCT_COPY_FILES += \
    prebuilts/docker/containerd:system/bin/containerd \
    prebuilts/docker/containerd-shim:system/bin/containerd-shim \
    prebuilts/docker/containerd-shim-runc-v2:system/bin/containerd-shim-runc-v2 \
    prebuilts/docker/ctr:system/bin/ctr \
    prebuilts/docker/docker:system/bin/docker \
    prebuilts/docker/dockerd:system/bin/dockerd \
    prebuilts/docker/docker-init:system/bin/docker-init \
    prebuilts/docker/docker-proxy:system/bin/docker-proxy \
    prebuilts/docker/runc:system/bin/runc \
$ vim build/target/product/sdk_phone_x86_64.mk
// 文件末尾添加
PRODUCT_ARTIFACT_PATH_REQUIREMENT_ALLOWED_LIST := \
    system/bin/containerd \
    system/bin/containerd-shim \
    system/bin/containerd-shim-runc-v2 \
    system/bin/ctr \
    system/bin/docker \
    system/bin/dockerd \
    system/bin/docker-init \
    system/bin/docker-proxy \
    system/bin/runc \
更改sepolicy权限以创建docker运行时需要的路径:
$ vim system/sepolicy/prebuilts/api/30.0/private/file_contexts
// 在# Symlinks下添加关于/var, /run, /system/etc/docker软链接定义
# Symlinks
/bin                u:object_r:rootfs:s0
/bugreports         u:object_r:rootfs:s0
/charger            u:object_r:rootfs:s0
/d                  u:object_r:rootfs:s0
/etc                u:object_r:rootfs:s0
/sdcard             u:object_r:rootfs:s0
/var                u:object_r:rootfs:s0
/run                u:object_r:rootfs:s0
/system/etc/docker                u:object_r:system_file:s0
$ vim system/sepolicy/private/file_contexts
// 约42行处:
 42 /sdcard             u:object_r:rootfs:s0
 43 /var             u:object_r:rootfs:s0
 44 /run             u:object_r:rootfs:s0
 45 /system/etc/docker             u:object_r:system_file:s0
 46
 47 # SELinux policy files
$ vim system/core/rootdir/Android.mk
// 约84行处:
83     ln -sf /system/etc $(TARGET_ROOT_OUT)/etc; \
 84     ln -sf /data/var $(TARGET_ROOT_OUT)/var; \
 85     ln -sf /data/run $(TARGET_ROOT_OUT)/run; \
 86     ln -sf /data/user_de/0/com.android.shell/files/bugreports $(TARGET_ROOT_OUT)/bugreports;
// 约143行处:
144 # Since init.environ.rc is required for init and satisfies that requirement, we hijack it to create the symlink.
145 LOCAL_POST_INSTALL_CMD += ; ln -sf /system/bin/init $(TARGET_ROOT_OUT)/init
146 LOCAL_POST_INSTALL_CMD += ; ln -sf /data/docker $(TARGET_OUT)/etc/
147 LOCAL_POST_INSTALL_CMD += ; ln -sf /data/resolv.conf $(TARGET_OUT)/etc/resolv.conf
m -j 50重新编译aosp镜像后,手动生成/data目录下所需预创建的文件后,重新生成userdataimage:
$ mkdir -p out/target/product/generic_x86_64/data/run
$ mkdir -p out/target/product/generic_x86_64/data/var
$ mkdir -p out/target/product/generic_x86_64/data/docker
$ echo "nameserver 223.5.5.5" > out/target/product/generic_x86_64/data/resolv.conf
$ make userdataimage -j50
重新启动emulator后,此时docker已经就绪了。
4. 启动redroid容器实例
手动启动dockerd进程:
$ adb root
$ adb shell
# dockerd --iptables=false --dns=223.5.5.5 --data-root=/data/var/
如果需要无Log输出(后台运行模式),可以使用以下命令:
# dockerd --iptables=false --dns=223.5.5.5 --data-root=/data/var/ &> /data/dockerd-logfile &
在另一个adb shell进程里,运行以下命令, 可以看到docker正常运行:
# docker version
启动redroid 9版本的容器实例并检查运行情况:
# docker run -d --privileged  -p 15589:5555 --memory-swappiness=0 redroid/redroid:9.0.0-latest
# docker ps
CONTAINER ID   IMAGE                          COMMAND                  CREATED          STATUS         PORTS                                         NAMES
a900b38c0fb1   redroid/redroid:9.0.0-latest   "/init qemu=1 androi…"   12 seconds ago   Up 9 seconds   0.0.0.0:15589->5555/tcp, :::15589->5555/tcp   gallant_mcclintock
# docker exec -it a900b38c0fb1 sh
# getprop | grep boot | grep complete
[dev.bootcomplete]: [1]
[sys.boot_completed]: [1]
[sys.logbootcomplete]: [1]
5. 配置网络
主机上配置tap0设备并桥接到br0(tunctl is installed via apt-get install -y uml-utilities):
$ sudo tunctl -u intel
$ sudo brctl addif br0 tap0
$ sudo ip link set dev tap0 up
启动avd的时候使用以下参数:
$ emulator -show-kernel -partition-size 61240 -net-tap tap0 -qemu -cpu host -m32768
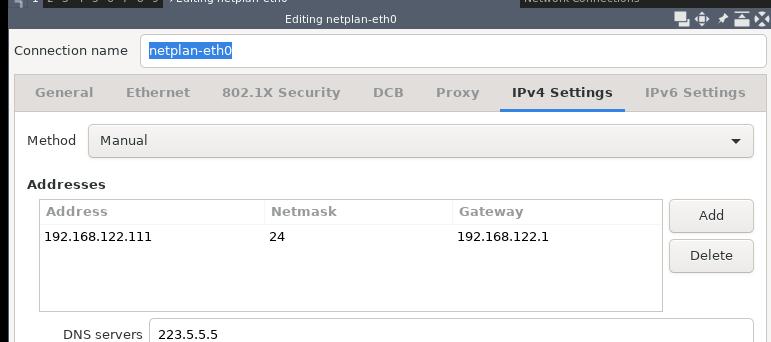
在avd中,手动设置wifi的地址为br0同网段固态IP地址, 而后可以直接Ping通该设置的地址。
Docker启动的命令需更改为:
$ dockerd --iptables=false --dns=223.5.5.5 --data-root=/data/var/ --ip=192.168.xx.xxx & >/data/dockerd-logfile 2>&1
此时接近于成功,但是仍然无法与容器实例通过转发后的adbd端口通信并截图。

