Sep 23, 2022
Technology1. x11docker
Start and specify vt:
# x11docker --gpu --vt=2 --xorg x11docker/mate
With internet and more features:
# x11docker --gpu --vt=2 --network --desktop --init=systemd x11docker/deepin
2. git without ssl check
via:
export GIT_SSL_NO_VERIFY=1
git clone https://xxxx.xx
3. Home Sharing environment
Install dnsmasq and configure:
# vim /etc/dnsmasq.conf
bind-interfaces
dhcp-range=10.1.10.128,10.1.10.200,12h
dhcp-option=3,10.1.10.1
dhcp-authoritative
interface=enp0s25
# systemctl restart dnsmasq
Start the sharing via(enp0s25->wlo1):
$ sudo iptables -t nat -A POSTROUTING -s '10.1.10.0/24' -o wlo1 -j MASQUERADE
Then with a ethernet cable connected, the other client could get reach into
the internet via sharing.
4. system_reset in qemu
via:
telnet localhost 1111
> system_reset
this could reset the machine and let it reboot.
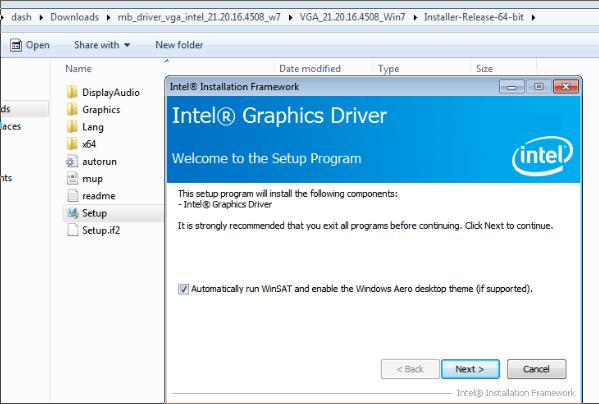
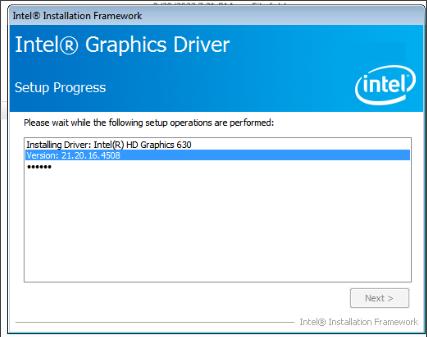
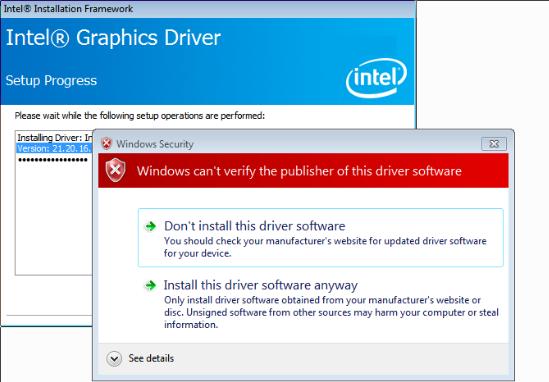
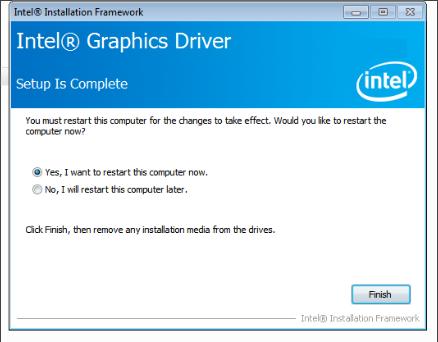
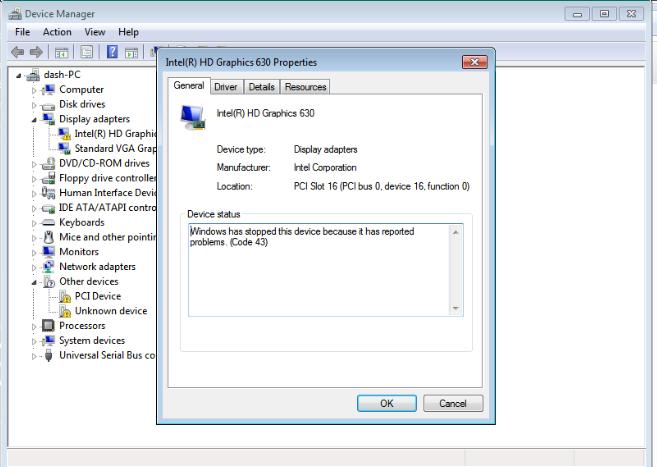
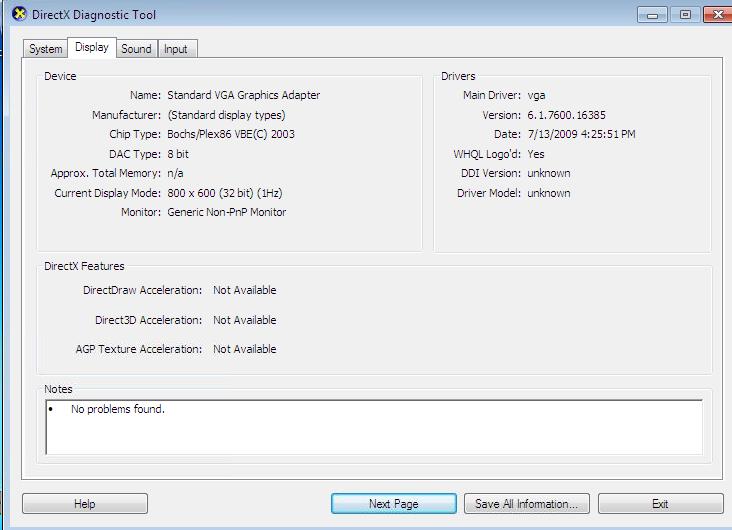
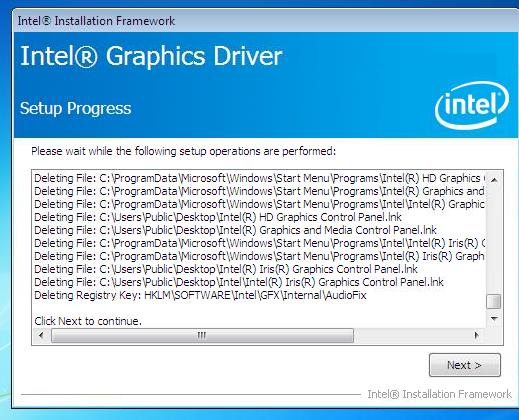
5. uhd510 win7 driver
download url:
https://downloadmirror.intel.com/30195/a08/win64_15.45.5174.exe
6. intel graphics
version:
21.20.16.5174 intel
7. Fix zsh issue
When type tab key in zsh shell, it will complains following arguments, and
won’t automatically auto-complete the command:
(eval):setopt:3: no such option: NO_typesettounset
Fixed via:
# chsh -s $(which zsh)
# vim /etc/shells
/usr/bin/zsh
Reboot the machine and this issue fixed.
8. Enter to M
^M will be replaced ,when hitting Enter:
stty icrnl
Could not use fcitx in wine’s tim:
Add:
export GTK_IM_MODULE=fcitx
export QT_IM_MODULE=fcitx
export XMODIFIERS=@im=fcitx
into /opt/apps/com.qq.tim.spark/files/run.sh
10. os-probe in archlinux
Add following lines into /etc/default/grub, then update grub configuration:
GRUB_DISABLE_OS_PROBER=false
11. ubuntu upgrade issue
solved via:
cd /var/lib/dpkg/info
sudo rm usrmerge.*
sudo apt-get -f install
12. ssh to dropbear
issue:
Unable to negotiate with 192.168.1.1 port 22: no matching host key type found. Their offer: ssh-rsa
solved via:
ssh -oHostKeyAlgorithms=+ssh-rsa root@xxx.xxx.xxx.xxx
13. autologin xfce4
Edit lightdm configuration files:
vi /etc/lightdm/lightdm.conf

[SeatDefaults]
autologin-user=username    #需要登录的用户名
autologin-user-timeout=delay
14. detect pci parameters
via:
sudo lspci  -v -s 00:02.0
00:02.0 VGA compatible controller: Intel Corporation Device 9a49 (rev 01) (prog-if 00 [VGA controller])
	DeviceName: Onboard - Video
	Subsystem: Intel Corporation Device 3004
	Flags: bus master, fast devsel, latency 0, IRQ 190
	Memory at 603c000000 (64-bit, non-prefetchable) [size=16M]
	Memory at 4000000000 (64-bit, prefetchable) [size=256M]
	I/O ports at 3000 [size=64]
	Expansion ROM at 000c0000 [virtual] [disabled] [size=128K]
	Capabilities: [40] Vendor Specific Information: Len=0c <?>
	Capabilities: [70] Express Root Complex Integrated Endpoint, MSI 00
	Capabilities: [ac] MSI: Enable+ Count=1/1 Maskable+ 64bit-
	Capabilities: [d0] Power Management version 2
	Capabilities: [100] Process Address Space ID (PASID)
	Capabilities: [200] Address Translation Service (ATS)
	Capabilities: [300] Page Request Interface (PRI)
	Capabilities: [320] Single Root I/O Virtualization (SR-IOV)
	Kernel driver in use: i915
	Kernel modules: i915
15. dnf speed up
add following :
# vim /etc/dnf/dnf.conf
fastestmirror=true
16. makepkg ignore check
via:
makepkg --skipinteg
17. building on cdesktop
on building gstreamer:
Force specify a macro.
on building net-snmp:
sudo apt install automake -y
aclocal
automake --add-missing --copy --force-missing
Detect pre-defined macros:
uos@uos-PC:~$ echo | gcc -E -dM - | grep sw
#define __sw_64_bwx__ 1
#define __sw_64 1
#define __sw_64_fix__ 1
#define __sw_64_sw6b__ 1
#define __sw_64__ 1
#define __sw_64_cix__ 1
18. markdown in confluence
via:
https://www.cnblogs.com/cuianbing/p/15891950.html
19. wine app fcitx
Added following in run.sh:
env locale=zh_CN

export XIM="fcitx"
export GTK_IM_MODULE="fcitx"
export QT_IM_MODULE="fcitx"
export XMODIFIERS="@im=fcitx"
20. wine app fonts
Verify you have the correct fonts under :
➜  Fonts pwd
/home/dash/.deepinwine/Spark-TIM/drive_c/windows/Fonts
➜  Fonts ls
simsunb.ttf  simsun.ttc
Then add following into the run.sh:
env locale=zh_CN.UTF-8
export LC_ALL=zh_CN.UTF-8
LC_ALL=zh_CN.UTF-8
WINE_CMD="LC_ALL=zh_CN.UTF-8 deepin-wine5"
21. virtualbox time issue
Windows side:
c:\Progra~1\Oracle\VirtualBox\VBoxManage setextradata %NOME% "VBoxInternal/Devices/VMMDev/0/Config/GetHostTimeDisabled" 1
c:\Progra~1\Oracle\VirtualBox\VBoxManage modifyvm %NOME% --biossystemtimeoffset -7628000000
22. python simple http server
via:
python -m http.server 9000
23. build kernel
BTF: .tmp_vmlinux.btf: pahole (pahole) is not available
sudo apt install dwarves
24. kernel install module
via:
make INSTALL_MOD_STRIP=1 modules_install -j4
then the initrd size will be small.
Or you will encounter initrd is too big issue.
25. Auto restart sshd
via:
pacman -S cron
systemctl enable cronie
crontab -e
@reboot sleep 120 && systemctl restart sshd
Then each time you reboot the machine it will automatically restart sshd.
26. Install graphical in pve
Install kde via following command:
apt install -y task-kde-desktop
27. RemoteDesktop GPU
via:
显卡加速
win+r打开运行 输入gpedit.msc
依次找到计算机配置->管理模板->Windows组件->远程桌面服务->远程桌面会话主机->远程会话环境
在右边选择将硬件图形适配器应用于所有远程桌面服务会话
右键编辑,选择已启用确定保存。
重启远程主机。
现在可以在远程桌面里运行需要GPU支持的应用了

提升传输帧率
RDP默认的帧率是30,可以设置为60帧传输
实际效果取决于客户端设置、网络环境等等因素
打开远程主机上的注册表编辑器 win+r输入regedit
找到HKEY_LOCAL_MACHINE\SYSTEM\CurrentControlSet\Control\Terminal Server\WinStations
在空白处右键->新建->DWORD(32位)值,命名为DWMFRAMEINTERVAL
双击刚添加的这一项,基数选择为十进制,数值数据填写15
确定保存,重启生效
28. fsck ext4 disk
error message:
[ 5903.331828] sd 4:0:0:0: [sdb] Attached SCSI removable disk
[ 5911.746891] EXT4-fs (sdb1): ext4_check_descriptors: Checksum for group 1 failed (43829!=56479)
[ 5911.746897] EXT4-fs (sdb1): group descriptors corrupted!
fixed via:
fsck.ext4 -fvy /dev/sdb1
29. width height
55 <40
30. check ssd/hdd in linux
via:
lsblk -d -o name,rota
NAME ROTA
sda     0
sdb     0
sdc     1
30. list all xsessions
Available session types can be found in /usr/share/xsessions/ for X and in /usr/share/wayland-sessions/ for Wayland.
31. gdm 6000 issue
Solved via:
[dash@localhost ~]$ which X
/usr/bin/X
[dash@localhost ~]$ sudo vim /usr/bin/X
[dash@localhost ~]$ ls -l -h /usr/bin/X
lrwxrwxrwx. 1 root root 4 Sep 26  2022 /usr/bin/X -> Xorg
[dash@localhost ~]$ sudo rm -f /usr/bin/X
[dash@localhost ~]$ sudo vim /usr/bin/X
[dash@localhost ~]$ sudo netstat -anp | grep 6000
tcp        0      0 0.0.0.0:6000            0.0.0.0:*               LISTEN      4215/X
tcp6       0      0 :::6000                 :::*                    LISTEN      4215/X
[dash@localhost ~]$ sudo systemctl restart gdm
[dash@localhost ~]$ sudo netstat -anp | grep 6000
[dash@localhost ~]$ cat /usr/bin/X
#!/bin/bash
exec /usr/bin/Xorg "$@" -nolisten tcp
exit 0
32. centos issue
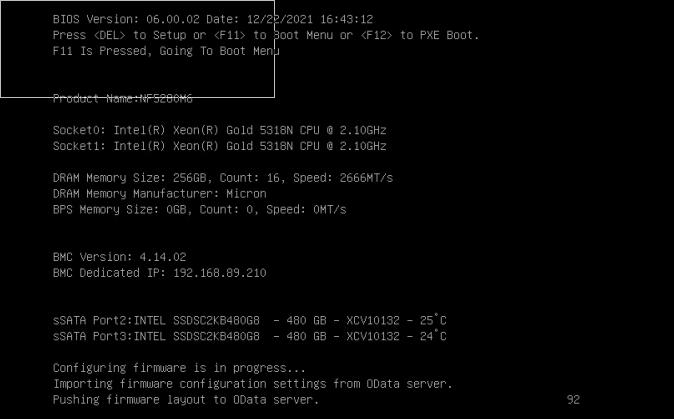
disk full, restart machine with a cdrom, press F11 for boot menu.
33. zhaoxin gpu
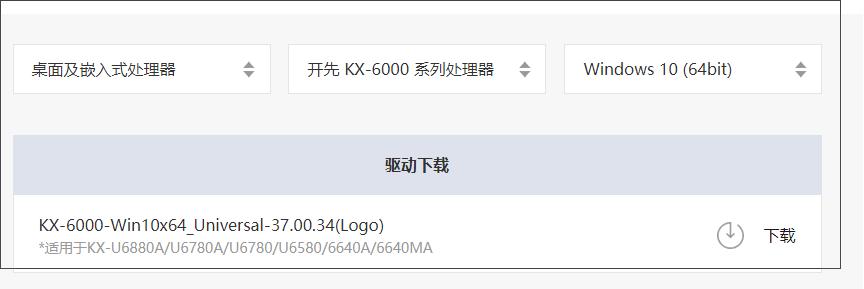
https://www.zhaoxin.com/qdxz.aspx?nid=31&typeid=554
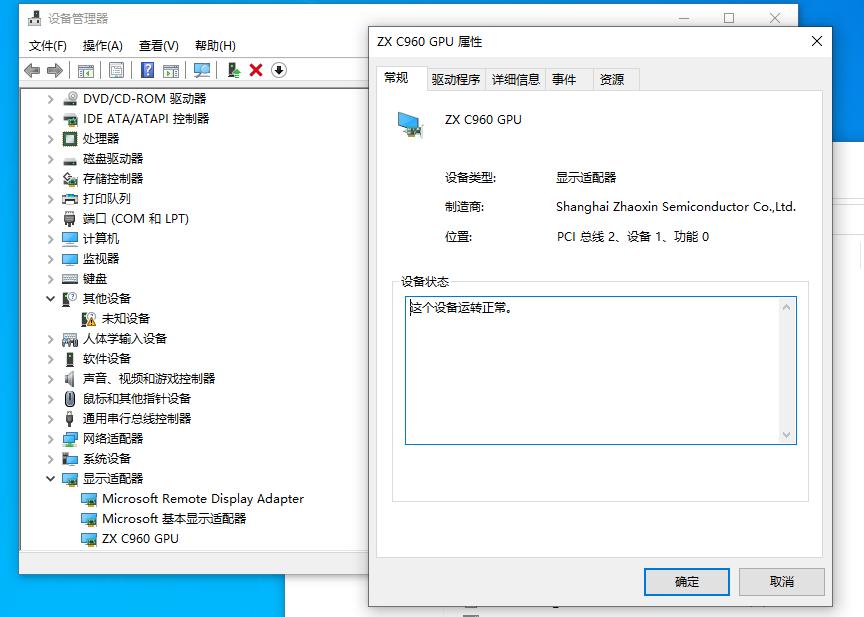
ubuntu guest, with qxl disabled.
windows, no spice server, no qxl graphical card.
34. sddm autologin
via:
vim /etc/sddm.conf.d/autologin.conf
[Autologin]
User=john
Session=plasma
35. reboot for normal user(ubuntu18.04)
via:
echo '[Remote SSH]
Identity=unix-user:userrer
Action=org.freedesktop.login1.*
ResultAny=yes
ResultInactive=yes
ResultActive=yes' | sudo tee /etc/polkit-1/localauthority/50-local.d/power.pkla
36. pivpn
create via:
pivpn add
Then copy the configuration files to wireguards.
37. setdefault
via:
 systemctl get-default
 systemctl set-default graphical.target
 systemctl get-default
 systemctl start graphical.target
 ps -ef | grep X
38. hackitosh
via:
https://www.itmanbu.com/ryzen-hackintosh-using-kvm-proxmox.html
https://blog.lv5.moe/p/pve-virtualized-hackintosh-gpu-passthrough-and-remote-access-tutorial
https://www.sqlsec.com/2022/04/pve.html#%E5%88%9D%E5%A7%8B%E5%8C%96%E8%99%9A%E6%8B%9F%E6%9C%BA
39. noip on rpi
add into the crontab via:
@reboot sleep 30 && /usr/local/bin/noip2 &
40. npci
via:
X99、X299 平台以及部分 AMD 平台需要添加 npci=0x2000 或 npci=0x3000,当跑代码卡在 PCI Start Configuration 时使用;

只有 AMD 平台的 BIOS 没有 Above 4G Decoding 选项时添加此参数,二者不可同时使用。
41. du and sort
via:
du -hs -- * .[^.]* | sort -h
42. Get the virsh parameters
Query the os type via osinfo-query, then install the os via:
virt-install --name win1010 --memory 10240 --vcpus=2 --os-type=Windows --os-variant=win10 --cdrom=/var/lib/libvirt/images/Win10_20H2_v2_Chinese_x64.iso --network network=default --graphics=vnc -v
osinfo-query os
43. qemu build
-no-pie error resolution:
Q: ld: Error: unable to disambiguate: -no-pie (did you mean --no-pie ?)
A: 这是因为新版本的ld不支持该参数导致,因此需要降低ld版本,由于ld属于Binutils中,所以要降低Binutils版本,参考如下方式:

# 下载binutils
wget https://ftp.gnu.org/gnu/binutils/binutils-2.30.tar.gz
tar zxvf  binutils-2.30.tar.gz
# 进入源码目录编译安装
cd binutils-2.30
./configure
make
make install
# 替换原来的ld
cd /usr/bin
mv ld ld.copy #备份旧版本ld
cd /usr/local/bin
ln -s ld /usr/bin/ld
# 验证ld版本是否降下来了
ld --version
44. Install mainline kernel on ubuntu
Via:
sudo add-apt-repository ppa:cappelikan/ppa
sudo apt update && sudo apt install mainline
sudo mainline --install-latest
Not working for ubuntu18.04.
45. custom uefi logo
via:
https://www.reddit.com/r/VFIO/comments/ayuffy/custom_ovmf_boot_logo/
46. virsh start with
With console output:
virsh start realwin10 --console 2>&1 | tee outputlog.txt
47. build ovmf with debug
via:
OvmfPkg/build.sh -a X64 -D DEBUG_ON_SERIAL_PORT
48. copy Vbt.bin
via:
sudo cp /sys/kernel/debug/dri/0/i915_vbt Vbt.bin
49. Disable suspend/hibernate service
via:
sudo systemctl mask sleep.target suspend.target hibernate.target hybrid-sleep.target
50. pnputil uninstall
via:
pnputil /delete-driver oem0.inf
pnputil /d oem0.inf
51. enable netplan Ubuntu
via:
sudo systemctl stop NetworkManager
sudo systemctl disable NetworkManager
sudo systemctl mask NetworkManager
Next, start and enable the systemd-networkd service:

sudo systemctl unmask systemd-networkd.service
sudo systemctl enable systemd-networkd.service
sudo systemctl start systemd-networkd.service
Add the interface configuration to the netplan config file (in the /etc/netplan directory):

network:
  version: 2
  renderer: networkd
  ethernets:
    enp0s3:
      dhcp4: yes
Apply the changes by running the following command:
sudo netplan apply
52. amt
3 articles:
https://mp.weixin.qq.com/s?__biz=MzAwODExNjI3NA==&mid=2649779334&idx=1&sn=1ca539bb708e8628a8beeaa8d4406985&chksm=83770ddbb40084cd9806537e1f31b9ac39bccccff0ee1ba7f7fe2e5c55296299b83ebf335014&cur_album_id=1374168008981184514&scene=189#wechat_redirect
https://mp.weixin.qq.com/s?__biz=MzAwODExNjI3NA==&mid=2649779281&idx=1&sn=3d5d84c753cb424bd7e1cefdf7ab30e8&chksm=83770d0cb400841a912ce894a94e555603a8c2b0314ec81c3e4701948da2d3b97ee8e085b204&token=187057378&lang=zh_CN&scene=21#wechat_redirect
https://mp.weixin.qq.com/s?__biz=MzAwODExNjI3NA==&mid=2649779314&idx=1&sn=f40ca8f4f4ba4ad2645cc0dc8fe658ee&chksm=83770d2fb400843949326a557f9849d1360f72ee79615d5be2a7793851e247c40caea13a08d8&token=187057378&lang=zh_CN&scene=21#wechat_redirect
53. redfish
https://mp.weixin.qq.com/s?__biz=MzAwODExNjI3NA==&mid=2649775148&idx=1&sn=9638581928f7fa98714c1ad24fafccdb&chksm=83773d71b400b467a9b72cbe8ae433393ab4e9f0b306c309d757ea08ba7bb4e27ddc24943951&token=1820633067&lang=zh_CN&scene=21#wechat_redirect
54. virt-xml
remove:
virt-xml instance-00000001 --remove-device --network 2
Add:
virt-xml instance-00000001 --add-device --network type=direct,mac=52:54:00:2d:2a:bb,source=enp1s0,source_mode=bridge,model=virtio
55. guestfish
Using guestfish for copy-in content:
主机上安装`libguestfs-tools`: `sudo apt-get install -y libguestfs-tools`:

关机进入到 guest镜像编辑, 拷贝文件/文件夹到Administrator桌面:

guestmount -a /var/lib/nova/instances/75f9c5f1-edc1-4184-969a-db326d973570/75f9c5f1-edc1-4184-969a-db326d973570.snap1 -m /dev/sda3 --rw /mnt
cp -r /root/2023_06_06_08_40_09_1912x1055.jpg /root/Videos/ /mnt/Users/Administrator/Desktop/
guestunmount /mnt
56. novnc desktop
https://hub.docker.com/r/fredblgr/ubuntu-novnc
57. build libvirtd(ubuntu22.04)
Build latest libvirtd(9.5.0)
sudo apt install -y build-essential git meson byobu
git clone https://gitlab.com/libvirt/libvirt.git
cd libvirt/
sudo apt install -y libxml2-utils xsltproc pkg-config libglib2.0-dev gnutls-bin libgnutls28-dev libxml2-dev libyajl-dev python3-docutils
meson build -Dsystem=true -Ddriver_qemu=enabled
ninja -C build
./build/src/libvirtd --version
systemctl stop libvirtd
./build/src/libvirtd
via:
rpm -e --nodeps kernel-headers
rpm -ivh kernel-headers-5.15.85_lts2021_iotg-3.x86_64.rpm
59. build libvirt(centos)
tobe finished. on centos 7, bad ….
pip3 install --user meson
export PATH=/root/.local/bin:$PATH
yum install -y git libxslt gnutls-devel
meson build -Dsystem=true -Ddriver_qemu=enabled

?
meson build -Dsystem=true -Ddriver_qemu=enabled -Ddriver_libvirtd=enabled -Ddriver_remote=enabled -Ddocs=disabled
60. dd speed(nvme)
via:
dd if=/dev/sda of=/root/240GSSD_FLH.img bs=30M status=progress && sync
255873515520 bytes (256 GB, 238 GiB) copied, 1648 s, 155 MB/s
8139+1 records in
8139+1 records out
256060514304 bytes (256 GB, 238 GiB) copied, 1648.91 s, 155 MB/s
61. vg activate
Show the volume uuid of the vg:
[root@ttt ~]# vgs -o vg_name,vg_uuid,pv_uuid
  VG     VG UUID                                PV UUID
  centos 2e15nC-l5TX-2hfy-gETN-cDj1-feIR-inF45Q Tfqq5p-otmc-PJ1u-8ySN-vX4v-0xmh-JzOnZg
  centos eShAUV-BMx6-ENXN-9L94-UNVC-PXJT-4bElEb uC9tgf-Jps0-TS9J-tesU-92MJ-J1o3-fa1eE1
Activate via uuid:
[root@ttt ~]#  lvchange -a y --select vg_uuid=eShAUV-BMx6-ENXN-9L94-UNVC-PXJT-4bElEb
[root@ttt ~]#  lvchange -a y --select vg_uuid=2e15nC-l5TX-2hfy-gETN-cDj1-feIR-inF45Q
now mount via:
[root@ttt ~]# mount /dev/mapper/centos-root1 /mnt
62. tips on vacation
https://www.reddit.com/r/VFIO/comments/uh172m/libvirt_82_qemudeviceoverride/
https://github.com/crc-org/crc/issues/2839
https://blog.51cto.com/u_15127621/2763672
https://www.jianshu.com/p/55cf54659e62
https://www.frytea.com/archives/546/#%e7%96%91%e9%9a%be%e8%a7%a3%e5%86%b3
https://www.mail-archive.com/libvir-list@redhat.com/msg226678.html
https://github.com/libvirt/libvirt/tags?after=v8.2.0
63. launch shell script on desktop
via desktop shortcuts:
test@test-VTE510:~$ cat Desktop/start_vm1.desktop
#!/usr/bin/env xdg-open
[Desktop Entry]
Version=1.0
Exec=sudo -E /home/test/win10/start_vm1.sh -m 8G -c 2 --audio device=intel-hda,name=hda-audio,timer-period=5000,sink=alsa_output.pci-0000_00_1f.3.hdmi-stereo
#Exec=sh /usr/bin/startvm1
Name=Start vm1
GenericName=Start vm1
Comment=Start vm1 sr-iov gtk
Encoding=UTF-8
Terminal=false
Type=Application
Categories=Application;Network;
test@test-VTE510:~$ cat Desktop/start_vm2.desktop
#!/usr/bin/env xdg-open
[Desktop Entry]
Version=1.0
Exec=sudo -E /home/test/win10/start_vm2.sh -m 8G -c 2 --spice display=egl-headless,disable-ticketing=on,port=5002
#Exec=sh /usr/bin/startvm1
Name=Start vm2
GenericName=Start vm2
Comment=Start vm2 sr-iov gtk
Encoding=UTF-8
Terminal=false
Type=Application
Categories=Application;Network;
64. nvidia vgpu
Create :
[root@text mdev_supported_types]# cd /sys/class/mdev_bus/0000\:01\:00.0/mdev_supported_types/
[root@text mdev_supported_types]# echo "638916c5-46ad-4a2f-9248-27b0164efc02">nvidia-232/create
# virsh start win10-rtx2080
65. Installation of 22h2
ignore the login for installing 22h2.
在 Windows 11 的最新版本 22H2 中,微软干掉了“我没有 Internet 连接”按钮,没登陆不让你装系统。有些电脑网卡没有驱动就直接卡在这里了。

此时你可以按下 Shift+F10 打开命令提示符,输入 oobe\BypassNRO.cmd 即可重启进入带有跳过按钮的 OOBE。
66. always restart docker instance
update its property:
docker update --restart=always grafana
67. keepcache in rockylinux
via:
vim /etc/dnf/dnf.conf
add:
keepcache=1
68. meshcommander
via:
https://github.com/Ylianst/MeshCommander
69. find DISPLAY
via:
ls /tmp/.X11-Unix
find the XNumber, where DISPLAY is the number
70. user network
via:
qemu-system-x86_64 -net nic -net user,hostfwd=tcp::2222-:22 -M q35 -cpu host -smp 4,sockets=1,cores=4,threads=1 -enable-kvm -m 16384 -drive file=/var/lib/libvirt/images/ubuntubuildidv.qcow2
71. openmdtk
download url https://meshcentral.com/info/extra/mdtk/ManageabilityDeveloperToolKit.msi
72. ubuntu2204 static ip
via:
/etc/netplan/00-installer-config.yaml
# This is the network config written by 'subiquity'
network:
  ethernets:
    enp89s0:
      addresses:
        - 192.168.1.11/24
      nameservers:
        addresses: [223.5.5.5,180.76.76.76]
      routes:
        - to: default
          via: 192.168.1.33
  version: 2
73. dnf builddep
via:
    yum install -y dnf-plugins-core
    dnf builddep kernel.spec
74. depmod failed
in fedroa building kernel, just refers to https://www.spinics.net/linux/fedora/fedora-kernel/msg13605.html
75. set default kernel(grubby)
via:
 grubby --info=ALL
 grubby --default-index
 grubby --set-default 1
76. on build rpms
Tips:
1. using dockerimage for building
2. change the kernel.spec and related files in SOURCES FOLDER
3. manually enable btf items.
77. 4 core vcpu
via:
  <cpu mode='host-passthrough' check='none' migratable='on'>
    <topology sockets='1' dies='1' cores='4' threads='1'/>
  </cpu>
78. awesome customization
via editing the default theme:
# vim /usr/share/awesome/theme/default/theme.lua
theme.font          = "Consolas 14"

theme.bg_normal     = "#222222"
-- theme.bg_focus      = "#535d6c"
theme.bg_focus      = "#14EEEE"
79. sr-iov items
Information:
https://www.supermicro.com/zh_cn/products/motherboard/H13SAE-MF
its mainboard:   https://www.supermicro.com/manuals/motherboard/H13/MNL-2627.pdf
80. git proxy(socks5)
via:
git config --global http.proxy 'socks5://192.168.1.22:10800'
81. ustc centos repository
via:
sed -e 's|^mirrorlist=|#mirrorlist=|g' \
         -e 's|^#baseurl=http://mirror.centos.org/centos|baseurl=https://mirrors.ustc.edu.cn/centos|g' \
         -i.bak \
         /etc/yum.repos.d/CentOS-Base.repo
82. install docker on rockylinux
via:
dnf config-manager --add-repo https://download.docker.com/linux/centos/docker-ce.repo
dnf install docker-ce docker-ce-cli containerd.io
83. nomachine issue
solved on nvidia machine via:
$HOME/.nx/config/player.cfg and set the configuration key “Enable hardware accelerated decoding” to “disabled”.
84. route add -net
via:
route add -net 172.23.0.0/16 gw 192.168.1.33
85. bridge example
via:
idv@idv-VTE510:~$ cd /etc/netplan/
idv@idv-VTE510:/etc/netplan$ ls
01-network-manager-all.yaml  01-network-manager-all.yaml.orig
idv@idv-VTE510:/etc/netplan$ cat 01-network-manager-all.yaml
# Let NetworkManager manage all devices on this system
network:
  version: 2
  renderer: networkd

  ethernets:
    enp1s0:
      dhcp4: false
      dhcp6: false

  bridges:
    br0:
      interfaces: [enp1s0]
      addresses: [192.168.1.239/24]
      # gateway4 is deprecated, use routes instead
      routes:
      - to: default
        via: 192.168.1.1
        metric: 100
        on-link: true
      mtu: 1500
      nameservers:
        addresses: [8.8.8.8]
      parameters:
        stp: true
        forward-delay: 4
      dhcp4: no
      dhcp6: no
Thus you will have your br0 setup.
86. qemu tap setup
create a tap0 via:
$ sudo tunctl -t tap0 -u `whoami`
Add tap0 to bridge
$ sudo brctl addif br0 tap0
$ sudo ifconfig tap0 up
Start the qemu instance via adding following guest network setting:
-netdev tap,id=mynet0,ifname=tap0,script=no,downscript=no -device e1000,netdev=mynet0,mac=52:55:00:d1:55:01
87. du with hidden directorys
via:
du -hs .[^.]*
88. meson build prefix
via:
meson -Dprefix=/usr ......
89. lxd issue(snapd)
solved via:
apt install libsquashfuse0 squashfuse fuse
apt install snapd
90. pve lxc desktop
via:
https://github.com/mrrudy/proxmoxHelper
91. cuda on ubuntu22.04
Install Steps:
sudo apt-get install linux-headers-$(uname -r)
wget https://developer.download.nvidia.com/compute/cuda/repos/ubuntu2204/x86_64/cuda-keyring_1.1-1_all.deb
sudo dpkg -i cuda-keyring_1.1-1_all.deb
sudo apt-get update
sudo apt-get install cuda-toolkit
sudo apt-get install nvidia-gds
sudo reboot
Configure steps:
# cat ~/.bashrc
......
export PATH=/usr/local/cuda-12.3/bin${PATH:+:${PATH}}
export LD_LIBRARY_PATH=/usr/local/cuda-12.3/lib64${LD_LIBRARY_PATH:+:${LD_LIBRARY_PATH}}
# nvcc --version
nvcc: NVIDIA (R) Cuda compiler driver
Copyright (c) 2005-2023 NVIDIA Corporation
Built on Fri_Sep__8_19:17:24_PDT_2023
Cuda compilation tools, release 12.3, V12.3.52
Build cuda_12.3.r12.3/compiler.33281558_0
Test steps:
git clone https://github.com/NVIDIA/cuda-samples.git
cd ./cuda-samples/Samples/1_Utilities/deviceQuery
make
./deviceQuery
92. bluetooth headset autodisconnect issue
solved via:
# cat /etc/default/grub
GRUB_CMDLINE_LINUX="btusb.enable_autosuspend=n"
sudo grub-mkconfig -o /boot/grub/grub.cfg
# cat /etc/modprobe.d/disable_autosuspend.conf
    # Disable autosuspend for btusb to make the bluetooth keyboard work again
    options btusb enable_autosuspend=n
Reboot then bluetooth headset runs well.
Examine via:
sudo systool -v -m btusb
93. gradio issue
listen on 0.0.0.0 modification:
Find networking.py in \python_embeded\Lib\site-packages\gradio
adjust :
LOCALHOST_NAME = os.getenv("GRADIO_SERVER_NAME", "0.0.0.0")
AND
server_name = server_name or LOCALHOST_NAME
url_host_name = "localhost" if server_name == "0.0.0.0" else server_name
By
server_name = "192.168.1.10"
url_host_name = "localhost" if server_name == "0.0.0.0" else server_name
192.168.1.10 is your server IP.
it works with Gradio
94. virsh undefine
undefine the vms which contains nvram:
virsh undefine --nvram
95. disable ipv6 at home
rpi :
# vim /etc/sysctl.conf
net.ipv6.conf.all.disable_ipv6=1
net.ipv6.conf.default.disable_ipv6=1
Ubuntu22.04:
# vim /etc/default/grub
GRUB_CMDLINE_LINUX_DEFAULT="quiet splash ipv6.disable=1"
# update-grub2
96. nethogs listening UDP
for:
nethogs -C
97. pypi
pip using tsinghua
pip install -r requirements_versions.txt -i https://pypi.tuna.tsinghua.edu.cn/simple
98. yay using proxy
Example:
$ export https_proxy=http://192.168.1.194:10809
$ export http_proxy=http://192.168.1.194:10809
$ yay  --sudoflags="http_proxy=http://192.168.1.194:10809 https_proxy=http://192.168.1.194:10809" nomachine

