May 13, 2014
TechnologyUse Template In Flask
To use template in flask, we should put the static file under the templates folder under the root directory. Our index page should looks like following:

So our html file shall wrote like following:
<!DOCTYPE HTML>
<html>
<head>
<meta http-equiv="Content-Type" content="text/html; charset=utf-8">
<title>{{title}}</title>
<link rel="stylesheet" type="text/css" href="/static/assets/css/styles.css" />
<!--[if IE]><script src="assets/js/excanvas.min.js"></script><![endif]-->
</head>
<body>
<div id="page">
<div id="header">
<h1>{{title}}</h1>
<h2>Nanjing Weather/PM Statistics</h2>
<div id="periodDropDown">
<span class="left"></span>
<span class="currentPeriod">Last 24 hours</span>
<span class="arrow"></span>
<span class="right"></span>
<ul>
<li data-action="24hours">Last 24 hours</li>
<li data-action="7days">Last 7 Days</li>
<li data-action="30days">Last 30 Days</li>
</ul>
</div>
</div>
<div class="temperature section">
<h3>Temperature</h3>
<div id="plot">
<span class="preloader"></span>
</div>
</div>
<div class="humidity section">
<h3>Humidity</h3>
<div id="humi_plot">
<span class="preloader"></span>
</div>
</div>
<div class="pm2.5 section">
<h3>PM2.5</h3>
<div id="pm25_plot">
<span class="preloader"></span>
</div>
</div>
<div class="pm10 section">
<h3>PM10</h3>
<div id="pm10_plot">
<span class="preloader"></span>
</div>
</div>
</div>
<p id="footer">
{{year}} © {{title}}. Powered by <a href="kkkttt.github.io">Dash</a> UTC: {{utctime}}
</p>
<script src="/static/assets/js/jquery.min.js"></script>
<script src="/static/assets/js/script.js"></script>
<script src="/static/assets/js/jquery.flot.min.js"></script>
</body>
</html>
To use CSS file to make sure the vision effect, to use css in flask, put your files into the directory static under the root directory. Just like following :
$ tree static
static
└── assets
    ├── css
    │   └── styles.css
    ├── img
    │   ├── bg_tile.jpg
    │   ├── bg_vert.jpg
    │   ├── preloader.gif
    │   └── sprite.png
    └── js
        ├── jquery.flot.min.js
        ├── jquery.min.js
        └── script.js
Rendering Html
In genhtml.py, we define the function which rendering the html template like following:
# @app.route('/index')
@app.route('/')
# Generate the index page, for debugging now
def index():
    # Use template for rendering the content
    Current_Year = datetime.now().strftime("%Y::%H:%M ")
    Current_UTC = datetime.utcnow().strftime("%H:%M")
    return render_template('index.html', title="NanJing Weather and PM2.5/10 Statistics", year=Current_Year, utctime=Current_UTC)
Now open your first page, you will see the rendered effect. But the flot div remains empty, next chapter we will introduce the javascript which used for draw the flot picture and AJAX which used for updating the content.
May 13, 2014
TechnologyDraw Flot Picture
Since the article is mainly on writing apps, I don’t want to spend much time on how to use javascript or flot for drawing picture.
Simply checkout the code on github, you will see the code which is used for retrieving the data and start drawing plot pictures.
Fetching 24-hours Data
Fetching 24 latest records from the postgres database, and then add them into the chart, chart then has been sent to simplejson which used for updating the flot picture locally .
@app.route('/ajax/24hours/')
# ajax updateing for 24-hour data
def TwentyFourHours():
    # Here we will visit postgres for retrieving back the last 24 hours' data
    # Local version
    # engine = create_engine('postgresql+psycopg2://Trusty:@localhost:5432/mylocaldb', echo=True)
    # Heroku Version
    db_conn = os.environ['DATABASE_URL']
    engine = create_engine(db_conn)
    # Engine selection
    metadata=MetaData(bind=engine)
    weather_table=Table('weather',metadata,
        Column('Insert_Time', DateTime(timezone=True),primary_key=True),
        Column('Temperature', Integer),
        Column('Humidity', Integer),
        Column('PmTen', Integer),
        Column('PmTwoFive', Integer),
    )
    s = select([weather_table]).order_by(weather_table.c.Insert_Time.desc()).limit(24)
    conn = engine.connect()
    result = conn.execute(s)
    chart = []
    for row in result:
        # row[0], datetime;
        # row[1], Temperature;
        # row[2], Humidity;
        # row[3], PM10;
        # row[4], PM2.5;

        ###  append row[x] into the char ###
        # chart.append({
        chart.insert(0, {
            "label": (row[0] + timedelta(hours = 8)).strftime("%H:%M"),
            "value": row[1],
            "humi_value": row[2],
            "pm25_value": row[4],
            "pm10_value": row[3]
            })

    jsonStr = simplejson.dumps({
        # This is char, will be used in script.js
        "chart" :{
            # tooltip is used by the jQuery chart:
            "tooltip"   : "Temperature at %1: %2 degree",
            # humi_tooltip is used for jQuery chart for humidity:
            "humi_tooltip" : "Humidity at %1: %2 \%",
            "pm25_tooltip" : "PM2.5 at %1: %2 ug/m(3)",
            "pm10_tooltip" : "PM10 at %1: %2 ug/m(3)",
            "data"      : chart
            },
        # This is "downtime" will be used in script.js
             "downtime"  : getDowntime(1)
        })

    return jsonStr;
The periodic task which runs in tasks.py will fetching the data from the python api and the webpage, then insert them into the postgres database, so here in 24-hours’ function we just get them out and fill in the flot picture.
Daily Data
Daily data shall be generated via calculating them at the mid-night, that is, at the beginning of a brand new day, we will calculate out the last day’s average data.
The code is implemented in tasks.py as a crontab task, the code is listed as following:
# Every Day we will run a periodly work which will calculate
# the average temperature/humidity/pm2.5/pm10 task, and store
# it into the daily database, thus we have to define new Database
# here and insert data into.
# Beijing is locate at east 8 zone, thus 16:12 + 8 hour = 24:12
# At every mid-night(24:12) it will caculate the average value for
# the past 24 hours.
@periodic_task(run_every=crontab(hour=16, minute=12))
def OneDayHandler():
    # First Get the last 24 hours' data set
    # Local Engine
    # engine = create_engine('postgresql+psycopg2://Trusty:@localhost:5432/mylocaldb',echo=True)
    # Heroku Engine
    db_conn = environ['DATABASE_URL']
    engine = create_engine(db_conn)
    metadata=MetaData(bind=engine)
    # Definition of the weather table
    weather_table=Table('weather',metadata,
    	Column('Insert_Time', DateTime(timezone=True),primary_key=True),
    	Column('Temperature', Integer),
    	Column('Humidity', Integer),
    	Column('PmTen', Integer),
    	Column('PmTwoFive', Integer),
    )
    # Get last 24 records, If we suppose there are truely 24 records in last 24 hours, we can enable this sentense. But sometimes, this will be wrong.
    s = select([weather_table]).order_by(weather_table.c.Insert_Time.asc()).limit(24)
    conn = engine.connect()
    results = conn.execute(s)

    # Temperature
    totTemperature = 0
    avgTemperature = 0
    # Humidity
    totHumidity = 0
    avgHumidity = 0
    # PM2.5
    totPm25 = 0
    avgPm25 = 0
    # PM10
    totPm10 = 0
    avgPm10 = 0

    records_number = 0
    for item in results:
        totTemperature += item[1]
        totHumidity += item[2]
        totPm25 += item[4]
        totPm10 += item[3]
        records_number += 1

    if records_number>0:
        avgTemperature = totTemperature/records_number
        avgHumidity = totHumidity/records_number
        avgPm25 = totPm25/records_number
        avgPm10 = totPm10/records_number

    # Definition of the avg_eather table
    avg_metadata = MetaData(bind=engine)
    avg_weather_table=Table('avg_weather',avg_metadata,
    	Column('avg_Insert_Time', DateTime(timezone=True),primary_key=True),
    	Column('avg_Temperature', Integer),
    	Column('avg_Humidity', Integer),
    	Column('avg_PmTen', Integer),
    	Column('avg_PmTwoFive', Integer),
    )
    # Create table in db
    avg_metadata.create_all(checkfirst=True)
    # Create insert sentense
    avg_ins = avg_weather_table.insert()
    # Really insert
    avg_ins = avg_weather_table.insert().values(avg_Insert_Time=datetime.utcnow(), avg_Temperature = avgTemperature, avg_Humidity = avgHumidity, avg_PmTen = avgPm10, avg_PmTwoFive = av
gPm25)
    # Connect to engine and execute
    avg_conn = engine.connect()
    avg_conn.execute(avg_ins)

    return 1
We defined a new table named avg_weather, and at the mid-night we will retrieve the latest 24 records, calculating their average value, then insert them into the aver_weather table.
Displaying Daily Data
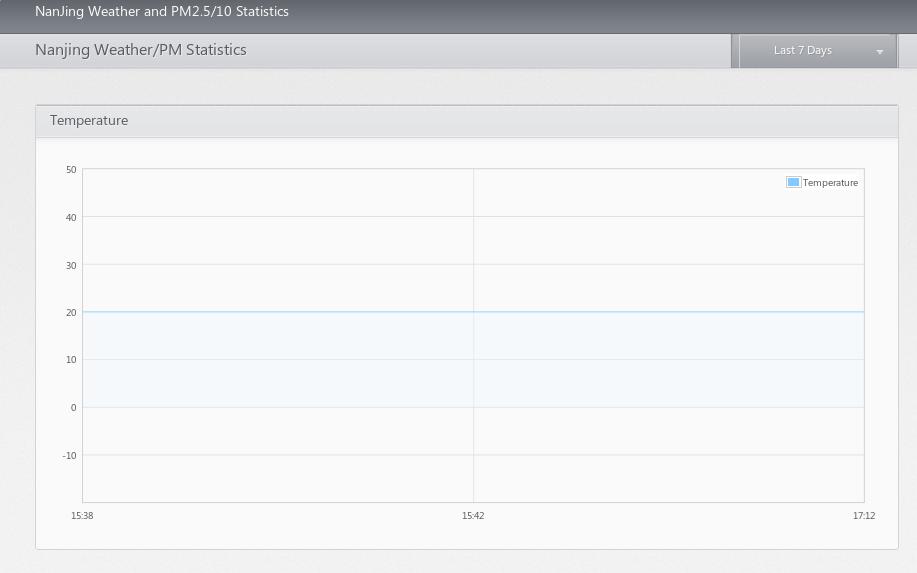
The main procedure is mainly like in 24-hours datas, but notice we are select from avg_weather, and we only select 7 items.
30-days data is very simple, change the day from 7 to 30, then you can see the monthly data.
Write Testing Interface
We hope we can manually test the functions via web. So we added following testing APIs in genhtml.py:
@app.route('/test/fetch/')
def fetch():
    fetch_and_store_data()
    return "Fetching Test Done!!!";

@app.route('/test/gen/')
def generateOneDay():
    OneDayHandler()
    return "Generate Test Done!!!";
If we visit http://Your_app_address/test/fetch, the program will fetch back the data. And for http://Your_app_address/test/gen, the daily average data will be generated.
Next Chapter is the last one. We simply paste the screenshots of the APP.
May 13, 2014
TechnologyFinal Effect
Following is the final effect of our own app:
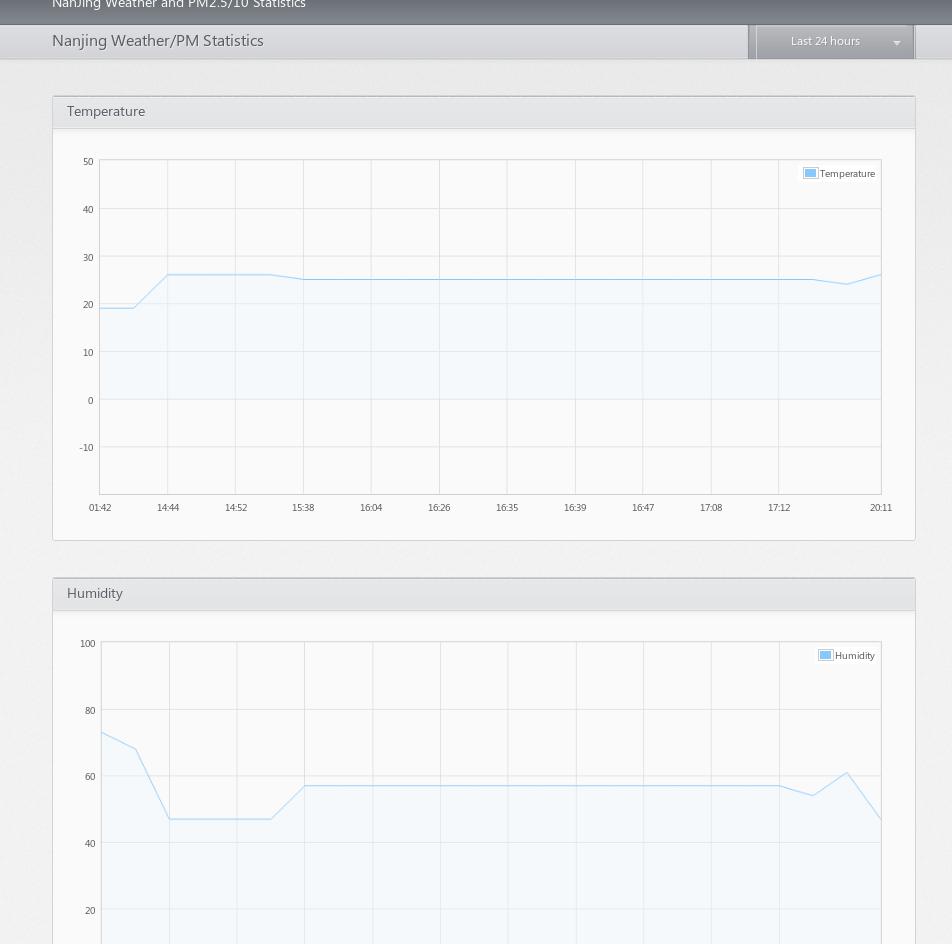

There are lots to be finalize and optimized, but currently It could be ful-fill our requirements which retriving the data and generate the flot.
The next series I will try to write some ruby or node.js programs which did the same functionalities, to compare the differencies between app developement.
Also to write a web-proxy is a work full of challenge, this will be took as next consideration of developing apps on heroku .
May 12, 2014
TechnologyUnderstanding the flask and Jinja
Flask Example
hello1.py is listed as following:
from flask import Flask
app = Flask(__name__)

@app.route("/")
def index():
    return 'Index Page'

@app.route('/hello')
def hello():
    return "Hello World!"

@app.route('/hello1')
def hello1():
    return "Hello World 1!"

if __name__ == "__main__":
    app.run()
Run this via:
$ python hello1.py
Then use your browser for visiting http://localhost:5000, http://localhost:5000/hello, http://localhost:5000/hello1. You will view different output result.
Jinja Example
The sample.py is listed as following:
# Load the jinja library's namespace into the current module.
import jinja2

# In this case, we will load templates off the filesystem.
# This means we must construct a FileSystemLoader object.
#
# The search path can be used to make finding templates by
#   relative paths much easier.  In this case, we are using
#   absolute paths and thus set it to the filesystem root.
templateLoader = jinja2.FileSystemLoader( searchpath="/" )

# An environment provides the data necessary to read and
#   parse our templates.  We pass in the loader object here.
templateEnv = jinja2.Environment( loader=templateLoader )

# This constant string specifies the template file we will use.
TEMPLATE_FILE = "//home/Trusty/code/python/heroku/Jinja2/example1.jinja"

# Read the template file using the environment object.
# This also constructs our Template object.
template = templateEnv.get_template( TEMPLATE_FILE )

# Specify any input variables to the template as a dictionary.
templateVars = { "title" : "Test Example",
                 "description" : "A simple inquiry of function." }

# Finally, process the template to produce our final text.
outputText = template.render( templateVars )
print outputText
Create the example1.jinja at the corresponding directory, contains following content:
<!doctype html>
<html lang="en">
<head>
  <meta charset="UTF-8" />

  <title>{{ title }}</title>
  <meta name="description" content="{{ description }}" />
</head>

<body>

<div id="content">
  <p>Why, hello there!</p>
</div>

</body>
</html>
Then the result will viewed as following:
<!doctype html>
<html lang="en">
<head>
  <meta charset="UTF-8" />

  <title>Test Example</title>
  <meta name="description" content="A simple inquiry of function." />
</head>

<body>

<div id="content">
  <p>Why, hello there!</p>
</div>

</body>
</html>
Rendering Template Returning
First create the template file under the directory ‘templates’, this is the default position for flask for searching the template files:
$ mkdir templates
$ cat layout.html
<style type="text/css">
.metanav
{
    background-color: yellow;
}
</style>
<div class="page">
  <h1>Flaskr</h1>
  <div class="metanav">
  {{ a_random_string }}
  {{ a_random_list[3] }}
  </div>
</div>
Then in the genhtml.py, we add the following lines for let the template system to rendering our pages:
from flask import render_template
@app.route('/index')
# Generate the index page, for debugging now
def index():
    # Use template for rendering the content
    rand_list= [0, 1, 2, 3, 4, 5]
    return render_template('layout.html', a_random_string="Heey, what's up!", a_random_list=rand_list)
Now browser you http://localhost:5000/index, you can see the template rendered result.
May 11, 2014
TechnologyWe will continue to deploy our tasks on heroku. In this article we will finish the data retriving and database insertion.
Honcho
Install and Configuration of Honcho:
$ pip install honcho
# Regenerate requirement.txt and upload it onto heroku
$ mv Procfile ProcfileHoncho
# Edit the new Procfile:
$ vim Procfile
web: honcho -f ProcfileHoncho start
In local, we can also use following command for swiftly verifying our code:
# Because our user belongs to root group, so set following variable firstly
$ export C_FORCE_ROOT=1
$ foreman start
Now you can visit http://localhost:5000 for viewing the result.
task.py
Following is the script for tasks.py:
#!/usr/bin/env python
# -*- coding: utf-8 -*-
# Set default encoding: utf-8
import sys;
reload(sys);
# Setting the utf-8 format
sys.setdefaultencoding("utf8")


import logging
import string
from celery import Celery
from celery.task import periodic_task
from datetime import datetime,timedelta
from os import environ


# For retrieving temperature/humidity
import pywapi
import urllib2
from urllib2 import ProxyHandler
import re
from BeautifulSoup import BeautifulSoup

# For using database(Postgresql)
# from flash.ext.sqlalchemy import SQLAlchemy
from sqlalchemy import create_engine
from sqlalchemy import MetaData, Column, Table, ForeignKey
from sqlalchemy import Integer, String, DateTime


# redis configuration for celery
### Local, should be change to remote when deploying to heroku
REDIS_URL = environ.get('REDISTOGO_URL', 'redis://localhost')

celery = Celery('tasks', broker=REDIS_URL)

# Fetch


# Define Periodic Tasks
# @periodic_task(run_every=timedelta(minutes=60))
# Funciton for fetching data and store it in Postgres
def fetch_and_store_data():
    # Fetching the weather information from Yahoo.
    Yahoo_Result = pywapi.get_weather_from_yahoo('CHXX0099')
    Current_Temp = string.lower(Yahoo_Result['condition']['temp'])
    Current_Humi = string.lower(Yahoo_Result['atmosphere']['humidity'])
    Tomorrow_Forecast = Yahoo_Result['forecasts'][0]
    Twenty_Four_Hours = Yahoo_Result['forecasts'][1]
    Fourty_Eight_Hours = Yahoo_Result['forecasts'][2]
    Seventy_Two_Hours = Yahoo_Result['forecasts'][3]
    # !!! comment proxy related for deploying to heroku !!! #
    proxy = urllib2.ProxyHandler({'http': '192.11.236.225:8000'})
    opener = urllib2.build_opener(proxy)
    urllib2.install_opener(opener)
    page = urllib2.urlopen("http://www.pm25.in/nanjing")
    soup = BeautifulSoup(page)                      #
    # Find the detailed table from the soup.        #
    table = soup.find('table', {'id':'detail-data'})#
    # Fetch the XuanWuHu, if not, use MaiGaoQiao ins#tead.
    rows = table.findAll('tr')                      #
    for subrows in rows:                            #
        if "玄武湖" in subrows.text:                #
            XuanwuLake = subrows                    #
        else:                                       #
            if "迈皋桥" in subrows.text:            #
                XuanwuLake = subrows                #
    XuanwuLake_subitem = XuanwuLake.findAll('td')   #
    # Here we will get an array, fetch out the text #for the content from this array.
    # Fetched origin data, different from cnpm25.cn #
    pm_25_orig = XuanwuLake_subitem[4].text         #
    pm_10_orig = XuanwuLake_subitem[5].text
    # Open the Database
    engine = create_engine('postgresql+psycopg2://Trusty:@localhost:5432/mylocaldb',echo=True)
    metadata=MetaData(bind=engine)

    # Definition of the weather table
    weather_table=Table('weather',metadata,
    	Column('Insert_Time', DateTime(timezone=True),primary_key=True),
    	Column('Temperature', Integer),
    	Column('Humidity', Integer),
    	Column('PmTen', Integer),
    	Column('PmTwoFive', Integer),
    )

    # Create the table in mylocaldb
    metadata.create_all(checkfirst=True)

    # Record Insertion
    # First generate an insertion sentense:
    ins = weather_table.insert()
    # Really insert into the Database
    # ins = weather_table.insert().values(Insert_Time=datetime.datetime.utcnow(), Temperature=25, Humidity=75, PmTen=100, PmTwoFive=55)   # Example
    ins = weather_table.insert().values(Insert_Time=datetime.utcnow(), Temperature=Current_Temp, Humidity=Current_Humi, PmTen=int(pm_10_orig), PmTwoFive=int(pm_25_orig))
    # Connect to engine and execute.
    conn = engine.connect()
    result = conn.execute(ins)

    #return Current_Temp
    return pm_25_orig


@periodic_task(run_every=timedelta(seconds=10))
def print_fib():
    #logging.info(fib(30))
    logging.info("This could be viewed in logging!")
Notice, this version only works in local.
For updating the real database on heroku, we have to do some modification on redis server and remove the proxy server, these are the works we need to done in next chapter.
