Nov 15, 2023
TechnologyVagrantfile definition:
Vagrant.configure("2") do |config|
  config.vm.box = "rockylinux/9"
config.disksize.size = '80GB'

config.vm.provider "virtualbox" do |v|
  v.memory = 81920
  v.cpus = 6
end

end
Should install following plugins:
$ vagrant plugin list
vagrant-disksize (0.1.3, global)
vagrant-libvirt (0.7.0, system)
vagrant-vbguest (0.31.0, global)
Install via vagrant plugin install xxxxxxxxxx
Resize in vm:
cfdisk /dev/sda
xfs_growfs /dev/sda5
On Ubuntu lvm, if you resize the disk, do following:
lvextend -l +100%FREE /dev/ubuntu-vg/ubuntu-lv
resize2fs /dev/ubuntu-vg/ubuntu-lv
Nov 13, 2023
Technology1. dnscrypt-proxy
Uninstall systemd-resolved then install dnscrypt-proxy:
sudo systemctl disable systemd-resolved
sudo systemctl stop systemd-resolved
sudo apt install -y dnscrypt-proxy
sudo systemctl start dnscrypt-proxy
Examine its running:
$ sudo netstat -anp | grep ":53" | grep "127.0.2.1"
tcp        0      0 127.0.2.1:53            0.0.0.0:*               LISTEN      1/init
udp        0      0 127.0.2.1:53            0.0.0.0:*                           1/init
Configure default dnscrypt-proxy.toml file:
$ cat /etc/dnscrypt-proxy/dnscrypt-proxy.toml
# Empty listen_addresses to use systemd socket activation
listen_addresses = ['0.0.0.0:5533']
server_names = ['alidns-doh','tuna-doh-ipv4']
cache_size = 4096
cache_min_ttl = 2400
cache_max_ttl = 86400
cache_neg_min_ttl = 60
cache_neg_max_ttl = 600

[query_log]
  file = '/var/log/dnscrypt-proxy/query.log'
......
Copy the dnscrypt-proxy.toml file for foreign dns query:
$ sudo cp /etc/dnscrypt-proxy/dnscrypt-proxy.toml /etc/dnscrypt-proxy/dnscrypt-proxy-foreign.toml
Change the content of this foreign content:
$ cat /etc/dnscrypt-proxy/dnscrypt-proxy-foreign.toml
# Empty listen_addresses to use systemd socket activation
listen_addresses = ['0.0.0.0:25533']
server_names = ['cloudflare','google']
cache_size = 4096
cache_min_ttl = 2400
cache_max_ttl = 86400
cache_neg_min_ttl = 60
cache_neg_max_ttl = 600


[query_log]
  file = '/var/log/dnscrypt-proxy/query1.log'

[nx_log]
  file = '/var/log/dnscrypt-proxy/nx1.log'
......
For using this newly created configuration file , create a new systemd item:
$ sudo cp /lib/systemd/system/dnscrypt-proxy.service /lib/systemd/system/dnscrypt-proxy-foreign.service
$ sudo vim /lib/systemd/system/dnscrypt-proxy-foreign.service
...
ExecStart=/usr/sbin/dnscrypt-proxy -config /etc/dnscrypt-proxy/dnscrypt-proxy-foreign.toml
...
Configure this service:
$ sudo systemctl daemon-reload
$ sudo systemctl enable dnscrypt-proxy
$ sudo systemctl enable dnscrypt-proxy-foreign.service
Test:
$ sudo systemctl restart dnscrypt-proxy
$ sudo systemctl start dnscrypt-proxy-foreign
$ dig google.com @127.0.0.1 -p 5533 +short
172.253.124.139
172.253.124.101
172.253.124.100
172.253.124.102
172.253.124.138
172.253.124.113
$ dig google.com @127.0.0.1 -p 25533 +short
142.250.217.142
2. dnsmasq flows
Clone the flow control repository:
cd /opt
git clone https://github.com/felixonmars/dnsmasq-china-list
ln -sf /opt/dnsmasq-china-list/accelerated-domains.china.conf  /etc/dnsmasq.d/accelerated-domains.china.conf
ln -sf /opt/dnsmasq-china-list/google.china.conf /etc/dnsmasq.d/google.china.conf
ln -sf /opt/dnsmasq-china-list/apple.china.conf /etc/dnsmasq.d/apple.china.conf
ln -sf /opt/dnsmasq-china-list/bogus-nxdomain.china.conf /etc/dnsmasq.d/bogus-nxdomain.china.conf
sed -i 's|114.114.114.114|127.0.0.1#5533|g' accelerated-domains.china.conf
Install dnsmasq:
$ sudo apt install -y dnsmasq
$ sudo vim /etc/resolv.conf
nameserver 127.0.0.1
$ sudo chattr +i /etc/resolv.conf
$ cat /etc/dnsmasq.conf
log-queries
log-facility=/var/log/dnsmasq.log
no-hosts
bogus-nxdomain=119.29.29.29
cache-size=1000
port=53
server=127.0.0.1#25533
$ sudo systemctl restart dnsmasq
Examine:
$ dig www.google.com
$ curl www.google.com
Change the dncrypt-proxy listend socket:
$ vim /lib/systemd/system/dnscrypt-proxy.socket
[Socket]
ListenStream=127.0.2.1:20153
ListenDatagram=127.0.2.1:20153
3. reference url
https://dnscrypt.info/public-servers/
Oct 30, 2023
TechnologyTips
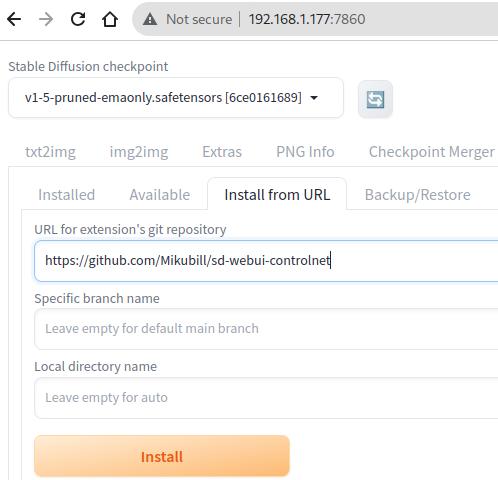
Install ControlNet:
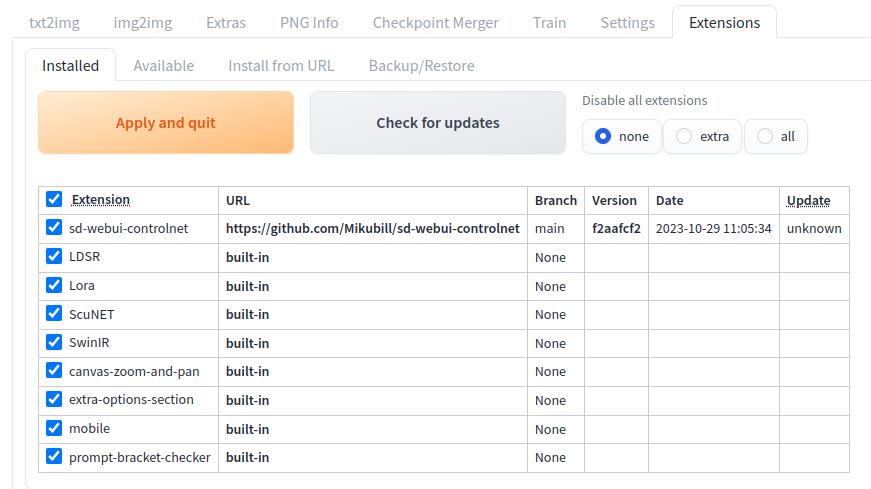
After installed, it will reloading:
Oct 19, 2023
TechnologyChanged DVServer/Driver.h:
Line 25:
//#define DVSERVER_HWDCURSOR
-->
#define DVSERVER_HWDCURSOR

Line 45->Line 58, CursorData, all commented
Compilation will give following errors 'device_iface_data':undeclared identifier:
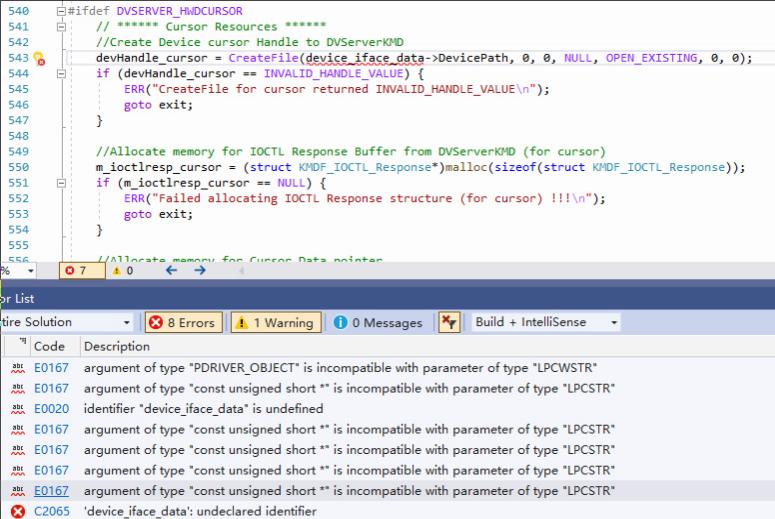
Comment DVServer/Driver.cpp Line 543 -> Line 547, rebuild.
Oct 16, 2023
TechnologyCreate lxc instance
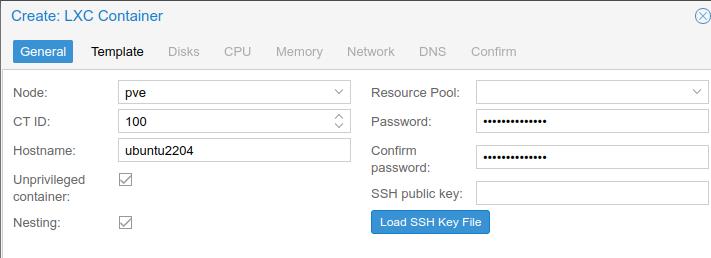
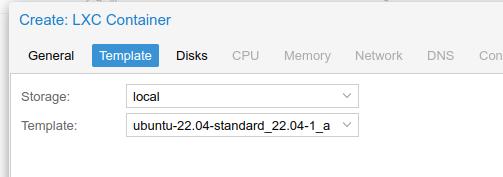
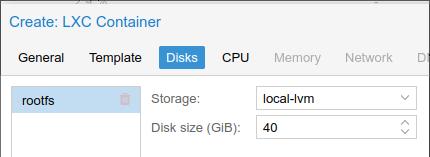
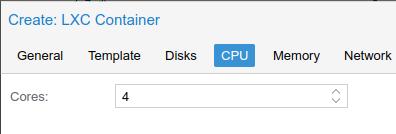
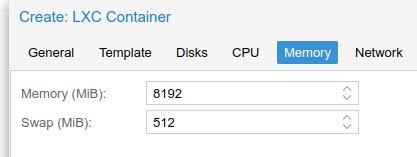
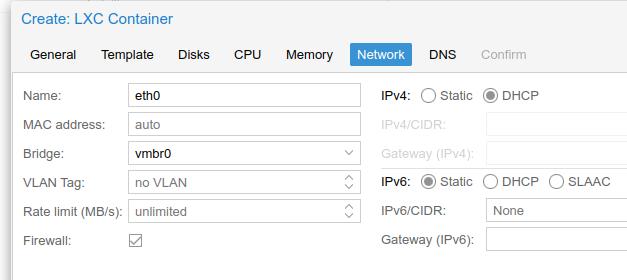
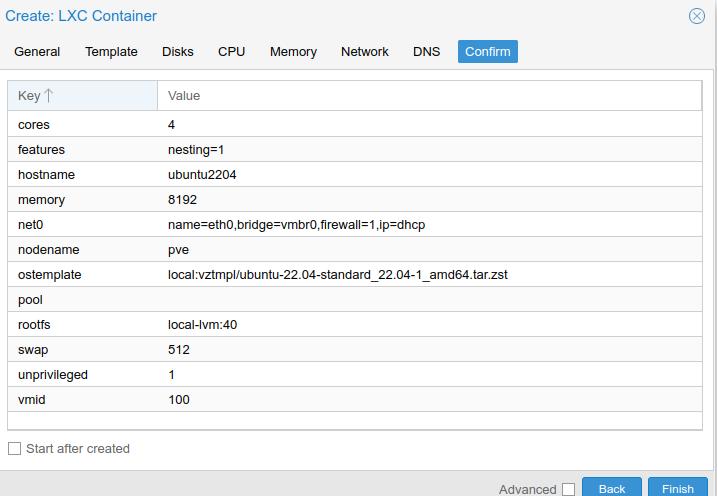
Configuration file for pve 100:
# cat /etc/pve/lxc/100.conf
arch: amd64
cores: 4
features: nesting=1
hostname: ubuntu2204
memory: 8192
net0: name=eth0,bridge=vmbr0,firewall=1,hwaddr=DA:8A:5D:E2:3D:1F,ip=dhcp,type=veth
ostype: ubuntu
rootfs: local-lvm:vm-100-disk-0,size=40G
swap: 512
unprivileged: 1
lxc.cgroup2.devices.allow: c 226:0 rwm
lxc.cgroup2.devices.allow: c 226:128 rwm
lxc.cgroup2.devices.allow: c 29:0 rwm
lxc.mount.entry: /dev/fb0 dev/fb0 none bind,optional,create=file
lxc.mount.entry: /dev/dri dev/dri none bind,optional,create=dir
lxc.mount.entry: /dev/dri/renderD128 dev/renderD128 none bind,optional,create=file
lxc.cgroup2.devices.allow: c 4:7 rwm
lxc.mount.entry: /dev/tty7 dev/tty7 none bind,optional,create=file
lxc.cgroup2.devices.allow: c 13:* rwm
lxc.mount.entry: /dev/input dev/input none bind,optional,create=dir
lxc.cgroup2.devices.allow: c 116:* rwm
lxc.mount.entry: /dev/snd dev/snd none bind,optional,create=dir
lxc.idmap: u 0 100000 65536
lxc.idmap: g 0 100000 5
lxc.idmap: g 5 5 1
lxc.idmap: g 6 100006 23
lxc.idmap: g 29 29 1
lxc.idmap: g 30 100030 14
lxc.idmap: g 44 44 1
lxc.idmap: g 45 100045 60
lxc.idmap: g 105 101 1
lxc.idmap: g 106 100106 2
lxc.idmap: g 108 103 1
lxc.idmap: g 109 100109 65427
Start the machine and ssh into it.
Configuration in lxc
apt update -y && apt upgrade -y
apt install -y curl sudo gnupg
apt install -y va-driver-all ocl-icd-libopencl1
apt-get install -y lightdm
echo "/usr/sbin/lightdm" > /etc/X11/default-display-manager
apt-get install -y kodi
apt install -y kodi-peripheral-joystick
cat <<EOF >/usr/share/xsessions/kodi-alsa.desktop
[Desktop Entry]
Name=Kodi-alsa
Comment=This session will start Kodi media center with alsa support
Exec=env AE_SINK=ALSA kodi-standalone
TryExec=env AE_SINK=ALSA kodi-standalone
Type=Application
EOF
useradd -d /home/kodi -m kodi &>/dev/null
gpasswd -a kodi audio &>/dev/null
gpasswd -a kodi video &>/dev/null
gpasswd -a kodi render &>/dev/null
groupadd -r autologin &>/dev/null
gpasswd -a kodi autologin &>/dev/null
gpasswd -a kodi input &>/dev/null

cat <<EOF >/usr/share/xsessions/kodi-alsa.desktop
[Desktop Entry]
Name=Kodi-alsa
Comment=This session will start Kodi media center with alsa support
Exec=env AE_SINK=ALSA kodi-standalone
TryExec=env AE_SINK=ALSA kodi-standalone
Type=Application
EOF

cat <<EOF >/etc/lightdm/lightdm.conf.d/autologin-kodi.conf
[Seat:*]
autologin-user=kodi
autologin-session=kodi-alsa
EOF

apt-get install -y xserver-xorg-input-evdev
mkdir -p /etc/X11/xorg.conf.d

cat >/usr/local/bin/preX-populate-input.sh  << __EOF__
#!/usr/bin/env bash

### Creates config file for X with all currently present input devices
#   after connecting new device restart X (systemctl restart lightdm)
######################################################################

cat >/etc/X11/xorg.conf.d/10-lxc-input.conf << _EOF_
Section "ServerFlags"
     Option "AutoAddDevices" "False"
EndSection
_EOF_

cd /dev/input
for input in event*
do
cat >> /etc/X11/xorg.conf.d/10-lxc-input.conf <<_EOF_
Section "InputDevice"
    Identifier "\$input"
    Option "Device" "/dev/input/\$input"
    Option "AutoServerLayout" "true"
    Driver "evdev"
EndSection
_EOF_
done
__EOF__

chmod +x /usr/local/bin/preX-populate-input.sh
mkdir -p /etc/systemd/system/lightdm.service.d
cat > /etc/systemd/system/lightdm.service.d/override.conf << __EOF__
[Service]
ExecStartPre=/bin/sh -c '/usr/local/bin/preX-populate-input.sh'
SupplementaryGroups=video render input audio tty
__EOF__

ln -fs /lib/systemd/system/lightdm.service /etc/systemd/system/display-manager.service
systemctl daemon-reload
systemctl start lightdm
ln -fs /lib/systemd/system/lightdm.service /etc/systemd/system/display-manager.service
Change to xfce4:
apt install -y xfce4
root@ubuntu2204:~# cat /etc/lightdm/lightdm.conf.d/autologin-kodi.conf
[Seat:*]
autologin-user=kodi
autologin-session=xfce4-alsa
#autologin-session=kodi-alsa
root@ubuntu2204:~# cat /usr/share/xsessions/xfce4-alsa.desktop
[Desktop Entry]
Name=xfce4-alsa
Comment=This session will start xfce4 with alsa support
Exec=env AE_SINK=ALSA startxfce4
TryExec=env AE_SINK=ALSA startxfce4
Type=Application
Change to dde:
add-apt-repository ppa:ubuntudde-dev/stable
apt install ubuntudde-dde


