Moving System On 1T Harddisk
Jul 31, 2014Technology
Preparation
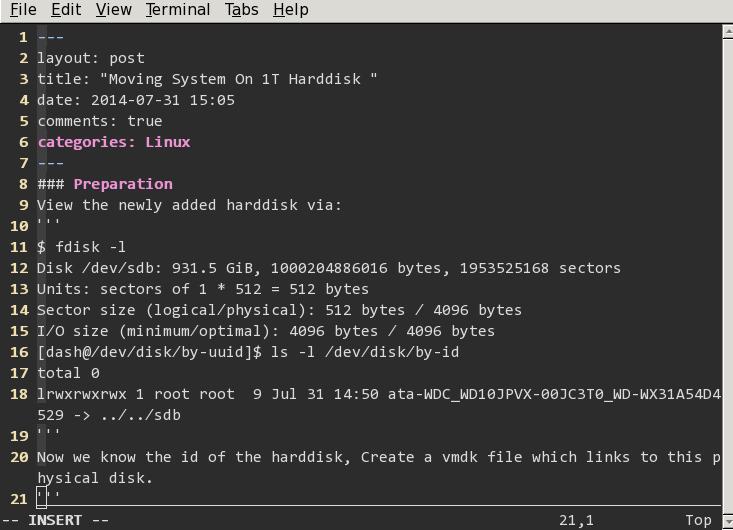
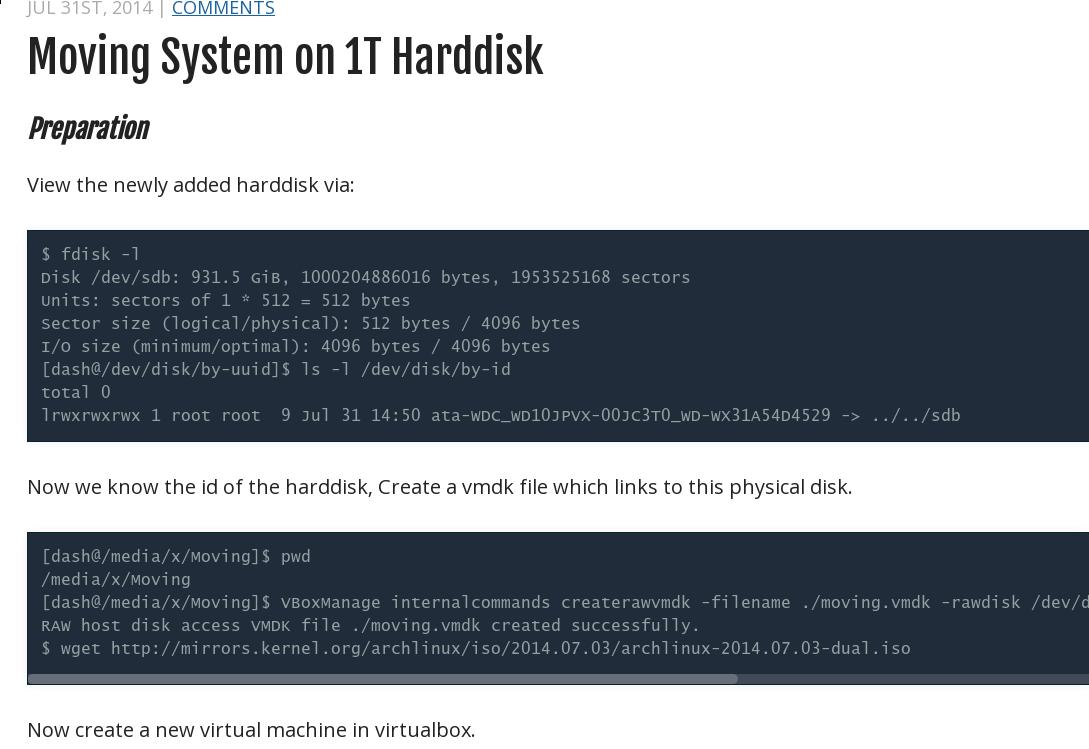
View the newly added harddisk via:
$ fdisk -l
Disk /dev/sdb: 931.5 GiB, 1000204886016 bytes, 1953525168 sectors
Units: sectors of 1 * 512 = 512 bytes
Sector size (logical/physical): 512 bytes / 4096 bytes
I/O size (minimum/optimal): 4096 bytes / 4096 bytes
[Trusty@/dev/disk/by-uuid]$ ls -l /dev/disk/by-id
total 0
lrwxrwxrwx 1 root root  9 Jul 31 14:50 ata-WDC_WD10JPVX-00JC3T0_WD-WX31A54D4529 -> ../../sdb
Now we know the id of the harddisk, Create a vmdk file which links to this physical disk.
[Trusty@/media/x/Moving]$ pwd
/media/x/Moving
[Trusty@/media/x/Moving]$ VBoxManage internalcommands createrawvmdk -filename ./moving.vmdk -rawdisk /dev/disk/by-id/ata-WDC_WD10JPVX-00JC3T0_WD-WX31A54D4529
RAW host disk access VMDK file ./moving.vmdk created successfully.
$ wget http://mirrors.kernel.org/archlinux/iso/2014.07.03/archlinux-2014.07.03-dual.iso
Now create a new virtual machine in virtualbox. Begin to install.
Installation
The detailed steps could be viewed in my previous blogs, “moving-from-working-pc-to-own-usb-disk-based”.
$ pacman -S chromium firefox xorg xorg-xinit awesome xf86-video-intel xf86-video-ati pidgin thunderbird wget libreoffice gnome-terminal tigervnc xfce4  evince gimp smplayer alsa-utils gvim eclipse git subversion wireshark-gtk tcpdump ddd gdb meld qemu virtualbox wqy-bitmapfont wqy-microhei wqy-microhei-lite wqy-zenhei fcitx fcitx-libpinyin rox gpicview conky fcitx-googlepinyin nodejs cronie ntfs-3g liferea
$ pacman -S zsh
$ useradd -m -g root -G audio -s /bin/zsh Trusty
$ pacman -S sudo
# Add yaourt, and
$ pacman -Syu && pacman -S yaourt
$ yaourt sipe webqq
Configure E-mail and Office Communicator:
Communicator:   UCCAPI/15.0.4481.1000 OC/15.0.4481.1000
TLS-DSK.
Tips for reconfiguring:
1. Install fcitx-configtool, then we could configure the fcitx and let it add more input method, or the default one is english.
2. Install hdtemp, lm_sensors, which will be used in conkyrc.
3. Copy the .config/awesome, and copy the themes to /usr/share/awesome/themes, the directory is named wabbit. This step is required in this time’s installation, previous I don’t remember this step, perhaps awesome changes.
4. Goagent, install python2-pyopenssl. Then goagent could be used.
5. mycapscr:
$ mkdir ~/capscr
$ sudo pacman -S scrot
$ cat /usr/bin/mycapscr
6. Install xampp
$ sudo yaourt xampp, then configure it.
7. Install udiskie for automount.
8. Install xlock-more for xlock.
9. Flash for chromium: yaourt chromium-pepper-flash. Then restart the chromim for using flash.
10. Enable the auto-login for ssh.
$ cat ~/.ssh/id_rsa.pub| ssh Trusty@1xx.xx.xxx.xxx'cat >> /home/Trusty/.ssh/authorized_keys'
$ cat ~/.ssh/id_rsa.pub| ssh root@1xx.xx.xxx.xxx'cat>>/root/.ssh/authorized_keys'
$ cat ~/.ssh/id_rsa.pub| ssh Tomcat@MisteryPlace.xxx.xxx.xxx.com 'cat>>~/.ssh/authorized_keys'
11. Font Configuration
$  sudo mkdir -p /usr/share/fonts/vista
$  sudo cp /mnt/usr/share/fonts/vista/YaHei.Consolas.1.11b.ttf /usr/share/fonts/vista
$  sudo chmod 644 /usr/share/fonts/vista/*.ttf
$  cd /usr/share/fonts/vista/
$  sudo mkfontscale && sudo mkfontdir && sudo fc-cache -fv
Then change the terminal font to YaHei
12. blog writing use:
$ echo insecure >> ~/.curlrc
$ curl -k --insecure  -L https://get.rvm.io | bash -s stable --ruby
$ rvm install 1.9.3
$ gem install bundler
$ bundle install
You have to enable the terminal emulator’s setting by enable “Run command as login shell”.
Then you have to add the ssh key to the github.com.
13. Configure bridged network for qemu use.
# systemctl start systemd-networkd.service
[root@TrustyArch network]# systemctl enable systemd-networkd.service
Created symlink from /etc/systemd/system/multi-user.target.wants/systemd-networkd.service to /usr/lib/systemd/system/systemd-networkd.service.
# systemctl disable dhcpcd@enp0s25
[root@TrustyArch Trusty]# systemctl enable dhcpcd@enp0s25
Created symlink from /etc/systemd/system/multi-user.target.wants/dhcpcd@enp0s25.service to /usr/lib/systemd/system/dhcpcd@.service.
[root@TrustyArch Trusty]# systemctl disable dhcpcd@enp0s25
Removed symlink /etc/systemd/system/multi-user.target.wants/dhcpcd@enp0s25.service.
[root@TrustyArch network]# cat MyDhcp.network
[Match]
Name=enp0s25

[Network]
DHCP=yes
[root@TrustyArch network]# pwd
/etc/systemd/network
Now the network is configured to dhcpcd@enp0s25.
Continue to edit for bridge :
[root@TrustyArch network]# cat MyBridge.netdev
[NetDev]
Name=br0
Kind=bridge
MacAddress=
[root@TrustyArch network]# cat MyBridge.network
[Match]
Name=br0

[Network]
DHCP=yes
[root@TrustyArch network]# cat MyEth.network
[Match]
Name=enp0s25

[Network]
Bridge=br0
$ systemctl restart systemd-networkd.service
Now restart and you will see the status via: systemctl status systemd-networkd.service
14. mlocate
sudo pacman -S mlocate
sudo updatedb
15. Whatpulse
yaourt whatpulse
Be sure to download the setup script, eg, the source code package, and grant all of the priviledge to your username.
16. Vim Customization
Copy the old .vimrc, and update it. Vundle will do everything for you.
17. Samba Configuration
sudo pacman -S samba
Then configure the samba configure, the configuration file should be the same or modifed from the old one.
$ sudo systemctl enable smbd.service
$ sudo systemctl enable nmbd.service
$ sudo systemctl start smbd.service
$ sudo systemctl start nmbd.service
$ sudo smbpasswd -a Trusty
Now in the guest machine you can use samba server for downloading.
18. Virtualbox Migration.
Create new machines using the exisiting hard-disk.
Then:
modprobe vboxdrv
modprobe vboxnetflt
Change the key for switching back to host system.
File->Preference->Input->Virtual Machine-> Host Key Combination.
19. Network Indicator
Install wicd via:
$ sudo pacman -S wicd wicd-gtk
$ sudo systemctl start wicd.service
$ sudo systemctl enable wicd.service
Then enable it in the awesome or change view files.
I enable it in rc.lua of awesome WM.
20. unrar
sudo pacman -S unrar
21. Vrome Customization
set useletters=0
22. Opera
yaourt -S opera
23. Nautilus
sudo pacman -S nautilus
24. xampp configuration
Refer to 2014-04-23-deploy-xampp-on-archlinux.markdown
25. Firefox customization
Install Vimperator.
Install video download.
26. Nokia 525
Install gmtp via yaourt:
$ yaourt gmtp
27. Virtualbox Modules.
Add following definitions:
[root@TrustyArch modules-load.d]# cat virtualbox.conf
vboxdrv vboxnetflt vboxnetadp
[root@TrustyArch modules-load.d]# pwd
/etc/modules-load.d
28. Install qupzilla.
sudo pacman -S qupzilla
29. Install gitbook.
sudo npm install gitbook -g
30. Install calibre.
sudo pacman -S calibre
31. Install tree.
sudo pacman -S tree
32. gitbook-pdf
First install phantomjs:
yaourt -S phantomjs
Then :
sudo npm install gitbook-pdf -g
Then generate book via:
$ gitbook pdf ./my_repository
33. Auto logon Auto login in tty1 at start-up:
[Trusty@DashArch ~]$ sudo mkdir /etc/systemd/system/getty@tty1.service.d
[Trusty@DashArch ~]$ cat /etc/systemd/system/getty\@tty1.service.d/autologin.conf
[Service]
ExecStart=
ExecStart=-/usr/bin/agetty --autologin Trusty --noclear %I 38400 linux