Apr 14, 2015
Technology这里我们安装horizon服务,使得我们对OpenStack的管理做到可视化.
###安装horizon
在Controller节点上,安装需要的包:
root@JunoController:~# apt-get -y install openstack-Trustyboard apache2 libapache2-mod-wsgi memcached python-memcache
建议删除ubuntu提供的主题,这个主题会使得一些翻译失效:
root@JunoController:~# apt-get remove --purge openstack-Trustyboard-ubuntu-theme
配置DashBoard的本地配置文件:
root@JunoController:~# vim /etc/openstack-Trustyboard/local_settings.py
    OPENSTACK_HOST = "10.17.17.211"
    TIME_ZONE = "Asia/Shanghai"
重新启动服务:
root@JunoController:~# service apache2 restart
root@JunoController:~# service memcached restart
访问http://10.17.17.211/horizon登入到DashBoard以管理OpenStack.
查看OpenStack版本
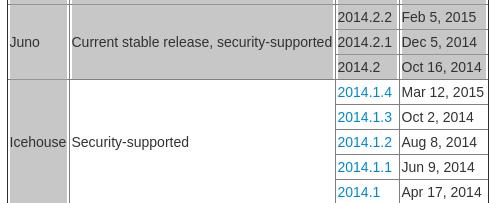
节点机器起名错误,应该是IcehouseController/IcehouseCompute/IcehouseNetwork之类,但是这里可以通过以下命令来查看OpenStack安装的版本:
root@JunoController:~# dpkg -l | grep nova-common
ii  nova-common                         1:2014.1.4-0ubuntu2                   all          OpenStack Compute - common files
2014.1.4就是我们要关注的版本信息,在:
https://wiki.openstack.org/wiki/Releases
可以查到,它属于Icehouse.
Apr 14, 2015
Technology接下来在OpenStack Icehouse的基础上,部署OpenContrail, OpenContrail能提供更为强大的网络功能。
首先从Juniper的官网上下载安装文件:
contrail-install-packages_2.10-39~ubuntu-14-04icehouse_all.deb
Contrail可以被安装到已经部署好的OpenStack环境中,只要在安装Contrail的时候,根据已有的OpenStack组件的部署情况作相应的调整就可以。
Hook
Contrail用到的钩子(Hook)有:
core_plugin – 它被用在neutron的配置中,用于指向ContrailPlugin组件。
libvirt_vif_driver – 它被用在nova计算节点配置中,用来指向Contrail的VRouterVIFDriver.
MQ broker IP and Port – 如果现有的OpenStack提供RabbitMQ那么将相应的IP和端口在neutron和nova的配置中指过去。
Contrial部署涉及组建
列举如下,对应的文件需要做修改,或者创建。
api_service.conf - This file needs to be edited to provide details of existing OpenStack keystone.
plugin.ini - This file needs proper keystone URL, token and credentials.
neutron.conf - This file needs auth_host credentials to connect OpenStack keystone.
config.global.js - This file contains IP and PORT for image (glance), compute (nova), identity (keystone), storage (cinder)
OpenStack controller nova config to point to Contrail neutron
OpenStack controller neuron service endpoint to point to contrail neutron.
为了让来之不易的OpenStack不至于被毁掉,建议先做好备份。因为接下来就要对已经部署好的节点做各种操作了。
干掉OVS
Make sure to remove existing OpenStack OVS installed modules and config.
首先,在DashBoard里干掉所有的网络配置(网络/路由等)。
Network节点移除OpenVSwitch
更改Network节点的网络配置,取消br-ex的配置:
root@JunoNetwork:~# vim /etc/network/interfaces
auto eth2
iface eth2 inet static
address 10.22.22.212
netmask 255.255.255.0

#iface eth2 inet manual
#iface br-ex inet static
#address 10.22.22.212
#netmask 255.255.255.0
## gateway 10.22.22.1
#bridge_ports eth2
#bridge_stp off
#auto br-ex
移除br-ex设备,并重启Network节点:
root@JunoNetwork:~# ovs-vsctl del-port br-ex eth2
root@JunoNetwork:~# ovs-vsctl del-br br-ex
root@JunoNetwork:~# reboot
注释掉关于ML2服务配置并重新启动服务:
root@JunoNetwork:~# cat /etc/neutron/plugins/ml2/ml2_conf.ini| grep -i "^###"
### type_drivers = flat,gre
### tenant_network_types = gre
### mechanism_drivers = openvswitch
### tunnel_id_ranges = 1:1000
### enable_security_group = True
### firewall_driver = neutron.agent.linux.iptables_firewall.OVSHybridIptablesFirewallDriver
### enable_security_group = True
### [ovs]
### local_ip = 10.19.19.212
### tunnel_type = gre
### enable_tunneling = True
root@JunoNetwork:~# service openvswitch-switch restart
注释掉关于metadata的相关配置:
root@JunoNetwork:~# cat /etc/neutron/metadata_agent.ini | grep -i "^###"
### auth_url = http://10.17.17.211:5000/v2.0
### auth_region = regionOne
### admin_tenant_name = service
### admin_user = neutron
### admin_password = engine
### nova_metadata_ip = 10.17.17.211
### metadata_proxy_shared_secret = engine
回到Controller节点,同样注释掉metadata的配置:
root@JunoController:~# cat /etc/nova/nova.conf | grep -i "^###"
### service_neutron_metadata_proxy = true
### metadata_proxy_shared_secret = engine
### neutron_metadata_proxy_shared_secret = engine
移除DHCP相关配置:
root@JunoNetwork:~# cat /etc/neutron/dhcp_agent.ini | grep -i "^###"
### interface_driver = neutron.agent.linux.interface.OVSInterfaceDriver
### dhcp_driver = neutron.agent.linux.dhcp.Dnsmasq
### use_namespaces = True
### dnsmasq_config_file = /etc/neutron/dnsmasq-neutron.conf
root@JunoNetwork:~# cat /etc/neutron/dnsmasp-neutron.conf | grep -i "^###"
### dhcp-option-force=26,1454
移除L3 agent:
root@JunoNetwork:~# cat /etc/neutron/l3_agent.ini | grep -i "^###"
### interface_driver = neutron.agent.linux.interface.OVSInterfaceDriver
### use_namespaces = True
### verbose = True
移除neutron通用组件的支持:
root@JunoNetwork:~# cat /etc/neutron/neutron.conf | grep -i "^###"
### rpc_backend = neutron.openstack.common.rpc.impl_kombu
### rabbit_host = 10.17.17.211
### rabbit_password = engine
### core_plugin = ml2
### service_plugins = router
### allow_overlapping_ips = True
### verbose = True
### auth_strategy = keystone
### auth_uri = http://10.17.17.211:5000
### auth_host = 10.17.17.211
### auth_port = 35357
### auth_protocol = http
### admin_tenant_name = service
### admin_user = neutron
### admin_password = engine
移除已经安装的vswitch相关的包:
root@JunoNetwork:~# apt-get purge neutron-plugin-ml2 neutron-plugin-openvswitch-agent neutron-l3-agent neutron-dhcp-agent
root@JunoCompute:~# apt-get purge openvswitch-common openvswitch-switch
root@JunoCompute:~# reboot
Compute节点移除OpenVSwitch
Compute节点的服务移除:
root@JunoCompute:~# cat /etc/neutron/neutron.conf | grep -i "^###"
[DEFAULT]
###auth_strategy = keystone
###rpc_backend = neutron.openstack.common.rpc.impl_kombu
###rabbit_host = 10.17.17.211
###rabbit_password = engine
###core_plugin = ml2
###service_plugins = router
###allow_overlapping_ips = True
###verbose = True
[keystone_authtoken]
### auth_uri = http://10.17.17.211:5000
### auth_host = 10.17.17.211
### auth_port = 35357
### auth_protocol = http
### admin_tenant_name = service
### admin_user = neutron
### admin_password = engine
### signing_dir = $state_path/keystone-signing
root@JunoCompute:~# cat /etc/neutron/plugins/ml2/ml2_conf.ini | grep -i "^###"
### type_drivers = gre
### tenant_network_types = gre
### mechanism_drivers = openvswitch
### tunnel_id_ranges = 1:1000
### firewall_driver = neutron.agent.linux.iptables_firewall.OVSHybridIptablesFirewallDriver
### enable_security_group = True
### [ovs]
### local_ip = 10.19.19.213
### tunnel_type = gre
### enable_tunneling = True
注释完毕后,重新启动服务:
root@JunoCompute:~# service nova-compute restart
root@JunoCompute:~# service neutron-plugin-openvswitch-agent restart
root@JunoCompute:~# service openvswitch-switch restart
Compute节点上的nova不再使用neutron作为网络管理器:
root@JunoCompute:~# cat /etc/nova/nova.conf | grep -i "^###"
### network_api_class = nova.network.neutronv2.api.API
### neutron_url = http://10.17.17.211:9696
### neutron_auth_strategy = keystone
### neutron_admin_tenant_name = service
### neutron_admin_username = neutron
### neutron_admin_password = engine
### neutron_admin_auth_url = http://10.17.17.211:35357/v2.0
### linuxnet_interface_driver = nova.network.linux_net.LinuxOVSInterfaceDriver
### firewall_driver = nova.virt.firewall.NoopFirewallDriver
### security_group_api = neutron
root@JunoCompute:~# service nova-compute restart
在Compute节点上,移除已经安装的openvswitch的包:
root@JunoCompute:~# apt-get purge neutron-plugin-ml2 neutron-plugin-openvswitch-agent openvswitch-datapath-dkms
root@JunoCompute:~# apt-get purge openvswitch-common openvswitch-switch
root@JunoCompute:~# reboot
检查状态,确保服务已经被移除:
root@JunoCompute:~# service openvswitch-switch status
openvswitch-switch: unrecognized service
root@JunoCompute:~# service neutron-plugin-openvswitch-agent status
neutron-plugin-openvswitch-agent: unrecognized service
Controller节点上移除OpenVSwitch
移除nova配置中关于neutron的条目:
root@JunoController:~# cat /etc/nova/nova.conf | grep -i "^###"
### service_neutron_metadata_proxy = true
### metadata_proxy_shared_secret = engine
### neutron_metadata_proxy_shared_secret = engine
### network_api_class = nova.network.neutronv2.api.API
### neutron_url = http://10.17.17.211:9696
### neutron_auth_strategy = keystone
### neutron_admin_tenant_name = service
### neutron_admin_username = neutron
### neutron_admin_password = engine
### neutron_admin_auth_url = http://10.17.17.211:35357/v2.0
### linuxnet_interface_driver = nova.network.linux_net.LinuxOVSInterfaceDriver
### firewall_driver = nova.virt.firewall.NoopFirewallDriver
### security_group_api = neutron
移除对于ML2插件的支持:
root@JunoController:~# cat /etc/neutron/plugins/ml2/ml2_conf.ini | grep -i "^###"
### type_drivers = flat,gre
### tenant_network_types = gre
### mechanism_drivers = openvswitch
### tunnel_id_ranges = 1:1000
### firewall_driver = neutron.agent.linux.iptables_firewall.OVSHybridIptablesFirewallDriver
### enable_security_group = True
移除neutron中配置:
root@JunoController:~# cat /etc/neutron/neutron.conf | grep -i "^###"
### rpc_backend = neutron.openstack.common.rpc.impl_kombu
### rabbit_host = 10.17.17.211
### rabbit_password = engine
### notify_nova_on_port_status_changes = True
### notify_nova_on_port_data_changes = True
### nova_url = http://10.17.17.211:8774/v2
### nova_admin_username = nova
### nova_admin_tenant_id = 4b22bf4e6a68419aa91da6e0ffaca2dc
### nova_admin_password = engine
### nova_admin_auth_url = http://10.17.17.211:35357/v2.0
### nova_region_name = regionOne
### core_plugin = ml2
### service_plugins = router
### allow_overlapping_ips = True
### auth_strategy = keystone
### auth_uri = http://10.17.17.211:5000
### auth_host = 10.17.17.211
### auth_port = 35357
### auth_protocol = http
### admin_tenant_name = service
### admin_user = neutron
### admin_password = engine
### connection = mysql://neutron:engine@10.17.17.211/neutron
删除ml2插件:
root@JunoController:~# apt-get purge neutron-plugin-ml2
测试,由于连验证都没法通过,所以会返回错误,当然你的DashBoard也会有错误,暂时没办法访问了。:
root@JunoController:~#  neutron agent-list
Authentication required
Contrail
创建机器
4G内存,2核CPU,同时连接到所有网络(10.17.17.0/24, 10.19.19.0/24, 10.22.22.0/24):
[root:/home/juju/img/OpenStack]# qemu-img create -f qcow2 -b ./UbuntuBase1404.qcow2 JunoContrail.qcow2
配置网络接口, hosts, hostname等:
root@JunoContrail:~# cat /etc/hostname
JunoContrail
root@JunoContrail:~# cat /etc/hosts
10.17.17.211    JunoController
10.17.17.212    JunoNetwork
10.17.17.213    JunoCompute
10.17.17.214    JunoContrail
root@JunoContrail:~# cat /etc/network/interfaces
auto lo
iface lo inet loopback

# The primary network interface
auto eth0
iface eth0 inet static
address 10.17.17.214
netmask 255.255.255.0
gateway 10.17.17.1
dns-nameservers 114.114.114.114

# Network, have the tunnel, which locates at the 10.19.19.0/24
auto eth1
iface eth1 inet static
address 10.19.19.214
netmask 255.255.255.0
up route add -net 10.19.19.0/24 dev eth1

auto eth2
iface eth2 inet static
address 10.22.22.214
netmask 255.255.255.0
得到包,并且安装之:
root@JunoContrail:~# wget http://xxxxxxxxxxxxxx/contrail-install-packages_2.10-39~ubuntu-14-04icehouse_all.deb
root@JunoContrail:~# dpkg -i contrail-install-packages_2.10-39~ubuntu-14-04icehouse_all.deb
直接安装会出错,为了避免,直接手动安装build-essential和python-pip:
root@JunoContrail:~# apt-get install build-essential python-pip
而后手动开始安装contrail:
root@JunoContrail:/opt/contrail/contrail_packages# ./setup.sh
使用模板生成testbed.py文件:
root@JunoContrail:/opt/contrail# cp /opt/contrail/utils/fabfile/testbeds/testbed_multibox_example.py /opt/contrail/utils/fabfile/testbeds/testbed.py
需要配置ntp,加入到本地的NTP网络里:
root@JunoContrail:/opt/contrail/utils# apt-get -y install ntp
root@JunoContrail:/opt/contrail/utils# vim /etc/ntp.conf
server 10.17.17.211 iburst
root@JunoContrail:/opt/contrail/utils# service ntp restart
 * Stopping NTP server ntpd
   ...done.
ntpq * Starting NTP server ntpd
   ...done.
root@JunoContrail:/opt/contrail/utils# ntpq -c peers
     remote           refid      st t when poll reach   delay   offset  jitter
==============================================================================
 JunoController  202.112.29.82    3 u    1   64    1    0.312   33.463   0.000
配置testbed.py文件,更改后的例子如下:
TBD........
安装的时候,出现问题,需要切换到最旧的原始安装的Ubuntu1404. 切换前,记下已有的步骤:
$ cd /opt/contrail/utils/
$ fab install_pkg_all:/root/contrail-install-packages_2.10-39~ubuntu-14-04icehouse_all.deb
$ fab -c fabrc install_without_openstack:no
切换:
[root:/home/juju/img/OpenStack]# mv JunoContrail.qcow2 JunoContrail.qcow2_Deploy_Failed_Too_new
Apr 13, 2015
Technology项目的需要,手动基于多台Ubuntu虚拟机部署OpenStack Icehouse, 然后在部署好的Icehouse的基础上,部署OpenContrail, 最终达到OpenContrail解耦的过程。
环境准备
物理机: i7-3770/24G Memory/CentOS 6.6
软件: virt-manager/qemu等
节点机(虚拟机):
节点机1: 控制节点(JunoController), 2 CPU+3G内存+单网卡(管理网络,10.17.17.211).
节点机2: 网络节点(JunoNetwork), 1 CPU+1G内存+3 网卡(管理网络:10.17.17.212, GRE Tunnel网络:10.19.19.212, 外部网络:10.22.22.212).
节点机3: 计算节点(JunoCompute), 2 CPU(Nested)+2G内存+2 网卡(管理网络:10.17.17.213, GRE Tunnel网络:10.19.19.213).
网络配置:
Virt-manager里需要配置三个网络,一个是管理网络10.17.17.0/24, 另一个GRE Tunnel网络10.19.19.0/24, 外部网络为10.22.22.0/24.
参考资料:
不错的指南文件:http://godleon.github.io/blog/2015/02/10/install-openstack-juno-in-ubuntu-basic-environment-setting/
官方文档:http://docs.openstack.org/icehouse/install-guide/install/apt/content/
虚拟机准备
用以下命令创建三台虚拟机的磁盘,而后按照上面的节点机配置完毕后,启动三台虚拟机。
# pwd
/home/juju/img/OpenStack
# qemu-img create -f qcow2 -b ./UbuntuBase1404.qcow2 JunoController.qcow2
# qemu-img create -f qcow2 -b ./UbuntuBase1404.qcow2 JunoNetwork.qcow2
# qemu-img create -f qcow2 -b ./UbuntuBase1404.qcow2 JunoCompute.qcow2
更改节点机的/etc/hostname文件,更改各自的名字为JunoController, JunoNetwork和JunoCompute.
每台机器的/etc/network/interfaces文件配置如下:
JunoController:
# The loopback network interface
auto lo
iface lo inet loopback

# The primary network interface
auto eth0
iface eth0 inet static
address 10.17.17.211
netmask 255.255.255.0
gateway 10.17.17.1
dns-nameservers 114.114.114.114
JunoNetwork:
# The loopback network interface
auto lo
iface lo inet loopback

# The primary network interface
# auto eth0
# iface eth0 inet dhcp

# The primary network interface
auto eth0
iface eth0 inet static
address 10.17.17.212
netmask 255.255.255.0
#gateway 10.17.17.1
dns-nameservers 114.114.114.114

# Network, have the tunnel, which locates at the 10.19.19.0/24
auto eth1
iface eth1 inet static
address 10.19.19.212
netmask 255.255.255.0
up route add -net 10.19.19.0/24 dev eth1

# Directly to internet, used for ovs
auto eth2
iface eth2 inet dhcp
JunoCompute:
# The loopback network interface
auto lo
iface lo inet loopback

# The primary network interface
auto eth0
iface eth0 inet static
address 10.17.17.213
netmask 255.255.255.0
gateway 10.17.17.1
dns-nameservers 114.114.114.114

# Network, have the tunnel, which locates at the 10.19.19.0/24
auto eth1
iface eth1 inet static
address 10.19.19.213
netmask 255.255.255.0
up route add -net 10.19.19.0/24 dev eth1
把下列条目添加到各台节点机的 /etc/hosts文件中:
10.17.17.211    JunoController
10.17.17.212    JunoNetwork
10.17.17.213    JunoCompute
NTP服务部署
NTP 服务器
使用NTP来保证各个节点之间的时间同步,对后续加入的各个节点,同样需要使用NTP来同步该节点时间。我们将JunoController作为NTP服务器,在JunoController上,安装和配置NTP服务器:
root@JunoController:~# apt-get -y install ntp
root@JunoController:~# vim /etc/ntp.conf
    # 修改成大陆时间
    server 2.cn.pool.ntp.org
    server 1.asia.pool.ntp.org
    server 2.asia.pool.ntp.org
    # 修改 restrict 設定
    restrict -4 default kod notrap nomodify
    restrict -6 default kod notrap nomodify
root@JunoController:~# service ntp restart
NTP客户端
其他的节点上都需要安装NTP客户端并使用NTP服务器时间同步。
# apt-get -y install ntp
# vim /etc/ntp.conf
    # 設定 controller 為參照的 time server
    # 並將其他 server 開頭的設定進行註解
    server 10.17.17.211 iburst
# service ntp restart
检查结果是否正确:
root@JunoNetwork:~# ntpq -c peers
     remote           refid      st t when poll reach   delay   offset  jitter
==============================================================================
 JunoController  59.106.180.168   3 u    1   64    1    0.239  447024.   0.049
添加软件仓库
官方文档中说icehouse已经在14.04的官方仓库中了,所以下面的步骤并不是必须的。
在所有节点上,执行以下操作:
# apt-get install python-software-properties
# add-apt-repository cloud-archive:icehouse
# apt-get update && apt-get -y dist-upgrade && reboot
安装/配置数据库
OpenStack需要一个数据库用于存储相关数据,一般情况下采用MySQL. “你问我支持不支持MySQL?我说不支持,我就明确告诉你,你们呀,我感觉你们开源界也要学习,你们非常熟悉MYSQL被Oracle这一套的,你们毕竟是Too Young,明白这意思吗?"—-所以装一个MariaDB来代替它.
root@JunoController:~# apt-get -y install mariadb-server python-mysqldb
root@JunoController:~# vim /etc/mysql/my.cnf
    [mysqld]
    # 修改 bind-address 設定
    bind-address = 10.17.17.211

    # 加入以下 UTF-8 的相關設定
    default-storage-engine = innodb
    innodb_file_per_table
    collation-server = utf8_general_ci
    init-connect = 'SET NAMES utf8'
    character-set-server = utf8
重启服务:
root@JunoController:~# service mysql restart
安装消息服务器
同样在控制节点上安装,OpenStack使用rabbitmq作为消息服务器:
root@JunoController:~# apt-get install -y rabbitmq-server
修改初始化guest密码:
root@JunoController:~# rabbitmqctl change_password guest RABBITMQ_PASSWD
第一部分跑完,这里我们完成了OpenStack创建的基本设定,接下来就可以挨个搭建OpenStack的服务了。
Apr 13, 2015
Technology安装Identity服务
首先创建keystone所需数据库:
root@JunoController:~# mysql -u root -p
Enter password:
Welcome to the MariaDB monitor.  Commands end with ; or \g.
Your MariaDB connection id is 28
Server version: 5.5.41-MariaDB-1ubuntu0.14.04.1 (Ubuntu)

Copyright (c) 2000, 2014, Oracle, MariaDB Corporation Ab and others.

Type 'help;' or '\h' for help. Type '\c' to clear the current input statement.

MariaDB [(none)]> CREATE DATABASE keystone;
Query OK, 1 row affected (0.00 sec)

MariaDB [(none)]> GRANT ALL PRIVILEGES ON keystone.* TO 'keystone'@'localhost' IDENTIFIED BY 'KEYSTONE_PASS';
Query OK, 0 rows affected (0.00 sec)

MariaDB [(none)]> GRANT ALL PRIVILEGES ON keystone.* TO 'keystone'@'%' IDENTIFIED BY 'KEYSTONE_PASS';
Query OK, 0 rows affected (0.00 sec)

MariaDB [(none)]> flush privileges;
Query OK, 0 rows affected (0.00 sec)

MariaDB [(none)]> exit;
Bye
安装keystone相关套件:
root@JunoController:~# apt-get -y install keystone python-keystoneclient
创建一个admin token用于做初始化配置:
root@JunoController:~# openssl rand -hex 10
5c3b5cd66a7dfa8e33e5
使用上面取得的admin token和mysql设置用于更新/etc/keystone.conf文件,更改如下:
root@JunoController:~# vim /etc/keystone/keystone.conf
[DEFAULT]
admin_token=5c3b5cd66a7dfa8e33e5
verbose=True
log_dir = /var/log/keystone

[database]
connection=mysql://keystone:KEYSTONE_DBPASS@10.17.17.211/keystone
部署数据库并重新启动Keystone服务:
root@JunoController:~# su -s /bin/sh -c "keystone-manage db_sync" keystone
root@JunoController:~# service keystone restart
删除不需要的sqlite数据库, 并设定crontab任务:
root@JunoController:~# rm -f /var/lib/keystone/keystone.db
root@JunoController:~# (crontab -l -u keystone 2>&1 | grep -q token_flush) || echo '@hourly /usr/bin/keystone-manage token_flush >/var/log/keystone/keystone-tokenflush.log 2>&1' >> /var/spool/cron/crontabs/keystone
建立 user / role / tenant
环境变量设置:
root@JunoController:~# export OS_SERVICE_TOKEN=5c3b5cd66a7dfa8e33e5
root@JunoController:~# export OS_SERVICE_ENDPOINT=http://10.17.17.211:35357/v2.0
tenant创建
创建admin tenant:
root@JunoController:~#  keystone tenant-create --name admin --description "Admin Tenant"
+-------------+----------------------------------+
|   Property  |              Value               |
+-------------+----------------------------------+
| description |           Admin Tenant           |
|   enabled   |               True               |
|      id     | ea1f0a6b15dc4796958f087c38756ed1 |
|     name    |              admin               |
+-------------+----------------------------------+
创建demo tenant:
root@JunoController:~# keystone tenant-create --name demo --description "Demo Tenant"
+-------------+----------------------------------+
|   Property  |              Value               |
+-------------+----------------------------------+
| description |           Demo Tenant            |
|   enabled   |               True               |
|      id     | 2ac9cae777014d3d94458f521b013e94 |
|     name    |               demo               |
+-------------+----------------------------------+
建立user
建立admin用户:
root@JunoController:~# keystone user-create --name admin --pass xxxx --email kkkttt@gmail.com
+----------+----------------------------------+
| Property |              Value               |
+----------+----------------------------------+
|  email   |        kkkttt@gmail.com        |
| enabled  |               True               |
|    id    | 055dd9b7b1564df5bf9e9c511f32978b |
|   name   |              admin               |
| username |              admin               |
+----------+----------------------------------+
在demo tenant下建立demo用户:
root@JunoController:~# keystone user-create --name demo --tenant demo --pass engine --email kkkttt@gmail.com
+----------+----------------------------------+
| Property |              Value               |
+----------+----------------------------------+
|  email   |        kkkttt@gmail.com        |
| enabled  |               True               |
|    id    | e8f2c2bdaee34f3895147f26a924e010 |
|   name   |               demo               |
| tenantId | 2ac9cae777014d3d94458f521b013e94 |
| username |               demo               |
+----------+----------------------------------+
admin role
建立admin role:
root@JunoController:~# keystone role-create --name admin
+----------+----------------------------------+
| Property |              Value               |
+----------+----------------------------------+
|    id    | 4af914913e154a599deb1b78a0751c1a |
|   name   |              admin               |
+----------+----------------------------------+
链接user/role/tenant
root@JunoController:~# keystone user-role-add --user admin --tenant admin --role admin
创建一个Service Tenant
先建立Service Tenant:
root@JunoController:~# keystone tenant-create --name service --description "Service Tenant"
+-------------+----------------------------------+
|   Property  |              Value               |
+-------------+----------------------------------+
| description |          Service Tenant          |
|   enabled   |               True               |
|      id     | 4b22bf4e6a68419aa91da6e0ffaca2dc |
|     name    |             service              |
+-------------+----------------------------------+
定义services & API 服务挂载点
所有安装好的服务都需要向Identity Service注册,甚至是Identity Service本身,都需要先注册上才可以被使用:
首先注册Identity Service:
root@JunoController:~# keystone service-create --name keystone --type identity --description "OpenStack Identity"
+-------------+----------------------------------+
|   Property  |              Value               |
+-------------+----------------------------------+
| description |        OpenStack Identity        |
|   enabled   |               True               |
|      id     | 27bf7f70deac429d8d28623d99939ae6 |
|     name    |             keystone             |
|     type    |             identity             |
+-------------+----------------------------------+
而后,设定Identity Service的服务端点:
root@JunoController:~# keystone endpoint-create --service-id $(keystone service-list | awk '/ identity / {print $2}') --publicurl http://10.17.17.211:5000/v2.0 --internalurl http://10.17.17.211:5000/v2.0 --adminurl http://10.17.17.211:35357/v2.0 --region regionOne
+-------------+----------------------------------+
|   Property  |              Value               |
+-------------+----------------------------------+
|   adminurl  |  http://10.17.17.211:35357/v2.0  |
|      id     | fb4c17d5c1414a7e852c6f7db552dd89 |
| internalurl |  http://10.17.17.211:5000/v2.0   |
|  publicurl  |  http://10.17.17.211:5000/v2.0   |
|    region   |            regionOne             |
|  service_id | 27bf7f70deac429d8d28623d99939ae6 |
+-------------+----------------------------------+
验证Identity服务是否安装成功,首先,unset环境变量:
root@JunoController:~# unset OS_SERVICE_TOKEN OS_SERVICE_ENDPOINT
以 tenant(admin) & user(admin) 的身份取得 token:
keystone --os-tenant-name admin --os-username admin --os-password ADMIN_PASS --os-auth-url http://10.17.17.211:35357/v2.0 token-get
以 tenant(admin) & user(admin) 的身分查詢 tenant 清單:
# keystone --os-tenant-name admin --os-username admin --os-password  xxxxxx --os-auth-url http://10.17.17.211:35357/v2.0 tenant-list
+----------------------------------+---------+---------+
|                id                |   name  | enabled |
+----------------------------------+---------+---------+
| ea1f0a6b15dc4796958f087c38756ed1 |  admin  |   True  |
| 2ac9cae777014d3d94458f521b013e94 |   demo  |   True  |
| 4b22bf4e6a68419aa91da6e0ffaca2dc | service |   True  |
+----------------------------------+---------+---------+
查询user清单:
root@JunoController:~# keystone --os-tenant-name admin --os-username admin --os-password xxxx --os-auth-url http://10.17.17.211:35357/v2.0 user-list
+----------------------------------+-------+---------+--------------------+
|                id                |  name | enabled |       email        |
+----------------------------------+-------+---------+--------------------+
| 055dd9b7b1564df5bf9e9c511f32978b | admin |   True  | kkkttt@gmail.com |
| e8f2c2bdaee34f3895147f26a924e010 |  demo |   True  | kkkttt@gmail.com |
+----------------------------------+-------+---------+--------------------+
查询role清单:
root@JunoController:~# keystone --os-tenant-name admin --os-username admin --os-password xxxx --os-auth-url http://10.17.17.211:35357/v2.0 role-list
+----------------------------------+----------+
|                id                |   name   |
+----------------------------------+----------+
| 9fe2ff9ee4384b1894a90878d3e92bab | _member_ |
| 4af914913e154a599deb1b78a0751c1a |  admin   |
+----------------------------------+----------+
以demo用户身份去的token
root@controller:~# keystone --os-tenant-name demo --os-username demo --os-password DEMO_PASS --os-auth-url http://10.17.17.211:35357/v2.0 token-get
以demo身份取得用户清单会被提示权限不足:
root@JunoController:~# keystone --os-tenant-name demo --os-username demo --os-password xxxx --os-auth-url http://10.17.17.211:35357/v2.0 user-list
You are not authorized to perform the requested action, admin_required. (HTTP 403)
现在keystone服务已经挂载完毕了,接下来就是逐个挂载组件。
快速切换脚本
快速切换脚本如下,记得加上执行权限:
root@JunoController:~# cat openstack/admin-openrc.sh
export OS_TENANT_NAME=admin
export OS_USERNAME=admin
export OS_PASSWORD=xxxx
export OS_AUTH_URL=http://10.17.17.211:35357/v2.0
root@JunoController:~# cat openstack/demo-openrc.sh
export OS_TENANT_NAME=demo
export OS_USERNAME=demo
export OS_PASSWORD=xxxx
export OS_AUTH_URL=http://10.17.17.211:5000/v2.0
Apr 13, 2015
TechnologyImage Service 用于提供给用户用于快速启动虚拟机的镜像文件,这样的服务称为glance服务。
Glance服务数据库设定
在mysql中创建glance数据库:
root@JunoController:~#  mysql -u root -p
Enter password:
Welcome to the MariaDB monitor.  Commands end with ; or \g.
Your MariaDB connection id is 33
Server version: 5.5.41-MariaDB-1ubuntu0.14.04.1 (Ubuntu)

Copyright (c) 2000, 2014, Oracle, MariaDB Corporation Ab and others.

Type 'help;' or '\h' for help. Type '\c' to clear the current input statement.

MariaDB [(none)]> CREATE DATABASE glance;
Query OK, 1 row affected (0.01 sec)

MariaDB [(none)]> GRANT ALL PRIVILEGES ON glance.* TO 'glance'@'localhost' IDENTIFIED BY 'xxxx'
    -> ;
Query OK, 0 rows affected (0.00 sec)

MariaDB [(none)]> GRANT ALL PRIVILEGES ON glance.* TO 'glance'@'%' IDENTIFIED BY 'xxxx';
Query OK, 0 rows affected (0.00 sec)

MariaDB [(none)]> flush privileges;
Query OK, 0 rows affected (0.00 sec)

MariaDB [(none)]> quit;
Bye
创建Glance的user/role/tenant权限
用admin的权限,创建以下权限:
root@JunoController:~# source ~/openstack/admin-openrc.sh
创建glance用户:
root@JunoController:~# keystone user-create --name glance --pass engine
+----------+----------------------------------+
| Property |              Value               |
+----------+----------------------------------+
|  email   |                                  |
| enabled  |               True               |
|    id    | c706febbcc8843fb97383c9fdfba6214 |
|   name   |              glance              |
| username |              glance              |
+----------+----------------------------------+
用户glance属于admin角色,使用service tanant:
keystone user-role-add --user glance --tenant service --role admin
在keystone注册glance服务:
root@JunoController:~# keystone service-create --name glance --type image --description "OpenStack Image Service"
+-------------+----------------------------------+
|   Property  |              Value               |
+-------------+----------------------------------+
| description |     OpenStack Image Service      |
|   enabled   |               True               |
|      id     | 3d52d2992b9f423eb9868304e4405fab |
|     name    |              glance              |
|     type    |              image               |
+-------------+----------------------------------+
在keystone创建服务的end-point:
root@JunoController:~# keystone endpoint-create --service-id $(keystone service-list | awk '/ image / {print $2}') --publicurl http://10.17.17.211:9292 --internalurl http://10.17.17.211:9292 --adminurl http://10.17.17.211:9292 --region regionOne
+-------------+----------------------------------+
|   Property  |              Value               |
+-------------+----------------------------------+
|   adminurl  |     http://10.17.17.211:9292     |
|      id     | f44400bebc07408d8e0f4e70a0d18475 |
| internalurl |     http://10.17.17.211:9292     |
|  publicurl  |     http://10.17.17.211:9292     |
|    region   |            regionOne             |
|  service_id | 3d52d2992b9f423eb9868304e4405fab |
+-------------+----------------------------------+
安装Glance服务
安装:
apt-get -y install glance python-glanceclient
配置:
# vim /etc/glance/glance-api.conf
[database]
# sqlite_db = /var/lib/glance/glance.sqlite
backend = sqlalchemy
connection = mysql://glance:engine@10.17.17.211/glance

[keystone_authtoken]
auth_uri = http://10.17.17.211:5000
auth_host = 10.17.17.211
auth_port = 35357
auth_protocol = http
admin_tenant_name = service
admin_user = glance
admin_password = engine
#  vim /etc/glance/glance-registry.conf
[database]
# The file name to use with SQLite (string value)
#sqlite_db = /var/lib/glance/glance.sqlite
backend = sqlalchemy
connection = mysql://glance:engine@10.17.17.211/glance

[keystone_authtoken]
auth_uri = http://10.17.17.211:5000
auth_host = 10.17.17.211
auth_port = 35357
auth_protocol = http
admin_tenant_name = service
admin_user = glance
admin_password = engine
# rm -f /var/lib/glance/glance.sqlite
# su -s /bin/sh -c "glance-manage db_sync" glance
这里会碰到一个问题,解决方案如下:
root@JunoController:~# su -s /bin/sh -c "glance-manage db_sync" glance
2015-04-13 17:20:22.637 9455 CRITICAL glance [-] ValueError: Tables "migrate_version" have non utf8 collation, please make sure all tables are CHARSET=utf8

root@JunoController:~# mysql -u root -p glance
Enter password:
Reading table information for completion of table and column names
You can turn off this feature to get a quicker startup with -A

Welcome to the MariaDB monitor.  Commands end with ; or \g.
Your MariaDB connection id is 29
Server version: 5.5.41-MariaDB-1ubuntu0.14.04.1 (Ubuntu)

Copyright (c) 2000, 2014, Oracle, MariaDB Corporation Ab and others.

Type 'help;' or '\h' for help. Type '\c' to clear the current input statement.

MariaDB [glance]> alter table migrate_version convert to character set utf8 collate utf8_unicode_ci;
Query OK, 1 row affected (0.09 sec)
Records: 1  Duplicates: 0  Warnings: 0

MariaDB [glance]> flush privileges;
Query OK, 0 rows affected (0.00 sec)

MariaDB [glance]> quit;
Bye
重启服务,
root@JunoController:~# service glance-registry restart
root@JunoController:~# service glance-api restart
验证Glance服务
首先下载镜像:
# wget http://cdn.download.cirros-cloud.net/0.3.3/cirros-0.3.3-x86_64-disk.img
创建Glance可见镜像:
# glance image-create --name "cirros-0.3.3-x86_64" --file cirros-0.3.3-x86_64-disk.img --disk-format qcow2 --container-format bare --is-public True --progress
[=============================>] 100%
+------------------+--------------------------------------+
| Property         | Value                                |
+------------------+--------------------------------------+
| checksum         | 133eae9fb1c98f45894a4e60d8736619     |
| container_format | bare                                 |
| created_at       | 2015-04-13T09:27:54                  |
| deleted          | False                                |
| deleted_at       | None                                 |
| disk_format      | qcow2                                |
| id               | 68f14900-8b25-4329-ad56-8fbd497c6812 |
| is_public        | True                                 |
| min_disk         | 0                                    |
| min_ram          | 0                                    |
| name             | cirros-0.3.3-x86_64                  |
| owner            | ea1f0a6b15dc4796958f087c38756ed1     |
| protected        | False                                |
| size             | 13200896                             |
| status           | active                               |
| updated_at       | 2015-04-13T09:27:54                  |
| virtual_size     | None                                 |
+------------------+--------------------------------------+
检查镜像:
root@JunoController:~# ls /var/lib/glance/images/
68f14900-8b25-4329-ad56-8fbd497c6812
列出可用镜像:
root@JunoController:~# glance image-list
+--------------------------------------+---------------------+-------------+------------------+----------+--------+
| ID                                   | Name                | Disk Format | Container Format | Size     | Status |
+--------------------------------------+---------------------+-------------+------------------+----------+--------+
| 68f14900-8b25-4329-ad56-8fbd497c6812 | cirros-0.3.3-x86_64 | qcow2       | bare             | 13200896 | active |
+--------------------------------------+---------------------+-------------+------------------+----------+--------+
好了,现在glance服务可以使用了,接下来将创建compute节点和网络节点。
