Jun 18, 2015
TechnologyCobbler Web
Visit the following website:
http://10.47.58.2/cobbler_web
You will see:
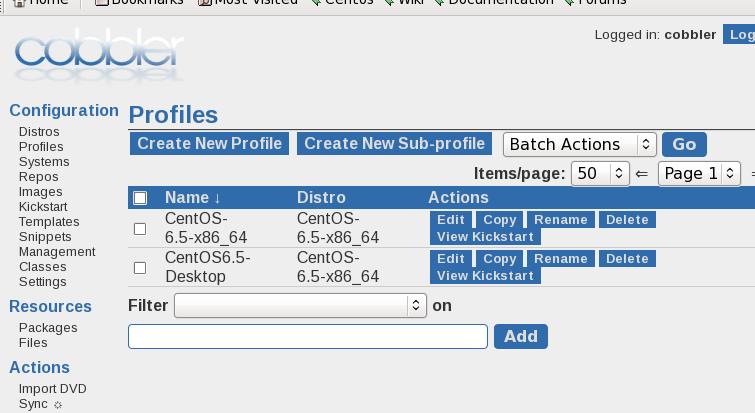
Added More Profiles
The default kickstart configuration file could found under:
/var/lib/cobbler/kickstarts/sample_end.ks , copy it to your own.
$ cp /var/lib/cobbler/kickstarts/sample_end.ks CentOS65Desktop.cfg
$ vim CentOS65Desktop.cfg
# Allow anaconda to partition the system as needed
# autopart
# 1G Swap and remains others to be ext4
part swap --fstype="swap" --size=1024
part / --asprimary --fstype="ext4" --grow --size=1
.......
%packages
# Added from here
@additional-devel
@basic-desktop
@chinese-support
@desktop-platform
@development
@fonts
@general-desktop
@input-methods
@x11
git
-ibus-table-cangjie
-ibus-table-erbi
-ibus-table-wubi
# End of added
$SNIPPET('func_install_if_enabled')
%end
More configurations could be customized.
Fixed IP Address Via DHCP
By adding the configuration in dhcp configuration:
$ sudo vim /etc/cobbler/dhcp.template
     max-lease-time             43200;
     next-server                $next_server;

     host ns111 {
         next-server $next_server;
         hardware ethernet 52:54:00:e0:cc:18;
         fixed-address 10.47.58.111;
     }


     class "pxeclients" {
$ sudo cobbler sync
Now restart the deployed node, you will easily see the node.
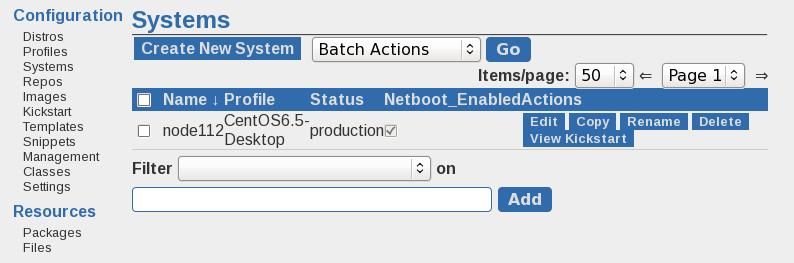
Specify Fixed IP For Host
Add the configration of the node112, then this machine will start with our specified parameters:
# cobbler system add --name=node112 --profile=CentOS6.5-Desktop --mac=52:54:00:92:8c:4d --interface=eth0 --ip-address=10.47.58.112 --hostname=node112 --gateway=10.47.58.1 --dns-name=node112
Now bootup the machine, then this computer will have the fixed IP address.
Use Ansible For Administrate The Added Nodes
Install ansible via:
# yum install -y ansible sshpass
# vim /etc/hosts
10.47.58.112    node112

# mkdir -p ~/Code/Ansible
# cd ~/Code/Ansible
# vim ansible.cfg
    [defaults]
    hostfile=/root/Code/Ansible/hosts

# vim hosts
    [node112]
    10.47.58.112

# vim ssh-addkey.yml
    ---
    - hosts: all
      sudo: yes
      gather_facts: no
      remote_user: root

      tasks:

      - name: install ssh key
        authorized_key: user=root
                        key="{{ lookup('file', '/root/.ssh/id_rsa.pub') }}"
                        state=present

# ssh-keyscan 10.47.58.112>>/root/.ssh/known_hosts
# ansible-playbook ssh-addkey.yml --ask-pass
Now the node112 is under controlled by you.
Take refers to:
https://sysadmincasts.com/episodes/45-learning-ansible-with-vagrant-part-2-4
Test via:
[root@z_WHServer Ansible]# ansible all -m shell -a "uptime"
10.47.58.112 | success | rc=0 >>
 06:18:59 up  1:32,  2 users,  load average: 0.00, 0.00, 0.00
In following parts we will try to deploy Cloudstack using playbook.
Jun 17, 2015
TechnologyPreparation
Hardware: 2G Memory, 1-Core, the Cobbler Server, which runs CentOS6.6.
Network: Use a 10.47.58.0/24(Its name is WHNetwork), no dhcp server in this network.
Cobbler Server Preparation
First Change its IP address to 10.47.58.2, gateway to 10.47.58.1.
[root@z_WHServer ~]# cat /etc/sysconfig/network-scripts/ifcfg-eth0
DEVICE=eth0
TYPE=Ethernet
UUID=a6e5b56f-661f-4128-ab8c-c575a9623245
ONBOOT=yes
NM_CONTROLLED=yes
BOOTPROTO=none
IPADDR=10.47.58.2
GATEWAY=10.47.58.1
......

[root@z_WHServer ~]# cat /etc/sysconfig/network
NETWORKING=yes
HOSTNAME=z_WHServer
# vim /etc/selinux/config
    #SELINUX=enforcing
    SELINUX=disabled
# reboot
Install and configure Cobbler Server via:
# yum -y update && yum install -y cobbler cobbler-web
# reboot
# openssl passwd -1                                                                                                     │
Password:                                                                                                                                 │
Verifying - Password:                                                                                                                     │
igaowugoauwgoueougo
# vim /etc/cobbler/settings
    default_password_crypted: "agowuoguwoawoguwoe"
    # default, localhost
    server: 10.47.58.2
    # default, localhost
    next_server: 10.47.58.2
    manage_dhcp: 1
Edit the dhcp template:
# vim /etc/cobbler/dhcp.template
####  subnet 192.168.1.0 netmask 255.255.255.0 {
####       option routers             192.168.1.5;
####       option domain-name-servers 192.168.1.1;
####       option subnet-mask         255.255.255.0;
####       range dynamic-bootp        192.168.1.100 192.168.1.254;
####       default-lease-time         21600;
####       max-lease-time             43200;
####       next-server                $next_server;
subnet 10.47.58.0 netmask 255.255.255.0 {
     option routers             10.47.58.1;
     range dynamic-bootp        10.47.58.3 10.47.58.254;
     option domain-name-servers 114.114.114.114, 180.76.76.76;
     option subnet-mask         255.255.255.0;
     filename                   "/pxelinux.0";
     default-lease-time         21600;
     max-lease-time             43200;
     next-server                $next_server;

     class "pxeclients" {
Check via:
[root@z_WHServer ~]# service cobblerd start
Starting cobbler daemon:                                   [  OK  ]
[root@z_WHServer ~]# chkconfig cobblerd on
[root@z_WHServer ~]# chkconfig httpd on
[root@z_WHServer ~]# service cobblerd status
cobblerd (pid 5421) is running...
Reboot and Check via:
# cobbler check
You will get lots of the errors, first solve the dhcpd issue, notice the following dhcpd configuration file is temporarily used.
# yum install -y dhcp
# vim /etc/dhcp/dhcpd.conf
#
# DHCP Server Configuration file.
#   see /usr/share/doc/dhcp*/dhcpd.conf.sample
#   see 'man 5 dhcpd.conf'
#
# create new
# specify domain name
option domain-name "server.world";
# specify name server's hostname or IP address
option domain-name-servers dlp.server.world;
# default lease time
default-lease-time 600;
# max lease time
max-lease-time 7200;
# this DHCP server to be declared valid
authoritative;
# specify network address and subnet mask
subnet 10.47.58.0 netmask 255.255.255.0 {
    # specify the range of lease IP address
    range dynamic-bootp 10.47.58.200 10.47.58.254;
    # specify broadcast address
    option broadcast-address 10.47.58.255;
    # specify default gateway
    option routers 10.47.58.1;
}
# service dhcpd start
# chkconfig dhcpd on
# chkconfig xinetd on
# reboot
Get loaders to download the loaders to /var/lib/cobbler/loaders:
!!! Notice, this step maybe failed because of networking issues!!!!
$ cobbler get-loaders
Change xinted:
# cat  /etc/xinetd.d/rsync
# default: off
# description: The rsync server is a good addition to an ftp server, as it \
#       allows crc checksumming etc.
service rsync
{
        disable = no
Edit iptables:
$ sudo vim /etc/sysconfig/iptables
:OUTPUT ACCEPT [0:0]
-A INPUT -p udp -m multiport --dports 69,80,443,25151 -j ACCEPT
-A INPUT -p tcp -m multiport --dports 69,80,443,25151 -j ACCEPT
-A INPUT -m state --state ESTABLISHED,RELATED -j ACCEPT
$ sudo reboot
Install packages:
# yum install -y debmirror pykickstart cman
# cobbler check
# cobbler sync
Import Systems
Import 2 DVD iso via:
# mount -o loop -t iso9660 CentOS-6.5-x86_64-bin-DVD1.iso  /mnt1/
# cobbler import --name=CentOS-6.5 --arch=x86_64 --path=/mnt1
# mount -o loop -t iso9660 CentOS-6.5-x86_64-bin-DVD2.iso  /mnt2
# rsync -a '/mnt2/' /var/www/cobbler/ks_mirror/CentOS-6.5-x86_64/ --exclude-from=/etc/cobbler/rsync.exclude --progress
# COMPSXML=$(ls /var/www/cobbler/ks_mirror/CentOS-6.5-x86_64/repodata/*comps*.xml)
# createrepo -c cache -s sha --update --groupfile ${COMPSXML} /var/www/cobbler/ks_mirror/CentOS-6.5-x86_64/
Verify it via:
[root@z_WHServer repodata]# cobbler distro list
   CentOS-6.5-x86_64
[root@z_WHServer repodata]# cobbler profile list
   CentOS-6.5-x86_64
[root@z_WHServer repodata]# cobbler distro report --name=CentOS-6.5-x86_64
Name                           : CentOS-6.5-x86_64
Architecture                   : x86_64
TFTP Boot Files                : {}
Breed                          : redhat
Comment                        :
Fetchable Files                : {}
Initrd                         : /var/www/cobbler/ks_mirror/CentOS-6.5-x86_64/images/pxeboot/initrd.img
Kernel                         : /var/www/cobbler/ks_mirror/CentOS-6.5-x86_64/images/pxeboot/vmlinuz
Check if your tftp working:
# yum install tftp-server
# vim /etc/xinetd.d/tftp
# /sbin/chkconfig tftp on
# service xinetd start
# netstat -anp | grep 69
# tftp 10.47.58.2
get pxelinux.0
If successful, the pxelinux.0 will downloaded to your directory.
Install New Systems
Use a machine, configure to the same network, then start from pxe.
Customize the KS file
Generate kickstart configuration file via:
# system-config-kickstart
Add a new profile via:
[root@z_WHServer kickstarts]# cobbler profile add --name=CentOS6.5-Desktop --kickstart=/var/lib/cobbler/kickstarts/CentOS-6.5-x86_64/C
sktop.cfg --distro=CentOS-6.5-x86_64
[root@z_WHServer kickstarts]# cobbler profile list
   CentOS-6.5-x86_64
   CentOS6.5-Desktop
Cobbler Web Interface
$ htdigest /etc/cobbler/users.digest "Cobbler" cobbler
Which will prompt you for a new password.
Once you have updated the password remember to run
$ cobbler sync
Jun 16, 2015
TechnologyRecently I want to research desktop virtualization on Xen, so this blog records all of the tips for Xen Hypervisor related info.
Nested Virtualization
I place 4 core(Copy Host Configuration on CPU parameter), but the XenServer refuse to start, by using a none-hosted-configuration CPU configuration, it will fail on starting the machine, So I choose to install xen hypervisor on Ubuntu14.04.
Ubuntu and Xen
Install via:
$ sudo apt-get install xen-hypervisor-amd64
$ sudo reboot
The Ubuntu will automatically choose xen for startup, so verify it via:
$ sudo xl list
Name                                        ID   Mem VCPUs      State   Time(s)
Domain-0                                     0  7832     4     r-----      72.8
Networking
Since the network is pretty complicated on my own machine, I decide to use openVSwitch for managing my own networking.
$ sudo apt-get install -y openvswitch-switch
Configuration of the networking:
$ cat /etc/network/interfaces
###########################################
## By using openVswitch, we enabled the following
###########################################
allow-hotplug ovsbr0
iface ovsbr0 inet static
address 192.168.0.119
netmask 255.255.0.0
gateway 192.168.0.176
dns-nameservers 114.114.114.114
dns-nameservers 180.76.76.76

$ sudo ovs-vsctl add-br ovsbr0
$ sudo ovs-vsctl set Bridge ovsbr0 stp_enable=false other_config:stp-max-age=6 other_config:stp-forward-delay=4
$ sudo ovs-vsctl list Bridge
$ sudo ovs-vsctl add-port ovsbr0 eth0
Disable the netfilter on all bridges:
$ sudo vi /etc/sysctl.conf

net.bridge.bridge-nf-call-ip6tables = 0
net.bridge.bridge-nf-call-iptables = 0
net.bridge.bridge-nf-call-arptables = 0

$ sudo sysctl -p /etc/sysctl.conf
# Note: These settings are created in /proc/sys/net. The bridge folder only appears to be created after first creating a bridge with the ''brctl' command.
$ sudo apt-get install virt-manager
$ sudo apt-get install xen-tools
Connect with virt-manager
Change following parameters and re-connect again.
# vim /etc/xen/xend-config.sxp
     xend-unix-server yes
     xend-unix-path /var/lib/xend/xend-socket
# service libvirt-bin restart
libvirt-bin stop/waiting
libvirt-bin start/running, process 5345
# service xen restart
 * Restarting Xen daemons                                                                                                             ^[[A                                                                                                                           [ OK ]
# service xendomains restart
$ sudo virt-install --connect=xen:/// --name u14.04 --ram 1024 --disk u14.04.img,size=4 --location http://ftp.ubuntu.com/ubuntu/dists/trusty/main/installer-amd64/


# http://ftp.ubuntu.com/ubuntu/dists/trusty/main/installer-amd64/
Jun 11, 2015
TechnologyHostAPD
Install HostAPD via following commands:
$ sudo apt-get autoremove hostapd
$ wget https://github.com/jenssegers/RTL8188-hostapd/archive/v2.0.tar.gz
$ tar -zxvf v2.0.tar.gz
$ cd RTL8188-hostapd-2.0/hostapd
$ sudo make
$ sudo make install
$ sudo service hostapd restart
[ ok ] Stopping advanced IEEE 802.11 management: hostapd.
[ ok ] Starting advanced IEEE 802.11 management: hostapd.
dhcpd
We need a dhcp server for assigning a new IP address to the clients who joins the ap:
An example file is listed as following:
ddns-update-style none;
ignore client-updates;
authoritative;
option local-wpad code 252 = text;

subnet
10.0.0.0 netmask 255.255.255.0 {
# --- default gateway
option routers
10.0.0.1;
# --- Netmask
option subnet-mask
255.255.255.0;
# --- Broadcast Address
option broadcast-address
10.0.0.255;
# --- Domain name servers, tells the clients which DNS servers to use.
option domain-name-servers
10.0.0.1, 8.8.8.8, 8.8.4.4;
option time-offset
0;
range 10.0.0.3 10.0.0.13;
default-lease-time 1209600;
max-lease-time 1814400;
}
WLAN0 Network
The WLAN0 equipment network should be configured as following:
$ cat /etc/network/interface
# wireless wlan0
allow-hotplug wlan0
iface wlan0 inet static
address 10.0.70.1
netmask 255.255.255.0
So next time you reboot the computer, it will automatically get the ip address for wlan0.
Enable the ip forwarding
Using following 2 commands for enabling your AP.
$ sudo iptables -t nat -A POSTROUTING -s 10.0.70.0/24 ! -d 10.0.70.0/24  -j MASQUERADE
$ sudo dhcpd wlan0
I add these two lines into the start file of awesome(My desktop environment).
Disable hostapd
You should remove the definition of the dhcpd, and the iptables forwarding rules, and
also the definition in /etc/network/interfaces, and the hostapd configuration in
/etc/rc*.d from S to K, while the rc*.d ranges from rc0 to rc6.
Jun 8, 2015
TechnologyMachine Preparation
QuickServer: 172.16.0.11, QuickClient: 172.16.0.12
QuickServer Machine:
xxx@QuickServer:~$ cat /etc/hostname
QuickServer
xxx@QuickServer:~$ cat /etc/hosts
127.0.0.1       localhost
127.0.1.1       QuickServer
172.16.0.11     QuickServer
172.16.0.12     QuickClient

# The following lines are desirable for IPv6 capable hosts
::1     localhost ip6-localhost ip6-loopback
ff02::1 ip6-allnodes
ff02::2 ip6-allrouters
xxx@QuickServer:~$ cat /etc/network/interfaces
# This file describes the network interfaces available on your system
# and how to activate them. For more information, see interfaces(5).

# The loopback network interface
auto lo
iface lo inet loopback

# The primary network interface
auto eth0
iface eth0 inet static
address 172.16.0.11
netmask 255.255.255.0
gateway 172.16.0.1
dns-nameservers 114.114.114.114
QuickClient Machine:
xxx@QuickClient:~$ cat /etc/hosts
127.0.0.1       localhost
127.0.1.1       QuickClient
172.16.0.12     QuickClient
172.16.0.11     QuickServer


# The following lines are desirable for IPv6 capable hosts
::1     localhost ip6-localhost ip6-loopback
ff02::1 ip6-allnodes
ff02::2 ip6-allrouters
xxx@QuickClient:~$ cat /etc/hostname
QuickClient
xxx@QuickClient:~$ cat /etc/network/interfaces
# This file describes the network interfaces available on your system
# and how to activate them. For more information, see interfaces(5).

# The loopback network interface
auto lo
iface lo inet loopback

# The primary network interface
auto eth0
iface eth0 inet static
address 172.16.0.12
netmask 255.255.255.0
gateway 172.16.0.1
dns-nameservers 114.114.114.114
QuickServer Installation
You should have following packges in this server/management node:
$ ls
chefdk_0.6.0-1_amd64.deb  chef-server-core_12.0.8-1_amd64.deb  opscode-manage_1.13.0-1_amd64.deb
Install and configuration:
$ sudo dpkg -i chef-server-core_12.0.8-1_amd64.deb
$ sudo chef-server-ctl reconfigure
Now configure the chefserver via following command:
$ sudo chef-server-ctl user-create twocloud cloud Yang twocloud@gmail.com engine --filename ~/twocloud.pem
$ sudo chef-server-ctl org-create twocloud OneCloud Software, Inc. --association_user twocloud --filename ~/twocloud_org.pem
$ ls ~/*.pem
/home/xxxx/twocloud_org.pem  /home/xxxx/twocloud.pem
Install opscode:
$ sudo dpkg -i opscode-manage_1.13.0-1_amd64.deb
$ sudo opscode-manage-ctl reconfigure
Also install the chefdk via:
$ sudo dpkg -i chefdk_0.6.0-1_amd64.deb
Install the git and configure the chef-repo:
$ sudo apt-get install git
$ git config --global user.name "purplepalm"
$ git config --global user.email "purplepalm@gmail.com"
$ git clone https://github.com/opscode/chef-repo.git
$ mkdir .chef
$ cd .chef/
$ scp xxxx@127.0.0.1:/home/xxxx/*.pem ./
Now under the .chef directory, create the knife.rb for letting knife using:
$ cat ~/chef-repo/.chef/knife.rb
current_dir = File.dirname(__FILE__)
log_level                :info
log_location             STDOUT
node_name                "twocloud"
client_key               "#{current_dir}/twocloud.pem"
validation_client_name   "twocloud"
validation_key           "#{current_dir}/twocloud_org.pem"
chef_server_url          "https://QuickServer/organizations/twocloud"
syntax_check_cache_path  "#{ENV['HOME']}/.chef/syntaxcache"
cookbook_path            ["#{current_dir}/../cookbooks"]
Verify ssl via:
$ knife ssl fetch
WARNING: Certificates from QuickServer will be fetched and placed in your trusted_cert
directory (/home/xxxx/chef-repo/.chef/trusted_certs).

Knife has no means to verify these are the correct certificates. You should
verify the authenticity of these certificates after downloading.

Adding certificate for QuickServer in /home/xxxx/chef-repo/.chef/trusted_certs/QuickServer.crt

$ knife ssl check
Connecting to host QuickServer:443
Successfully verified certificates from `QuickServer'
$ knife client list
twocloud-validator
Next, configure the QuickClient and add it to the Chef.
QuickClient
Install the client deb file via:
$ ls
chef_12.3.0-1_amd64.deb
$ sudo dpkg -i chef_12.3.0-1_amd64.deb
Now,On !!! QuickServer !!! , bootstrap the QuickClient via:
$ cd ~/chef-repo/
$ knife bootstrap 172.16.0.12 -x xxxx -P xxxxxxxx --sudo
Doing old-style registration with the validation key at /home/xxxx/chef-repo/.chef/twocloud_org.pem...
Delete your validation key in order to use your user credentials instead

Connecting to 172.16.0.12
172.16.0.12 Starting first Chef Client run...
172.16.0.12 Starting Chef Client, version 12.3.0
172.16.0.12 Creating a new client identity for QuickClient using the validator key.
172.16.0.12
172.16.0.12 ================================================================================
172.16.0.12 Chef encountered an error attempting to create the client "QuickClient"
172.16.0.12 ================================================================================
Yes, you will meet an error, Now go back to !!! QuickClient !!! and solve it.
First retrieve the pem file under your own home directory:
$ scp xxxx@172.16.0.11:/home/xxxx/*.pem ./
Password:
twocloud_org.pem                                                                                             100% 1674     1.6KB/s   00:00
twocloud.pem                                                                                                 100% 1674     1.6KB/s   00:00
Then fetch back the ssl via:
$ sudo knife ssl fetch --config /etc/chef/client.rb
WARNING: Certificates from QuickServer will be fetched and placed in your trusted_cert
directory (/etc/chef/trusted_certs).

Knife has no means to verify these are the correct certificates. You should
verify the authenticity of these certificates after downloading.

Adding certificate for QuickServer in /etc/chef/trusted_certs/QuickServer.crt
Now manually use the /home/xxxx/twocloud.pem for ssl checking.
$ sudo chef-client -l debug -S https://QuickServer/organizations/twocloud -K /home/xxxx/twocloud.pem 2>&1
Your terminal may encounter Garbled codes, simply quit it, and go back to !!! QuickServer !!!, Bootstrap again via:
$ knife bootstrap 172.16.0.12 -x xxxx -P xxxxxxxx --sudo
Doing old-style registration with the validation key at /home/xxxx/chef-repo/.chef/twocloud_org.pem...
Delete your validation key in order to use your user credentials instead

Connecting to 172.16.0.12
172.16.0.12 Starting first Chef Client run...
172.16.0.12 Starting Chef Client, version 12.3.0
172.16.0.12 resolving cookbooks for run list: []
172.16.0.12 Synchronizing Cookbooks:
172.16.0.12 Compiling Cookbooks...
172.16.0.12 [2015-06-08T09:12:09-04:00] WARN: Node QuickClient has an empty run list.
172.16.0.12 Converging 0 resources
172.16.0.12
172.16.0.12 Running handlers:
172.16.0.12 Running handlers complete
172.16.0.12 Chef Client finished, 0/0 resources updated in 1.179038534 seconds
Now you could list all of the client under your workstation directory:
$ knife client list
QuickClient
twocloud-validator
QuickClient is the node we just added.
Here provides a good start-point for following operations, next step you could do more magics on newly added nodes, also you could add more nodes for deployment.
