Jul 22, 2015
TechnologyProblem Description
When upgraded from CentOS6.6 to CentOS7, the libvirtd will encounter following error:
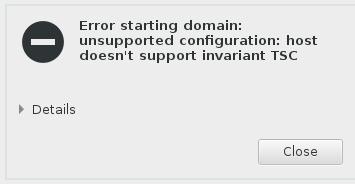
Simply remove:
# virsh edit nodename
-     <feature policy='require' name='invtsc'/>
Jul 19, 2015
TechnologyMigration
First create the qemu based vm:
$ pwd
/media/arch/home/juju/img/migration
$ qemu-img create -f qcow2 ubuntu1504.qcow2 100G
$ sudo qemu-system-x86_64 -enable-kvm -m 512 -smp 4 -name ubuntu1504 -monitor stdio -boot c -drive file=/media/arch/home/juju/img/migration/ubuntu1504.qcow2,if=none,id=drive-virtio-disk0,boot=on -device virtio-blk-pci,bus=pci.0,addr=0x4,drive=drive-virtio-disk0,id=virtio-disk0 -drive file=/media/arch/home/dash/iso/ubuntu-15.04-server-amd64.iso,if=none,media=cdrom,id=drive-ide0-1-0 -device ide-drive,bus=ide.1,unit=0,drive=drive-ide0-1-0,id=ide0-1-0 -device virtio-net-pci,vlan=0,id=net0,mac=52:54:00:13:08:96 -net tap -vnc 127.0.0.1:3
After Installation, startup the vm via(didn’t attach the file):
$ sudo qemu-system-x86_64 -enable-kvm -m 512 -smp 4 -name ubuntu1504 -monitor stdio -boot c -drive file=/media/arch/home/juju/img/migration/ubuntu1504.qcow2,if=none,id=drive-virtio-disk0,boot=on -device virtio-blk-pci,bus=pci.0,addr=0x4,drive=drive-virtio-disk0,id=virtio-disk0 -drive if=none,media=cdrom,id=drive-ide0-1-0 -device ide-drive,bus=ide.1,unit=0,drive=drive-ide0-1-0,id=ide0-1-0 -device virtio-net-pci,vlan=0,id=net0,mac=52:54:00:13:08:96 -net tap -vnc 127.0.0.1:3
Use top -d 1 for every second refreshed.
The same environment is set as the src machine.
$ qemu-img create -f qcow2 dest.img 20G
$ qemu-system-x86_64 -enable-kvm -m 512 -smp 4 -name ubuntu1504 -monitor stdio -boot c -drive file=/root/Code/dest.img,if=none,id=drive-virtio-disk0,boot=on -device virtio-blk-pci,bus=pci.0,addr=0x4,drive=drive-virtio-disk0,id=virtio-disk0 -drive if=none,media=cdrom,id=drive-ide0-1-0 -device ide-drive,bus=ide.1,unit=0,drive=drive-ide0-1-0,id=ide0-1-0 -device virtio-net-pci,vlan=0,id=net0,mac=52:54:00:13:08:96 -net tap -vnc 127.0.0.1:8
(qemu) info status
VM status: paused (inmigrate)
Start migration in the src side via:
(qemu) migrate -d -b tcp:192.168.1.18:8888
(qemu) info migrate
In destination machine, you can see the status of the migration.
After migration, the machine stays its top output to the terminal.
Trouble Shooting On Newly Installed Arch
Bug1 virtual network start fail
libvirt via virt-manager virtual network start failed.
Change:
--- libvirt-1.2.16.orig/src/util/virfirewall.c  2015-05-23 08:56:12.000000000 -0400
+++ libvirt-1.2.16.new/src/util/virfirewall.c   2015-06-18 10:01:51.954157612 -0400
@@ -932,14 +932,14 @@

     virMutexLock(&ruleLock);

-    if (currentBackend == VIR_FIREWALL_BACKEND_AUTOMATIC) {
+//    if (currentBackend == VIR_FIREWALL_BACKEND_AUTOMATIC) {
         /* a specific backend should have been set when the firewall
          * object was created. If not, it means none was found.
          */
-        virReportError(VIR_ERR_INTERNAL_ERROR, "%s",
-                       _("Failed to initialize a valid firewall backend"));
-        goto cleanup;
-    }
+//        virReportError(VIR_ERR_INTERNAL_ERROR, "%s",
+//                       _("Failed to initialize a valid firewall backend"));
+//        goto cleanup;
+//    }
     if (!firewall || firewall->err == ENOMEM) {
         virReportOOMError();
         goto cleanup;
For building the libvirt, do following:
# pacman -S abs base-devel
# abs
# cp /var/abs/community/libvirt ~/Code/
# sudo pacman -S lxc libiscsi open-iscsi perl-xml-xpath
# cd ~/Code/libvirt
# makepkg
After makepkg, change the code as in above, tar it again, makepkg with following command makepkg --skipchecksums, this time it will generate a new tar.xz file. Install it via:
# pacman -U libvirt-1.2.17-1-x86_64.pkg.tar.xz
starting network out of memory
Solve it via:
# pacman -S ebtables vde2
# reboot
Start again and this time is OK.
Bridge Configuration
[root@Arch network]# pwd
/etc/systemd/network
[root@Arch network]# cat MyBridge.netdev
[NetDev]
Name=br0
MACAddress=52:54:00:91:e8:11
Kind=bridge
[root@Arch network]# cat MyBridge.network
[Match]
Name=br0

[Network]
DNS=180.76.76.76,114.114.114.114

[Address]
Address=192.168.1.18/24

[Route]
Gateway=192.168.1.1
[root@Arch network]# cat MyEth.network
[Match]
Name=eth0

[Network]
Bridge=br0
Now enable and start the systemd’s networkd service via:
# systemctl enable systemd-networkd.service
# reboot
By this you could enable systemd on ArchLinux.
Easy way:
Simply resolved this issue via:
# pacman -S firewalld
# systemctl enable firewalld
# systemctl start firewalld
# pacman -Syu ebtables dnsmasq
Jul 17, 2015
TechnologyFreeNAS Installation And Configuration
Install Procedure ignored, because it’s simple.
Following steps are used for adding iscsi partition.
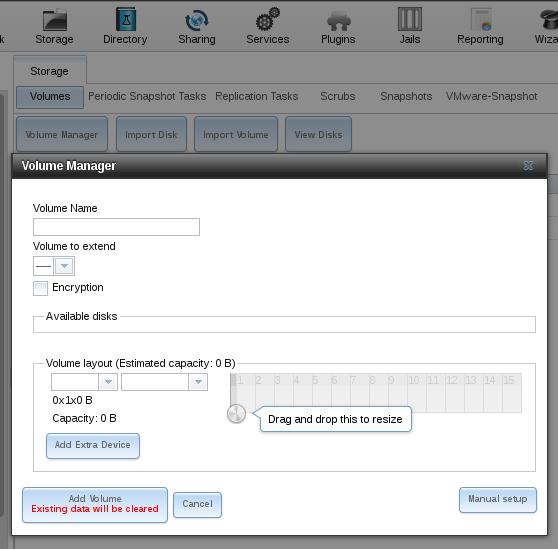
Manually setup the volumn and now you could add your volumn into the FreeNAS System.
Configure iscsi:
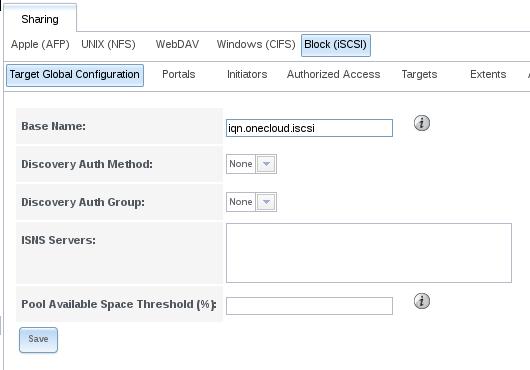
Add the name of iqn.onecloud.iscsi, next we add portal:
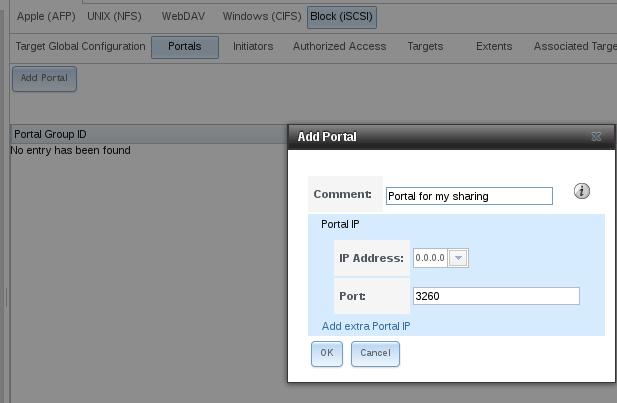
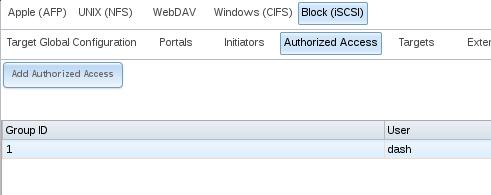
Add Authorized Access Now:
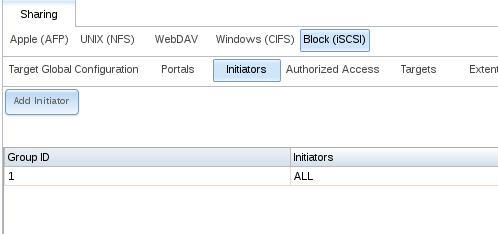
Add Initator:
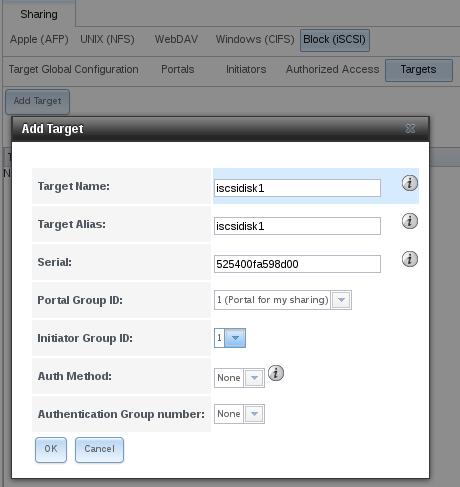
Create target:
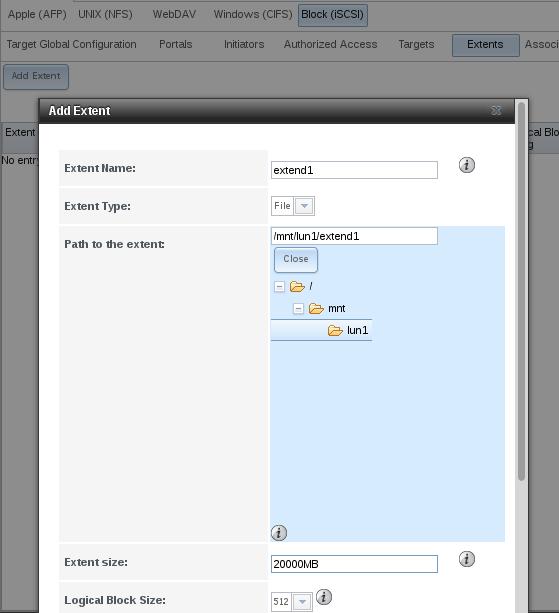
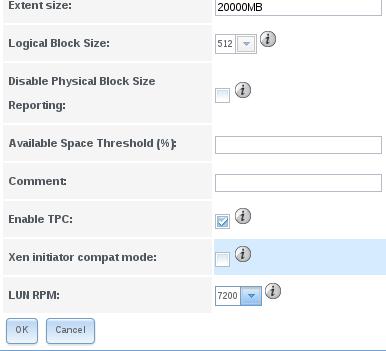
Add extent:
LUM RPMs could also be spcified:
Associate Targets:

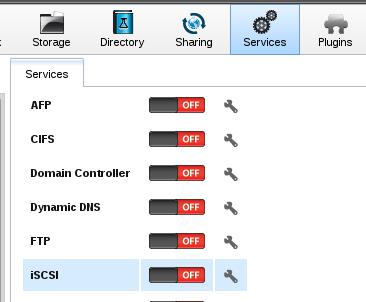
Enable the iscsi service:
Better you change the IP Address into static IP address.
Install Debian Jessie Onto ISCSI Disk:
On a installed Ubuntu, I choose Ubuntu14.04, do following for connecting the exising created iscsi partition:
$ sudo apt-get install -y open-iscsi gdisk
[root:~]# iscsiadm -m discovery -t sendtargets -p 10.47.58.40
10.47.58.40:3260,-1 iqn.onecloud.iscsi:iscsidisk1
Login and listed the device :
[root:~]# iscsiadm -m node -T 'iqn.onecloud.iscsi:iscsidisk1' -p 10.47.58.40 -l
Logging in to [iface: default, target: iqn.onecloud.iscsi:iscsidisk1, portal: 10.47.58.40,3260] (multiple)
Login to [iface: default, target: iqn.onecloud.iscsi:iscsidisk1, portal: 10.47.58.40,3260] successful.
[root:~]# ls -l /dev/disk/by-path
total 0
lrwxrwxrwx 1 root root 9 Jul 17 05:39 ip-10.47.58.40:3260-iscsi-iqn.onecloud.iscsi:iscsidisk1-lun-0 -> ../../sda
Use gdisk for partition the /dev/sda, and creating the filesystem on them:
# gdisk -l /dev/sda

Number  Start (sector)    End (sector)  Size       Code  Name
   1            2048            8191   3.0 MiB     EF02  BIOS boot partition
   2            8192         1056767   512.0 MiB   8200  Linux swap
   3         1056768        40959966   19.0 GiB    8300  Linux filesystem
# mkfs.ext4 /dev/sda3
# mkswap /dev/sda2
Now install system, first mount usable systems:
# mkdir /mnt/chroot
# mount /dev/sda3 /mnt/chroot
# debootstrap wheezy /mnt/chroot
# debootstrap jessie /mnt/chroot http://mirrors.aliyun.com/debian/
chroot into the newly install jessie:
root@Ubuntu-14:~# mount -t proc none /mnt/chroot/proc
root@Ubuntu-14:~# mount -t sysfs none /mnt/chroot/sys
root@Ubuntu-14:~# mount --bind /dev /mnt/chroot/dev
root@Ubuntu-14:~# chroot /mnt/chroot /bin/bash
Disk configuration:
root@Ubuntu-14:/# cp /proc/mounts /etc/mtab
root@Ubuntu-14:/# sed -i '\|^/dev/sda3|,$!d' /etc/mtab
root@Ubuntu-14:/# blkid /dev/sda2 /dev/sda3
/dev/sda2: UUID="0c570265-543a-41ec-9edb-65bc55d677cd" TYPE="swap" PARTLABEL="Linux swap" PARTUUID="bfb7c1b1-c6cd-4302-9cb4-d6c1de43a0ad"
/dev/sda3: UUID="c1c5f995-e3f7-48c7-b5d5-4963a77d9b7b" TYPE="ext4" PARTLABEL="Linux filesystem" PARTUUID="00ccaf63-b3b3-46c4-92ab-1933d31cbcb7"
root@Ubuntu-14:/# echo 'UUID=c1c5f995-e3f7-48c7-b5d5-4963a77d9b7b / ext4 errors=remount-ro 0 1' >> /etc/fstab
root@Ubuntu-14:/# echo 'UUID=0c570265-543a-41ec-9edb-65bc55d677cd none swap sw 0 0' >> /etc/fstab
root@Ubuntu-14:/# cat /etc/fstab
# UNCONFIGURED FSTAB FOR BASE SYSTEM
UUID=c1c5f995-e3f7-48c7-b5d5-4963a77d9b7b / ext4 errors=remount-ro 0 1
UUID=0c570265-543a-41ec-9edb-65bc55d677cd none swap sw 0 0
Install some packages, be sure to make grub2 installed to /dev/sda:
# apt-get install vim less openssh-server locales
# apt-get install linux-image-amd64 grub2 initramfs-tools
Configure the Grub:
# apt-get install open-iscsi
# vim /etc/default/grub
GRUB_CMDLINE_LINUX_DEFAULT=""
GRUB_CMDLINE_LINUX=""ISCSI_INITIATOR=iqn.onecloud.iscsi.client:client ISCSI_TARGET_NAME=iqn.onecloud.iscsi:iscsidisk1 ISCSI_TARGET_IP=10.47.58.40 ISCSI_TARGET_PORT=3260 root=UUID=c1c5f995-e3f7-48c7-b5d5-4963a77d9b7b ip=10.47.58.176::10.47.58.1:255.255.255.0:client:eth0:off""
# touch /etc/iscsi/iscsi.initramfs
# echo "InitiatorName=iqn.onecloud.iscsi.client:client" > /etc/iscsi/initiatorname.iscsi
# update-grub
# update-initramfs -u
# passwd
Configure the network interfaces:
root@Ubuntu-14:/etc/network# cat interfaces
# interfaces(5) file used by ifup(8) and ifdown(8)
# Include files from /etc/network/interfaces.d:
#source-directory /etc/network/interfaces.d
# The loopback network interface
auto lo
iface lo inet loopback

# The primary network interface
auto eth0
iface eth0 inet static
#iface eth0 inet manual
address 10.47.58.176
netmask 255.255.255.0
gateway 10.47.58.1
dns-nameservers 114.114.114.114
Now exit and umount all of the mounted partitions.
# exit
# umount /mnt/chroot/{dev,proc,sys,}
root@Ubuntu-14:~# iscsiadm -m node -T 'iqn.onecloud.iscsi:iscsidisk1' -p 10.47.58.40 -u
# echo "InitiatorName=iqn.onecloud.iscsi.client:client" > /etc/iscsi/initiatorname.iscsi
#!ipxe
set initiator-iqn iqn.2007-08.com.example.client:client
sanboot iscsi:san.example.com:6:3260:0:iqn.2007-08.com.example.san:rootp
Jul 13, 2015
TechnologyCentOS7 Based
Following modification need to be done:
On Deployed node:
$ sudo vim /etc/hosts
10.47.58.157	node157
There will be iptables issue. for you have to install following packages:
# yum install -y install iptables-utils iptables-services
# reboot
Now begin to install again, and it will be ok.
Add the client, and make sure the “COPY CPU configuration” is selected in the menu.
Or, your system vm won’t startup.
Why at home my output becomes:
[root@node157 network-scripts]# cat ifcfg-cloudbr0

DEVICE=cloudbr0

ONBOOT=yes
HWADDR=52:54:00:73:86:D2

TYPE=Bridge
BOOTPROTO=dhcp
NM_CONTROLLED=no
[root@node157 network-scripts]# cat ifcfg-eth0
DEVICE=eth0

ONBOOT=yes
HWADDR=52:54:00:73:86:D2
TYPE=Ethernet
BOOTPROTO=dhcp
NM_CONTROLLED=no
BRIDGE=cloudbr0
Jul 10, 2015
TechnologyCobbler In Non-DHCP Server Networking
Sometimes you want to deploy system with cobbler server, in some restricted network which dhcp service is not allowed(considering broadcasting storm, security, etc.) Following are the steps of how-to:
Change Cobbler server setting:
$ sudo vim /etc/cobbler/settings
manage_dhcp: 0
$ sudo cobbler sync
$ sudo service dhcpd stop
Add the node definition in cobbler(useless):
# cobbler system add --name=node2 --profile=CentOS6.5-x86_64 --mac=52:54:00:71:59:64 --interface=eth0 --static=1 --ip-address=10.47.58.3 --dns-name=node2 --gateway=10.47.58.1
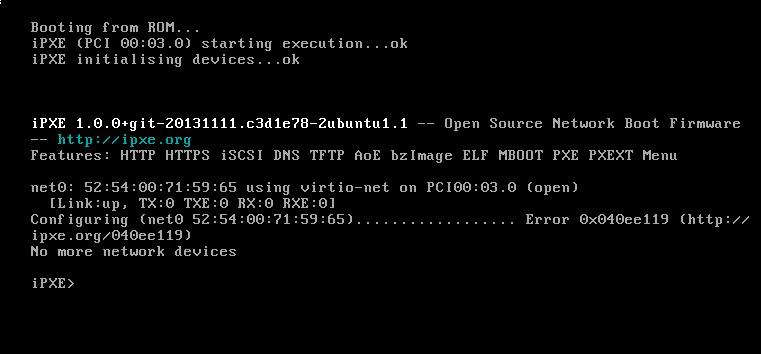
Now bootup your newly added computer with PXE, hit ctrl+B once you see the bios hint.
iPXE> config net0
hit ctrl+B should be like in following image:
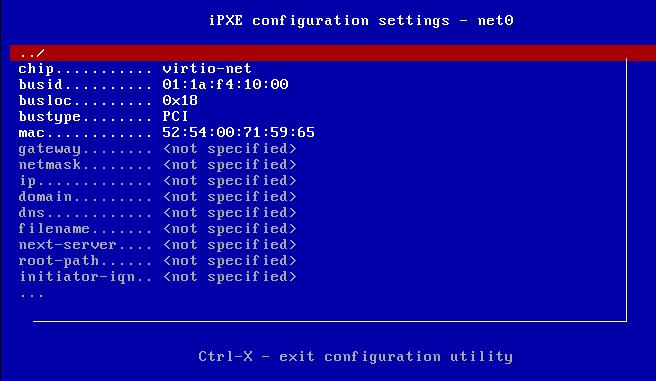
Setting like following:
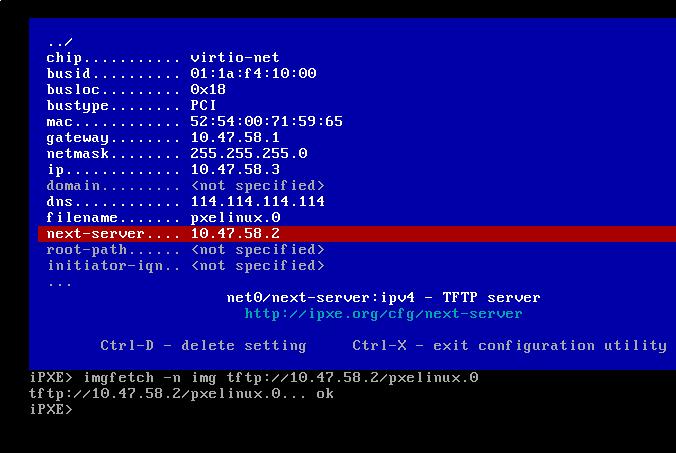
Hit Ctrl+x for saving the settings and continue to set:
iPXE> imgfetch -n img tftp://10.47.58.2/pxelinux.0
iPXE> imgload img
iPXE> boot
Now begin to install, you will met nework configuration fail issue:
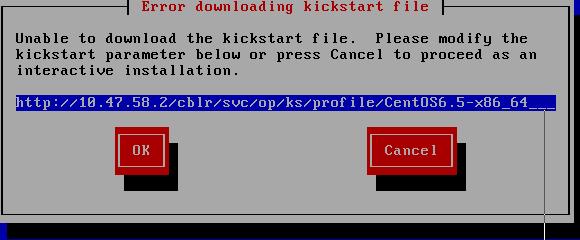
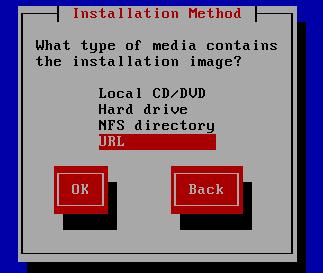
Hit Cancel, manually set up the network, first select installation method:
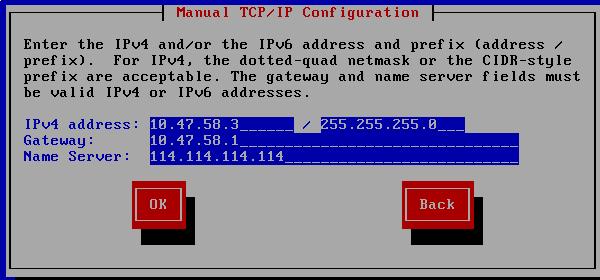
Configure TCP/IP:
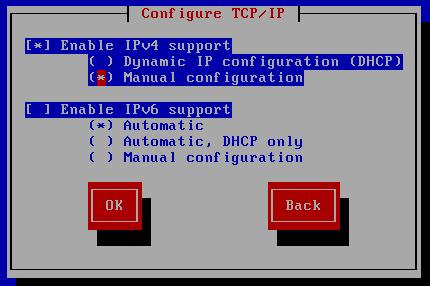
Configure IP address/gateway/dns/netmask:
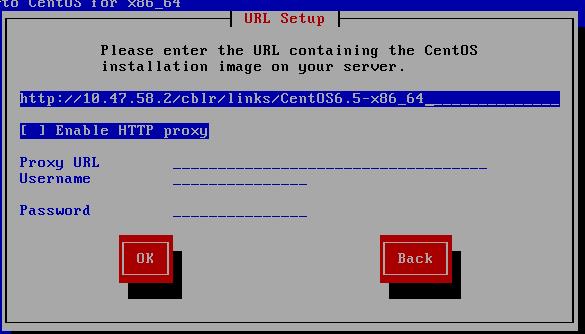
Now configure the installation setting, you could find it in your own ks configuration file:
Continue to install, they are the same as you did before.
Cobbler in the existing DHCP enabled Network
Since the dhcp server is available in the network, simply press ctrl+B to enter the pxe boot menu and set the next_server to 10.47.58.2, then:
iPXE> imgfetch -n img tftp://10.47.58.2/pxelinux.0
iPXE> imgload img
iPXE> boot
Now select whichever you want to deploy, your configuration will be deployed ASAP.
Cobbler Server Image To New Network
You have to change following items:
- IP address.
- dhcp templates
- Next Server Name.
$ sudo vim /etc/cobbler/settings
next_server: 172.16.10.2
server: 172.16.10.2
$ sudo vim /etc/cobbler/dhcp.templates
subnet 172.16.10.0 netmask 255.255.255.0 {
     option routers             172.16.10.1;
     range dynamic-bootp        172.16.10.3 172.16.10.254;
     option domain-name-servers 114.114.114.114, 180.76.76.76;
     option subnet-mask         255.255.255.0;
     filename                   "/pxelinux.0";
     default-lease-time         21600;
     max-lease-time             43200;
     next-server                $next_server;
     class "pxeclients" {

//..................
$ sudo vim /etc/default/isc-dhcp-server
INTERFACES="eth0"
Notice the IP address should be in the same ip address range.
After modification, simply use cobbler sync for syncing your changes, now restart the cobbler server, your operation should be the same as the above situations.
Also if you have playbooks of ansible which uses the static IP address, you also have to replace the IP related settings.
