Feb 27, 2024
TechnologyUsing AFU(AMI FIRMWARE UPDATE) for extract the uefi rom file:
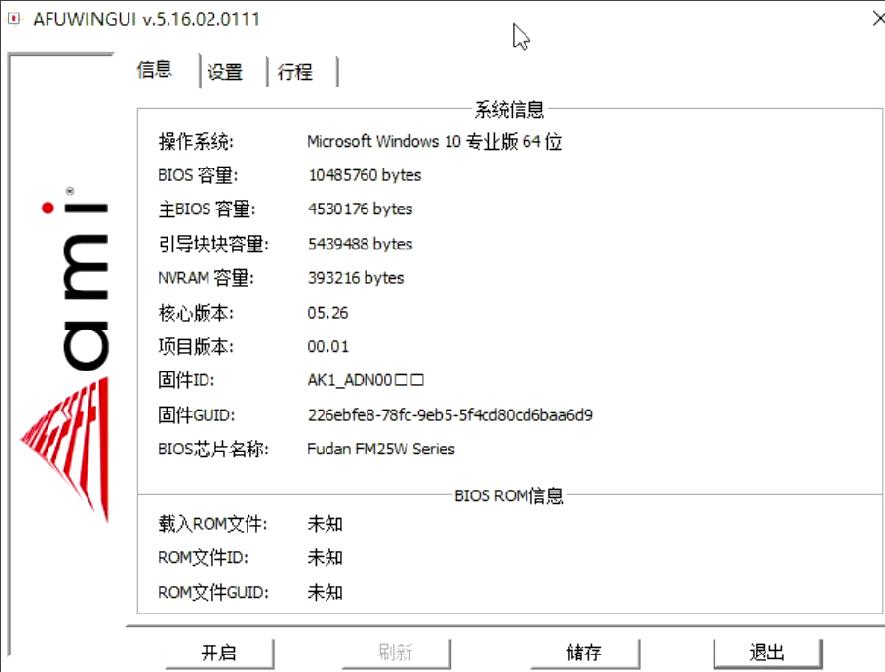
Click save to save the current rom:
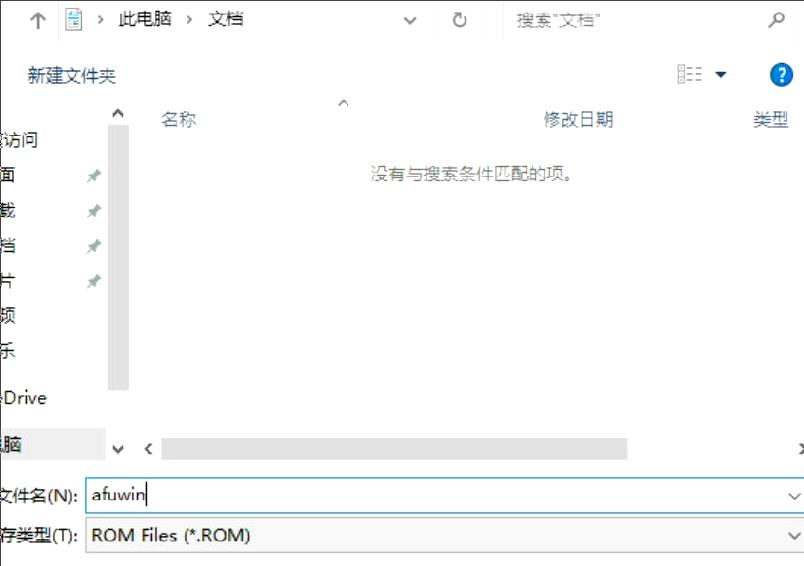
View the result:

Using UBU_v1.79.17 for extracting IntelGopDriver.efi:

put afuwin.rom(extracted via AFU) into the same folder:
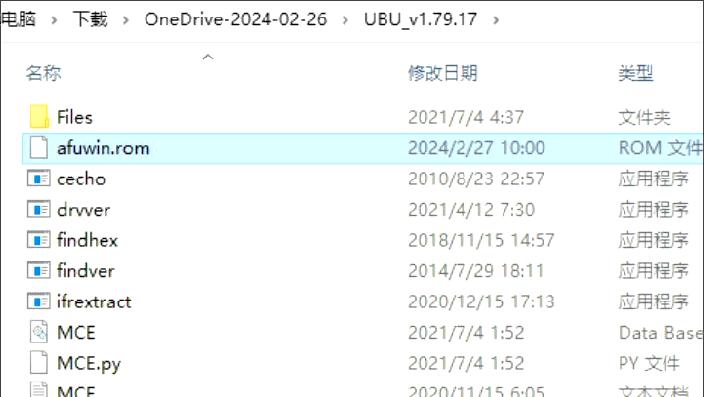
Wait util scanning finished:
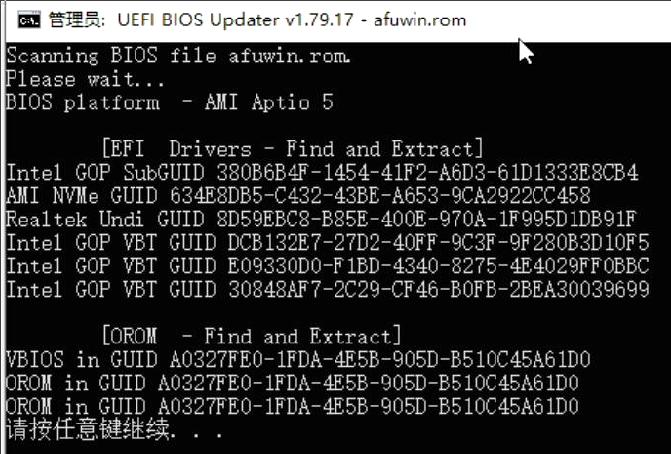
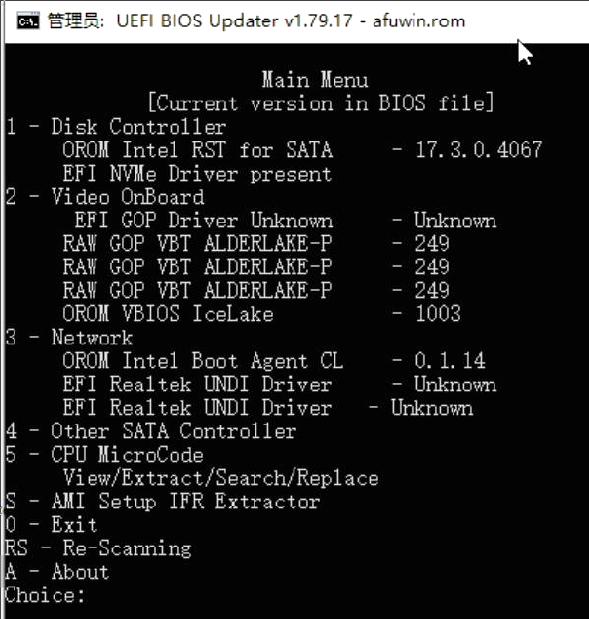
Enter next step and Press 2:
Press S for share this:
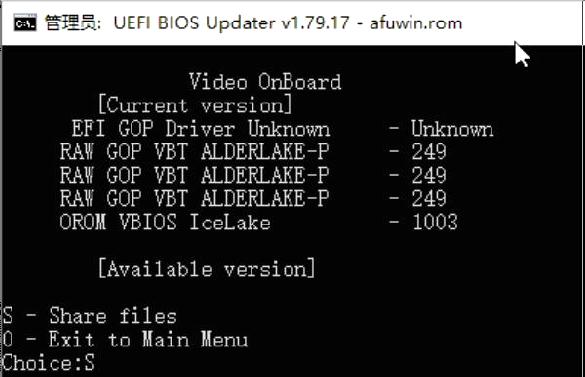
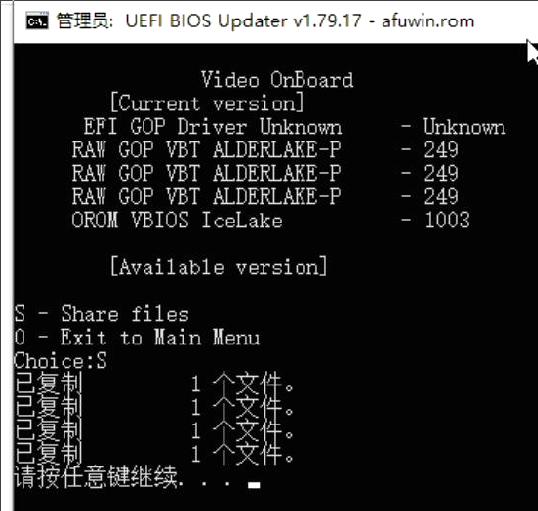
Now you get the IntelGopDriver.efi file for building OVMF:

2. Building OVMF
Building the OVMF via following commands:
git clone git@github.com:cmd2001/build-edk2-gvtd.git
cd build-edk2-gvtd
sh ./init_edk2.sh
mkdir -p gop
cp <intel gop driver efi> gop/IntelGopDriver.efi
sudo bash ./build_ovmf.sh
sudo bash ./build_oprom.sh
Your generated OVMF and rom files should be like following:
$ ls product/ -l -h
total 7.4M
-rw-r--r-- 1 root root 186K Feb 27 19:29 B660_GOP.rom
-rw-r--r-- 1 root root 213K Feb 27 19:29 B660.rom
-rw-r--r-- 1 root root 3.5M Feb 27 19:20 OVMF_CODE_4M.fd
-rw-r--r-- 1 root root 3.5M Feb 27 19:22 OVMF_CODE_4M.secboot.fd
Copy the files to N100 machine, rename OVMF_CODE_4M.fd to own_OVMF_CODE_4M.fd, OVMF_CODE_4M.secboot.fd to own_OVMF_CODE_4M.secboot.fd, save them under the folder /usr/share/OVMF/:
root@n100:~# ls /usr/share/OVMF/own_OVMF_CODE_4M.*
/usr/share/OVMF/own_OVMF_CODE_4M.fd  /usr/share/OVMF/own_OVMF_CODE_4M.secboot.fd
root@n100:~# ls /usr/share/OVMF/B660*
/usr/share/OVMF/B660_GOP.rom  /usr/share/OVMF/B660.rom
3. n100 OS setup
Hardware/Software details:
# uname -r
6.1.30-victory
# cat /etc/issue
Ubuntu 18.04.6 LTS \n \l
# lscpu | grep -i model
Model:               190
Model name:          Intel(R) N100
# free -m
              total        used        free      shared  buff/cache   available
Mem:          31876        9263       16566           1        6046       22217
Swap:          2047           0        2047
Grub default configration:
# vim /etc/default/grub
...
GRUB_CMDLINE_LINUX_DEFAULT="quiet splash processor.max_cstate=0 intel_idle.max_cstate=0 intel_iommu=on iommu=pt split_lock_detect=off intel_iommu=pt kvm.ignore_msrs=1 video=efifb:off,vesafb:off initcall_backlist=sysfb_init pcie_acs_override=downstream,multifunction"
...
# update-grub2
# vim /etc/modprobe.d/blacklist.conf
...
...
blacklist i915
blacklist snd_hda_intel
blacklist snd_hda_codec_hdmi
options vfio_iommu_type1 allow_unsafe_interrupts=1
# vim /etc/initramfs-tools/module
...
vfio
vfio_iommu_type1
vfio_pci
vfio_virqfd
# update-initramfs -u -k all
4. Qemu
Build qemu via:
git clone https://git.qemu.org/git/qemu.git
cd qemu
git checkout v8.0.1
git submodule init
git submodule update --recursive
mkdir -p build
cd build
mkdir -p /opt/local1
../configure --prefix=/opt/local --enable-kvm --disable-xen --enable-libusb --enable-debug-info --enable-debug --enable-sdl --enable-vhost-net --enable-spice --disable-debug-tcg --enable-opengl --enable-gtk --target-list=x86_64-softmmu --audio-drv-list=alsa
make -j4 && make install
Check the qemu version:
# /opt/local1/bin/qemu-system-x86_64 --version
QEMU emulator version 8.0.1 (v8.0.1)
Copyright (c) 2003-2022 Fabrice Bellard and the QEMU Project developers
5. vm setup
Prepare the iso and qcow2 files:
# pwd
/root
# ls *.iso
virtio-win-0.1.208.iso  Win10_22H2_Chinese_Simplified_x64.iso
# qemu-img create -f qcow2 win10_base.qcow2 100G
Prepare the vfio pci devices:
# vfio-pci.sh -h 00:02.0 && vfio-pci.sh -h 00:14.0
# lspci -s 00:02.0 -vv | grep -i driver
	Kernel driver in use: vfio-pci
# lspci -s 00:14.0 -vv | grep -i driver
	Kernel driver in use: vfio-pci
Create the machine via:
sudo /opt/local1/bin/qemu-system-x86_64 -no-user-config -nodefaults -m 8192M,slots=4,maxmem=16G -enable-kvm \
-machine pc,accel=kvm,kernel_irqchip=on,mem-merge=off \
-drive file=/usr/share/OVMF/own_OVMF_CODE_4M.fd,format=raw,if=pflash \
-cpu host,hv_relaxed,hv-vapic,hv-spinlocks=4096,hv-time,hv-runtime,hv-synic,hv-stimer,hv_vpindex,hv-tlbflush,hv-ipi \
-smp cores=1,threads=2,sockets=2 \
-device vfio-pci,host=00:02.0,id=vga0,bus=pci.0,addr=0x2,x-igd-gms=6,x-igd-opregion=on,romfile=/usr/share/OVMF/B660_GOP.rom \
-device vfio-pci,host=0000:00:14.0,id=hostpci1,bus=pci.0,addr=0x11 \
-drive file=/root/win10_base.qcow2,format=qcow2,cache=none,if=none,id=drv0 -device virtio-blk,drive=drv0,id=vdisk0 \
-drive file=/root/Win10_22H2_Chinese_Simplified_x64.iso,media=cdrom -drive file=/root/virtio-win-0.1.208.iso,media=cdrom  \
-vga none -nographic -netdev user,hostfwd=tcp::2288-:22,hostfwd=tcp::13389-:3389,id=net0 -device virtio-net-pci,netdev=net0,mac=11:22:33:44:55:66 \
-monitor telnet:localhost:2222,server,nowait
You will get the installation window directly on Monitor, simply install the system, when system ready, get the latest i915 driver from intel website(gfx_win_101.5333).
6. Result
Device Driver:
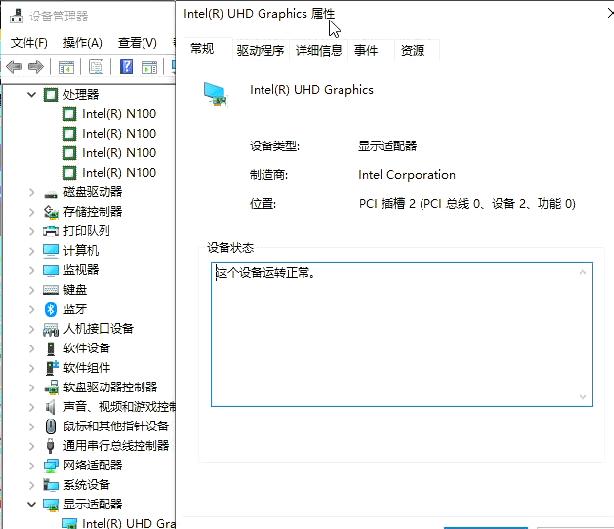
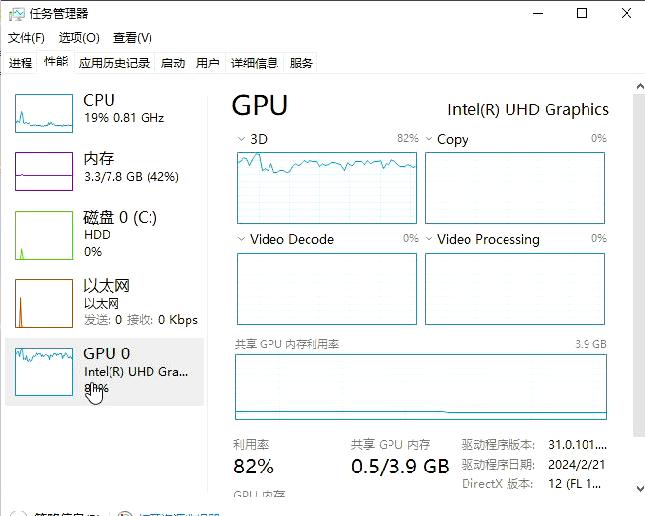
Task manager details:
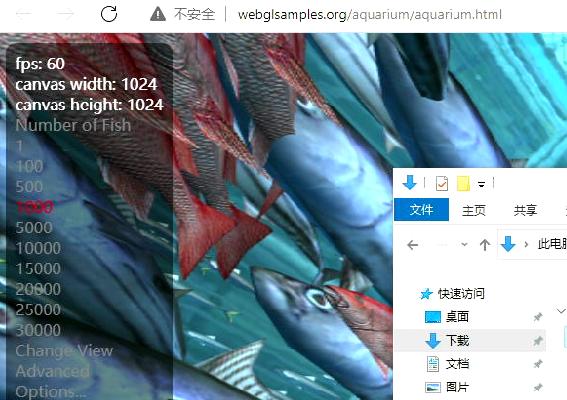
WebGL fish:
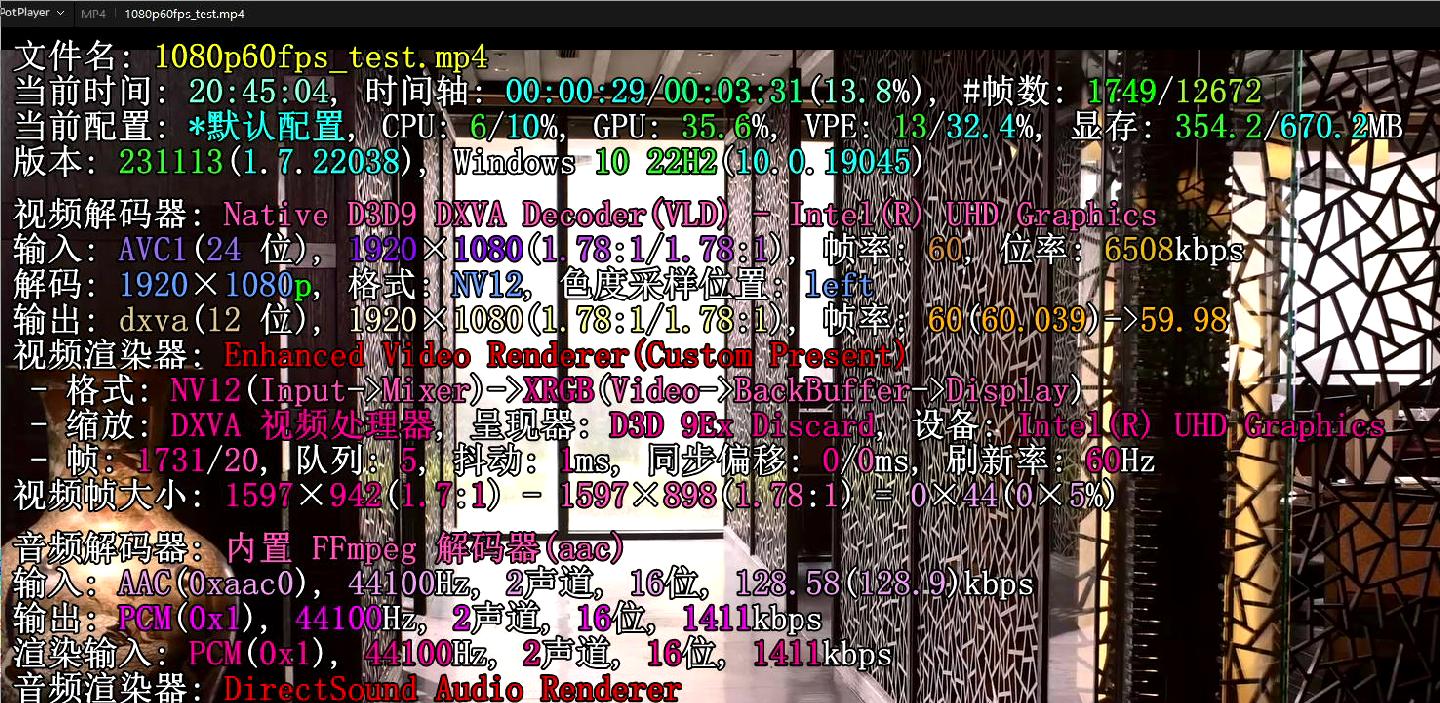
Video decoding(1080p 60fps):
Feb 27, 2024
Technologywin10 Quickstart
Quickly partition:
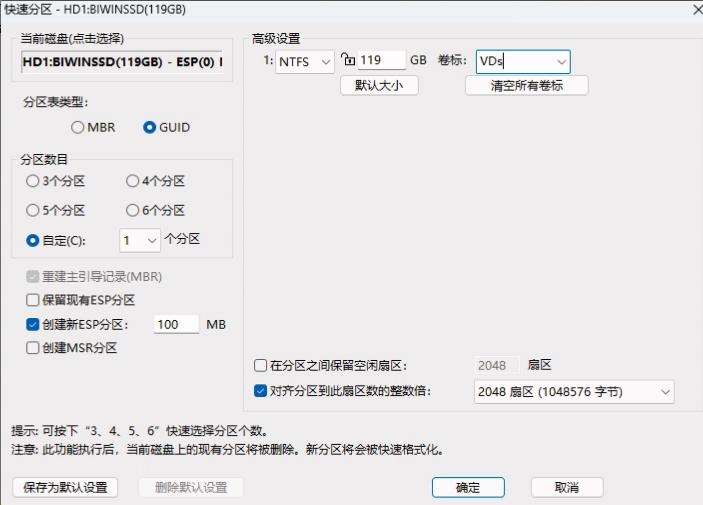
Like following layout:

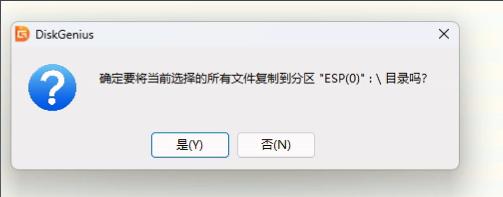
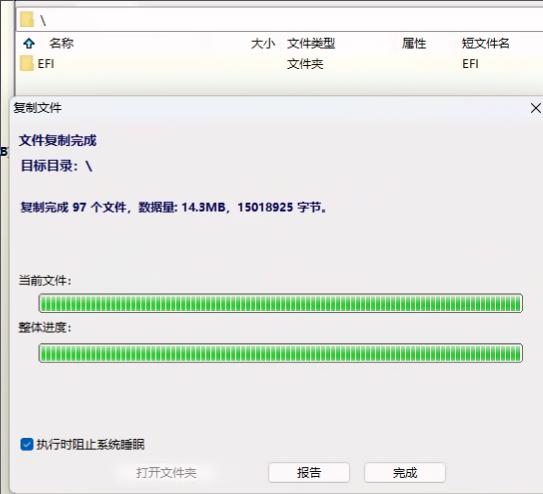
Insert Cloudfirmware flash disk , copy the files:
Download the AMI FIRMWARE UPDATE(AFU) FROM:
https://www.ami.com/bios-uefi-utilities/


Click save to save the current rom:

View the result:

Using UBU_v1.79.17:

put afuwin.rom into this folder:

Wait util scanning finished:

Enter next step and Press 2:

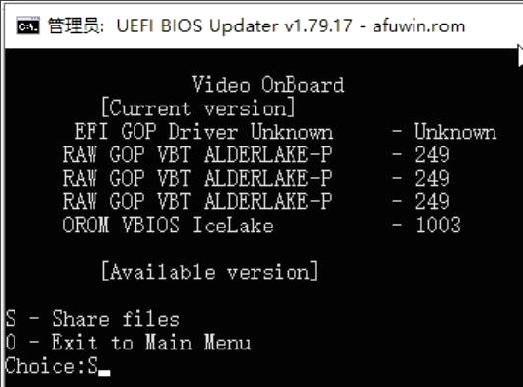
Press S for share this:


Get the IntelGopDriver.efi:

Extract using edk2-BaseTools:
EfiRom.exe -f 0x8086 -i 0x46d1 -e IntelGopDriver.efi
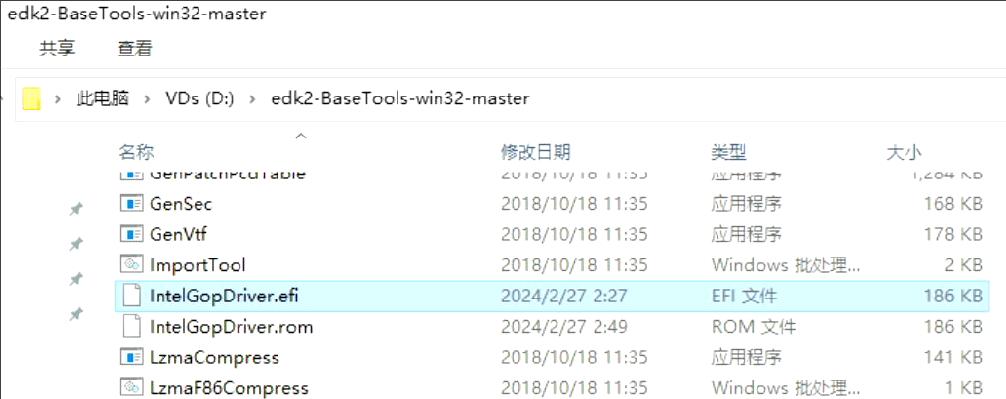
pve configuration
cd /etc/apt
cp sources.list sources.list.back
sed -i 's|^deb http://ftp.debian.org|deb https://mirrors.ustc.edu.cn|g' /etc/apt/sources.list
sed -i 's|^deb http://security.debian.org|deb https://mirrors.ustc.edu.cn/debian-security|g' /etc/apt/sources.list
sed -i 's|^deb https://enterprise.proxmox.com|deb https://mirrors.ustc.edu.cn|g' /etc/apt/sources.list.d/ceph.list
sed -i 's|enterprise|no-subscription|g' /etc/apt/sources.list.d/ceph.list
source /etc/os-release
echo "deb https://mirrors.ustc.edu.cn/proxmox/debian/pve $VERSION_CODENAME pve-no-subscription" > /etc/apt/sources.list.d/pve-no-subscription.list
cp /usr/share/perl5/PVE/APLInfo.pm /usr/share/perl5/PVE/APLInfo.pm_back
sed -i 's|http://download.proxmox.com|https://mirrors.ustc.edu.cn/proxmox|g' /usr/share/perl5/PVE/APLInfo.pm
mv /etc/apt/sources.list.d/pve-enterprise.list /root
添加概要信息:
wget -q -O /root/pve_source.tar.gz 'https://bbs.x86pi.cn/file/topic/2023-11-28/file/01ac88d7d2b840cb88c15cb5e19d4305b2.gz' && tar zxvf /root/pve_source.tar.gz && /root/./pve_source
Install vim:
apt install -y vim
edit the grub and blacklists:
# vim /etc/default/grub
GRUB_CMDLINE_LINUX_DEFAULT="quiet intel_iommu=on initcall_blacklist=sysfb_init"
# update-grub2
# vim /etc/modprobe.d/pve-blacklist.conf
blacklist nvidiafb
blacklist amdgpu
blacklist i915
blacklist snd_hda_intel
options vfio_iommu_type1 allow_unsafe_interrupts=1
# update-initramfs -u -k all
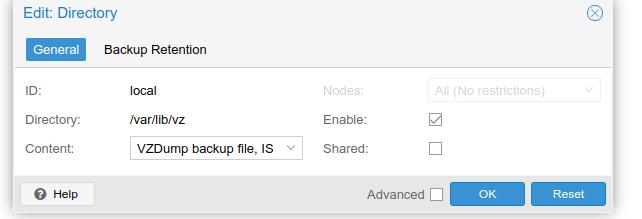
Get the pciids:
root@pve:~# lspci -D -nn | grep VGA
0000:00:02.0 VGA compatible controller [0300]: Intel Corporation Alder Lake-N [UHD Graphics] [8086:46d1]
root@pve:~# lspci -D -nn | grep Audio
0000:00:1f.3 Audio device [0403]: Intel Corporation Device [8086:54c8]
Prepare the rom files:
root@pve:~/igd-main# cp gen12_gop.rom gen12_igd.rom /usr/share/kvm/
root@pve:~/igd-main# pwd
/root/igd-main
# cp IntelGopDriver.rom /usr/share/kvm/
vm setup
Configuration:
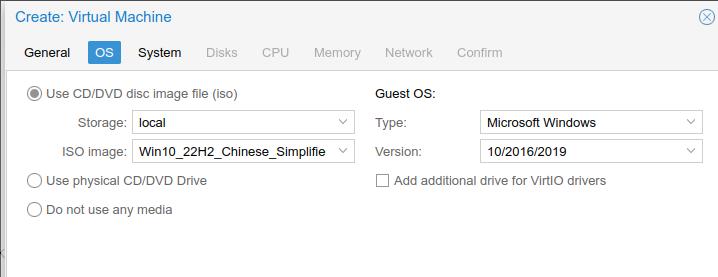
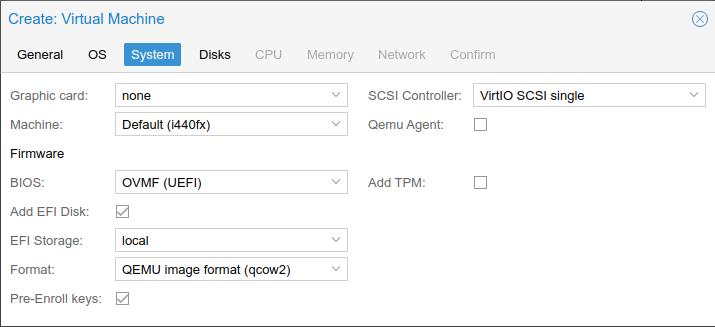
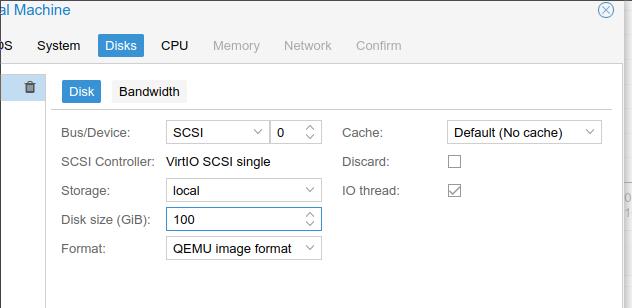


Hardware Adjust:
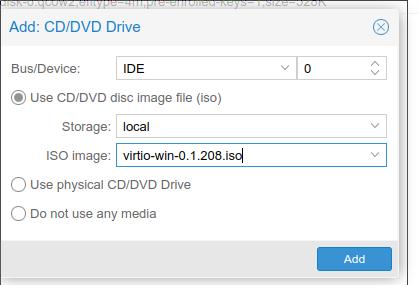
Add pci/usb devices:

qemu commands:
root 14422 1 99 12:04 ? 00:45:17 /usr/bin/kvm -id 100 -name win10,debug-threads=on -no-shutdown -chardev socket,id=qmp,path=/var/run/qemu-server/100.qmp,server=on,wait=off -mon chardev=qmp,mode=control -chardev socket,id=qmp-event,path=/var/run/qmeventd.sock,reconnect=5 -mon chardev=qmp-event,mode=control -pidfile /var/run/qemu-server/100.pid -daemonize -smbios type=1,uuid=b886e2ce-0caf-42a3-84db-d3568b369292 -drive if=pflash,unit=0,format=raw,readonly=on,file=/usr/share/pve-edk2-firmware//OVMF_CODE_4M.fd -drive if=pflash,unit=1,id=drive-efidisk0,format=qcow2,file=/var/lib/vz/images/100/vm-100-disk-0.qcow2 -smp 4,sockets=1,cores=4,maxcpus=4 -nodefaults -boot menu=on,strict=on,reboot-timeout=1000,splash=/usr/share/qemu-server/bootsplash.jpg -vga none -nographic -cpu host,hv_ipi,hv_relaxed,hv_reset,hv_runtime,hv_spinlocks=0x1fff,hv_stimer,hv_synic,hv_time,hv_vapic,hv_vpindex,+kvm_pv_eoi,+kvm_pv_unhalt -m 8192 -object iothread,id=iothread-virtioscsi0 -device pci-bridge,id=pci.1,chassis_nr=1,bus=pci.0,addr=0x1e -device pci-bridge,id=pci.2,chassis_nr=2,bus=pci.1,addr=0x1e -device pci-bridge,id=pci.3,chassis_nr=3,bus=pci.0,addr=0x5 -device vmgenid,guid=e489d935-fb57-482a-9c07-0a14cb77f1e7 -device piix3-usb-uhci,id=uhci,bus=pci.0,addr=0x1.0x2 -device qemu-xhci,p2=15,p3=15,id=xhci,bus=pci.1,addr=0x1b -device usb-tablet,id=tablet,bus=uhci.0,port=1 -device vfio-pci,host=0000:00:02.0,id=hostpci0,bus=pci.0,addr=0x2,romfile=/usr/share/kvm/gen12_igd.rom -device vfio-pci,host=0000:00:1f.3,id=hostpci1,bus=pci.0,addr=0x11,romfile=/usr/share/kvm/IntelGopDriver.rom -device usb-host,bus=xhci.0,port=1,hostbus=1,hostport=1,id=usb0 -device usb-host,bus=xhci.0,port=2,hostbus=1,hostport=4,id=usb1 -device virtio-balloon-pci,id=balloon0,bus=pci.0,addr=0x3,free-page-reporting=on -iscsi initiator-name=iqn.1993-08.org.debian:01:7462d45a788 -drive file=/var/lib/vz/template/iso/virtio-win-0.1.208.iso,if=none,id=drive-ide0,media=cdrom,aio=io_uring -device ide-cd,bus=ide.0,unit=0,drive=drive-ide0,id=ide0,bootindex=102 -drive file=/var/lib/vz/template/iso/Win10_22H2_Chinese_Simplified_x64.iso,if=none,id=drive-ide2,media=cdrom,aio=io_uring -device ide-cd,bus=ide.1,unit=0,drive=drive-ide2,id=ide2,bootindex=101 -device virtio-scsi-pci,id=virtioscsi0,bus=pci.3,addr=0x1,iothread=iothread-virtioscsi0 -drive file=/var/lib/vz/images/100/vm-100-disk-1.qcow2,if=none,id=drive-scsi0,format=qcow2,cache=none,aio=io_uring,detect-zeroes=on -device scsi-hd,bus=virtioscsi0.0,channel=0,scsi-id=0,lun=0,drive=drive-scsi0,id=scsi0,bootindex=100 -netdev type=tap,id=net0,ifname=tap100i0,script=/var/lib/qemu-server/pve-bridge,downscript=/var/lib/qemu-server/pve-bridgedown,vhost=on -device virtio-net-pci,mac=BC:24:11:33:3E:BB,netdev=net0,bus=pci.0,addr=0x12,id=net0,rx_queue_size=1024,tx_queue_size=256 -rtc driftfix=slew,base=localtime -machine hpet=off,type=pc-i440fx-8.1+pve0 -global kvm-pit.lost_tick_policy=discard -set device.hostpci0.addr=02.0 -set device.hostpci0.x-igd-gms=0x2 -set device.hostpci0.x-igd-opregion=on
Feb 26, 2024
TechnologyEdit the grub items:
# vim /etc/default/grub
......
GRUB_CMDLINE_LINUX_DEFAULT="amd_iommu=on iommu=pt kvm.ignore_msrs=1 video=efifb:off"
......
# update-grub2 && reboot
update the initramfs:
# vim /etc/initramfs-tools/modules
vfio
vfio_iommu_type1
vfio_pci
vfio_virqfd
# update-initramfs -u -k all
Download the nvflash, and them dump the vbios:
$ sudo ./nvflash --save vbios.rom
patch the vbios.rom:
Using an hex editor to open the vbios.rom(via bless vbios.rom):
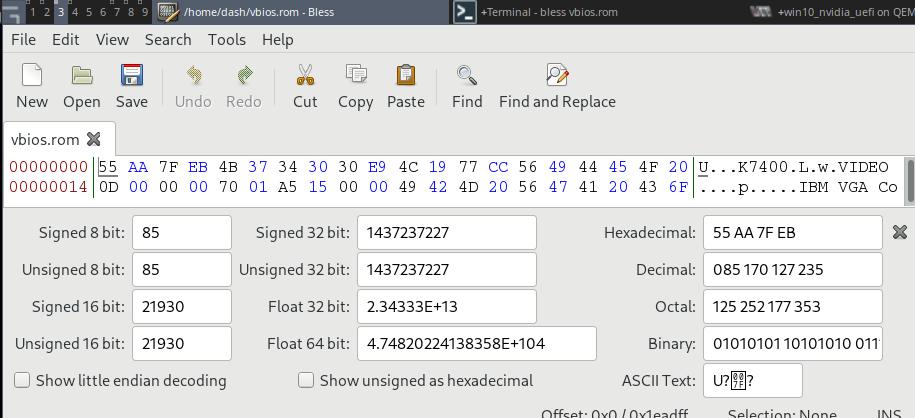
Search the text VIDEO, place your cursor before the first U before the VIDEO we just searched, and select everything before it, delete all.
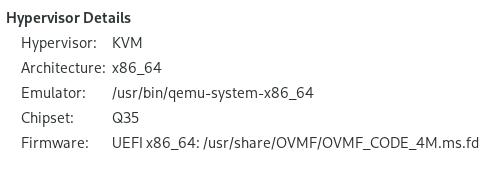
Select the pci vfio equipments:

romfile should be specified:

<rom file="/usr/share/OVMF/nvidia_vbios.rom"/>
Now remove all of the virtual gpu(qxl, virtio-gpu, etc), use nvidia card for boot up. You will get the nvidia card once you installed the nvidia device drivers.
Feb 22, 2024
Technology创建:
qemu-img create -f qcow2 testvirtio.qcow2 80G
挂载:
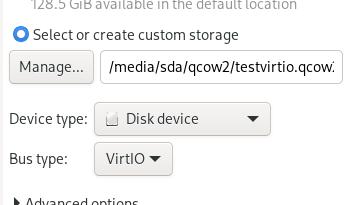
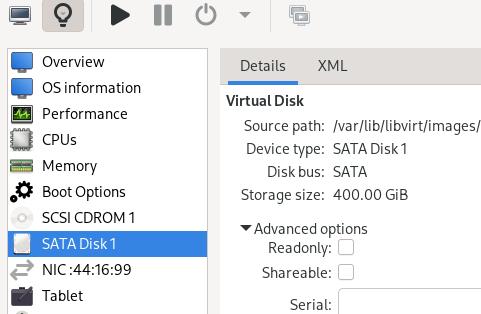
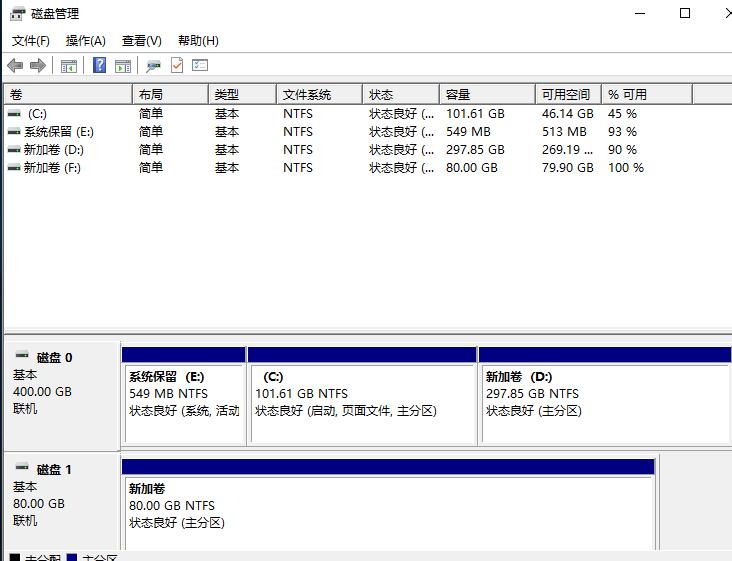
进入SATA启动的win10系统后, 磁盘管理中可看(磁盘1, 对应F盘):
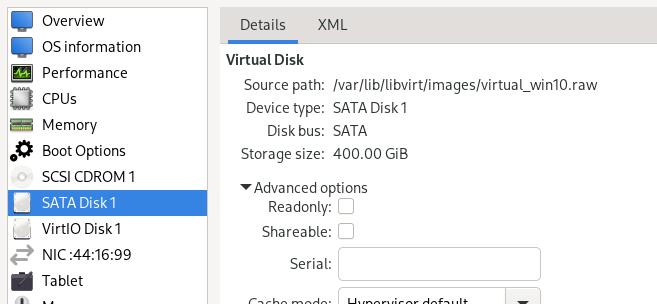
关机,将SATA盘切换为virtio.
切换前:
添加:
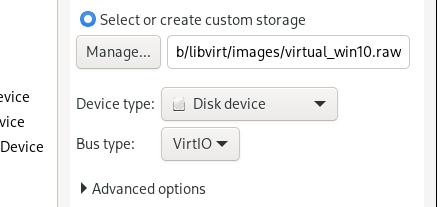
添加后:
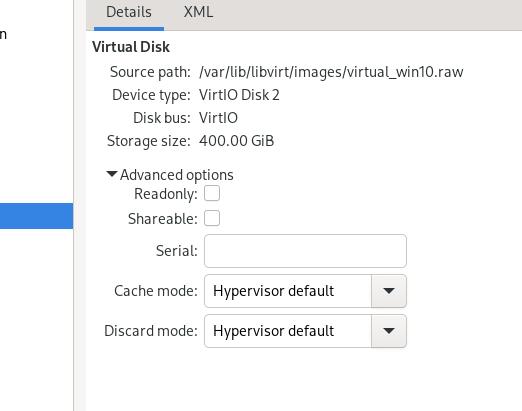
更换启动顺序:
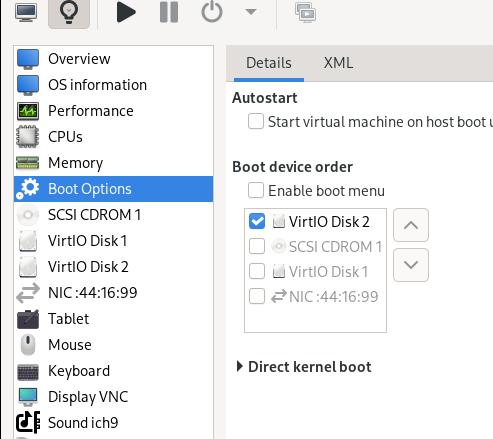
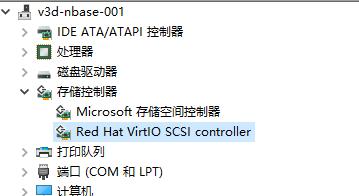
启动蓝屏:

设备管理器中确实有virtio的驱动,但是启动时切换会蓝屏:
Feb 22, 2024
Technology在XenServer虚机实例中,删除1中所示意的两个软件, 将C:\windows\system32\drivers\xen.sys删除或者转移目录:
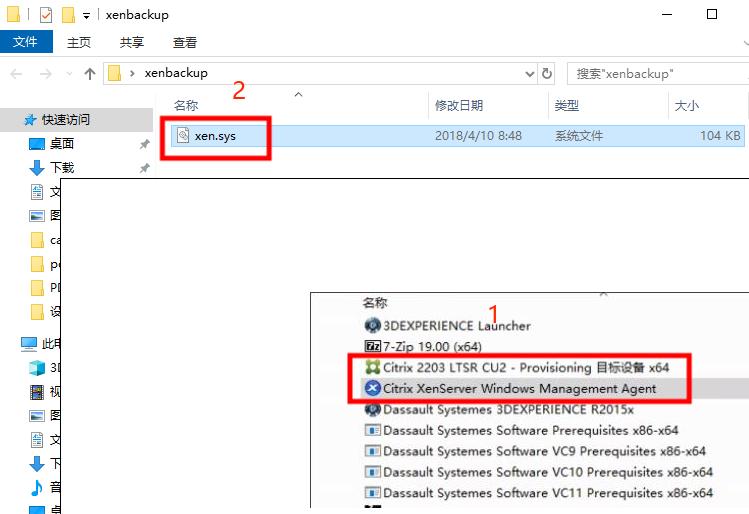
从Xencenter导出镜像文件, 可通过XenCenter或者命令行导出,导出格式为xva格式.
编译xva-img:
$ git clone https://github.com/eriklax/xva-img.git
$ cd xva-img/
$ sudo apt install -y cmake libxxhash-dev
$ cmake .
$ sudo make install
$ which xva-img
/usr/local/bin/xva-img
解压xva文件并进行转换:
$ mkdir win10 && cd win10 && tar xf ../20240222XXXXXXXXXXX.xva
$ cd ..
$ xva-img -p disk-export win10/Ref\:21/ virtual_win10.raw
使用导出的virtual_win10.raw文件启动Qemu虚机, 注意磁盘类型为SATA:
