Jan 15, 2016
TechnologyRecently I am busy with configurating the LXC networking in Cloudstack, so following is
how I understanding the vlan experiment on how to understand the
public/private/management networking in CloudStack.
Prerequisite
Prepare 2 virtual machine of CentOS6.7, each connected to a seperated networking.
Machine 1, dhcp, got 10.47.58.203. Named vlan1.
Machine 2, dhcp, got 10.47.58.214. Named vlan2.
Install Software
For easily configure 802.1Q vlan tagging networking in CentOS7, install following packages.
$ yum install vconfig
Vlan Configurating
Configure like following:
[root@localhost ~]# cat /etc/sysconfig/network-scripts/ifcfg-eth0
DEVICE="eth0"
#BOOTPROTO="dhcp"
BOOTPROTO="none"
NM_CONTROLLED="yes"
ONBOOT="yes"
TYPE="Ethernet"
[root@localhost ~]# cat /etc/sysconfig/network-scripts/ifcfg-eth0.100
DEVICE=eth0.100
ONBOOT=yes
HOTPLUG=no
BOOTPROTO=none
TYPE=Ethernet
VLAN=yes
IPADDR=192.168.42.11
NETMASK=255.255.255.0
In another machine, configure the eth0.100 as 192.168.42.12, after reboot, they could
be reached via this vlan tagging 100 address.
Jan 3, 2016
TechnologyInstall Veewee
First you should get rvm avaiable, then use rvm for install ruby-2.2.1:
Note: you should import gpg signature via commandline.
$ proxychains4 curl -k --insecure  -L https://get.rvm.io | bash -s stable --ruby
$ proxychains4 rvm install ruby-2.2.1
Install the veewee via:
$ proxychains4 gem install bundler
$ git clone https://github.com/jedi4ever/veewee.git
$ cd veewee
$ proxychains4 gem install i18n -v '0.7.0'
$ proxychains4 bundle install
After installation createing an alias for quickly refers to veewee:
$ alias veewee="bundle exec veewee version"
Bug-fix: for adding net/scp in the Gemfile:
$ vim Gemfile
.......
+ gem "net-scp"
gemspec
Install Vagrant
Since the vagrant provided via Ubuntu14.04 is pretty old, we have to download
it from vagrant’s official website and dpkg install it.
Install veewee plugins:
$ proxychains4 vagrant plugin install veewee
Create new definition
Create new definition via:
$ veewee vbox define awesome-ubuntu-server ubuntu-14.04-server-amd64
The basebox 'awesome-ubuntu-server' has been successfully created from the template
'ubuntu-14.04-server-amd64'
You can now edit the definition files stored in
/home/dash/Code/veewee/definitions/awesome-ubuntu-server or build the box with:
veewee vbox build 'awesome-ubuntu-server' --workdir=/home/dash/Code/veewee
Now start building:
$ veewee vbox build awesome-ubuntu-server
Speed-up Building
Use Local Installation ISO:
$ vim definitions/awesome-ubuntu-server/definition.rb
+   :iso_src => "http://192.168.0.79/iso/ubuntu-14.04-server-amd64.iso",
$ vim ./lib/veewee/provider/virtualbox/box/helper/guest_additions.rb
+          url="http://192.168.0.79/iso/#{isofile}"
Force ruby for using local installation:
$ vim definitions/awesome-ubuntu-server/ruby.sh
......
wget http://192.168.0.79/iso/veewee/ruby-$RUBY_VERSION.tar.gz
tar xvzf ruby-$RUBY_VERSION.tar.gz
......
RUBYGEMS_VERSION=2.1.10
wget http://192.168.0.79/iso/veewee/rubygems-$RUBYGEMS_VERSION.tgz
File Position
The generated image position is listed in:
➜  awesome-ubuntu-server  pwd
/home/dash/VirtualBox VMs/awesome-ubuntu-server
➜  awesome-ubuntu-server  du -hs *
3.2G    awesome-ubuntu-server1.vdi
8.0K    awesome-ubuntu-server.vbox
8.0K    awesome-ubuntu-server.vbox-prev
68K     Logs
Dec 30, 2015
TechnologyInstalling and configurating steps:
$ git clone https://github.com/balint256/gr-baz
$ sudo apt-get install libboost-all-dev gr-osmosdr gnuradio-dev liblog4cpp5-dev
$ cd gr-baz
$ mkdir build
$ cd build
$ cmake ..
$ make && sudo make install
Install rtl-sdr:
$ git clone git://git.osmocom.org/rtl-sdr.git
$ cd rtl-sdr
$ mkdir build
$ cd build/
$ cmake ../ -DINSTALL_UDEV_RULES=ON
$ sudo make install
$ sudo ldconfig
Now you could use sudo rtl_eeprom for probing the rtl equipments.
$ sudo modprobe -r dvb_usb_rtl28xxu
$ sudo apt-get install -y gqrx-sdr
Using gqrx could scan the frequency and get the radio stations.
Dec 30, 2015
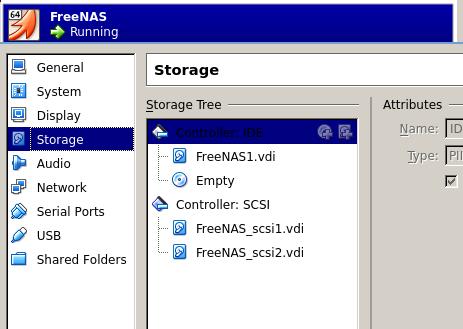
TechnologyUse Virtualbox for integrating FreeNAS.
Add Disks
Add a new SCSI controller and two disks:
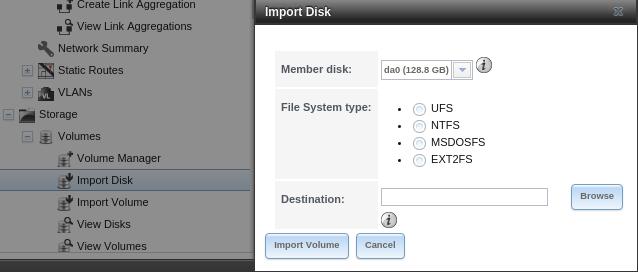
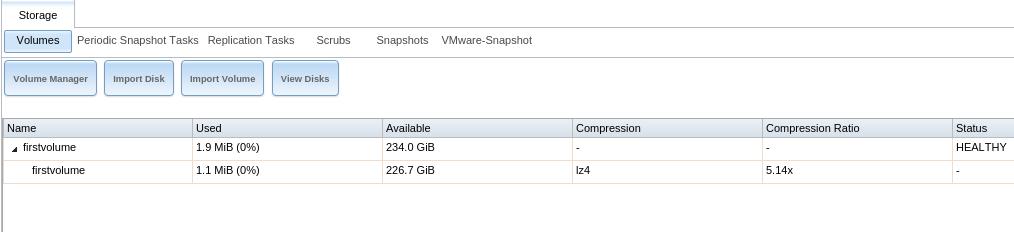
Then in FreeNAS, import this new disks via:
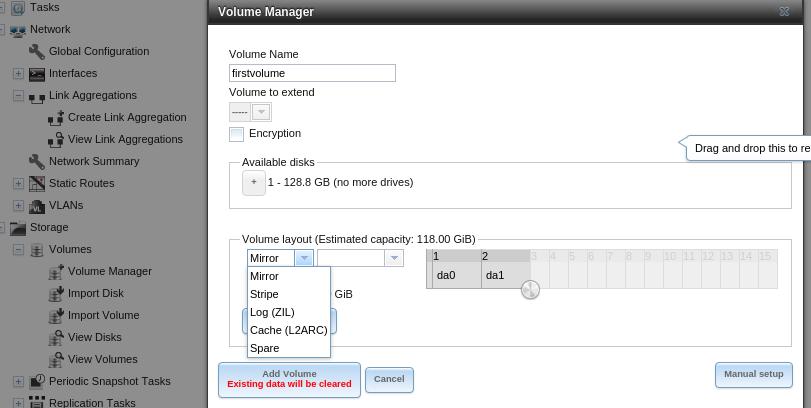
Volume Manager
Add volume of added 2 disks:
Continue:
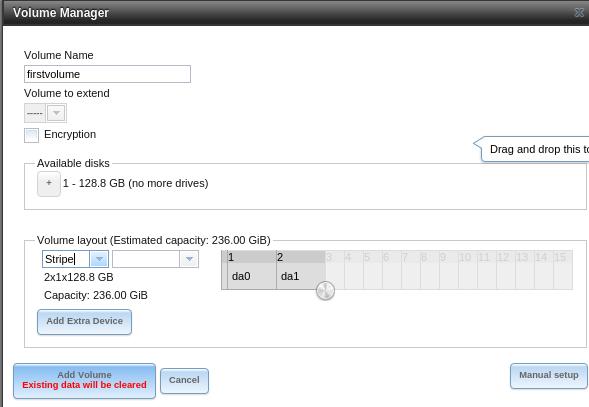
After added:
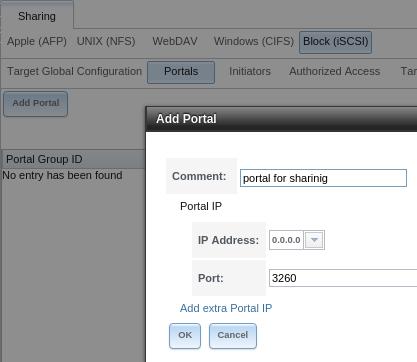
ISCSI Sharing
Create new sharing:

Add portal:
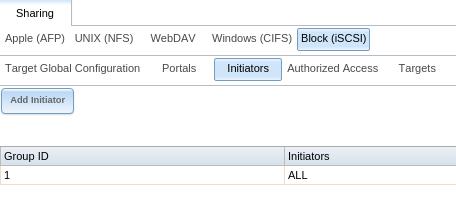
Add Initiator:
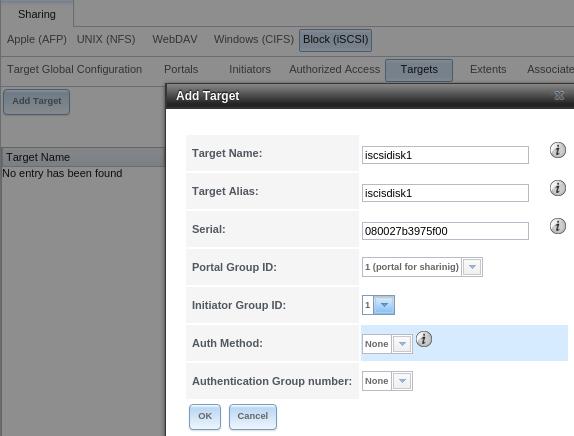
Add Target:
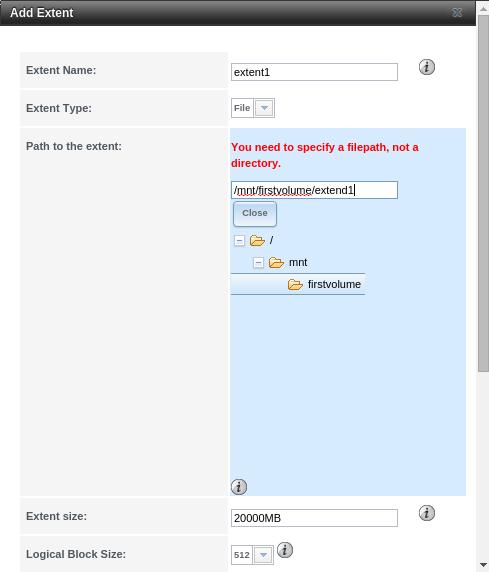
Add Extent:
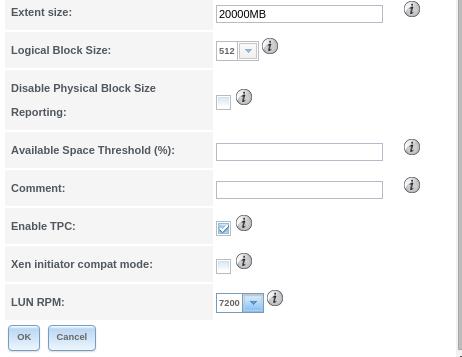
Extend options:
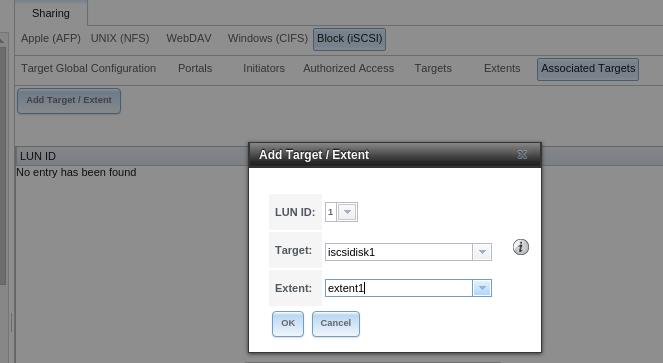
Associate:
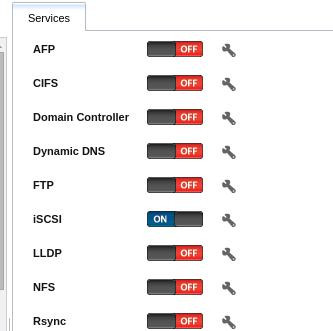
Enable the iscsi service:
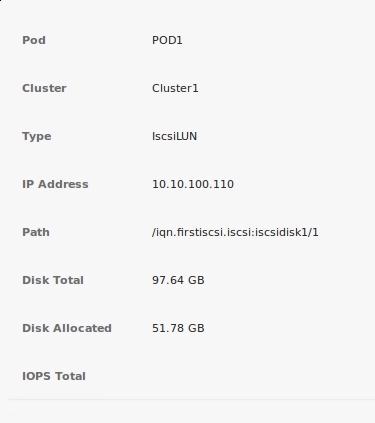
Integration
Integaration with cloudstack would be looked like following:
Dec 28, 2015
TechnologyUsing NFS for testing.
dash@agent:/sdb4$ echo "iops 5"
iops 5
dash@agent:/sdb4$ time cp Kinetis\ SDK\ 1.3.0\ Mainline\ -\ Windows.exe /mnt/

real    1m1.908s
user    0m0.002s
sys     0m0.156s
dash@agent:/sdb4$ time cp Kinetis\ SDK\ 1.3.0\ Mainline\ -\ Windows.exe /mnt/2.exe

real    0m59.375s
user    0m0.001s
sys     0m0.154s
dash@agent:/sdb4$ rm -f /mnt/
2.exe                                     Kinetis SDK 1.3.0 Mainline - Windows.exe
dash@agent:/sdb4$ rm -f /mnt/*
dash@agent:/sdb4$ echo "iops 50"
iops 50
dash@agent:/sdb4$ time cp Kinetis\ SDK\ 1.3.0\ Mainline\ -\ Windows.exe /mnt/2.exe

real    0m29.177s
user    0m0.001s
sys     0m0.144s
dash@agent:/sdb4$ time cp Kinetis\ SDK\ 1.3.0\ Mainline\ -\ Windows.exe /mnt/

real    0m29.798s
user    0m0.002s
sys     0m0.146s
dash@agent:/sdb4$ rm -f /mnt/*
dash@agent:/sdb4$ echo "iops 2"
iops 2
dash@agent:/sdb4$ time cp Kinetis\ SDK\ 1.3.0\ Mainline\ -\ Windows.exe /mnt/2.exe

real    2m26.402s
user    0m0.002s
sys     0m0.151s
dash@agent:/sdb4$ time cp Kinetis\ SDK\ 1.3.0\ Mainline\ -\ Windows.exe /mnt/

real    2m24.976s
user    0m0.002s
sys     0m0.142s
