May 4, 2016
LinuxTips1. Detach Running Tasks
Ctrl+Z for suspend the tasks, then bg it, now you could use disown %1 for
detaching the running process.
Next time you login, you will see this background task is also running.
2. Installation of Cobbler
Shell Scripts:
https://gist.github.com/luisbolson/1d0dc42976d2468171d0
3. yum groups
http://ramblings.narrabilis.com/creating-a-yum-repository-repo-and-creating-a-yum-group-to-install-kickstart
4. rvm issue
rvm met openssl.so (LoadError), could be solved via following steps.
$  curl https://github.com/ruby/ruby/commit/801e1fe46d83c856844ba18ae4751478c59af0d1.diff > openssl.patch\n
$  rvm install 1.9.3 --with-openssl-dir=$HOME/.rvm/usr --patch ./openssl.patch
5. Get the name of rpm packages
Only print the name of the rpm package:
# rpm -qp --queryformat '%{NAME}\n' *.rpm>package.list
6. xargs tips
Example:
# find . -type f -exec grep -ilR "MY PATTERN" {} \; | xargs -I % cp % /dest/dir/
For me, I find out all of the packges in cache file, and copy them to another position:
$ find . | \grep rpm$ | xargs -I % cp % /home/dash/rpms
7. Make local repo
From the stackoverflow answers.
Yes as you've described it, it sounds doable. I think I would be inclined to do the
following steps.

Setup directories
$ mkdir {Desktop,Desktop_Platform,X_Window_System,Fonts}
Download RPMs
Then run these types of commands to download the RPMs for the given groups:

$ repoquery --qf=%{name} -g --list --grouppkgs=all "Fonts" | \
     xargs -I{} repotrack -a x86_64 -p Fonts/ {}
You can wrap it in a for loop too:

$ for i in "Desktop" "Desktop_Platform" "X_Window_System" "Fonts";do
    repoquery --qf=%{name} -g --list --grouppkgs=all "$i" | \
       xargs -I{} repotrack -a x86_64 -p $i/ {};
  done
This will go through each group and download the packages into their respective
directories.

Re-installation
Then use the command as you've described:

$ yum --nogpgcheck localinstall {Desktop,Desktop_Platform,X_Window_System,Fonts}/*.rpm
8. Simple Screen Recorder
Ubuntu:
sudo add-apt-repository ppa:maarten-baert/simplescreenrecorder
sudo apt-get update
sudo apt-get install simplescreenrecorder
# if you want to record 32-bit OpenGL applications on a 64-bit system:
sudo apt-get install simplescreenrecorder-lib:i386
ArchLinux:
$ sudo pacman -S simplescreenrecorder
9. Convert virtualbox hd to qcow2
VBoxManage clonehd /home/dash/VirtualBox\ VMs/ansible-cobbler_cobbler-ubuntu_1462410925173_15793/packer-virtualbox-iso-1454031074-disk1.vmdk /home/dash/output.img --format raw && qemu-img convert -f raw /home/dash/output.img -O qcow2 /home/dash/ansible-cobbler.qcow2
10. Ansible issue
The isssue is:
ansible: ERROR: become is not a legal parameter in an Ansible Playbook
Solved via upgrading to the newest version of ansible:
$ sudo apt-get install software-properties-common
$ sudo apt-add-repository ppa:ansible/ansible
$ sudo apt-get update
$ sudo apt-get install ansible
Using the newest ansible you could aoid this error.
11. Create customized lxc image
http://unix.stackexchange.com/questions/186638/how-to-make-a-local-template-for-a-linux-container-and-point-to-that
https://insights.ubuntu.com/2015/03/20/installing-lxd-and-the-command-line-tool/
https://www.stgraber.org/2016/03/30/lxd-2-0-image-management-512/
https://insights.ubuntu.com/2016/04/01/lxd-2-0-image-management-512/
12. Changing to eth0 in Ubuntu
Modify the name of enps* to eth0/1/2/3/4/, via following steps:
try this: Edit your /etc/default/grub. Change the line from

GRUB_CMDLINE_LINUX=""
to

GRUB_CMDLINE_LINUX="net.ifnames=0 biosdevname=0"
and, finally run:

# update-grub
If you runs the CentOS/RHEL Systems, you could use following commands for
updating your grub configuration:
# grub2-mkconfig -o /boot/grub2/grub.cfg
13. MAAS Syncing PXE File
https://maas.ubuntu.com/docs/sstreams-mirror.html
http://ytooyama.hatenadiary.jp/entry/2016/05/11/002532
For building our own MAAS image:
http://askubuntu.com/questions/744966/how-do-you-install-the-maas-image-builder-on-14-04-lts
14. Vagrant For MAAS
https://github.com/battlemidget/vagrant-maas
https://github.com/battlemidget/vagrant-maas-in-a-box/blob/master/Vagrantfile
15. Convert vm to physical
Thus you could enjoy packer building the physical machine! :)
cd /media/wherever-the-image-is/

# for VMWare
sudo apt-get install qemu-kvm
qemu-img convert your-vmware-disk.vmdk -O raw disk.img

# For VirtualBox
VBoxManage internalcommands converttoraw your-virtualbox-disk.vdi /dev/sdX
16. Generate Random Seed
Error message is Please do some other work to give the OS a chance to collect more entropy!
$ sudo aptitude install haveged
17. DEB Repository in Cobbler
https://github.com/cobbler/cobbler/wiki/Creating-custom-apt-repositories-in-centos-or-el-based-cobbler
Trouble-Shooting:
https://github.com/cobbler/cobbler/issues/1530
18. Manually Install Mate Desktop
echo "debconf debconf/frontend select noninteractive" | sudo debconf-set-selections
apt-get --allow-unauthenticated update -y
apt-get --allow-unauthenticated upgrade -y
apt-get --allow-unauthenticated install -y build-essential
apt-get --allow-unauthenticated install -y ubuntu-mate-desktop
apt-get --allow-unauthenticated install -y vim
apt-get --allow-unauthenticated install -y chromium-browser
apt-get --allow-unauthenticated install -y meld vim-gtk
apt-get --allow-unauthenticated install -y evince
sudo apt-get --allow-unauthenticated install -y language-pack-zh-hans language-pack-zh-hans-base language-pack-gnome-zh-hans language-pack-gnome-zh-hans-base
sudo apt-get --allow-unauthenticated install -y `check-language-support -l zh`
sudo localectl set-locale LANG=zh_CN.UTF-8
# TW/HK language support
sudo apt-get --allow-unauthenticated install -y language-pack-zh-hant language-pack-zh-hant-base language-pack-gnome-zh-hant language-pack-gnome-zh-hant-base
sudo apt-get --allow-unauthenticated install -y `check-language-support -l zh`
apt-get --allow-unauthenticated install -y fcitx
apt-get --allow-unauthenticated install -y fcitx-table-wubi fcitx-table-wubi-large
apt-get --allow-unauthenticated install -y fcitx-googlepinyin
apt-get --allow-unauthenticated install -y gimp
apt-get --allow-unauthenticated install -y ibus-pinyin
apt-get --allow-unauthenticated install -y thunderbird-locale-en-us mythes-en-au hunspell-en-gb thunderbird-locale-en-gb fonts-arphic-ukai wbritish fcitx-sunpinyin openoffice.org-hyphenation language-pack-gnome-en hunspell-en-za fcitx-chewing fcitx-table-cangjie gimp-help-en language-pack-en mythes-en-us thunderbird-locale-en fcitx-module-cloudpinyin libreoffice-help-en-us firefox-locale-en libreoffice-help-en-gb fonts-arphic-uming hyphen-en-gb libreoffice-l10n-en-za fcitx-ui-qimpanel hunspell-en-au libreoffice-l10n-en-gb hyphen-en-us hunspell-en-ca
apt-get --allow-unauthenticated install -y zsh
apt-get --allow-unauthenticated install -y fonts-wqy-zenhei fonts-wqy-microhei ttf-wqy-microhei  ttf-wqy-zenhei  xfonts-wqy
apt-get --allow-unauthenticated install -y eclipse
apt-get --allow-unauthenticated install -y gpicview
apt-get --allow-unauthenticated install -y scrot
apt-get --allow-unauthenticated install -y byobu
apt-get --allow-unauthenticated install -y subversion git
apt-get --allow-unauthenticated install -y kdiff3
apt-get --allow-unauthenticated install -y docker
Final Version should be:
echo "debconf debconf/frontend select noninteractive" | sudo debconf-set-selections
unset DEBIAN_HAS_FRONTEND DEBIAN_FRONTEND DEBCONF_REDIR DEBCONF_OLD_FD_BASE
export DEBIAN_FRONTEND=noninteractive
apt-get update --assume-yes
apt-get dist-upgrade --assume-yes
apt-get install --assume-yes vim build-essential ubuntu-mate-desktop chromium-browser meld vim-gtk evince language-pack-zh-hans language-pack-zh-hans-base language-pack-gnome-zh-hans language-pack-gnome-zh-hans-base language-pack-zh-hant language-pack-zh-hant-base language-pack-gnome-zh-hant language-pack-gnome-zh-hant-base fcitx fcitx-table-wubi fcitx-table-wubi-large fcitx-googlepinyin gimp ibus-pinyin thunderbird-locale-en-us mythes-en-au hunspell-en-gb thunderbird-locale-en-gb fonts-arphic-ukai wbritish fcitx-sunpinyin openoffice.org-hyphenation language-pack-gnome-en hunspell-en-za fcitx-chewing fcitx-table-cangjie gimp-help-en language-pack-en mythes-en-us thunderbird-locale-en fcitx-module-cloudpinyin libreoffice-help-en-us firefox-locale-en libreoffice-help-en-gb fonts-arphic-uming hyphen-en-gb libreoffice-l10n-en-za fcitx-ui-qimpanel hunspell-en-au libreoffice-l10n-en-gb hyphen-en-us hunspell-en-ca zsh fonts-wqy-zenhei fonts-wqy-microhei ttf-wqy-microhei  ttf-wqy-zenhei  xfonts-wqy eclipse gpicview scrot byobu subversion git kdiff3 docker
apt-get install --assume-yes  `check-language-support -l zh`
19. Use rync for resume tranferring
Command:
$ rsync -P -e ssh remoteuser@remotehost:/remote/path /local/path
20. RackHD Howto
http://dojoblog.emc.com/rackhd-cpi/setting-up-rackhd/
21. sync repo
vagrant@ubuntu-1404:/etc/apt$ cat /var/mirrors/ubuntu/14.04/var/postmirror.sh
#!/bin/sh -x
# the udebs script gets the actual files we need
#/mnt/repo/apt-mirror/var/udebs.sh
# A quick apt directory structure primer:
# an apt server (e.g. archive.ubuntu.com) contains repositories (e.g. trusty-backports),
# which contain archives (e.g. multiverse), which contain directories
# a complete example - http://archive.ubuntu.com/ubuntu/dists/trusty-backports/multiverse/debian-installer/
# With this in mind, we create bash 'arrays' of the structure:
# server we're syncing against
#MIRROR="cn.archive.ubuntu.com"
MIRROR="archive.ubuntu.com"
# repositories we're mirroring
#REPOS="trusty trusty-updates trusty-security trusty-proposed trusty-backports"
REPOS="trusty"
# archives in repositories
#ARCHIVES="main multiverse restricted universe"
ARCHIVES="main"
# installer location inside archive
#DIRECTORIES="debian-installer dist-upgrader-all installer-amd64 installer-i386"
DIRECTORIES="debian-installer installer-amd64"
#where we're storing it locally
LOCALDIR="/var/mirrors/ubuntu/14.04/mirror/mirrors.aliyun.com"
#LOCALDIR="/mnt/repo/apt-mirror/mirror/archive.ubuntu.com"
for REPO in $REPOS; do
for ARCHIVE in $ARCHIVES; do
for DIRECTORY in $DIRECTORIES;do
# create directory structure
if [ ! -e "$LOCALDIR/ubuntu/dists/$REPO/$ARCHIVE/$DIRECTORY" ]; then
mkdir -p "$LOCALDIR/ubuntu/dists/$REPO/$ARCHIVE/$DIRECTORY"
fi
# do the sync
rsync --recursive --times --links --hard-links --delete --delete-after \
rsync://$MIRROR/ubuntu/dists/$REPO/$ARCHIVE/$DIRECTORY/ $LOCALDIR/ubuntu/dists/$REPO/$ARCHIVE/$DIRECTORY
done
done
done
22. Vagrantfile for adding more disks
To be done.
23. rvm install issue
With openssl patched you can install rvm successfully:
$ wget https://github.com/ruby/ruby/commit/801e1fe46d83c856844ba18ae4751478c59af0d1.diff -O openssl.patch
$ rvm install --patch ./openssl.patch 2.2.3
http://www.tecmint.com/linux-cpu-load-stress-test-with-stress-ng-tool/2/
25. X11 Forwarding Issue
Problem:
X11 forwarding request failed on channel 0
Solved via:
# pacman -S xorg-xauth
# vim /etc/ssh/sshd_config
AddressFamily any
X11Forwarding yes
Then restart the sshd daemon, you will get X11 on ssh forwarding enabled.
If you are under CentOS, then install the package xorg-x11-xauth.
Add new user clouder:
# useradd -d /home/clouder/ clouder
# chown -R clouder:clouder /home/clouder/
# usermod -aG kvm clouder
# usermod -aG libvirt clouder
polkit configuration:
# vim /etc/polkit-1/rules.d/50-libvirt.rules
/* Allow users in kvm group to manage the libvirt
daemon without authentication */
polkit.addRule(function(action, subject) {
    if (action.id == "org.libvirt.unix.manage" &&
        subject.isInGroup("kvm")) {
            return polkit.Result.YES;
    }
});
Install following packages:
# pacman -Syu ebtables dnsmasq
Open nested kvm.
26. Hack into system
http://null-byte.wonderhowto.com/how-to/hack-like-pro-hack-shellshock-vulnerability-0157651/
27. Quickly setup graphite and grafana
On ArchLinux, do following:
$ mkdir -p /root/data/graphite/storage/whisper/
$ sudo docker run -d \
  --name graphite \
  -p 8080:80 \
  -p 2003:2003 \
  -v /local/path/to/.htpasswd:/etc/nginx/.htpasswd \
  -v /root/data/graphite/storage/whisper:/opt/graphite/storage/whisper \
  sitespeedio/graphite
Now your graphite runs OK, default username/password is guest/guest.
Continue setup the docker container for grafana:
$ docker run -i -p 3000:3000 grafana/grafana
Or, setup our own persistent storage via:
$ mkdir -p /root/data/grafana/
$ chmod 777 -R /root/data/grafana/
$ docker run -d -v /root/data/grafana:/var/lib/grafana --name grafana-storage busybox:latest
$ docker run  -d -p 3000:3000 --name=grafana --volumes-from grafana-storage grafana/grafana
$ docker logs grafana
The correct way for running grfafana via following:
# docker run -d -p 3000:3000 --name=grafana -v /root/data/grafana:/var/lib/grafana grafana/grafana
28. docker-enter issue
If you met importenv: not found issue, do following to let docker-enter running:
# docker pull jpetazzo/nsenter
# docker run --rm -v /usr/local/bin:/target jpetazzo/nsenter
# docker-enter <container_name>
29. Docker-Collectd
# docker run -d --net=host --privileged -v /:/hostfs:ro --name=collectd -e HOST_NAME=localhost -e \
GRAPHITE_HOST=192.168.1.79 andreasjansson/collectd-write-graphite
30. For using bridged vagrant-libvirt
An example Vagrantfile is listed as following , notice it’s using ovsbr0.
# -*- mode: ruby -*-
# vi: set ft=ruby :

############### Vagrant Configuration Here #############
Vagrant.configure(2) do |config|

  # vagrant issues #1673..fixes hang with configure_networks
  config.ssh.shell = "bash -c 'BASH_ENV=/etc/profile exec bash'"
  config.ssh.username = 'vagrant'
  config.ssh.password = 'vagrant'
  config.ssh.insert_key = 'true'
  config.vm.provider :libvirt do |domain|
    domain.nic_model_type = 'e1000'
    domain.memory = 384
    domain.nested = true
    domain.cpu_mode = 'host-passthrough'
  end

  # bridge node.
  # Add one networking, modify hostname, define memory, CPU cores.
  config.vm.define :bridge do |bridge|
    bridge.vm.box = "csmgmtv4"
    bridge.vm.hostname = "bridgenode"
    bridge.vm.network :public_network,
	:dev => "ovsbr0",
	:mode => "bridge",
	:type => "bridge",
	:ip => "192.168.178.2",
	:ovs => "true"
    bridge.vm.provider :libvirt do |domain|
      domain.storage :file, :size => '100G'
      domain.memory = 1024
      domain.cpus = 1
      domain.nested = true
      domain.disk_bus = 'virtio'
      domain.nic_model_type = 'virtio'
      domain.volume_cache = 'writeback'
    end
  end
end
###31. Using VPN in CloudStack
https://portal.redbridge.se/faq/getting-started/accessing-your-instance-from-the-outside/
https://blog.remibergsma.com/2012/11/18/securely-connect-an-advanced-private-cloudstack-network-by-using-a-vlan-aware-switch-and-a-basic-vpn-device/
http://www.furorteutonicus.eu/2013/08/04/enabling-host-guest-networking-with-kvm-macvlan-and-macvtap/
32. python issue(easy_install)
Solved via:
$ wget https://bootstrap.pypa.io/ez_setup.py -O - | python
33. VPN Over ssh
Established via:
$ sudo pppd updetach noauth silent nodeflate pty "/usr/bin/ssh root@192.168.1.79 \
/usr/bin/pppd nodetach notty noauth" ipparam vpn 10.0.8.1:10.0.8.2
34. X Windows for normal user
X Window for normal user
➜ ~ chmod u+s /usr/bin/Xorg
35. Chromium Flash
Install it via:
$ proxychains4 yaourt chromium-pepper-flash
Then enable it in chrome://plugins.
36. JunOS Issue
http://www.juniper.net/techpubs/en_US/junos-ansible1.0/topics/example/junos-ansible-playbooks-device-configuring.html
https://ittechnologist.wordpress.com/2015/08/23/use-vagrant-with-juniper-junos-vms-on-ubuntu/
https://atlas.hashicorp.com/juniper
37. hugo materials
http://dongjian.github.io/post/howtobuildablog/
http://bling.github.io/blog/2015/12/31/migrating-from-jekyll-octopress-to-hugo/
https://parsiya.net/blog/2016-02-02-from-octopress-to-hugo/
http://nathanleclaire.com/blog/2014/12/22/migrating-to-hugo-from-octopress/
38. awk
Some tricks on awk:
$ document_keywords="categories: ["Technology"]
$ echo $document_keywords | awk '{
for(i=2;i<=NF;i++){if(i!=NF){$i="\""$i"\""","}else{$i="\""$i"\""}}}1'
39. sed ways
Using sed for switching from octopress to hugo:
$  cat edit.sh
    #!/bin/bash
    for i in `ls ./*.markdown`
    do
    	# Generate the modified result, like categories: ["Technology"]
    	replaceline=`grep -i "categories: ["Technology"]
    '{for(i=2;i<=NF;i++){if(i!=NF){$i="\""$i"\""","}else{$i="\""$i"\""}}}1'`
    	sed -i "2s|.*|$replaceline|" $i
    done
$ sed -i '2s/\(:[[:blank:]]*\)\(.*\)/\1[\2]/' *.markdown
40. Gnome-terminal go to the same directory
Added following definition(this is a bug)
$ vim ~/.zshrc
. /etc/profile.d/vte.sh
41. asoundconf
Since I used GigaByte Brix for working, the alsasound should be configured.
Default card is via HDMI, but I want to use PCH. Following are the steps:
$ yaourt asoundconf
$ asoundconf list
Names of available sound cards:
HDMI
PCH
$ asoundconf set-default-card PCH
Now you could enjoy the PCH output.
42. OCR under Linux
Using tesseract:
$ convert beforeconvert.jpg -auto-level -compress none converted.tiff
$ sudo pacman -S tesseract tesseract-data-eng
$ tesseract converted.tiff myoutput
The above commands first convert the jpg to tiff, then install tesseract and its
language pack, then we could recoginze the text out of the tiff picture.
43. Vagrant Provision With Shell Scripts
Configuration for the Vagrantfile:
Vagrant.configure(2) do |config|

  config.ssh.shell = "bash -c 'BASH_ENV=/etc/profile exec bash'"
  config.vm.provision :shell, path: "bootstrap.sh"
The bootstrap.sh configuration:
#!/usr/bin/env bash
# Use the proxy for apt-get
sudo echo 'Acquire::http::Proxy
"http://192.168.1.69:3142";'>/etc/apt/apt.conf.d/01proxy
# Replace the repository
sudo sed -i 's/security.ubuntu.com/mirrors.aliyun.com/g' /etc/apt/sources.list
sudo sed -i 's/us.archive.ubuntu.com/mirrors.aliyun.com/g' /etc/apt/sources.list
sudo apt-get -y update
sudo apt-get -y upgrade
44. Python OCR Web Appliation
https://realpython.com/blog/python/setting-up-a-simple-ocr-server/
45. Jenkins user priviledge
Run jenkins as the user “johndoe”:
Let's say the user you want is called "johndoe" and it has an userid=2000 and
groupid=2004 in your box, do this:

1. Edit /etc/password

jenkins:x:2000:2004::/var/lib/jenkins:/bin/bash

2. Change permissions so they reflect the new ID

chown jenkins:jenkins -Rv /var/cache/jenkins/
chown -Rv jenkins:jenkins /var/lib/jenkins/
46. Disable auto detect Ethernet Name
On Ubuntu16.04:
Try this: Edit your /etc/default/grub. Change the line from

GRUB_CMDLINE_LINUX=""
to

GRUB_CMDLINE_LINUX="net.ifnames=0 biosdevname=0"
and, finally run:

# update-grub
as root, and reboot your system.
47. CentOS Network issue
eth0 works but eth1/2/3/4 failed, because those SB didn’t enable NetworkManager
Service!
$ sudo systemctl enable NetworkManager.service
48. Vagrant/Ansible
https://www.codementor.io/development-process/tutorial/wrapping-lamp-project-into-vagrant-with-ansible
49. Install vagrant-libvirt in ArchLinux
Via following command:
$ CONFIGURE_ARGS='with-ldflags=-L/opt/vagrant/embedded/lib with-libvirt-include=/usr/include/libvirt with-libvirt-lib=/usr/lib' \
  GEM_HOME=~/.vagrant.d/gems GEM_PATH=$GEM_HOME:/opt/vagrant/embedded/gems PATH=/opt/vagrant/embedded/bin:$PATH \
  vagrant plugin install vagrant-libvirt
Fix bug:
export PATH=/opt/vagrant/embedded/bin:$PATH
export GEM_HOME=~/.vagrant.d/gems
export GEM_PATH=$GEM_HOME:/opt/vagrant/embedded/gems
gem uninstall ruby-libvirt
sudo mv /opt/vagrant/embedded/lib/libcurl.so{,.backup}
sudo mv /opt/vagrant/embedded/lib/libcurl.so.4{,.backup}
sudo mv /opt/vagrant/embedded/lib/libcurl.so.4.4.0{,.backup}
sudo mv /opt/vagrant/embedded/lib/pkgconfig/libcurl.pc{,.backup}
gem source -r https://rubygems.org
gem source -a http://mirrors.aliyun.com/rubygems
gem install ruby-libvirt
sudo mv /opt/vagrant/embedded/lib/libcurl.so{.backup,}
sudo mv /opt/vagrant/embedded/lib/libcurl.so.4{.backup,}
sudo mv /opt/vagrant/embedded/lib/libcurl.so.4.4.0{.backup,}
sudo mv /opt/vagrant/embedded/lib/pkgconfig/libcurl.pc{.backup,}
50. update-ca-trust
Using update-ca-trust could solve curl’s CA ISSUE.
51. Squid quickly
Install and run squid via:
docker run --name squid -d --restart=always \
  --publish 3128:3128 \
  --volume /srv/docker/squid/cache:/var/spool/squid3 \
  sameersbn/squid:3.3.8-16
52. Installing Haroopad On CentOS
URL:
http://www.bonashen.com/post/artifice/20140805-install-haroopad-on-fedora-20-64bit
Switching keystroke.
hello! first install the xentools of your linux vm, then in the tools of xencenter hit
options , go to the console, change the keyboard shortcut for the fullscreen of vm from
ctrl alt to f12. then you can use the ctrl alt f1 to launch the console of your vm
linux
54. Delete sr in XenServer
Some tips, may be indentified later:
   15  service xapi restart
   16  exit
   17  xe list
   18  xe sr list
   19  xe sr-list
   20  xe pif 36be98fc-e046-44bf-aaa9-77e7c1f228b5
   21  xe pif-list sr-uuid=36be98fc-e046-44bf-aaa9-77e7c1f228b5
   22  xe pif-list sr_uuid=36be98fc-e046-44bf-aaa9-77e7c1f228b5
   23  xe pif-list sr-uuid=36be98fc-e046-44bf-aaa9-77e7c1f228b5
   24  xe pif-list help
   25  xe pif-list
   26  help xe pif-list
   27  xe help pif-list
   28  xe help  pdp-list
   29  xe  help
   30  xe  help --all
   31  xe pbd-list
   32  xe pif-list
   33  xe pif-list sr-uuid=36be98fc-e046-44bf-aaa9-77e7c1f228b5
   34  xe pbd-list sr-uuid=36be98fc-e046-44bf-aaa9-77e7c1f228b5
   35  xe pbd-unplug uuid=6f5d5678-87be-c5ba-7c57-8d01ba00c3ba
   36  xe pbd-list sr-uuid=36be98fc-e046-44bf-aaa9-77e7c1f228b5
   37  xe sr-unplug uuid=36be98fc-e046-44bf-aaa9-77e7c1f228b5
   38  xe help --all | grep sr
   39  xe sr-destroy uuid=36be98fc-e046-44bf-aaa9-77e7c1f228b5
   40  xe sr-detach uuid=36be98fc-e046-44bf-aaa9-77e7c1f228b5
   41  xe sr-forget uuid=36be98fc-e046-44bf-aaa9-77e7c1f228b5
   42  history
55. Vagrant for junos
Quickly setup junos dev env.
$ vagrant box add hc-download --name "juniper/ffp-12.1X47-D15.4-packetmode"
$ vagrant init juniper/ffp-12.1X47-D15.4-packetmode
$ vagrant plugin install vagrant-junos
$ vagrant plugin install vagrant-host-shell
$ vagrant up --provider virtualbox
56. cloudmonkey error
request-toolbelt missing, solved via:
$ easy_install --upgrade pip && pip install --upgrade setuptools && pip install --upgrade \
distribute && wget https://bootstrap.pypa.io/ez_setup.py -O - | python
Simple solved:
$ pip install --upgrade setuptools
57. cloudmonkey for installing templates
Install templates via:
$ cloudmonkey list zones name=FirstZone | grep ^id | awk {'print $3'}
$  cloudmonkey register template hypervisor=XenServer
zoneid=47865946-c129-424c-9fe4-a2e1786193cb format=vhd name=ubuntu1404
displaytext=ubuntu1404 ispublic=true ostypeid=8f94fb50-5561-11e6-993d-5254002a1e68
hvm=false passwordenabled=true url=http://192.168.1.69/ubuntu1404.vhd
58. make specific windows image
Make the virtualbox based win2008 datacenter version:
$ make virtualbox/eval-win2008r2-datacenter
59. pushbullet app
Could use it in IOT projects:
https://docs.pushbullet.com/
60. Virtualbox And Cloudstack
For building a minimum environment:
http://www.shapeblue.com/virtualbox-test-env/
61. Windows LifeCycle
Find out the lifecycle of windows:
https://support.microsoft.com/en-us/lifecycle/search?sort=PN&alpha=Windows%20Server%202008%20R2&Filter=FilterNO
62. Creately website
For drawing beautiful network diagrams:
https://creately.com/app/#
You can login with your google profiles.
63. Default route for CentOS
Add following in /etc/sysconfig/network-scripts/ifcfg-cloudbr:
DEFROUTE=yes
64. OVS Bridge example
You can remove some parameters, like intefaceid, target dev, alias name, etc.
    <interface type='bridge'>
      <mac address='52:54:00:63:d2:1e'/>
      <source bridge='ovsbr0'/>
      <virtualport type='openvswitch'>
        <parameters interfaceid='3f320d2c-7adc-46dd-857c-fb04a96ab416'/>
      </virtualport>
      <target dev='vnet7'/>
      <model type='virtio'/>
      <alias name='net1'/>
      <address type='pci' domain='0x0000' bus='0x00' slot='0x07' function='0x0'/>
    </interface>
65. flatpak
https://linux.cn/article-7673-1.html?utm_source=weibo&utm_medium=weibo
66. CloudStack APIs
http://docs.idcf.jp/cloud/introduction/
https://github.com/idcf/cloudstack-api
67. Specify vagrant deployment vars in Vagrantfile
An example in Vagrantfile:
  # Install CloudStack Agent node.
  config.vm.define "allinone" do |allinone|
    allinone.vm.provision :ansible do |ansible|
      ansible.playbook = "./Ansible/CloudStackAgent.yml"
      ansible.limit = CLOUDSTACK_ALLINONE_HOSTNAME
      ansible.inventory_path = "./Ansible/vagrant"
      ansible.inventory_path = "./Ansible/vagrant"
      ansible.extra_vars = { ansible_ssh_user: 'vagrant' }
      ansible.extra_vars = { ansible_ssh_pass: 'vagrant' }
      ansible.verbose = 'vvvv'
    end
  end
68. ssh login with RSA Issue
First add following parameters:
$ sudo vim /etc/ssh/sshd_config
RSAAuthentication yes
PubkeyAuthentication yes
Then restart the sshd service and also change the priviledge of the ssh configuration
directory:
$ chmod go-w ~/
$ chmod 700 ~/.ssh
$ chmod 600 ~/.ssh/authorized_keys
Now restart the sshd service and it will work properly.
Under ArchLinux + Awesome, configure it via:
$ vim ~/.config/rc.lua
terminal = "gnome-terminal --hide-menubar"
Use following commands for convert to 0.10 version of qemu image:
$ qemu-img convert -f qcow2 -O qcow2 -o compat=0.10 Origin.qcow2 Converted.qcow2
71. grub default OK For packer
GRUB_CMDLINE_LINUX_DEFAULT="net.ifnames=0 biosdevname=0 quiet text splash nomodeset"
Hugo After Changing ssh-key
Better if you remove the initial .travis.yml, and touch again.
$ touch .travis.yml
$ travis login --org
$ cp ~/.ssh/id_rsa ./
$ travis encrypt-file id_rsa --add
$ rm -f ./id_rsa
Then add the hint message into your .travis.yml file, update.
72. On installing XenServer
Use ultraiso could directly write XenServer iso into a flash disk, then you could use
this flash disk for booting up the machine.
73. Resume ansible-playbook running
Command:
ansible-playbook -i inventory OnecloudPlaybooks/LAMP/main.yml  --start-at-task="Disable
Apache modules" -u vagrant -k
74. Force install
apt-get method:
$ /usr/bin/apt-get -y -o Dpkg::Options::=--force-confdef -o Dpkg::Options::=--force-confold
75. slack and ssh
https://segmentfault.com/a/1190000006681056
76. php info
Display php info:
<?php

// Show all information, defaults to INFO_ALL
phpinfo();

?>
77. WordPress
Edit the wordpress:
wp-config.php in the root of your website and add there two lines:
define('WP_DEBUG', true);
@ini_set('display_errors', 1);
78. Packer Specify var
For using ansible playbooks:
packer build \
    -var 'aws_access_key=foo' \
    -var 'aws_secret_key=bar' \
    template.json
79. Minimum CloudStack Mem Usage
To limit the memory usage.
mysql -u cloud -p<password>
UPDATE cloud.service_offering SET ram_size='128', speed='128' WHERE vm_type='domainrouter';
UPDATE cloud.service_offering SET ram_size='128', speed='128' WHERE vm_type='elasticloadbalancervm';
UPDATE cloud.service_offering SET ram_size='128', speed='128' WHERE vm_type='secondarystoragevm';
UPDATE cloud.service_offering SET ram_size='128', speed='128' WHERE vm_type='internalloadbalancervm';
UPDATE cloud.service_offering SET ram_size='128', speed='128' WHERE vm_type='consoleproxy';
quit
80. Nethogs In Ubuntu14.04
The default version of nethogs is too old, thus won’t be used properly.
# wget -c https://github.com/raboof/nethogs/archive/v0.8.5.tar.gz
# tar xf v0.8.5.tar.gz
# cd ./nethogs-0.8.5/
# sudo apt-get install libncurses5-dev libpcap-dev
# make && sudo make install
81. Vagrant Disk Usage
Standard VS LVM:
Standard:
    qemu: Filesystem      Size  Used Avail Use% Mounted on
    qemu: udev            228M     0  228M   0% /dev
    qemu: tmpfs            49M  1.8M   48M   4% /run
    qemu: /dev/vda1       211G  1.1G  199G   1% /
    qemu: tmpfs           245M     0  245M   0% /dev/shm
    qemu: tmpfs           5.0M     0  5.0M   0% /run/lock
    qemu: tmpfs           245M     0  245M   0% /sys/fs/cgroup
    qemu: tmpfs            49M     0   49M   0% /run/user/0
LVM:
    qemu: Filesystem                   Size  Used Avail Use% Mounted on
    qemu: udev                         227M     0  227M   0% /dev
    qemu: tmpfs                         49M  1.9M   48M   4% /run
    qemu: /dev/mapper/ubuntu--vg-root  3.0G  1.1G  1.8G  37% /
    qemu: tmpfs                        245M     0  245M   0% /dev/shm
    qemu: tmpfs                        5.0M     0  5.0M   0% /run/lock
    qemu: tmpfs                        245M     0  245M   0% /sys/fs/cgroup
    qemu: /dev/vda1                    472M   53M  395M  12% /boot
    qemu: tmpfs                         49M     0   49M   0% /run/user/0
The standard will take very long time for shrinking the disk.
So we have to choose lvm, and use vagrant command for enlarge it during start up.
An example of Vagrantfile is listed as:
# -*- mode: ruby -*-
# vi: set ft=ruby :

############### Definitions Comes Here #################
OPENSTACK_HOSTNAME = "openstackallinone"


############### Vagrant Configuration Here #############
Vagrant.configure(2) do |config|

  # vagrant issues #1673..fixes hang with configure_networks
  config.ssh.shell = "bash -c 'BASH_ENV=/etc/profile exec bash'"
  config.vm.provision :shell, path: "add_new_disk.sh"
  config.ssh.username = 'root'
  config.ssh.password = 'YourPasswordForRoot'
  config.ssh.insert_key = 'true'
  config.vm.provider :libvirt do |domain|
    domain.nic_model_type = 'e1000'
    domain.memory = 384
    domain.nested = true
    domain.cpu_mode = 'host-model'
  end

  # openstackallinone node.
  # Add one networking, modify hostname, define memory, CPU cores.
  config.vm.define :openstackallinone do |openstackallinone|
    openstackallinone.vm.box = "Ubuntu1604OneLVM"
    openstackallinone.vm.boot_timeout = '36000'
    openstackallinone.vm.hostname = OPENSTACK_HOSTNAME
    openstackallinone.vm.network :public_network,
	    :dev => "br0",
	    :mode => "bridge",
	    :type => "bridge",
	    :ip => "192.168.10.33"
    # Disable mounting of vagrant folder as it's not supported on xenserver
    openstackallinone.vm.synced_folder ".", "/vagrant", disabled: true
    openstackallinone.vm.provider :libvirt do |domain|
      domain.memory = 10240
      domain.cpus = 8
      domain.storage :file, :size => '200G'
      domain.storage_pool_name = 'XenStoragePool'
      domain.nested = true
      domain.cpu_mode = 'host-model'
      domain.nic_model_type = 'virtio'
      domain.disk_bus = 'virtio'
      domain.volume_cache = 'writeback'
    end
  end

end
Make sure your add_new_disk.sh avaiable:
set -e
set -x

if [ -f /etc/disk_added_date ]
then
   echo "disk already added so exiting."
   exit 0
fi


sudo fdisk -u /dev/vdb <<EOF
n
p
1


t
8e
w
EOF

pvcreate /dev/vdb1
vgextend ubuntu-vg /dev/vdb1
lvextend -l +100%FREE  /dev/ubuntu-vg/root
resize2fs /dev/ubuntu-vg/root

date > /etc/disk_added_date
82. Quickly add swapfile
Format a swapfile using following command:
# dd if=/dev/zero of=/swapfile bs=1M count=2048
# mkswap /swapfile
# chmod 600 /swapfile
# swapon /swapfile
Add swapfile.
echo '/swapfile none swap sw 0 0' | sudo tee -a /etc/fstab
83. Vmware tips
Issue:
vmmon-only/linux/driver.c:390:8
Fixed by:
# cd /usr/lib/vmware/modules/source
# tar xf vmmon.tar
# nano ./vmmon-only/linux/driver.c
 #ifdef VMX86_DEVEL
    unregister_chrdev(linuxState.major, linuxState.deviceName);
 #else
-   if (misc_deregister(&linuxState.misc)) {
-      Warning("Module %s: error unregistering\n", linuxState.deviceName);
-   }
+   misc_deregister(&linuxState.misc);
Then recompile the modules via:
# tar cf vmmon.tar ./vmmon-only
# vmware-modconfig --console --install-all
Before start vmware, you should include following library:
export LD_LIBRARY_PATH=/usr/lib/vmware/lib/libglibmm-2.4.so.1/:$LD_LIBRARY_PATH
84. Good Material On OpenStack building
http://blog.l1n3.net/category/cloud/openstack/
https://cunninghamshane.com/deploying-and-customizing-openstack-mitaka-with-openstack-ansible/
85. Digital Ocean docker issue
Issue:
DJANGO_APP=$(docker run -d -i -t -p 8000:8000 ubuntu /bin/bash)
WARNING: Docker detected local DNS server on resolv.conf. Using default external servers: [8.8.8.8 8.8.4.4]
WARNING: IPv4 forwarding is disabled.
2013/09/12 12:52:02 Error: Error starting container 037aac8ca3ab: iptables failed: iptables -t nat -A DOCKER -p tcp --dport 8000 ! -i docker0 -j DNAT --to-destination 172.17.0.3:8000
Solved by:
$ modprobe xt_conntrack
$ sudo service docker restart
86. Studying material in weekend
https://www.zybuluo.com/gump88/note/440777
http://geek.csdn.net/news/detail/65292
87. xzoom
Could be a desktop magnifier. Install it via yaourt xzoom.
88. Questions
To be investigated:
十台服务器,关于并发的问题
十台 8C 16G 100M 这样配置的服务器,要是求支持 3w 并发,简单的三台 web ,做 nginx ,两
台调度器,做 lvs+keepalived ,四台做数据库集群架构,用 amoeba 做读写分离,简单的主从复
制,,这样的一个简单的架构方案能抗住 3w 并发吗???
89. Convertion for mobi
If your file extension is doc, then first convert it to rtf in libreoffice, then use
calibre for converting it to mobi.
90. Linux PC Benchmark
https://linux.cn/article-7810-1.html?utm_source=weibo&utm_medium=weibo
May 4, 2016
TechnologySource
The source are downloaded from:
https://github.com/signed8bit/ansible-cobbler
Git clone it via:
$ git clone https://github.com/signed8bit/ansible-cobbler.git
Test
The test will be done via vagrant up, while we met the problem: the cobbler version
in ansible playbooks are too old, thus the command cobbler get-loaders won’t acts
well. we have to changing to the newest cobbler version which is available in
http://cobbler.github.io/
Manually Steps(Ubuntu)
Install the newest cobbler via:
$ wget -qO - http://download.opensuse.org/repositories/home:/libertas-ict:/cobbler26/xUbuntu_14.04/Release.key | sudo apt-key add -
$ sudo add-apt-repository "deb http://download.opensuse.org/repositories/home:/libertas-ict:/cobbler26/xUbuntu_14.04/ ./"
$ sudo apt-get install -y cobbler
$ cobbler --version
Cobbler 2.6.11
  source: ?, ?
  build time: Sat Jan 23 14:13:42 2016
Change Password of the cobbler:
Change the password for the 'cobbler' username:
htdigest /etc/cobbler/users.digest "Cobbler" cobbler
visit the url of http://xxx.xxx.xxx.xx/cobbler_web and you could access the management interface of cobbler.
Import CentOS7.2
Import the iso via following command
$ sudo mount -t iso9660 -o loop ./CentOS-7-x86_64-Everything-1511.iso /mnt1
$ sudo cobbler import --name=CentOS-7.2 --arch=x86_64 --path=/mnt1
Examine the imported iso:
root@cobbler-ubuntu:~# cobbler profile list
   CentOS-7.2-x86_64
root@cobbler-ubuntu:~# cobbler distro list
   CentOS-7.2-x86_64
Change the default password of root:
# openssl passwd -1
# vim /etc/cobbler/settings
- default_password_crypted: "$1$mF86/UHC$WvcIcX2t6crBz2onWxyac."
+ default_password_crypted: "$awegwaegoguoweuouoeh/"
# cobbler sync
# service cobbler restart
# service cobblerd restart
Todo
How to automatically install the mate desktop via kickstart?
First find out all of the pkgs in group, then add them into the kickstart file?
For Making Mate
Steps are listed as following:
# curl http://mirrors.aliyun.com/repo/epel-7.repo>/etc/yum.repos.d/epel-7.repo
# curl http://mirrors.aliyun.com/repo/Centos-7.repo>CentOS-Base.repo
# yum groupinstall "X Window system"
# yum groupinstall "MATE Desktop"
Remain the yum cache:
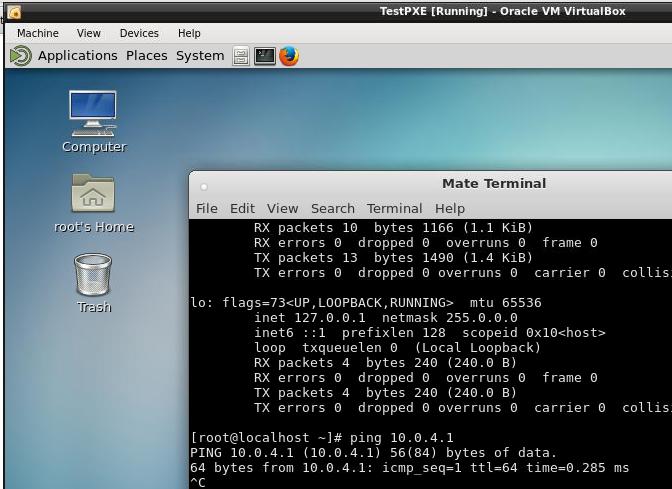
[root@localhost ~]# cat /etc/yum.conf
[main]
#cachedir=/var/cache/yum/$basearch/$releasever
cachedir=/root/cache/$basearch/$releasever
keepcache=1
For setting mate as the default desktop envs:
# systemctl isolate graphical.target
# systemctl set-default graphical.target
Repo In Cobbler
We could setup the cobbler’s repository via following steps:
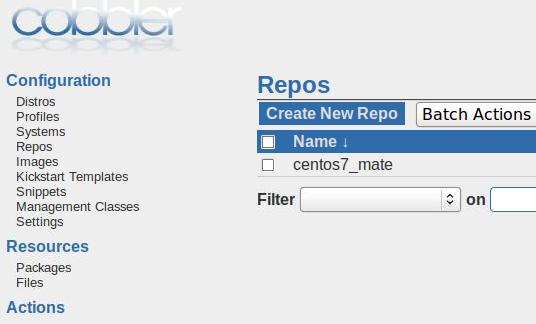
The configuration of this repo:

Now you repo’s configuration file should be like following:
root@cobbler-ubuntu:/var/lib/cobbler/snippets# cat /srv/www/cobbler/repo_mirror/centos7_mate/config.repo
[centos7_mate]
name=centos7_mate
baseurl=http://${http_server}/cobbler/repo_mirror/centos7_mate
enabled=1
priority=99
gpgcheck=0
Copy the rpms into /srv/www/cobbler/repo_mirror/centos7_mate/, and then createrepo for generating the package informations.
Now edit the existing profile’s repo configurations:
# cobbler profile list
   CentOS-7.2-x86_64
# cobbler profile edit --name=CentOS-7.2-x86_64 --repo='centos7_mate'
Examine it via:
# cobbler repo report --name=centos7_mate
Name                           : centos7_mate
Apt Components (apt only)      : []
Apt Dist Names (apt only)      : []
Arch                           : x86_64
Breed                          : yum
Comment                        : This Repo is for installing MATE Desktop
Createrepo Flags               : <<inherit>>
Environment Variables          : {}
Keep Updated                   : False
Mirror                         :
Mirror locally                 : True
Owners                         : ['admin']
Priority                       : 99
External proxy URL             :
RPM List                       : []
Yum Options                    : {}
Using the repo in kickstart
First define the snippet:
root@cobbler-ubuntu:/var/lib/cobbler/snippets# pwd
/var/lib/cobbler/snippets
root@cobbler-ubuntu:/var/lib/cobbler/snippets# cat mate
# Install mate
mkdir -p /etc/yum.repos.d/back
mv /etc/yum.repos.d/CentOS* /etc/yum.repos.d/back/
yum install -y abattis-cantarell-fonts abrt abrt-addon-ccpp abrt-addon-kerneloops abrt-addon-pstoreoops abrt-addon-python abrt-addon-vmcore abrt-addon-xorg abrt-dbus abrt-desktop abrt-gui abrt-gui-libs abrt-java-connector abrt-libs abrt-python abrt-retrace-client accountsservice adwaita-cursor-theme adwaita-gtk2-theme adwaita-icon-theme alsa-plugins-pulseaudio alsa-utils atk atkmm atril atril-caja atril-libs at-spi2-atk at-spi2-core audit-libs-python augeas-libs avahi-autoipd avahi-glib avahi-libs bind-libs-lite bind-license brasero brasero-libs bzip2 ca-certificates cairo cairo-gobject cairomm caja caja-extensions caja-extensions-common caja-image-converter caja-open-terminal caja-schemas caja-sendto cdparanoia cdparanoia-libs cdrdao centos-indexhtml check checkpolicy cjkuni-uming-fonts clutter clutter-gst2 clutter-gtk cogl colord-libs compat-libcogl12 compat-libcogl-pango12 compat-libcolord1 coreutils cpp crda cronie cronie-anacron cryptsetup cups-libs cyrus-sasl-lib dbus-x11 dconf dconf-editor dejavu-fonts-common dejavu-sans-fonts dejavu-sans-mono-fonts dejavu-serif-fonts desktop-file-utils device-mapper device-mapper-event device-mapper-event-libs device-mapper-libs djvulibre-libs dleyna-connector-dbus dleyna-core dleyna-server dosfstools dracut dracut-config-rescue dracut-network dvd+rw-tools elfutils emacs-filesystem enchant engrampa eom exempi fftw-libs-double filezilla firefox firewall-config flac-libs fontconfig fontpackages-filesystem fortune-mod fros fuse fuse-libs gamin GConf2 gcr gd gdb gdisk gdk-pixbuf2 genisoimage geoclue2 ghostscript ghostscript-fonts giflib glibc glibc-common glibmm24 glx-utils gmp gnome-abrt gnome-desktop3 gnome-icon-theme gnome-icon-theme-extras gnome-icon-theme-legacy gnome-keyring gnome-keyring-pam gnome-online-accounts gnome-python2 gnome-python2-canvas gnome-themes-standard gnote gnu-free-fonts-common gnu-free-mono-fonts gnu-free-sans-fonts gnu-free-serif-fonts gnutls gom google-crosextra-caladea-fonts google-crosextra-carlito-fonts gparted gpm-libs graphite2 grilo grilo-plugins grub2 grub2-tools gsm gssdp gstreamer gstreamer1 gstreamer1-plugins-bad-free gstreamer1-plugins-base gstreamer1-plugins-good gstreamer-plugins-bad-free gstreamer-plugins-base gstreamer-plugins-good gstreamer-tools gtk2 gtk2-engines gtk2-immodule-xim gtk3 gtk3-immodule-xim gtkmm24 gtkmm30 gtk-murrine-engine gtksourceview2 gtkspell3 gucharmap gupnp gupnp-av gupnp-dlna gvfs gvfs-afc gvfs-archive gvfs-fuse gvfs-gphoto2 gvfs-mtp gvfs-smb harfbuzz harfbuzz-icu hicolor-icon-theme hunspell hunspell-en-US ibus ibus-chewing ibus-gtk2 ibus-gtk3 ibus-hangul ibus-kkc ibus-libpinyin ibus-libs ibus-m17n ibus-rawcode ibus-sayura ibus-setup ibus-table ibus-table-chinese icedax ilmbase ImageMagick initscripts iso-codes iw jasper-libs jbigkit-libs jomolhari-fonts json-glib kernel kernel-tools kernel-tools-libs kexec-tools khmeros-base-fonts khmeros-fonts-common kpartx krb5-libs lcms2 libao libarchive libart_lgpl libasyncns libatasmart libavc1394 libblkid libbluray libburn libcanberra libcanberra-gtk2 libcanberra-gtk3 libcdio libcdio-paranoia libcgroup libchewing libdmapsharing libdmx libdnet libdv libdvdnav libdvdread libepoxy liberation-fonts-common liberation-mono-fonts liberation-sans-fonts liberation-serif-fonts libevdev libevent libexif libfontenc libgdata libgee06 libglade2 libgnomecanvas libgnome-keyring libgphoto2 libgpod libgsf libgtop2 libgudev1 libgusb libgxps libhangul libICE libicu libiec61883 libieee1284 libimobiledevice libiptcdata libisofs libjpeg-turbo libkkc libkkc-common libkkc-data libldb libmatekbd libmatemixer libmateweather libmateweather-data libmbim libmediaart libmount libmpc libmpcdec libmspack libmtp libmx libnatpmp libnl libnm-gtk libnotify libntlm liboauth libofa libogg libosinfo libpeas libpinyin libpinyin-data libplist libpng libqmi libraw1394 libreport libreport-centos libreport-filesystem libreport-gtk libreport-plugin-mantisbt libreport-plugin-reportuploader libreport-plugin-rhtsupport libreport-plugin-ureport libreport-python libreport-web librsvg2 libsamplerate libsecret libsemanage-python libsexy libshout libsigc++20 libSM libsmbclient libsndfile libspectre libsrtp libssh2 libtalloc libtar libtdb libteam libtevent libthai libtheora libtiff libtomcrypt libtommath libtool-ltdl libudisks2 libusal libusb libusbx libuser-python libuuid libv4l libvisual libvorbis libvpx libwbclient libwebp libwmf-lite libwnck libwnck3 libwvstreams libX11 libX11-common libXau libxcb libXcomposite libXcursor libXdamage libXdmcp libXevie libXext libXfixes libXfont libXft libXi libXinerama libxkbfile libxklavier libxml2 libxml2-python libXmu libXpm libXrandr libXrender libXres libXScrnSaver libxshmfence libxslt libXt libXtst libXv libXvMC libXxf86dga libXxf86misc libXxf86vm lightdm lightdm-gobject lightdm-gtk lightdm-gtk-common lklug-fonts lockdev logrotate lohit-assamese-fonts lohit-bengali-fonts lohit-devanagari-fonts lohit-gujarati-fonts lohit-kannada-fonts lohit-malayalam-fonts lohit-marathi-fonts lohit-nepali-fonts lohit-oriya-fonts lohit-punjabi-fonts lohit-tamil-fonts lohit-telugu-fonts lrzsz lvm2 lvm2-libs lz4 m17n-contrib m17n-db m17n-lib madan-fonts marco mariadb-libs marisa mate-applets mate-backgrounds mate-calc mate-control-center mate-control-center-filesystem mate-desktop mate-desktop-libs mate-dictionary mate-disk-usage-analyzer mate-icon-theme mate-media mate-menus mate-menus-libs mate-menus-preferences-category-menu mate-netspeed mate-notification-daemon mate-panel mate-panel-libs mate-polkit mate-power-manager mate-screensaver mate-screenshot mate-search-tool mate-session-manager mate-settings-daemon mate-system-log mate-system-monitor mate-terminal mate-themes mate-user-guide mate-utils-common mathjax mathjax-ams-fonts mathjax-caligraphic-fonts mathjax-fraktur-fonts mathjax-main-fonts mathjax-math-fonts mathjax-sansserif-fonts mathjax-script-fonts mathjax-size1-fonts mathjax-size2-fonts mathjax-size3-fonts mathjax-size4-fonts mathjax-typewriter-fonts mathjax-winchrome-fonts mathjax-winie6-fonts mdadm media-player-info mesa-dri-drivers mesa-filesystem mesa-libEGL mesa-libgbm mesa-libGL mesa-libglapi mesa-libGLU mesa-libxatracker mesa-private-llvm mobile-broadband-provider-info ModemManager ModemManager-glib mozilla-filesystem mozo mpfr mtdev net-tools NetworkManager NetworkManager-adsl network-manager-applet NetworkManager-glib NetworkManager-libnm NetworkManager-openconnect NetworkManager-openvpn NetworkManager-pptp NetworkManager-team NetworkManager-tui NetworkManager-vpnc NetworkManager-vpnc-gnome nhn-nanum-fonts-common nhn-nanum-gothic-fonts nm-connection-editor nspr nss nss-softokn nss-softokn-freebl nss-sysinit nss-tools nss-util numactl-libs oddjob oddjob-mkhomedir opencc openconnect OpenEXR-libs openjpeg-libs openldap open-sans-fonts openssh openssh-clients openssh-server openssl openssl-libs open-vm-tools open-vm-tools-desktop openvpn opus orc overpass-fonts PackageKit-glib PackageKit-gstreamer-plugin paktype-naskh-basic-fonts pango pangomm paratype-pt-sans-fonts pcsc-lite-libs perl perl-Carp perl-constant perl-Encode perl-Exporter perl-File-Path perl-File-Temp perl-Filter perl-Getopt-Long perl-HTTP-Tiny perl-libs perl-macros perl-parent perl-PathTools perl-Pod-Escapes perl-podlators perl-Pod-Perldoc perl-Pod-Simple perl-Pod-Usage perl-Scalar-List-Utils perl-Socket perl-Storable perl-Text-ParseWords perl-threads perl-threads-shared perl-Time-HiRes perl-Time-Local pexpect pinentry-gtk pixman pkcs11-helper pluma pluma-data plymouth-graphics-libs plymouth-plugin-label plymouth-plugin-two-step plymouth-system-theme plymouth-theme-charge policycoreutils-python polkit polkit-gnome poppler poppler-data poppler-glib pptp procps-ng psmisc pulseaudio pulseaudio-libs pulseaudio-libs-glib2 pulseaudio-module-x11 pulseaudio-utils pycairo pygobject2 pygobject3 pygtk2 pygtk2-libglade pygtksourceview pyOpenSSL pytalloc python-augeas python-backports python-backports-ssl_match_hostname python-beaker python-chardet python-cups python-dmidecode python-inotify python-IPy python-kitchen python-mako python-markupsafe python-paste python-perf python-pwquality python-pyudev python-setuptools python-six python-tempita pyxdg qemu-guest-agent rarian rarian-compat rdma realmd recode redhat-menus rest rhythmbox rtkit samba-client-libs samba-common samba-common-libs samba-common-tools samba-libs sane-backends-libs satyr SDL seahorse selinux-policy selinux-policy-targeted setools-libs setroubleshoot setroubleshoot-plugins setroubleshoot-server sg3_utils-libs sil-abyssinica-fonts sil-nuosu-fonts sil-padauk-fonts simple-scan skkdic smc-fonts-common smc-meera-fonts sos sound-theme-freedesktop soundtouch speex spice-vdagent startup-notification stix-fonts stoken-libs sudo system-config-date system-config-date-docs system-config-language system-config-printer system-config-printer-libs system-config-users system-config-users-docs systemd systemd-libs systemd-python systemd-sysv taglib teamd telepathy-glib texlive-kpathsea-lib thai-scalable-fonts-common thai-scalable-waree-fonts totem totem-pl-parser tracker transmission-common transmission-gtk tuned tzdata ucs-miscfixed-fonts udisks2 unique upower urw-fonts usb_modeswitch usb_modeswitch-data usbmuxd usermode usermode-gtk util-linux vim-common vim-enhanced vim-filesystem vlgothic-fonts vorbis-tools vpnc vpnc-script vte wavpack web-assets-filesystem webkitgtk webkitgtk3 webrtc-audio-processing wireless-tools wodim wqy-microhei-fonts wqy-zenhei-fonts wvdial wxBase wxGTK xcb-util xchat xdg-user-dirs xdg-user-dirs-gtk xdg-utils xkeyboard-config xml-common xmlrpc-c xmlrpc-c-client xorg-x11-drivers xorg-x11-drv-ati xorg-x11-drv-dummy xorg-x11-drv-evdev xorg-x11-drv-fbdev xorg-x11-drv-intel xorg-x11-drv-nouveau xorg-x11-drv-qxl xorg-x11-drv-synaptics xorg-x11-drv-v4l xorg-x11-drv-vesa xorg-x11-drv-vmmouse xorg-x11-drv-vmware xorg-x11-drv-void xorg-x11-drv-wacom xorg-x11-font-utils xorg-x11-server-common xorg-x11-server-utils xorg-x11-server-Xorg xorg-x11-utils xorg-x11-xauth xorg-x11-xinit xorg-x11-xkb-utils xvattr yelp yelp-libs yelp-xsl yumex zenity
systemctl isolate graphical.target
systemctl set-default graphical.target
Now involved this snippet in ks_end
# pwd
/var/lib/cobbler/kickstarts
# vim sample_end.ks
    # Insert a key
    $SNIPPET('publickey')
    # Instal mate
    $SNIPPET('mate')
    # End final steps
    %end
Now run cobbler sync for syncing your configurations.
Next time you bootstrap a machine, it will automatically runs into MATE desktop.