Jul 18, 2016
TechnologyGitLab仓库
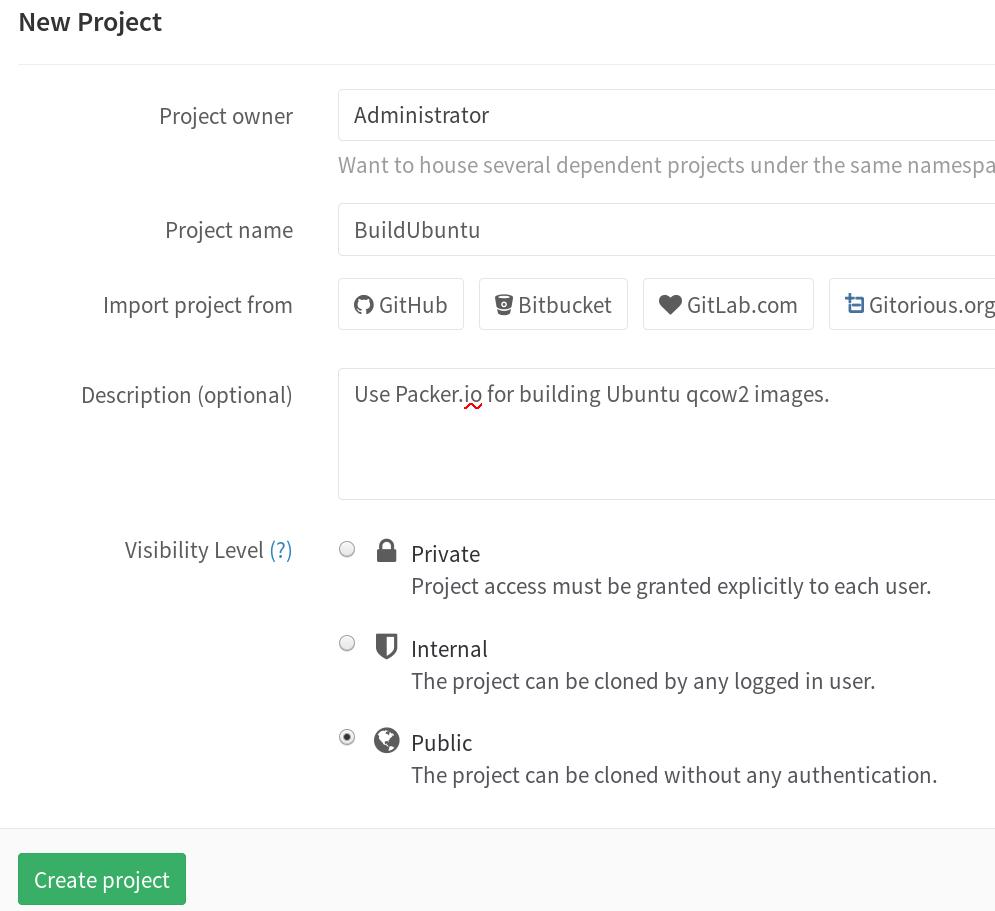
在前面搭建的GitLab里创建一个新仓库,用于存储Packer.io脚本。
在编译机器的仓库里,运行以下命令,添加自己到新创建的仓库里:
$ cd existing_folder
$ git init
$ git remote add origin http://192.168.1.79:10080/root/BuildUbuntu.git
$ git add .
$ git commit
$ git push -u origin master
提交完毕之后,在GitLab服务器上就可以看到新添加的代码了。
Jenkins配置
在Jenkins里创建一个新项目,选择Freestyle Project, 默认创建完毕。
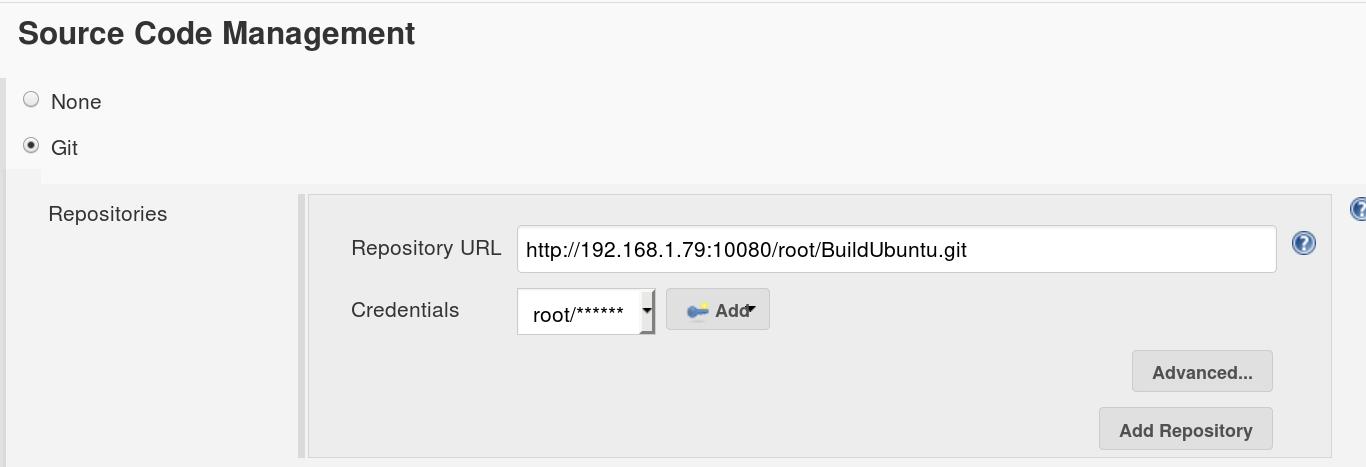
在源代码管理的设置中,填入以下的条目:
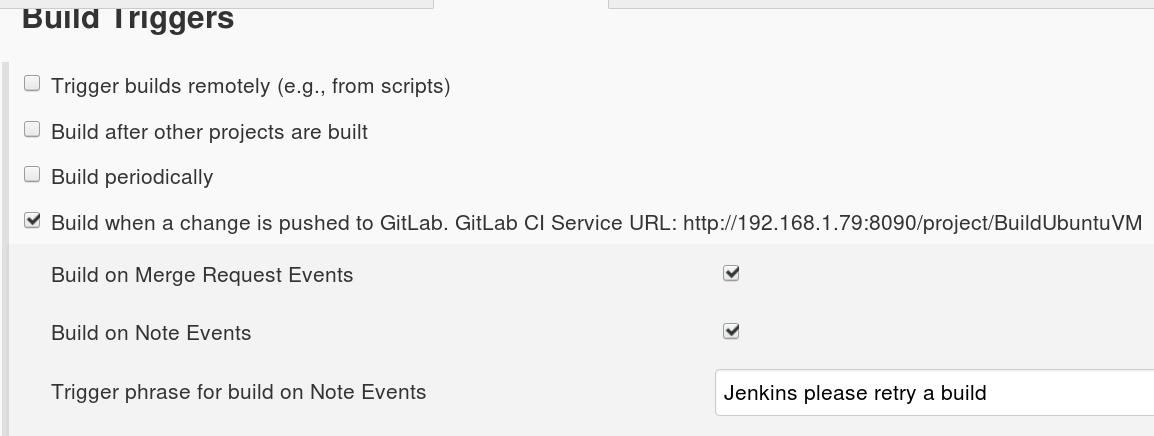
Build Trigger中我们选择由GitLab触发:
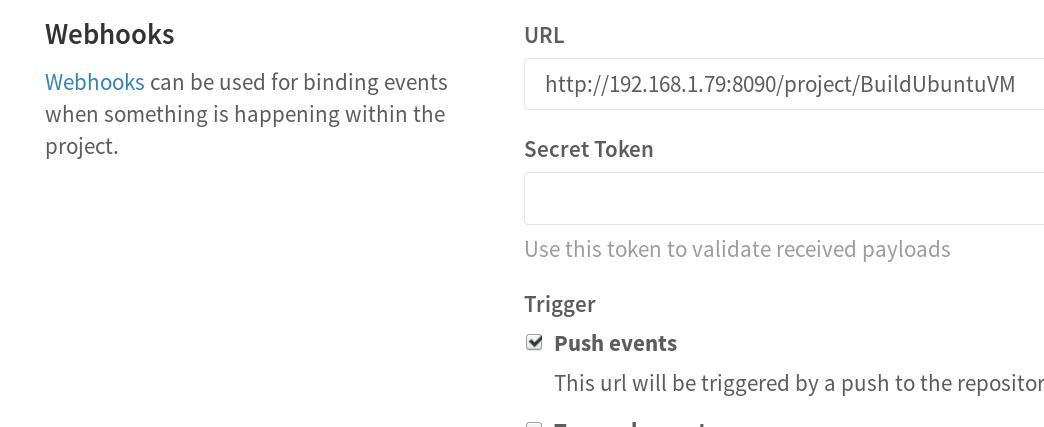
在GitLab中我们需要添加相应的钩子(WebHook):
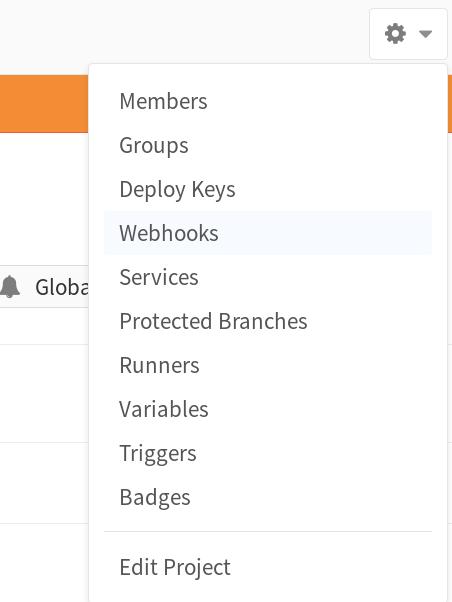
设置:
添加Build脚本(选择execute shell):
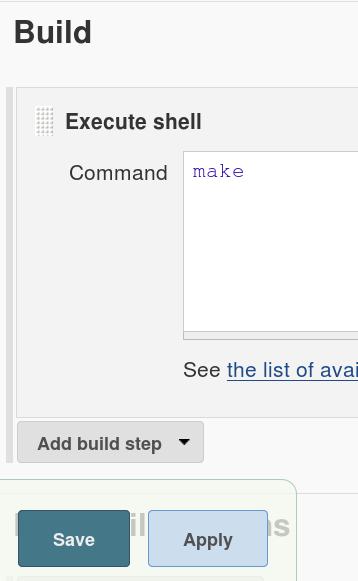
配置完毕后,就可以通过点击Build Now来编译Packer.io工程了。
Jul 13, 2016
TechnologyAIM
Jenkins + Packer.io + GitLab + Gogs, for automatically building the virtual machine
images.
Jenkins Installation/Configuration
TBD
GitLab
Refers to:
https://github.com/sameersbn/docker-gitlab
Image Preparation
Using docker for installing gitlab. First pull the docker image back via:
$ docker pull sameersbn/gitlab:8.9.6
Also pull back the postgres and redis images, for we will link to these container’s
services:
$ docker pull sameersbn/postgresql:9.4-22
$ docker pull sameersbn/redis:latest
Run GitLab
Create the data directory for holding the data:
$ mkdir -p /root/data/gitlab
$ cd /root/data/gitlab
$ mkdir redis postgresql gitlab
$ chmod 777 -R /root/data/gitlab/
Launch a postgresql container via:
# docker run --name gitlab-postgresql -d \
     --env 'DB_NAME=gitlabhq_production' \
     --env 'DB_USER=gitlab' --env 'DB_PASS=password' \
     --env 'DB_EXTENSION=pg_trgm' \
     --volume /root/data/gitlab/postgresql:/var/lib/postgresql \
     sameersbn/postgresql:9.4-22
Launch a redis container via:
# docker run --name gitlab-redis -d \
     --volume /root/data/gitlab/redis:/var/lib/redis \
     sameersbn/redis:latest
Launch the gitlab container:
# docker run --name gitlab -d \
     --link gitlab-postgresql:postgresql --link gitlab-redis:redisio \
     --publish 10022:22 --publish 10080:80 \
     --env 'GITLAB_PORT=10080' --env 'GITLAB_SSH_PORT=10022' \
     --env 'GITLAB_SECRETS_DB_KEY_BASE=long-and-random-alpha-numeric-string' \
     --volume /root/data/gitlab/gitlab:/home/git/data \
     sameersbn/gitlab:8.9.6
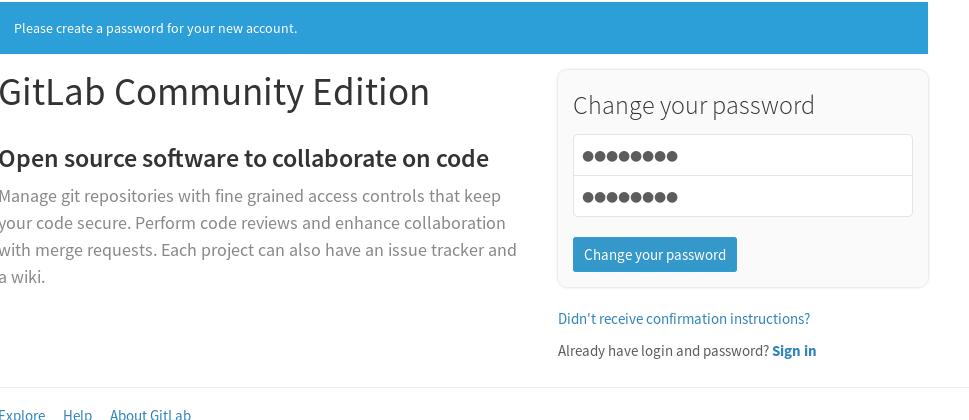
Now visit http://127.0.0.1:10080, for setting up the password:
Systemd Services
For automatically startup the docker service in system boot, create the service items
in systemd, listed in following:
Create the gitlab service:
$ vim /usr/lib/systemd/system/gitlab.service
[Unit]
Description=gitlab
Requires=docker.service
After=docker.service

[Service]
Restart=always
ExecStart=/usr/bin/docker start -a gitlab
ExecStop=/usr/bin/docker stop -t 2 gitlab

[Install]
WantedBy=multi-user.target
Also create another 2 service named gitlab-redis.service and
gitlab-postgres.service, then enable the service via:
# systemctl enable gitlabpostgres.service
# systemctl enable gitlabredis.service
# systemctl enable gitlab.service
Then next time when system reboot, these service will automatically restart.
Jul 12, 2016
Technology拥有Web界面的好处是显而易见的,譬如说,我们可能需要下载Youtube上的某一段视频。传统的操
作方式是这样的:登录位于国外的vps-> 下载youtube视频到VPS -> 退出vps登录 ->采用某种手段
(ftp/scp?)传送到本地。这时候如果有一个运行于远端VPS上的Web App,本地输入Youtube视频链接
,下载完毕后直接生成下载链接,这该有多好!这里我们来实现这个功能。
Flask
运行环境
远程VPS位于Digital Ocean上,运行Ubuntu14.04。 这里我们基于python virtualenv来构建Flask
开发框架.
$ sudo apt-get install -y python-virtualenv
$ virtualenv myflask
$ source ~/myflask/bin/activate
$ mkdir ~/flask_youtube
$ vim requirements.txt
Flask==0.10.1
$ pip install -r requirements.txt
运行完上述命令后,flask运行环境就已经就绪了。
Flask App
这里我们参考了以下链接(实际上是照搬):
http://charlesleifer.com/blog/a-flask-front-end-and-chrome-extension-for-youtube-dl/
也参考了(关于virtualenv):
https://realpython.com/blog/python/setting-up-a-simple-ocr-server/
$ vim youtube.py
import subprocess
import sys

from flask import Flask, flash, redirect, request, render_template, url_for

DEBUG = False
SECRET_KEY = 'this is needed for flash messages'

BINARY = '/usr/bin/youtube-dl'
DEST_DIR = '/home/dash/videos'
OUTPUT_TEMPLATE = '%s/%%(title)s-%%(id)s.%%(ext)s' % DEST_DIR

app = Flask(__name__)
app.config.from_object(__name__)

@app.route('/', methods=['GET', 'POST'])
def download():
    if request.method == 'POST':
        url = request.form['url']
        p = subprocess.Popen([BINARY, '-o', OUTPUT_TEMPLATE, '-q', url])
        p.communicate()
        flash('Successfully downloaded!', 'success')
        return redirect(url_for('download'))
    return render_template('download.html')

if __name__ == '__main__':
    app.run(host='0.0.0.0', port=8801)
实例中用到了flask里的模版,为此我们需要创建template目录:
$ mkdir templates
$ vim templates/download.html
<!doctype html>
<html>
  <head>
    <title>youtuber</title>
    <link rel=stylesheet type=text/css href="{{ url_for('static', filename='css/youtuber.min.css') }}" />
    <script src="{{ url_for('static', filename='js/jquery-1.11.0.min.js') }}" type="text/javascript"></script>
    <script src="{{ url_for('static', filename='js/bootstrap.min.js') }}"></script>
  </head>
  <body>
    <div class="container">
      {% for category, message in get_flashed_messages(with_categories=true) %}
        <div class="alert alert-{{ category }} alert-dismissable">
          <button type="button" class="close" data-dismiss="alert" aria-hidden="true">×</button>
          <p>{{ message }}</p>
        </div>
      {% endfor %}

      <h1>Download</h1>
      <form action="{{ url_for('download') }}" method="post">
        <div class="form-group">
          <label for="url">URL</label>
          <input type="text" name="url" class="form-control" id="url" placeholder="url" />
        </div>
        <button type="submit" class="btn btn-primary">Download</button>
      </form>
    </div>
  </body>
</html>
因为我们这里有指定用static/js下的静态文件,所以需要手动创建目录并下载文件:
$ mkdir -p static/js
$ cd static/js
$ wget https://maxcdn.bootstrapcdn.com/bootstrap/3.3.6/css/bootstrap.min.css
$ wget https://code.jquery.com/jquery-1.11.0.js
youtuber.min.css是样式表文件,这里先不加入,除了效果差一点,没啥副作用。
运行
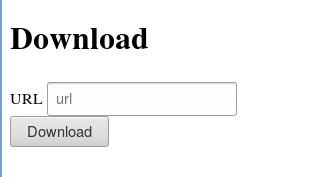
键入python youtube.py即可运行该Web App. 访问http://YourIPAddress:8801即可访问到该WebApp的界面:
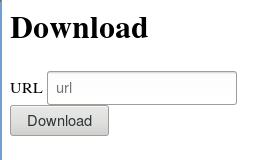
输入下载链接后,点击submit按钮后,VPS将自动下载该youtube影片。
下载结果页面
下载结果页面需要在static目录下新建一个用于存放视频的videos/目录夹. 同时需要添加一个模
板文件.
$ tree
.
└── down
    ├── requirements.txt
    ├── static
    │   ├── js
    │   │   ├── bootstrap-3.0.0.min.js
    │   │   ├── bootstrap.min.js
    │   │   ├── jquery-1.10.2.min.js
    │   │   └── jquery-1.11.0.min.js
    │   └── videos
    │       ├── abc.mp4
    │       └── ccc.mp4
    ├── templates
    │   ├── download.html
    │   └── videos.html
    └── youtube.py
其中templates/videos.html文件是用于渲染下载视频文件的模版,内容如下:
<!doctype html>
<html>
  <head>
    <title>Video download info</title>
  </head>
  <body>
    <div class="container">
      <h1>All Downloadable Videos</h1>
      {% for video in video_url %}
      <a href="/static/videos/{{ video }}">{{ video }}</a><br />
      {% endfor %}
      <h1>Click Following Links For Downloading!</h1>
      <a href="/">Go Back To Download Page</a><br />
    </div>
  </body>
</html>
在youtube.py文件中添加/videos路由,及相关处理函数:
import subprocess
import sys
import os
from flask import Flask, flash, redirect, request, render_template, url_for

DEBUG = False
SECRET_KEY = 'this is needed for flash messages'

BINARY = '/usr/bin/youtube-dl'
DEST_DIR = '/home/dash/down/static/videos/'
OUTPUT_TEMPLATE = '%s/%%(title)s-%%(id)s.%%(ext)s' % DEST_DIR

app = Flask(__name__)
app.config.from_object(__name__)

@app.route('/', methods=['GET', 'POST'])
def download():
    if request.method == 'POST':
        url = request.form['url']
        print url
        p = subprocess.Popen([BINARY, '-o', OUTPUT_TEMPLATE, '-q', url])
        p.communicate()
        flash('Successfully downloaded!', 'success')
        return redirect(url_for('videos'))
    return render_template('download.html')

# For holding all of the videos
@app.route('/videos')
def videos():
    names = os.listdir(os.path.abspath(DEST_DIR))
    return render_template('videos.html', video_url=names)

if __name__ == '__main__':
    app.run(host='0.0.0.0', port=8801)
下载流程
首先,访问http://YourIpAddress:8801/, 得到的结果如下:
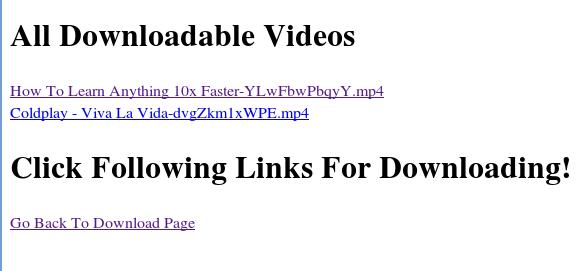
填入youtube上的视频地址以后,下载完毕后,可以看到videos页面变成了:
删除功能
youtube.py添加一个函数和路由:
# For deleting specified file
@app.route('/delete/<filename>')
def remove_file(filename):
    filename_full = os.path.join(DEST_DIR, filename)
    print filename_full
    os.remove(filename_full)
    return redirect(url_for('videos'))
模版文件更改:
$ vim templates/videos.html
<!doctype html>
<html>
  <head>
    <title>Video download info</title>
  </head>
  <body>
    <div class="container">
      <h1>All Downloadable Videos</h1>
      {% for video in video_url %}
      <a href="/static/videos/{{ video }}">{{ video }}</a>
      <a href="/delete/{{ video }}"><img src="/static/img/fuck.png" alt="FuckYou"></a>
      <a href="/delete/{{ video }}"> Delete this video</a>
      <br />
      <hr>
      {% endfor %}
...........
fuck.png是从网上下载的图片,更改完毕后,页面如下:

ToDo
添加权限,只有认证过后的用户才能使用删除功能。
Jul 8, 2016
Technology最近和小伙伴一起出去玩的次数比较多,免不了要拍下不少照片。考虑到照片共享的便捷性,特地调研了
几个关于照片共享的方法,最后打算基于Piwigo来搭建,以下是详细的步骤。
从Iphone同步图片到ArchLinux
参考了https://wiki.archlinux.org/index.php/IPod
$ sudo pacman -S ifuse usbmuxd libplist
$ lsmod | grep -i fuse
fuse                   94208  3
$ ifuse ~/iphone
$ cd ~/iphone
$ ls
Books  DCIM  Downloads  MediaAnalysis  PhotoData  PhotoStreamsData
Photos  Purchases  Radio  Recordings  iTunes_Control
DCIM/100APPLE下即为我们Iphone里所储存的图片。可以直接拷贝到本地。
Piwigo
有了容器以后,很多配置的工作就完全被简化了。以下是步骤:
$ sudo docker pull mathieuruellan/piwigo
$ sudo docker pull mysql:5.5
而后,在某个目录下,创建一个fig.yml文件, fig可以通过pip install fig来安装.
$ pwd
/home/dash/Code/piwigo
$ cat fig.yml
mysqlpiwigo:
   image: mysql:5.5
   volumes:
      - /home/dash/piwigo/mysql/:/var/lib/mysql
   environment:
      - MYSQL_ROOT_PASSWORD=XXXXXXXX
      - MYSQL_DATABASE=piwigo
      - MYSQL_USER=piwigo
      - MYSQL_PASSWORD=XXXXXX
piwigo:
   image: mathieuruellan/piwigo
   links:
      - mysqlpiwigo:mysql
   volumes:
      - /home/dash/piwigo/data/galleries:/var/www/galleries
      - /home/dash/piwigo/data/local:/var/www/local
      - /home/dash/piwigo/data/plugins:/var/www/plugins
      - /home/dash/piwigo/data/themes:/var/www/themes
      - /home/dash/piwigo/cache:/var/www/_data/i
      - /home/dash/piwigo/upload:/var/www/upload"
      - /var/log
      - /var/log/piwigo:/var/log/apache2
   ports:
      - "8964:80"
   hostname: piwigo
   domainname: localhost
写好以上的配置文件以后,在该目录下运行sudo fig up -d即可将Piwigo运行起来。
运行的结果检查:
$ sudo docker ps
CONTAINER ID        IMAGE                   COMMAND                  CREATED             STATUS              PORTS                  NAMES
9575cd9dbbae        mathieuruellan/piwigo   "/bin/sh -c /entrypoi"   40 minutes ago      Up 40 minutes       0.0.0.0:8964->80/tcp   piwigo_piwigo_1
31f7ecc60985        mysql:5.5               "docker-entrypoint.sh"   41 minutes ago      Up 41 minutes       3306/tcp               piwigo_mysqlpiwigo_1
容器启动完毕后,就可以开始配置网站了。
###配置piwigo
打开浏览器,访问http://localhost:8964, 即可访问到piwigo的初始配置页面,如下图:
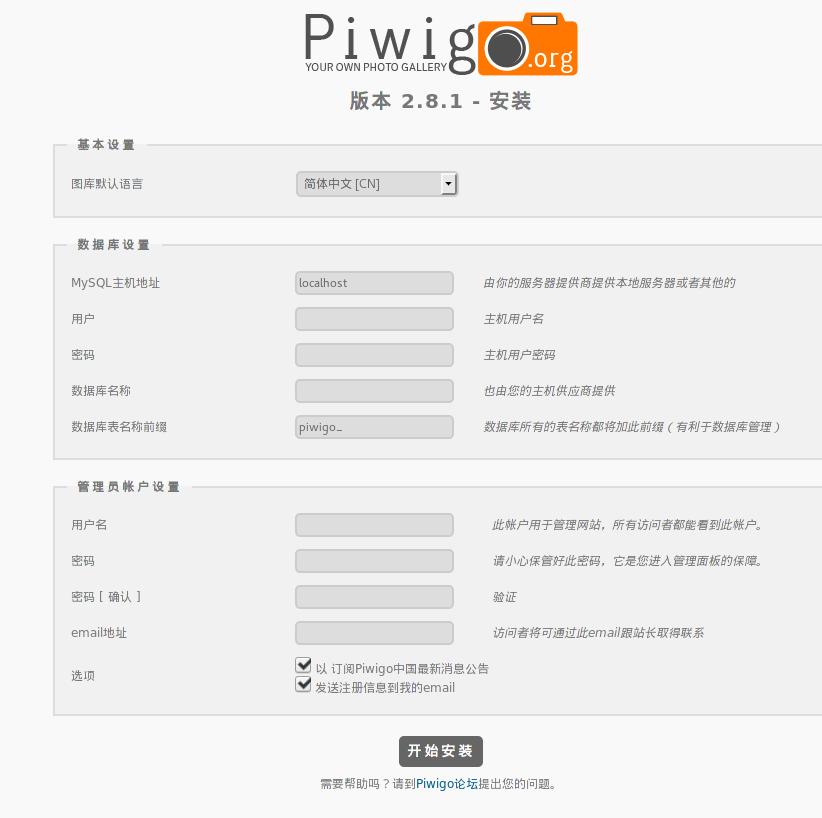
这里要注意的是,MySQL主机名字应该填我们在fig配置文件中定义出的mysql。数据库名称填piwigo,
这些同样在启动piwigo容器的fig文件中被定义。
配置好以后,进入到后台,可以选择上传图片,如图:
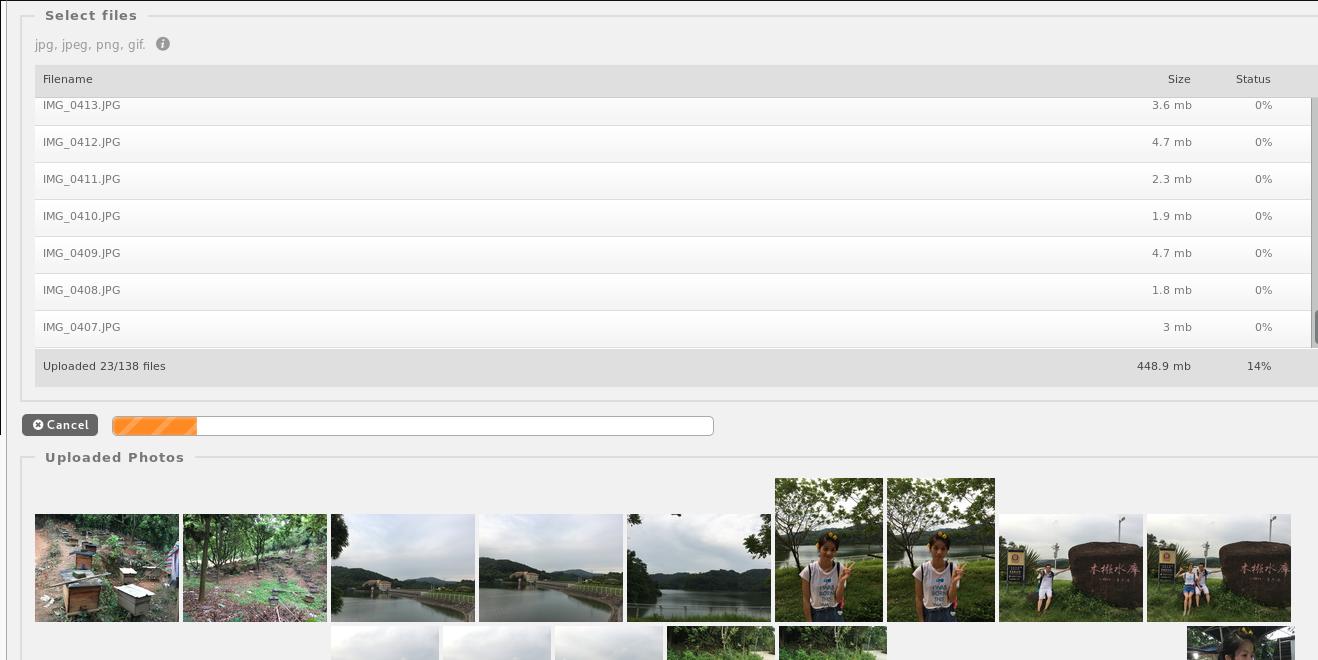
400多M的图片大概需要用1分钟时间上传完毕。
好了,一个完全可控的图像分享站点OK了,你可以用它来管理你的家庭照片。一切就只需要两个容器而已。
Jul 7, 2016
Technology背景
在前面的文章
Using hugo中我已经完成了从
Octopress到Hugo博客构建引擎的迁移,这篇文章将讲述如何进一步简化博客从撰写到发布的流程。
主要使用了Travis CI和Github Page.
如果没有Travis帐号的,可以到Travis-ci注册一个,也可以使用
github帐号连接使用。
github pages
Github的pages遵循的命名原则非常简单,如果github在用户的账户下发现一个名字为
<username>.github.io的仓库,那它会将这个仓库的master分支里的内容映射到
http://<username>.github.io.
以下创建出了一个名字为purplepalmdash.github.io的github仓库, 并将hugo生成的public/目
录下的所有内容(即整个静态网站)上传到了github。
$ git clone git@github.com:purplepalmdash/purplepalmdash.github.io.git
$ cp -r public/* purplepalmdash.github.io/
$ cd purplepalmdash.github.io
$ git add --all
$ git commit -m "First commit under hugo"
$ git push
这时打开浏览器,访问http://purplepalmdash.github.io就可以看到上传后的静态网站。
github pages代码分支
仅仅拥有master分支用来存储静态网站是不够的,我们还需要创建一个用于存放网站源代码的
source分支。以下命令创建出source分支,并上传了hugo源代码内容.
$ cd purplepalmdash.github.io
$ git checkout -b source
$ rm -rf *
$ cp -r ~/blog_source/* ./
$ git add --all
$ git commit -m "First commit for source code"
$ git push --set-upstream origin source
现在我们已经把源代码和生成的网站放在同一个仓库的不同分支了。
使用travis自动生成网站
仓库设置
如果每次都需要执行上述的操作来更新网站的话,那就显得太笨拙且太费时了。手动来执行的话我
们不得不在不同的分支之间切换。幸运的是travis可以自动化上述的操作。
我们的目的是,任何提交给source分支的改动,将触发出travis-ci里对网站的重新生成过程,并
把生成后的新的静态网站提交到github page上的master分支。
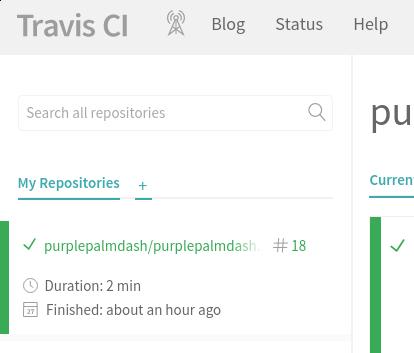
在travis-ci中,将purplepalmdash.github.io仓库加到travis-ci:
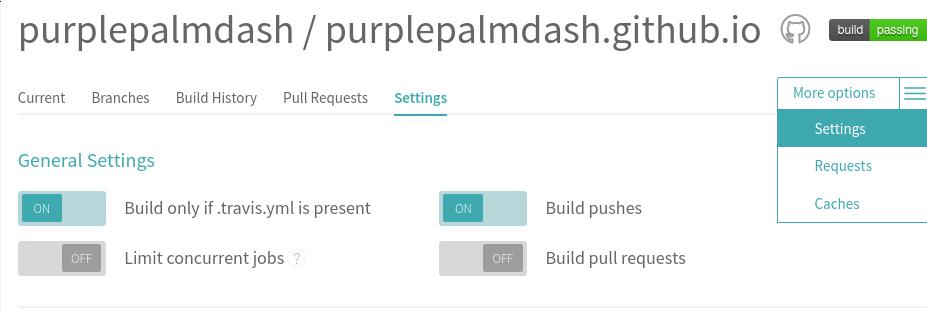
加入该仓库后,在Settings选项下,激活Build only if .travis.yml is present和Build pushes选项:
.travis.yml文件设置
接下来我们需要在source分支创建.travis.yml文件,在这个文件中,我们将给予travis权限用
于推送仓库。使用ssh-keygen可以创建出新的ssh key, 为了简单起见,我使用本机上已经有的
ssh key, 位置在~/.ssh/下,文件名分别为id_rsa和id_rsa.pub。我们将使用id_rsa文件
作为travis的认证, 以下是步骤.
首先安装travis(ruby需要事先安装):
$ gem install travis
在仓库中生成.travis.yml文件, 这里是使用id_rsa生成加密后的id_rsa.enc文件:
$ git checkout source
$ touch .travis.yml
$ travis login --org
$ cp ~/.ssh/id_rsa ./
$ travis encrypt-file id_rsa --add
$ rm -f ./id_rsa
$ ls -l id_rsa.enc
-rw-r--r-- 1 dash root 1680 Jul  7 11:18 id_rsa.enc
因为id_rsa.pub已经被添加到github的无密码认证中,又因为我的travis-ci和github共享用户名
,所以无需对id_rsa.pub做其他动作。
如果是travis-ci的私有仓库,则需要手动添加id_rsa.pub。
到这里,travis已经有了对master分支推送的权限,这种推送动作将被提交给source的任何改
动所触发。这里我们需要告诉travis如何编译出网站。以下是我的.travis.yml例子,供参考.
.travis.yml例子
以下是本站的.travis.yml例子:
language: go

go:
    - 1.6

env:
    global:
        - SSH_KEY="id_rsa"
        - GIT_NAME="purplepalmdash"
        - GIT_EMAIL="purplepalm@gmail.com"
        - SOURCE_DIR="public"
        - DEPLOY_BRANCH="source"
git:
    submodules: false

before_install:
    - openssl aes-256-cbc -K $encrypted_b37d26c66aa0_key -iv $encrypted_b37d26c66aa0_iv -in id_rsa.enc -out id_rsa -d

install:
    - go get -u -v github.com/spf13/hugo

script:
    - git https://github.com/rcoedo/hugo-steam-theme ./themes/hugo-steam-theme
    - hugo

after_success:
    - echo "purplepalmdash.github.io" > ./public/CNAME
    - ./scripts/deploy.sh
scripts/deploy.sh
这个代码是直接拷贝别人的。
#!/bin/bash
set -e

# Deploy built docs to this branch
TARGET_BRANCH=master

if [ ! -d "$SOURCE_DIR" ]; then
  echo "SOURCE_DIR ($SOURCE_DIR) does not exist, build the source directory before deploying"
  exit 1
fi

REPO=$(git config remote.origin.url)

if [ -n "$TRAVIS_BUILD_ID" ]; then
  # When running on Travis we need to use SSH to deploy to GitHub
  #
  # The following converts the repo URL to an SSH location,
  # decrypts the SSH key and sets up the Git config with
  # the correct user name and email (globally as this is a
  # temporary travis environment)
  #
  # Set the following environment variables in the travis configuration (.travis.yml)
  #
  #   DEPLOY_BRANCH    - The only branch that Travis should deploy from
  #   ENCRYPTION_LABEL - The label assigned when encrypting the SSH key using travis encrypt-file
  #   GIT_NAME         - The Git user name
  #   GIT_EMAIL        - The Git user email
  #
  echo DEPLOY_BRANCH: $DEPLOY_BRANCH
  echo ENCRYPTION_LABEL: $ENCRYPTION_LABEL
  echo GIT_NAME: $GIT_NAME
  echo GIT_EMAIL: $GIT_EMAIL
  if [ "$TRAVIS_BRANCH" != "$DEPLOY_BRANCH" ]; then
    echo "Travis should only deploy from the DEPLOY_BRANCH ($DEPLOY_BRANCH) branch"
    exit 0
  else
    if [ "$TRAVIS_PULL_REQUEST" != "false" ]; then
      echo "Travis should not deploy from pull requests"
      exit 0
    else
      # switch both git and https protocols as we don't know which travis
      # is using today (it changed!)
      REPO=${REPO/git:\/\/github.com\//git@github.com:}
      REPO=${REPO/https:\/\/github.com\//git@github.com:}

      chmod 600 $SSH_KEY
      eval `ssh-agent -s`
      ssh-add $SSH_KEY
      git config --global user.name "$GIT_NAME"
      git config --global user.email "$GIT_EMAIL"
    fi
  fi
fi

REPO_NAME=$(basename $REPO)
TARGET_DIR=$(mktemp -d /tmp/$REPO_NAME.XXXX)
REV=$(git rev-parse HEAD)
git clone --branch ${TARGET_BRANCH} ${REPO} ${TARGET_DIR}
rsync -rt --delete --exclude=".git" --exclude=".travis.yml" $SOURCE_DIR/ $TARGET_DIR/
cd $TARGET_DIR
git add -A .
git commit --allow-empty -m "Built from commit $REV"
git push $REPO $TARGET_BRANCH

git config --global user.name "$GIT_NAME"
git config --global user.email "$GIT_EMAIL"
现在万事就绪了,每一次对source的提交都将触发travis-ci对整个网站的重构,并推送改动到
master分支后,更新完成以后,purplepalmdash.github.io看到的就是更新后的内容。
Enjoy it!!!
