Feb 23, 2017
Technology参考资料
《Docker基础与实战》第八章 (韩) 李在弘。
环境
本机, ArchLinux.
服务器, DigitalOcean, Ubuntu14.04.
之所以选择DO的主机,是因为它位于墙外,不会有防火墙的阻挡,每次都能编译成功。
本机配置
Git
ArchLinux上安装sudo pacman -S git, 之后可以配置global:
$ git config --global user.name xxxx
$ git config --global user.email xxxx@gamil.com
app.js
用Node.js编写一个简单的Web服务器,返回Hello Docker:
var express = require('express');
var app = express();

app.get(['/', '/index.html'], function (req, res) {
  res.send('Hello Docker1');
});

app.listen(80);
package.json
用于描述运行该程序的依赖关系:
{
  "name": "exampleapp",
  "description": "Hello Docker",
  "version": "0.0.1",
  "dependencies": {
    "express": "4.4.x"
  }
}
Dockerfile
用于运行该APP的Docker容器定义如下:
FROM ubuntu:14.04

RUN apt-get update
RUN apt-get install -y nodejs npm

ADD app.js /var/www/app.js
ADD package.json /var/www/package.json

WORKDIR /var/www
RUN npm install

CMD nodejs app.js
DO服务器配置
Git配置
需要安装Docker, Docker的安装方法不再重复,安装git, 安装方法也不再重复.
创建服务器端的git仓库:
$ cd ~
$ git init exampleapp
$ cd exampleapp
$ git config receive.denycurrentbranch ignore
配置成receive.denycurrentbranch ignore是为了便于从开发者PC接收推送的源代码.
Git Hook配置
在~/exampleapp/.git/hooks目录下,创建一个post-receive文件,内容如下:
#!/bin/bash

APP_NAME=exampleapp
APP_DIR=$HOME/$APP_NAME
REVISION=$(expr substr $(git rev-parse --verify HEAD) 1 7)

GIT_WORK_TREE=$APP_DIR git checkout -f

cd $APP_DIR
docker build --tag $APP_NAME:$REVISION .
docker stop $APP_NAME
docker rm $APP_NAME
docker run -d --name $APP_NAME -p 8068:80 $APP_NAME:$REVISION
保存并设置可执行权限:
$ chmod +x ~/exampleapp/.git/hooks/post-receive
更新流程
在开发机的目录下,添加remote分支:
$ git remote add origin dash@xxx.xxx.xxx.x:exampleapp
如果你的DO上主机使用别的端口,例如8894端口,则编辑ssh的配置,为主机指定端口即可:
$ vim ~/.ssh/config
host 1xx.xx.xx.xxx
port 8894
此时每次提交的代码都会触发DO上主机的自动化构建过程,且自动侦听8068端口。
自动推送到服务器
只需要更改post-receive文件即可实现自动推送流程:
#!/bin/bash

APP_NAME=exampleapp
APP_DIR=$HOME/$APP_NAME
REVISION=$(expr substr $(git rev-parse --verify HEAD) 1 7)

+++ REGISTRY=192.168.0.40:5000
+++ APP_SERVERS=(
+++   "pyrasis@192.168.0.101"
+++   "pyrasis@192.168.0.102"
+++ )

GIT_WORK_TREE=$APP_DIR git checkout -f

cd $APP_DIR
docker build --tag $APP_NAME:$REVISION .
docker tag $APP_NAME:$REVISION $REGISTRY/$APP_NAME:$REVISION
docker push $REGISTRY/$APP_NAME:$REVISION

+++ SSH="ssh -o StrictHostKeyChecking=no"
+++ for SERVER in ${APP_SERVERS[@]}
+++ do
+++   $SSH $SERVER docker pull $REGISTRY/$APP_NAME:$REVISION
+++   $SSH $SERVER docker stop $APP_NAME
+++   $SSH $SERVER docker rm $APP_NAME
+++   $SSH $SERVER docker run -d --name $APP_NAME \
+++     -p 80:80 $REGISTRY/$APP_NAME:$REVISION
+++ done
上面的代码需要事先实现中转机(即运行git的机器)与目标服务器的ssh免登录设置。
Feb 22, 2017
Technology目的
在诸如OpenSuse
11.1这一类的古老系统上,对组建系统的加密可能会比较繁琐,首先全盘加密的实现并不容易(几乎不可能,因为内核太古老)。
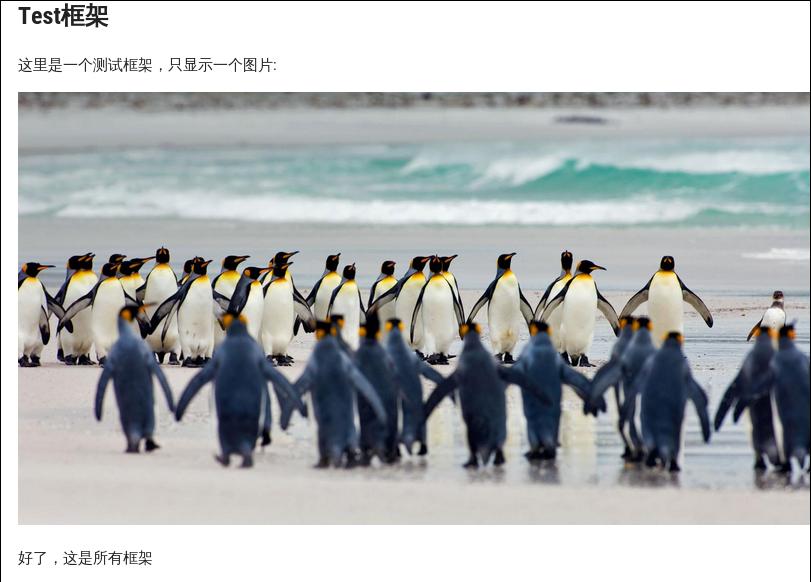
测试用框架
为了简单起见,我们将使用一个非常简单的基于C语言的网页服务器,来将我们的静态网站导出,静态网站也没什么内容,大体截图如下:
框架目录结构如下:
.
├── images
│   └── 2017_02_22_09_41_24_1599x874.jpg
├── index.html
└── index.md

1 directory, 3 files
网页服务器
为了测试的方便,我们用一个基于C实现的静态网页服务器:
$ wget https://gist.githubusercontent.com/sumpygump/9908417/raw/5fa991fda103d0b7a0c38512394a83ccada9ad6c/nweb23.c
$ gcc -O -DLINUX nweb32.c -o nweb
$ ./nweb 8848 ./
加入到启动项中:
$ sudo vim /etc/rc.d/boot.local
/home/dash/Code/nweb 8848 /home/dash/testwebsite/ &
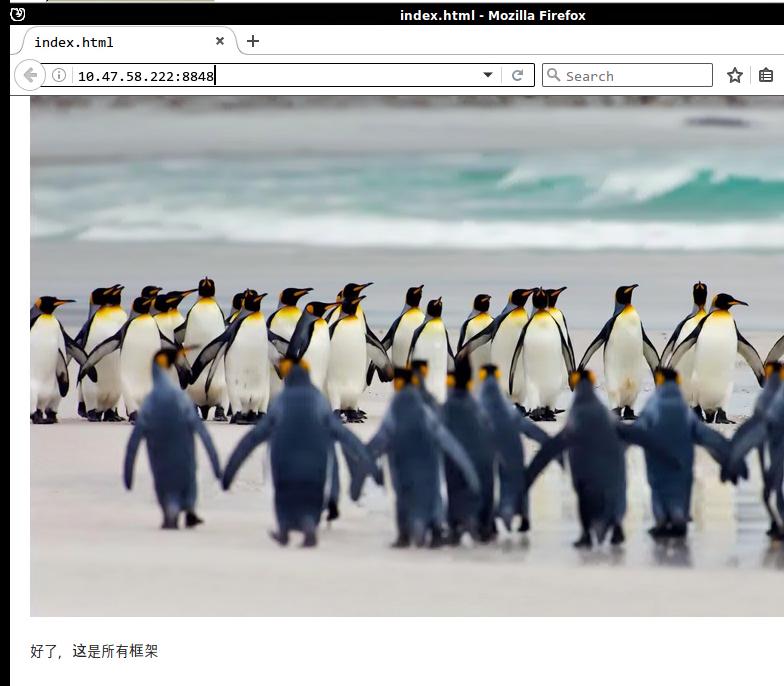
现在打开浏览器访问该机器的8848端口,可以看到我们的框架已经正确运行:
加密问题
现在的问题在于:一旦用户登入到系统,对我们框架的结构即可一目了然。
因而首先要解决的是:禁止用户登入进LINUX系统,这个步骤很简单,设置用户名/密码更加复杂就可以,理论上可以防止用户暴力破解并登入系统。
但是一旦用户拔下硬盘,将此机器上的硬盘插入到另一台机器上,则框架的所有结构同样一览无余,接下来我们来解决框架的加密问题.
虚拟加密盘
创建一个大小为1G的虚拟加密盘raw文件:
# dd if=/dev/zero of=/root/luks.vol bs=1M count=1024
1024+0 records in
1024+0 records out
1073741824 bytes (1.1 GB) copied, 9.32633 s, 115 MB/s
当11.1系统运行加密的时候,会得到以下错误:
# cryptsetup --cipher aes-xts-plain64 --key-size 512 --hash sha512 --iter-time 10000 luksFormat /root/luks.vol

WARNING!
========
This will overwrite data on /root/luks.vol irrevocably.

Are you sure? (Type uppercase yes): YES
Enter LUKS passphrase:
Verify passphrase:
Command failed: Unable to obtain sector size for /root/luks.vol
而在12.3系统上,则加密成功,猜想应该是cryptsetup版本的问题:
 # cryptsetup --cipher aes-xts-plain64 --key-size 512 --hash sha512 --iter-time 10000 luksFormat /root/luks.vol

WARNING!
========
This will overwrite data on /root/luks.vol irrevocably.

Are you sure? (Type uppercase yes): YES
Enter LUKS passphrase:
Verify passphrase:
自动挂载加密盘
自动挂在加密盘可以通过keyfile来进行,创建一个用于解锁加密raw文件的keyfile的步骤如下:
# dd if=/dev/urandom of=/root/file_key bs=512 count=8
8+0 records in
8+0 records out
4096 bytes (4.1 kB) copied, 0.000364836 s, 11.2 MB/s
# cryptsetup -v luksAddKey /root/luks.vol /root/file_key
Enter any passphrase:
Key slot 0 unlocked.
Command successful.
创建一个用于挂载加密raw文件的位置:
# mkdir -p /media/vol
用keyfile解锁并挂载到/media/vol:
# cryptsetup -v luksOpen /root/luks.vol vol_crypt --key-file=/root/file_key
# mkfs.ext4 /dev/mapper/vol_crypt
# mount /dev/mapper/vol_crypt /media/vol
查看是否被挂载成功:
# df -h | grep crypt
/dev/mapper/vol_crypt 1006M   18M  938M   2% /media/vol
将框架拷贝入加密目录:
# cp -r testwebsite/ /media/vol/
# cp /root/nweb /media/vol/
现在在OpenSuse的自启动文件中添加以下条目,用于自动解锁及开机时自动运行框架:
# vim /etc/rc.d/boot.local
cryptsetup -v luksOpen /root/luks.vol vol_crypt --key-file=/root/file_key
mount /dev/mapper/vol_crypt /media/vol
/media/vol/nweb 8848 /media/vol/testwebsite/ &
重新启动机器,验证结果:
# ps -ef | grep nweb
root      1980     1  0 21:52 ?        00:00:00 /media/vol/nweb 8848 /media/vol/testwebsite/
root      1983  1876  0 21:52 pts/0    00:00:00 grep --color=auto nweb
打开浏览器,可以看到该框架已经被正确运行, 而这一次框架的可执行文件位于加密磁盘里。
试图解锁框架
前面说过,如果用户能登入系统,则框架对用户来说完全可见,不存在加密的问题。所以第一步应该是阻止用户登录入系统.
如果用户得到虚拟机磁盘,挂载到另一台机器上:
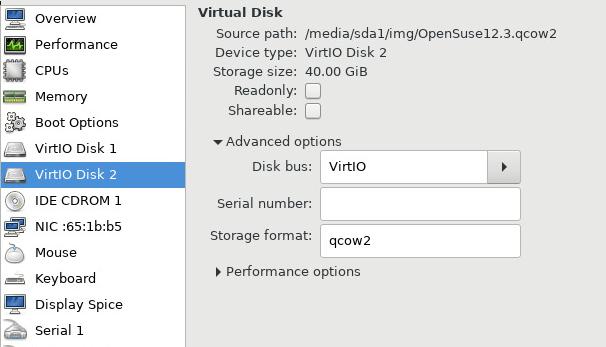
启动后检查磁盘的挂载情况, 可以看到40G 大小的OpenSuse12.3系统盘已经被挂载上:
$ sudo fdisk -l /dev/vdb
Disk /dev/vdb: 40 GiB, 42949672960 bytes, 83886080 sectors
Units: sectors of 1 * 512 = 512 bytes
Sector size (logical/physical): 512 bytes / 512 bytes
I/O size (minimum/optimal): 512 bytes / 512 bytes
Disklabel type: dos
Disk identifier: 0x0000bea3

Device     Boot    Start      End  Sectors  Size Id Type
/dev/vdb1           2048  4208639  4206592    2G 82 Linux swap / Solaris
/dev/vdb2  *     4208640 36403199 32194560 15.4G 83 Linux
/dev/vdb3       36403200 83886079 47482880 22.7G 83 Linux
/dev/vdb2为OpenSuse 12.3的系统盘,我们挂载一下,并检查/media/vol里的内容:
# mount /dev/vdb2 /mnt1
# ls /mnt1
bin  boot  dev  encryption  etc  home  lib  lib64  lost+found  media  mnt  opt  proc  root  run  sbin  selinux  srv  sys  tmp  usr  var
# ls /mnt1/media/vol/
可以看到此挂载目录下框架内容完全不可见,而此时如果硬行查看/root/luks.vol文件,只能看到乱码.
解密加密后的raw文件的关键在于拿到keyfile,
而我们的keyfile位于/root/keyfile,理论上还是存在被解密的可能。为了保密起见,可以考虑将此keyfile置于可移动介质中,或者云端。
Feb 20, 2017
TechnologyAims
Recently I am frequently using vagrant for verification, so quickly creating
the vagrant box becomes the essential tasks. Previsouly I am suing packer for
building vagrant box, but it requires you for writing the complex
configuration files. How to quickly generate the vagrant box using virtualbox,
following lists the steps
Virtual Machine
Create a new virtual machine in virtualbox, make sure you locate your disk
file in /tmp folder!!! In ArchLinux, the /tmp directly is actually the
ramfs, so the read/write speed would be pretty quick! Thus you could greatly
save your time for installing the system.
The partition size depends on your own requirement, I have a 8G memory
machine, So I choose 3G for partition disk, later we will see the partition
will be seperated into 2 part(Swap/Root), the swap is equal to your virtual
machine memory size, all of the remain spaces will be allocated into root
directory.
In partition, you should select Use all spaces and setup LVM, the
installation process will automatically create the layout for you.
Create the username/password for vagrant/vagrant, also your hostname would
also be vagrant.
Enable the sshd.
Finish installation and reboot your machine.
Configuration
Update and upgrade your system via:
$ sudo apt-get update -y
$ sudo apt-get upgrade -y
# Restart the machine
$ sudo shutdown -r now
Add vagrant user to sudoer’s list:
$ sudo su -
$ visudo
# Add the following line to the end of the file.
vagrant ALL=(ALL) NOPASSWD:ALL
Install the vagrant publicfile:
$ mkdir -p /home/vagrant/.ssh
$ wget --no-check-certificate https://raw.github.com/mitchellh/vagrant/master/keys/vagrant.pub -O /home/vagrant/.ssh/authorized_keys
# Ensure we have the correct permissions set
$ chmod 0700 /home/vagrant/.ssh
$ chmod 0600 /home/vagrant/.ssh/authorized_keys
$ chown -R vagrant /home/vagrant/.ssh
Install the guest tools:
$ sudo apt-get install -y gcc build-essential linux-headers-server
Mount the guest tools, and do following commands for compiling the
guest-tools:
$ sudo mount /dev/sr0 /mnt
$ cd /mnt
$ sudo ./VBoxLinuxAdditions.run
Before your packaging the box, remove the un-continous spaces in disk via
following command:
$ sudo dd if=/dev/zero of=/EMPTY bs=1M
$ sudo rm -f /EMPTY
# Shutdown the machine
$ sudo shutdown -h now
Packaging the Box
Packaging is so simple via:
$ vagrant package --base <VitualBox VM Name>
You could install it via:
$ vagraant box add package.box --name "YourName"
Exapand your disks
An example of Vagrantfile is listed as following:
# -*- mode: ruby -*-
# vi: set ft=ruby :

Vagrant.configure("2") do |config|
  config.vm.box = "UbuntuTrusty3G"
  config.vm.provision :shell, path: "initial.sh"

  config.vm.provider "virtualbox" do |vb|
      unless File.exist?('./secondDisk.vdi')
        vb.customize ['createhd', '--filename', './secondDisk.vdi', '--variant', 'Fixed', '--size', 10 * 1024]
      end

    vb.memory = "1024"
    vb.customize ['storageattach', :id,  '--storagectl', 'SATA', '--port', 1, '--device', 0, '--type', 'hdd', '--medium', './secondDisk.vdi']
  end
end
The initial.sh called in Vagrantfile is like following:
set -e
set -x
#echo 'Acquire::http::Proxy "http://192.168.0.121:3142";'>/etc/apt/apt.conf.d/01proxy
# Added the primary repository
apt-get update
apt-get -y install vim lvm2

if [ -f /etc/disk_added_date ]
then
   echo "disk already added so exiting."
   exit 0
fi


sudo fdisk -u /dev/sdb <<EOF
n
p
1


t
8e
w
EOF

pvcreate /dev/sdb1
vgextend vagrant-vg /dev/sdb1
lvextend -l +100%FREE /dev/vagrant-vg/root
resize2fs /dev/vagrant-vg/root

date > /etc/disk_added_date
This script will automatically expand your root disk from the original 2.5G to 12.5G, you could adjust the size in Vagrantfile.
On CentOS7
The default configuration for sshd should be changed to:
# vi /etc/ssh/sshd_config
PermitRootLogin yes
UseDNS	no
PasswordAuthentication yes
ChallengeResponseAuthentication yes
Feb 17, 2017
TechnologyVagrantfile
Configuration for setting Ubuntu14.04, bridged networking, and setting its
routing to specified node.
# -*- mode: ruby -*-
# vi: set ft=ruby :
Vagrant.configure("2") do |config|
  config.vm.box = "minimum/ubuntu-trusty64-docker"

  # Networking
  config.vm.network "public_network", ip:"192.168.10.217", netmask: "16",bridge:"xenbr0"
  # default router
  config.vm.provision "shell",
    run: "always",
    inline: "route add default gw 192.168.0.176"

  # delete default gw on eth0
  config.vm.provision "shell",
    run: "always",
    inline: "eval `route -n | awk '{ if ($8 ==\"eth0\" && $2 != \"0.0.0.0\") print \"route del default gw \" $2; }'`"

  # Hostname
  config.vm.hostname = "CSMgmt"

  # Memory and CPU Configuration
  config.vm.provider "virtualbox" do |vb|
    # Display the VirtualBox GUI when booting the machine
    # vb.gui = true

    # Customize the amount of memory on the VM:
    vb.memory = "4096"
    vb.cpus = 2
  end

end
Feb 14, 2017
Technology系统准备
OpenSuse 13.2 DVD, Libvirt.
磁盘分区
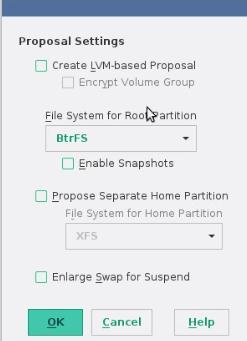
在初始化磁盘配置的时候,点击Edit Proposal Settings:
 点击
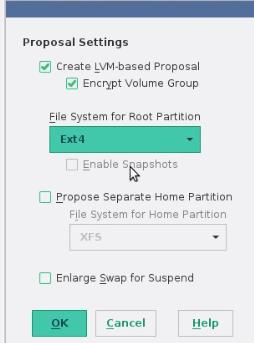
点击Create LVM-based Proposal并勾选Encrypt Volume Group:
 输入两次密码:
 可以选择
可以选择ext4为默认的文件系统:
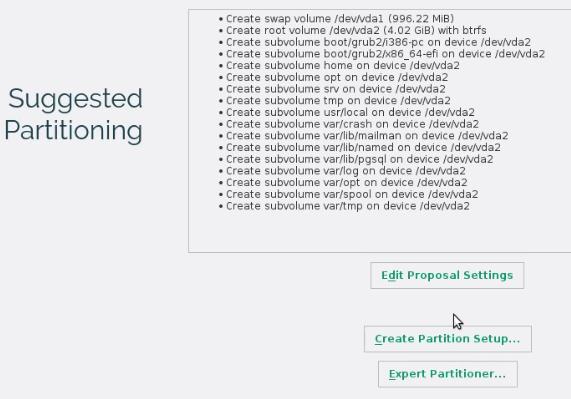
 磁盘分区格局如下:
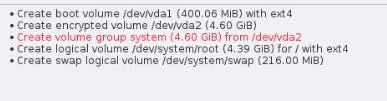 点击
点击Next按钮,继续完成安装.
安装完毕后,需要手动输入密码才能进入系统:
免密码登录
OpenSuse的免密码登录与CentOS相同, 都是通过修改dracut来实现免密码登录.
