Mar 17, 2017
Technology背景
最近在帮一个亲戚做企业类网站,最初方案是基于Docker化的WordPress,搭建好以后
一直不闻不问,思想可能是因为WP对于小白用户来说太过于复杂的缘故。
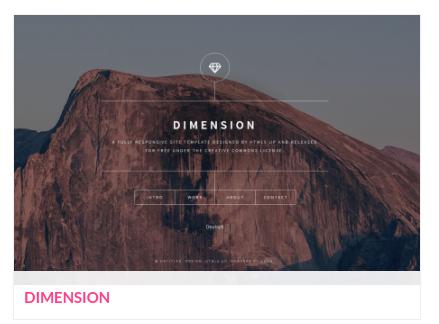
正好今天查看hugo的模板方案时,发现有一个很美观的静态页面叫Dimension, 于是起
了把网站迁移到静态网站上的心思。
Dimension主题预览:
搭建环境
首先从github下载源代码:
$ git clone https://github.com/sethmacleod/dimension.git
$ mkdir Website/themes
$ mv dimension-master Website/themes/dimension
$ cp -ar Website/themes/dimension/exampleSite/* Website/
经过上面的步骤,我们已经设置了模板可工作的DEMO环境,在Website目录下执行以下命令,
分别为编译整个静态网站和预览更改:
$ cd Website
$ hugo
$ sudo python2 -mSimpleHTTPServer 18118
现在打开你的浏览器访问http://localhost:18118,即可看到本地搭建的dimension示例网站。
自定义
如果要创建自己的页面,则hugo new Your-Page.md即可创建出来页面,编辑方法就是针对markdown的编辑。
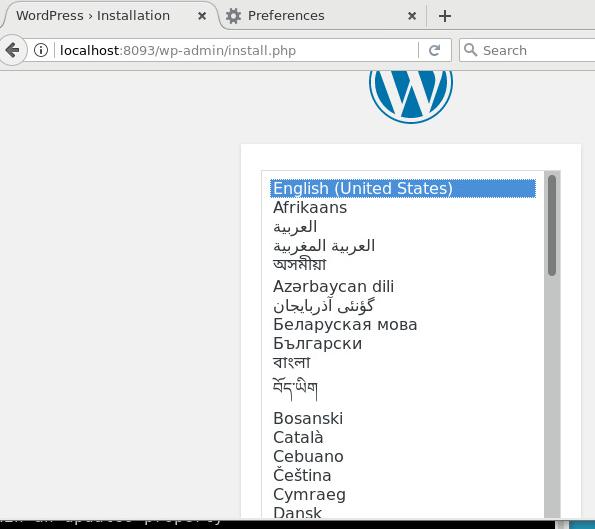
多语言支持
默认的DEMO提供了对德语和英语的支持,我们只需要删除config.toml文件中的[languages]的字段就可以,
例如删除:
[languages]
[languages.en]
languageName = "English"
weight = 1
title = "Dimension"
logo修改
默认的logo使用的是fontawesome字体,我们可以修改为自定义的图片,需要修改以下两个地方:
config.toml文件:
- logo = "fa-diamond"
- logo = "/images/jqlogo.png"
同时放置jqlogo.png文件于static/images/目录下.
themes/dimension/layouts/index.html文件中需要做对应的修改:
            {{ with .Site.Params.logo }}
-              <span class="icon {{ . }}"></span>
+	    <img src="{{ . }}" style="padding: 10px 10px 10px 10px;" width="100%">
这样就完成了对logo的修改.
首页滚动字幕
这里主要参考了另一个网站https://robinson-schule.ch/中的解决方案。
$ cd themes/dimension/static/js
$ wget https://robinson-schule.ch/js/quotes.js
$ cd ../css
$ wget https://robinson-schule.ch/css/project.css
接着就可以修改quotes.js文件中关于滚动条的内容,同时在themes/dimension/layouts/index.html文件
中添加:
                <p>{{ .Site.Params.description | safeHTML }}</p>
+		<p id="quotes"></p><script type="text/javascript" src="/js/quotes.js"></script></p>
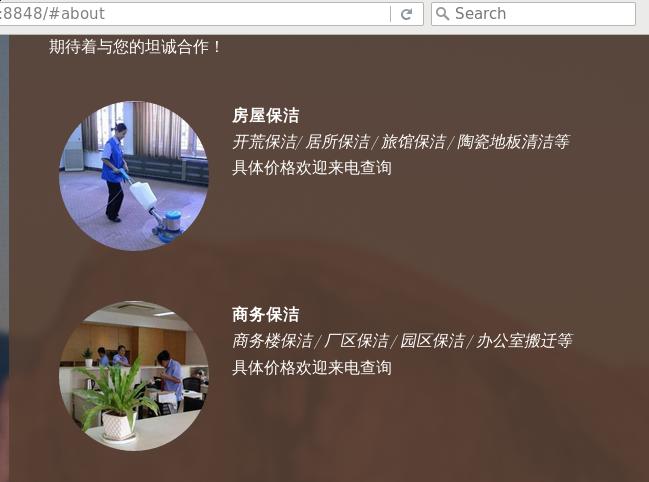
人物介绍
markdown中可以直接添加html,添加以下的html字段来实现图像的自动圆圈处理:
  <div class="person">
	<div class="personheadshot">
		<img src="/images/yuangong3.jpg" alt="yuangong3" class="circle headshot">
	</div>
	<div class="persondescription">
		<span><b>刘梦之</b></span><br/>
		<span><i>场地保洁主管 / 场地保洁专家 / 某保洁项目组组长</i></span><br/>
		<span>晶巧连续四年优秀员工 (2013 / 2014 / 2015 / 2016)</span>
	</div>
  </div>
这里用到的circle headshot的css定义在project.css文件中:
img.headshot
{
    width: 150px;
    height: 150px;
}
img.circle {
 	border-radius: 50%;
}
而div.person等定义也可以在该文件中找到。
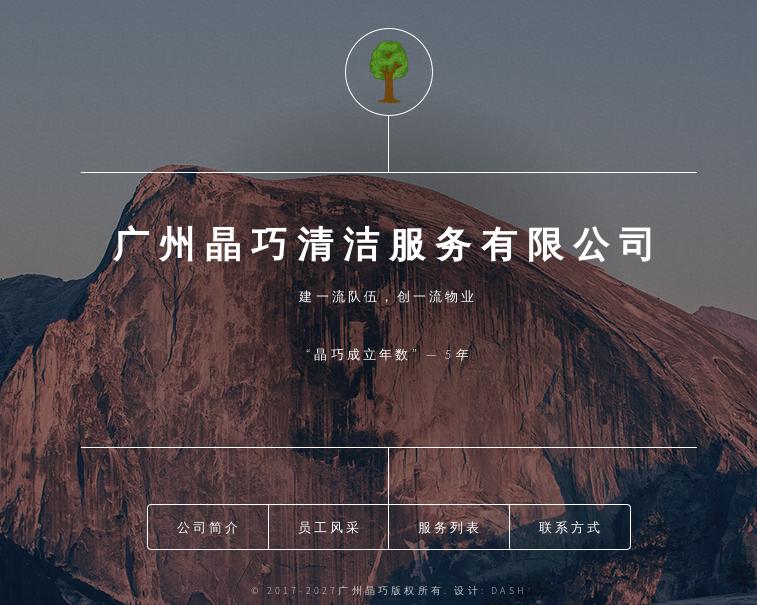
完成效果
首页:
about页面:
Enjoy it!!!
延伸阅读
可以考虑hugo的另一个模板效果:
http://themes.gohugo.io/theme/hugo-elate-theme/
Mar 17, 2017
Technologyntp server
Configure an ntp server in ubuntu16.04, IP address is 192.168.0.221:
$ sudo apt-get install -y openntp
$ sudo vim /etc/ntp.conf
The reference configuration file is listed as following:
# /etc/ntp.conf, configuration for ntpd; see ntp.conf(5) for help

driftfile /var/lib/ntp/ntp.drift

# Enable this if you want statistics to be logged.
#statsdir /var/log/ntpstats/

statistics loopstats peerstats clockstats
filegen loopstats file loopstats type day enable
filegen peerstats file peerstats type day enable
filegen clockstats file clockstats type day enable

# Specify one or more NTP servers.

# Use servers from the NTP Pool Project. Approved by Ubuntu Technical Board
# on 2011-02-08 (LP: #104525). See http://www.pool.ntp.org/join.html for
# more information.
#pool 0.ubuntu.pool.ntp.org iburst
#pool 1.ubuntu.pool.ntp.org iburst
#pool 2.ubuntu.pool.ntp.org iburst
#pool 3.ubuntu.pool.ntp.org iburst

server 0.cn.pool.ntp.org
server 1.cn.pool.ntp.org
server 2.cn.pool.ntp.org
server 3.cn.pool.ntp.org
#
#server 127.127.1.0 minpoll 4
#fudge 127.127.1.0 stratum 1
#restrict 127.0.0.1

# Use Ubuntu's ntp server as a fallback.
#pool ntp.ubuntu.com

# Access control configuration; see /usr/share/doc/ntp-doc/html/accopt.html for
# details.  The web page <http://support.ntp.org/bin/view/Support/AccessRestrictions>
# might also be helpful.
#
# Note that "restrict" applies to both servers and clients, so a configuration
# that might be intended to block requests from certain clients could also end
# up blocking replies from your own upstream servers.

# By default, exchange time with everybody, but don't allow configuration.
restrict -4 default kod notrap nomodify nopeer noquery limited
restrict -6 default kod notrap nomodify nopeer noquery limited

# Local users may interrogate the ntp server more closely.
restrict 127.0.0.1
restrict ::1

# Needed for adding pool entries
restrict source notrap nomodify noquery

# Clients from this (example!) subnet have unlimited access, but only if
# cryptographically authenticated.
#restrict 192.168.123.0 mask 255.255.255.0 notrust
restrict 192.168.1.0 mask 0.0.0.0 nomodify notrap
Then restart the ntp service via:
$ sudo systemctl restart ntp
Note the ubuntu16.04 machine should be online(could reach Internet), after a while it will sync the
time from the internet.
Windows Configuration
See following image:

Mar 15, 2017
TechnologyBackground
Moving a friend’s wordpress blog from DigitalOcean to a new cheap vps, here
are all of the tips and steps.
MySQL Password recovery
I forget the mysql password, recover it via following ways(Ubuntu14.04
Version):
Stop the mysql instance via:
$ sudo /etc/init.d/mysql stop
Start the mysqld daemon process use --skip-grant-tables options:
$ sudo /usr/sbin/mysqld --skip-grant-tables --skip-networking &
Mysql steps are listed as:
$ mysql -u root
>   FLUSH PRIVILEGES;
>   SET PASSWORD FOR root@'localhost' = PASSWORD('password');
>   FLUSH PRIVILEGES;
>   \q
Now better you reboot the machine, thus you could login to the mysql using the
newly changed passwd.
MySQL database backup
Backup the existing running mysql via following command:
$ mysqldump -uroot -pxxxxxx wordpress>Yourbackup.sql
This Yourbackup.sql will be used later for restoring the database to the
newly created database instance.
Docker Compose
The docker compose file is listed as:
version: '2'

services:

  wordpress:
    image: wordpress
    volumes:
      - ./www:/var/www/html
    ports:
      - 8093:80
    environment:
      WORDPRESS_DB_PASSWORD: Myexample250

  mysql:
    image: mariadb
    volumes:
      - ./mysql:/var/lib/mysql
    environment:
      MYSQL_ROOT_PASSWORD: Myexample250
Up/Down the service via following command:
### Up the wordpress website:
$ sudo docker-compose up -d

### Down the wordpress
$ sudo docker-compose down
Now open your browser http://localhost:8093, you will see the wordpress
installation page, install it:
The username/password would be any characters, because we will use our dumped
wordpress database for restoring it.
Restoring Database
Create a new maria docker instance for restoring the mysql:
$ mv Yourbackup.sql ./restore
$ sudo docker run -it -v `pwd`/restore:/var/lib/mysql --link mariadb:mymariadb --net lili_default mariadb:latest /bin/bash
Now get the running mariadb’s IP address:
$ sudo docker ps | grep mariadb
f1233de46f3b        mariadb:latest                   "docker-entrypoint.sh"   About a minute ago   Up About a minute   3306/tcp                      amazing_jang
52df3ac6298d        mariadb                          "docker-entrypoint.sh"   9 minutes ago        Up 9 minutes        3306/tcp                      lili_mysql_1
$ sudo docker exec -it 52df3ac6298d /bin/bash
root@52df3ac6298d:/# ip addr
....
Get the ip address , we know it’s 172.19.0.3/16.
Now in the root@f1233de46f3b, do following commands:
# mysql -h172.19.0.3 -P3306 -uroot -pMyexample250
Welcome to the MariaDB monitor.  Commands end with ; or \g.
Your MariaDB connection id is 15
Server version: 10.1.20-MariaDB-1~jessie mariadb.org binary distribution

Copyright (c) 2000, 2016, Oracle, MariaDB Corporation Ab and others.

Type 'help;' or '\h' for help. Type '\c' to clear the current input statement.

MariaDB [(none)]> \q
Bye
root@f1233de46f3b:/#
If you get the mysql shell, it hints that you could run following commands for
restoring the database:
# mysql -u root -pMyexample250 --host=172.19.0.3 wordpress<Yourbackup.sql
Now you won’t get any article, because the old domain name is not compatible
for the new domain name, suppose our old domain name is www.oldname.com, the
new domain name is localhost:8093`, do following command for adjust to the
new domain name:
Run:
mysql -h172.19.0.2 -P3306 -uroot -pMyexample250
use wordpress;
UPDATE wp_options SET option_value = replace(option_value, 'www.oldname.com','localhost:8093');
UPDATE wp_posts SET post_content = replace(post_content, 'www.oldname.com','localhost:8093');
UPDATE wp_comments SET comment_content = replace(comment_content, 'www.oldname.com','localhost:8093');
UPDATE wp_comments SET comment_author_url = replace(comment_author_url, 'www.oldname.com','localhost:8093');
\q
Now the database has been restored, you could restart the docker instance, and
examing the result, 52df3ac6298d 096fdeaac08a are the id for wordpress and
mariadb.
$ sudo docker restart 52df3ac6298d 096fdeaac08a
Now reopen the browser,this time you will see the page has been adjusted to
old website:
Ubuntu Env Preparation
scp the whole directory to remote machine(Ubuntu16.04).
Install docker via:
$ sudo apt-get install \
    apt-transport-https \
    ca-certificates \
    curl \
    software-properties-common
$ curl -fsSL <DOCKER-EE-URL>/gpg | sudo apt-key add -
$ sudo add-apt-repository \
   "deb [arch=amd64] <-DOCKER-EE-URL> \
   $(lsb_release -cs) \
   stable-17.03"
$ sudo apt-get install docker-ce
Install docker-compose via:
$ sudo pip install docker-compose
$ sudo docker-compose up -d
Mar 14, 2017
Life
无网络后的生活
前几天折腾我两年已久的长城宽带终于到期了,长城宽带是假宽带,根本达不到宣称
的速度,一句话便宜无好货啊,好在它终于到期,我也终于可以不用再受丫的气了。
停机前长城宽带的人无数次电话骚扰了我,均被一一碾回。珍爱生命,远离垃圾宽带。
于是我过回了一种曾经很熟悉的无网络生活。
回想一下,在有网络的时候,我的业余生活是怎样度过的呢?中午时分我回到家里的时候,
吃点东西后就会躺在床上,然后顺手打开手机,刷几下微博或者看看朋友圈,再看看微信
里的消息,好了,1点到了,开始睡,然而,效果并不好。
或者,下班回家后,往电脑前一坐,驾上梯子,开始浏览推特或者刷墙外楼上的新闻,那些
新闻也许很有意思,所以不知不觉,一个晚上就这样过去了…………
而在没有了网络的家里,我再也找不到WIFI的标记。随手刷几下便是浪费我宝贵的流量。尽管
我有着1块钱800M的无敌电信卡,然而那毕竟是要通过开热点才能打开的功能。这个门槛的设置
让网络不再触手可及,因而不知不觉之间,微博/朋友圈/微信等等那些可能谋杀生命的东西因为
门槛的设置被挡在了外面。
于是如今中午的生活我是这样的:
回家后,吃点东西,躺下,开始翻某本小说,或者过我前段时间买回来的技术类/语言类书籍。
到1点的时候,放开书本,哇,绝对的好梦。
其实也不用担心在离线的时候无法提升技能,这世界上有的是离线教程,或者书籍,似乎我离开
那种对着书本敲入代码运行的年代已经很远。有时候我想着,互联网的便利,似乎让我们失去了
长久以来养成的良好的学习习惯,我们不再依赖于技术文档而完成研发,我们似乎只是动用着搜索引擎
在网上找着现成的答案。我们似乎变成了临场考试时随手打小抄的学生,而不是平时认真积累凭借
自己的深入理解认真答题的学霸。
中午回家的时候在楼道里看到电信1000块钱两年的宽带,实在是实惠,小小动心。然而反思断网
后的自由,我深感断开网络后所获得的岂止是全身心的自由?
没有网络的家里,带来的是一种失去已久的我曾经很熟悉的求学求知模式。眼下看来,我打算延续这种难得的自由, 继续
无WIFI生存。。
有时我们费心所追求的东西,正是
把我们身心自由束缚上的那一道金制的枷锁。
无网络后的知识提升
1、 更多的依赖于纸质资料,凭借对问题的领悟找寻解决方案。
2、 利用公司网络下载学习资料和搭建开发环境,用自己的笔记本上班,以便同步工作。
3、 1块钱800M的电信卡,不到万不得已的时候不开作弊模式。
4、 破解邻居WIFI,你懂得。
5、 实在不行就装回来1000块钱两年的真电信宽带吧。
说实话,我也有点好奇这样下去我能挺多久?
Mar 9, 2017
Technology最近扫了扫一本知名书《程序员面试宝典》。众所周知国内的面试都得要靠扫书来的嘛。
然而这本书上的有些习题,答案也未必为对,这里列举一个:
CPU架构导致的sizeof
原题目如下:
#include <stdio.h>
#include <stdlib.h>
struct {
	short a1;
	short a2;
	short a3;
}A;
struct {
	long a1;
	short a2;
}B;

int main(void)
{
	char *ss1= "0123456789";
	char ss2[]= "0123456789";
	char ss3[100] = "0123456789";
	int ss4[100];
	char q1[]="abc";
	char q2[]="a\n";
	char *str1= (char*)malloc(100);
	void *str2= (void*)malloc(100);

	printf("Sizeof ss1 is %d\n", sizeof(ss1));
	printf("Sizeof ss2 is %d\n", sizeof(ss2));
	printf("Sizeof ss3 is %d\n", sizeof(ss3));
	printf("Sizeof ss4 is %d\n", sizeof(ss4));
	printf("Sizeof q1 is %d\n", sizeof(q1));
	printf("Sizeof q2 is %d\n", sizeof(q2));
	printf("Sizeof str1 is %d\n", sizeof(str1));
	printf("Sizeof str2 is %d\n", sizeof(str2));
	printf("Sizeof A is %d\n", sizeof(A));
	printf("Sizeof B is %d\n", sizeof(B));

	return 0;
}
在我的机器上的答案是:
Sizeof ss1 is 8
Sizeof ss2 is 11
Sizeof ss3 is 100
Sizeof ss4 is 400
Sizeof q1 is 4
Sizeof q2 is 3
Sizeof str1 is 8
Sizeof str2 is 8
Sizeof A is 6
Sizeof B is 16
而原文答案则有差距,例如ss1的大小为4, str/str2的结果为4, B的大小为8.
为什么?
我猜想是因为CPU架构的不同,64位系统与32位系统的不同而导致。
为了验证,我创建了一台virtualbox的32位Ubuntu16.04的机器, 验证结果:
root@ubuntu:~# uname -a
Linux ubuntu 4.4.0-31-generic #50-Ubuntu SMP Wed Jul 13 00:06:14 UTC 2016 i686 i686 i686 GNU/Linux
root@ubuntu:~# ./test
Sizeof ss1 is 4
Sizeof ss2 is 11
Sizeof ss3 is 100
Sizeof ss4 is 400
Sizeof q1 is 4
Sizeof q2 is 3
Sizeof str1 is 4
Sizeof str2 is 4
Sizeof A is 6
Sizeof B is 8
由此可见,其答案局限于32位平台,不能单纯的盲从于参考答案。
sizeof(string)变化
例子:
#include <iostream>
#include <string>
using namespace std;

int main()
{
	string strArr1[] = {"Trend", "Micro", "Soft"};
	string *pStrArr1 = new string[2];
	pStrArr1[0] = "US";
	pStrArr1[1] = "CN";

	for(int i = 0; i<sizeof(strArr1)/sizeof(string); i++)
		cout<<strArr1[i];
	for(int j = 0; j<sizeof(pStrArr1)/sizeof(string); j++)
		cout<<pStrArr1[j];

	cout<<endl;
	cout<<sizeof(pStrArr1)<<endl;
	cout<<sizeof(string)<<endl;
	return 0;
}
实际的输出应该为:
TrendMicroSoft
8
32
这是因为库函数发生了变化,sizeof(string)的大小已经调整为32, 因而书里说的TrendMicroSoftUS是永远不会打印出来的。
