May 24, 2017
Technology目的
LAB验证环境的搭建。
前提条件: 最小化CentOS7系统迁移(见前一篇文章).
安装
CentOS 7.3(1611), 最小化安装。
# yum update -y
# yum install -y vim qemu libvirt libvirt-devel ruby-devel gcc qemu-kvm
net-tools virt-manager wget lm_sensors iotop
# wget -O /etc/yum.repos.d/epel.repo http://mirrors.aliyun.com/repo/epel-7.repo
# yum install -y nethogs byobu ansible rubygem-ruby-libvirt.x86_64
# wget https://releases.hashicorp.com/vagrant/1.9.1/vagrant_1.9.1_x86_64.rpm
# yum install vagrant_1.9.1_x86_64.rpm
# vagrant plugin install --plugin-version  0.0.37 vagrant-libvirt
# cd ~/.vagrant.d/gems/2.2.5/gems
# ln -s ../extensions ./
# vi /etc/modprobe.d/kvm-nested.conf
options kvm_intel nested=1
Disable the selinux, firewalld:
# vim /etc/selinux/config
SELINUX=disabled
# systemctl disable firewalld
Now restart the machine, your dev environment is ready now.
Install desktop(MATE):
$ yum groupinstall "MATE Desktop" -y
$ yum groupinstall "X Window System" -y
# systemctl isolate graphical.target
# systemctl set-default graphical.target
# yum install -y gvim gedit gimp
# wget http://download.virtualbox.org/virtualbox/rpm/rhel/virtualbox.repo
# sed -i "s/gpgkey=https/gpgkey=http/" /etc/yum.repos.d/virtualbox.repo
# yum install  gcc make patch  dkms qt libgomp
# yum install -y kernel-headers kernel-devel fontforge binutils glibc-headers
glibc-devel VirtualBox-5.1 tigervnc tigervnc-server tigervnc tigervnc-server
# yum install -y wireshark tcpdump iftop  python-epdb.noarch python3-rpdb.noarch python2-rpdb.noarch sysstat libreoffice golang unzip htop wireshark-gnome zsh ddd gdb git subversion
# yum install epel-release
# rpm -Uvh http://li.nux.ro/download/nux/dextop/el7/x86_64/nux-dextop-release-0-5.el7.nux.noarch.rpm
# yum install simplescreenrecorder
# yum install -y smplayer
Install Docker(stable version):
# curl -sSL http://acs-public-mirror.oss-cn-hangzhou.aliyuncs.com/docker-engine/internet | sh -
# systemctl enable docker
Install xfce4 desktop:
# yum groupinstall "Xfce" -y
USB启动问题
CentOS 7的initramfs需要重新编译,以获得usb支持。步骤如下:
获取Linux Kernel版本:
# ls /lib/modules
3.10.0-514.el7.x86_64
在/boot/目录下重新生成initramfs:
# mkinitrd --with-usb --preload=ehci-hcd --preload=usb-storage --preload=scsi_mod --preload=sd_mod ./usbinitrd-3.10.0-514.el7.x86_64 3.10.0-514.el7.x86_64
更改grub配置项:
# vim /boot/grub2/grub.cfg
	- initrd16 /boot/initramfs-3.10.0-514.el7.x86_64.img
	+ initrd16 /boot/usbinitrd-3.10.0-514.el7.x86_64.img
现在重新启动,则可以通过USB启动系统。
megaraid sas issue
The server has the megaraid sas 2208:
LSI Logic / Symbios Logic MegaRAID SAS 2208 [Thunderbolt] (rev 05)
which could not be recognized via CentOS 7.3, thus we have to install
following packages:
# yum install kmod-redhat-megaraid_sas.x86_64
I thinks this could solve the problems.
Or we could use the rescue kernel for booting the system, which acts the same
as the general kernels
No, install kmod-redhat-megaraid_sas.x86_64 won’t solve the problem, so I
googled and finf following way could solves this problem.
# dracut --add-driver megaraid_sas.ko -f
/boot/initramfs-3.10.0-514.21.1.el7.x86_64.img 3.10.0-514.21.1.el7.x86_64
TBD
ScreeShot Software
May 24, 2017
Technology目的
使用磁盘克隆的方式快速安装、部署系统。
验证环境
Virt-manager, CentOS 7 ISO安装盘
安装注意事项
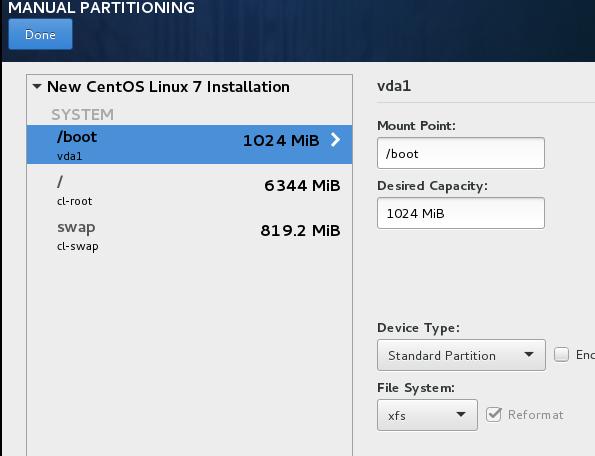
分区时选择xfs(CentOS默认), 选择LVM分区。
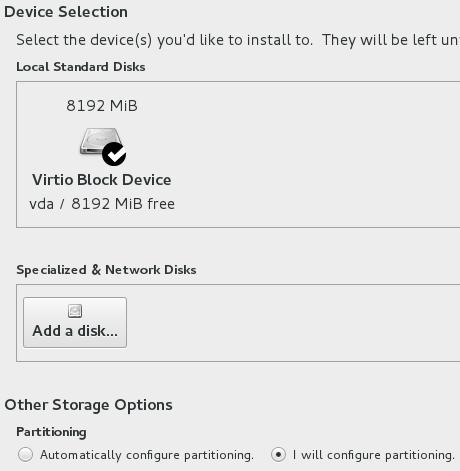
The disk partition should be Automatically create them.
安装时选择minimum installation. 安装完毕后,关闭虚拟机
安装后调整
复制安装好的硬盘:
$ ls
CentOS5G.qcow2
$ cp CentOS5G.qcow2 Duplicated.qcow2
$ ls
CentOS5G.qcow2  Duplicated.qcow2
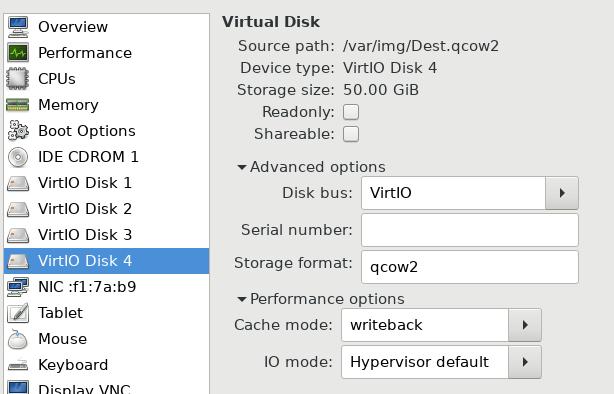
创建一个中转盘,一个大小为50G的目标盘,
中转盘用于存放克隆文件,而目标盘则是我们将克隆文件拷贝过去的盘。
$ qemu-img create -f qcow2 Middle.qcow2 16G
Formatting 'Middle.qcow2', fmt=qcow2 size=17179869184 encryption=off cluster_size=65536 lazy_refcounts=off refcount_bits=16
$ qemu-img create -f qcow2 Dest.qcow2 50G
Formatting 'Dest.qcow2', fmt=qcow2 size=53687091200 encryption=off cluster_size=65536 lazy_refcounts=off refcount_bits=16
在virt-manager中,依次添加剩余的三块硬盘.
查看磁盘格局为,
可以看到,vdb和vda其实一样,但因为vdb没有被挂载,所以可以直接从其上往目标盘使用dd进行拷贝:
# fdisk -l

Disk /dev/vda: 8589 MB, 8589934592 bytes, 16777216 sectors
Units = sectors of 1 * 512 = 512 bytes
Sector size (logical/physical): 512 bytes / 512 bytes
I/O size (minimum/optimal): 512 bytes / 512 bytes
Disk label type: dos
Disk identifier: 0x000c7c16

   Device Boot      Start         End      Blocks   Id  System
/dev/vda1   *        2048     1026047      512000   83  Linux
/dev/vda2         1026048    16777215     7875584   8e  Linux LVM

Disk /dev/vdb: 8589 MB, 8589934592 bytes, 16777216 sectors
Units = sectors of 1 * 512 = 512 bytes
Sector size (logical/physical): 512 bytes / 512 bytes
I/O size (minimum/optimal): 512 bytes / 512 bytes
Disk label type: dos
Disk identifier: 0x000c7c16

   Device Boot      Start         End      Blocks   Id  System
/dev/vdb1   *        2048     1026047      512000   83  Linux
/dev/vdb2         1026048    16777215     7875584   8e  Linux LVM

Disk /dev/vdc: 17.2 GB, 17179869184 bytes, 33554432 sectors
Units = sectors of 1 * 512 = 512 bytes
Sector size (logical/physical): 512 bytes / 512 bytes
I/O size (minimum/optimal): 512 bytes / 512 bytes


Disk /dev/vdd: 53.7 GB, 53687091200 bytes, 104857600 sectors
Units = sectors of 1 * 512 = 512 bytes
Sector size (logical/physical): 512 bytes / 512 bytes
I/O size (minimum/optimal): 512 bytes / 512 bytes
中转盘可以用于制作img文件,
这里我们先不制作img文件,我们直接从复制的盘往目标盘写入:
[root@localhost ~]# dd if=/dev/vdb of=/dev/vdd bs=1M
8192+0 records in
8192+0 records out
8589934592 bytes (8.6 GB) copied, 150.443 s, 57.1 MB/s
现在查看/dev/vdd的磁盘结构,可以看到与/dev/vda和/dev/vdb是一样的.
扩展/dev/vdd的分区,从8G 扩展到50G:
# fdisk /dev/vdd
Welcome to fdisk (util-linux 2.23.2).

Changes will remain in memory only, until you decide to write them.
Be careful before using the write command.


Command (m for help): d
Partition number (1,2, default 2):
Partition 2 is deleted

Command (m for help): n
Partition type:
   p   primary (1 primary, 0 extended, 3 free)
   e   extended
Select (default p): p
Partition number (2-4, default 2):
First sector (1026048-104857599, default 1026048):
Using default value 1026048
Last sector, +sectors or +size{K,M,G} (1026048-104857599, default 104857599):
Using default value 104857599
Partition 2 of type Linux and of size 49.5 GiB is set

Command (m for help):
Command (m for help): p

Disk /dev/vdd: 53.7 GB, 53687091200 bytes, 104857600 sectors
Units = sectors of 1 * 512 = 512 bytes
Sector size (logical/physical): 512 bytes / 512 bytes
I/O size (minimum/optimal): 512 bytes / 512 bytes
Disk label type: dos
Disk identifier: 0x000c7c16

   Device Boot      Start         End      Blocks   Id  System
/dev/vdd1   *        2048     1026047      512000   83  Linux
/dev/vdd2         1026048   104857599    51915776   83  Linux

Command (m for help): t
Partition number (1,2, default 2): 2
Hex code (type L to list all codes): 8e
Changed type of partition 'Linux' to 'Linux LVM'

Command (m for help): w
The partition table has been altered!

Calling ioctl() to re-read partition table.
Syncing disks.
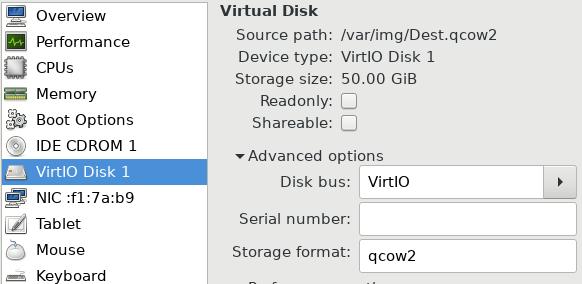
现在关闭虚拟机,使用Dest.qcow2文件创建一台新的虚拟机,
扩展分区
进入系统后,看到磁盘分区依然保持为8G下的磁盘格局
# df -HT
Filesystem                Type      Size  Used Avail Use% Mounted on
/dev/mapper/centos00-root xfs       7.2G  897M  6.3G  13% /
devtmpfs                  devtmpfs  510M     0  510M   0% /dev
tmpfs                     tmpfs     521M     0  521M   0% /dev/shm
tmpfs                     tmpfs     521M  7.0M  514M   2% /run
tmpfs                     tmpfs     521M     0  521M   0% /sys/fs/cgroup
/dev/vda1                 xfs       521M  131M  391M  26% /boot
tmpfs                     tmpfs     105M     0  105M   0% /run/user/0
使用以下命令,扩展pv(physical volumn):
[root@localhost ~]# pvs
  PV         VG       Fmt  Attr PSize PFree
  /dev/vda2  centos00 lvm2 a--  7.51g 40.00m
[root@localhost ~]# pvresize /dev/vda2
  Physical volume "/dev/vda2" changed
  1 physical volume(s) resized / 0 physical volume(s) not resized
[root@localhost ~]# pvs
  PV         VG       Fmt  Attr PSize  PFree
  /dev/vda2  centos00 lvm2 a--  49.51g 42.04g
扩展根分区, 注意mapper的名称:
[root@localhost ~]# vgs
  VG       #PV #LV #SN Attr   VSize  VFree
  centos00   1   2   0 wz--n- 49.51g 42.04g
[root@localhost ~]# ls /dev/centos00/
root  swap
[root@localhost ~]# lvextend -l +100%FREE /dev/centos00/root
  Size of logical volume centos00/root changed from 6.67 GiB (1707 extents) to 48.71 GiB (12469 extents).
  Logical volume root successfully resized.
扩展xfs:
[root@localhost ~]# xfs_growfs /dev/centos00/root
meta-data=/dev/mapper/centos00-root isize=256    agcount=4, agsize=436992 blks
         =                       sectsz=512   attr=2, projid32bit=1
         =                       crc=0        finobt=0
data     =                       bsize=4096   blocks=1747968, imaxpct=25
         =                       sunit=0      swidth=0 blks
naming   =version 2              bsize=4096   ascii-ci=0 ftype=0
log      =internal               bsize=4096   blocks=2560, version=2
         =                       sectsz=512   sunit=0 blks, lazy-count=1
realtime =none                   extsz=4096   blocks=0, rtextents=0
data blocks changed from 1747968 to 12768256
[root@localhost ~]# df -HT
Filesystem                Type      Size  Used Avail Use% Mounted on
/dev/mapper/centos00-root xfs        53G  897M   52G   2% /
devtmpfs                  devtmpfs  510M     0  510M   0% /dev
tmpfs                     tmpfs     521M     0  521M   0% /dev/shm
tmpfs                     tmpfs     521M  7.0M  514M   2% /run
tmpfs                     tmpfs     521M     0  521M   0% /sys/fs/cgroup
/dev/vda1                 xfs       521M  131M  391M  26% /boot
tmpfs                     tmpfs     105M     0  105M   0% /run/user/0
现在重新启动系统,发现根分区已经扩展到了50G的空间。
May 23, 2017
TechnologyPreviously install vagrant-libvirt is a tough task on ArchLinux, thus I do
following steps to let my vagrant-libvirt running again on archlinux, steps
are listed as following:
Remove the installed vagrant and backup the configuration files.
$ sudo pacman -Rsn vagrant
$ sudo mv ~/.vagrant.d ~/vagrant.d.back
$ sudo rm -rf /opt/vagrant
Install the vagrant-libvirt in AUR repository:
$ yaourt vagrant-libvirt
$ tsocks vagrant plugin install vagrant-libvirt
$ vagrant plugin list
vagrant-libvirt (0.0.40)
Please notice the plugin should also be installed after you have installed the
vagrant-libvirt via yaourt.
May 22, 2017
TechnologyPurpose
For adding second disk to vagrant machine, while vagrant machine is running
under virtualbox hypervisor. Following are the steps for doing this.
Steps
Vagrantfile definition:
# -*- mode: ruby -*-
# vi: set ft=ruby :
Vagrant.configure("2") do |config|

  config.vm.provider "virtualbox" do |vb|
    # Display the VirtualBox GUI when booting the machine
    #vb.gui = true
      unless File.exist?('./secondDisk.vdi')
        vb.customize ['createhd', '--filename', './secondDisk.vdi', '--variant', 'Fixed', '--size', 10 * 1024]
      end

    # Customize the amount of memory on the VM:
    vb.memory = "1024"
    vb.customize ['storageattach', :id,  '--storagectl', 'SATA', '--port', 1, '--device', 0, '--type', 'hdd', '--medium', './secondDisk.vdi']

  end
end
The initial.sh should be run under the vagrant machine has been created:
cat initial.sh
set -e
set -x
echo 'Acquire::http::Proxy "http://192.168.0.121:3142";'>/etc/apt/apt.conf.d/01proxy
# Added the primary repository
apt-get update
apt-get -y install vim lvm2

if [ -f /etc/disk_added_date ]
then
   echo "disk already added so exiting."
   exit 0
fi


sudo fdisk -u /dev/sdb <<EOF
n
p
1


t
8e
w
EOF

pvcreate /dev/sdb1
vgextend vagrant-vg /dev/sdb1
lvextend -l +100%FREE /dev/vagrant-vg/root
resize2fs /dev/vagrant-vg/root

date > /etc/disk_added_date
!!!Notice!!!
You should especially notice the lvextend’s configuration, for every vagrant box
has the different naming mechanism.
May 12, 2017
Technology- 处理用户输入
vars_prompt, 设置KVMPassword的值为多少

- name: apply CloudStack configuration to all nodes
  hosts: cloudstackmanagement
  sudo: yes

  #########################################################################################
  # Vars and vars_prompt
  #
  vars_prompt:

    - name: "KVMPassword"
      prompt: "KVM host root password"
      private: yes
- 可以使用when来界定用户输入值的有效
    - name: Validate input - KVMServer host password
      fail: msg="Missing or incorrect KVM Host password."
      when: KVMPassword is not defined or ( KVMPassword is defined and KVMPassword  == "" )
when 针对不同的返回值采取不同的行动(举某个安装命令yum/apt差别为例)
- name: Install the required  packages in Redhat derivatives
  yum: name={{ item }} state=installed
  with_items: network_pkgs
  when: ansible_os_family == 'RedHat'

- name: Install the required packages in Debian derivatives
  apt: name={{ item }} state=installed update_cache=yes
  with_items: network_pkgs
  environment: env
  when: ansible_os_family == 'Debian'
- 某节点输出的值可以被写入到register中,譬如以下命令根据预定义参数,创建zone,管道输出后结果到ZoneID变量中。
    - name: Configure zone and add resources
      shell: cloudmonkey create zone name={{ CMConfig.ZoneName }} dns1={{ CMConfig.PublicDNS1 }} dns2={{ CMConfig.PublicDNS2 }} internaldns1={{ CMConfig.InternalDNS1 }} internaldns2={{ CMConfig.InternalDNS2 }} guestcidraddress={{ CMConfig.GuestCIDR }} networktype={{ CMConfig.NetworkType }} localstorageenabled=false | grep ^id | awk '{print $3}'
      register: ZoneID
- 对ZoneID变量的使用: {{ ZoneID.stdout }}
    - name: Create physical network 1
      shell:  cloudmonkey create physicalnetwork name={{ CMConfig.Phys1Name }} zoneid={{ ZoneID.stdout }} isolationmethods={{ CMConfig.Phys1Isolation }} vlan={{ CMConfig.Phys1VLANs }} | grep ^id | awk '{print $3}'
      register: Phys1ID
