Aug 21, 2017
TechnologyEnvironment
bare metal vs kvm vs docker
Testing script:
#!/bin/bash
function tgt_r {
fio -filename=/root/ioscript/ccc -direct=1 -iodepth 4 -thread -rw=read -ioengine=libaio -bs=$1 -size=120G  -runtime=200 -group_reporting -name=mytest &>> s_r_test
}

function tgt_w {
fio -filename=/root/ioscript/ccc -direct=1 -iodepth 4 -thread -rw=write -ioengine=libaio -bs=$1 -size=120G  -runtime=200 -group_reporting -name=mytest &>> s_w_test
}


function tgt_rr {
fio -filename=/root/ioscript/ccc -direct=1 -iodepth 4 -thread -rw=randread -ioengine=libaio -bs=$1 -size=120G  -runtime=200 -group_reporting -name=mytest &>> r_r_test
}

function tgt_rw {
fio -filename=/root/ioscript/ccc -direct=1 -iodepth 4 -thread -rw=randwrite -ioengine=libaio -bs=$1 -size=120G  -runtime=200 -group_reporting -name=mytest &>> r_w_test
}

mkdir -p /root/ioscript
rm -f /root/ioscript/ccc; touch /root/ioscript/ccc
tgt_r 128K
rm -f /root/ioscript/ccc; touch /root/ioscript/ccc
tgt_w 128K
rm -f /root/ioscript/ccc; touch /root/ioscript/ccc
tgt_rr 4K
rm -f /root/ioscript/ccc; touch /root/ioscript/ccc
tgt_rw 4K
Sequence read/write, 128K. Random read/write: 4K.
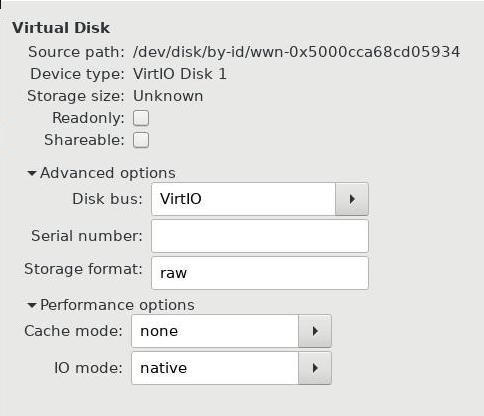
KVM using block device:

Result:
Bare Metal:
Sequence Read: 1000
Sequence Write: 893
Random Read: 1000
Random Write: 131
KVM:
Sequence Read: 800
Sequence Write: 795
Random Read: 84
Random Write: 107
Docker:
Sequence Read: 975
Sequence Write: 909
Random Read: 114
Random Write: 81
Seems Not OK…….
Will use another disk for testing.
Aug 11, 2017
TechnologyCode
Before you run:
# apt-get install python-pip
# pip install nose
# pip install python-memcached
Directory Structure:
test@local:~$ tree /tmp/foomodule/
/tmp/foomodule/
|-- foo
|   |-- a.py
|   |-- b.py
|   `-- __init__.py
`-- tests
    |-- test_a.py
    `-- test_b.py
Module Source Code:
# /tmp/foomodule/foo/a.py

def add(a, b):
    return a + b
def double(a):
    return a * 2

# /tmp/foomodule/foo/b.py

import memcache
class Cache:
    def __init__(self, server):
        self.cache = memcache.Client([server])
    def get(self, name):
        return self.cache.get(name)
    def set(self, name, value):
        return self.cache.set(name, value)
    def delete(self, name):
        return self.cache.delete(name)
    def close(self):
        self.cache.disconnect_all()

# /tmp/foomodule/foo/__init__.py

from a import *
from b import *
Testing Code:
# /tmp/foomodule/tests/test_a.py
from foo.a import add, double
def test_add():
    v = add(10, 20)
    assert v == 30
def test_double():
    v = double(10)
    assert v == 20

# /tmp/foomodule/tests/test_b.py
from foo.b import Cache
class TestCache:

    def setUp(self):
        self.cache = Cache("172.17.0.1:11211")
        self.key   = "name"
        self.value = "smallfish"

    def tearDown(self):
        self.cache.close()

    def test_00_get(self):
        v = self.cache.get(self.key)
        assert v == None

    def test_01_set(self):
        v = self.cache.set(self.key, self.value)
        assert v == True
        v = self.cache.get(self.key)
        assert v == self.value

    def test_02_delete(self):
        v = self.cache.delete(self.key)
        assert v == True
memcached running in docker:
# docker pull memcached
# docker run -d -p 11211:11211 memcached
Run testing via:
# nosetests -s -v
test_a.test_add ... ok
test_a.test_double ... ok
test_b.TestCache.test_00_get ... ok
test_b.TestCache.test_01_set ... ok
test_b.TestCache.test_02_delete ... ok

----------------------------------------------------------------------
Ran 5 tests in 0.012s

OK
By default, nose will run test to test directory, file(contains test),
functions(started with test_), class(started with Test), assert will run
assertion.
coverage
Install coverage via:
# pip install coverage
Run with coverage:
# coverage html
# ls
foo  htmlcov  tests
# nosetests -s -v --with-coverage
# coverage report -m
nosetests could be run with coverage items.
Aug 2, 2017
TechnologyDocker Images
需要用到的Docker Image: wgetbuildcs6, 构建的Dockerfile:
FROM centos:centos6

MAINTAINER dash xxx <xxxx@gmail.com>

RUN yum -y install curl git gcc make rpm-build python-devel which lrzsz tar gnutls gnutls-devel
将创建好的镜像上传到私有仓库(某台内网主机):
$ sudo docker load<wgetbuildcs6.tar
$ sudo docker images | grep wgetbuildcs6
$ sudo docker tag 1020xxxxx 192.168.124.102:5000/xxxxx/wgetbuildcs6:latest
$ sudo docker push  192.168.124.102:5000/xxxxx/wgetbuildcs6:latest

Git Repository
在CentOS7.3系统上,安装git daemon:
# yum install -y git-daemon
在源码目录下, 执行以下命令:
# git init
# git add .
# git commit -m "initial commit"
# cd ..
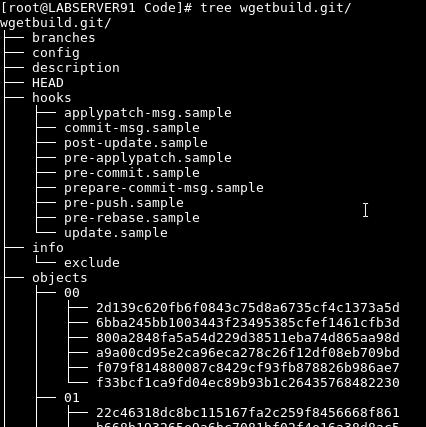
# git clone --bare wgetbuild wgetbuild.git

现在运行:
# git daemon --verbose --export-all --base-path=.
即可激活git server.
测试:
# git clone git://192.192.192.91/wgetbuild.git mybuild
证明友商方案对git协议支持不佳,切换回gitlab,用http继续测试。
Enable push in git
Enable push to git server in git daemon:
# git daemon --enable=receive-pack --verbose --export-all --base-path=.
Aug 1, 2017
TechnologyNetwork Preparation
libvirt network preparation:
$ cat internal.xml
<network>
	<name>internal</name>
	<bridge name='virbr8'/>
</network>
$ cat external.xml
<network>
	<name>external</name>
	<bridge name='virbr9'/>
</network>
$ cat management.xml
<network>
	<name>management</name>
	<bridge name='virbr7'/>
	<ip address='192.168.3.1' netmask='255.255.255.0'>
	</ip>
</network>
$ cat heartbeat.xml
<network>
	<name>heartbeat</name>
	<bridge name='virbr6'/>
</network>
Define all of the networking, take heartbeat networking for example:
$ sudo virsh net-define heartbeat.xml
$ sudo virsh net-autostart heartbeat
$ sudo virsh net-start heartbeat
iscsi node
Create a new machine(192.168.122.200), CentOS6.9, use local iso for
installation:
First you have to add one network card(192.168.3.200), and disable selinux,
then you do following steps:
# yum install -y scsi-target-utils
# mkdir -p /var/lib/tgtd/cluster01
# cd /var/lib/tgtd/cluster01/
# dd if=/dev/zero of=volume01.img bs=1M count=100
# dd if=/dev/zero of=volume02.img bs=1M count=1000
Edit the tgtd configuration:
# vim /etc/tgt/targets.conf
<target iqn.2011-10.com.example.kvmhost01:tgt01>
    backing-store /var/lib/tgtd/cluster01/volume01.img
    backing-store /var/lib/tgtd/cluster01/volume02.img
</target>
# chkconfig tgtd on
# service tgtd start
# tgt-admin -s
# chkconfig iptables off
# service iptables stop
node01/node02
Take node01 for example:
[root@node01 ~]# cat /etc/sysconfig/network-scripts/ifcfg-eth1
DEVICE=eth1
TYPE=Ethernet
ONBOOT=yes
NM_CONTROLLED=no
BOOTPROTO=static
IPADDR=192.168.3.201
NETMASK=255.255.255.0

[root@node01 ~]# cat /etc/sysconfig/network-scripts/ifcfg-eth2
DEVICE=eth2
TYPE=Ethernet
ONBOOT=yes
NM_CONTROLLED=no
BOOTPROTO=static
IPADDR=192.168.4.201
NETMASK=255.255.255.0
node02 for example:
[root@node02 ~]# cat /etc/sysconfig/network-scripts/ifcfg-eth1
DEVICE=eth1
TYPE=Ethernet
ONBOOT=yes
NM_CONTROLLED=no
BOOTPROTO=static
IPADDR=192.168.3.202
NETMASK=255.255.255.0

[root@node02 ~]# cat /etc/sysconfig/network-scripts/ifcfg-eth2
DEVICE=eth2
TYPE=Ethernet
ONBOOT=yes
NM_CONTROLLED=no
BOOTPROTO=static
IPADDR=192.168.4.202
NETMASK=255.255.255.0
Define its /etc/hosts:
127.0.0.1   localhost
192.168.122.201	node01
192.168.122.202	node02
192.168.3.201	node01m
192.168.3.202	node02m
192.168.4.201	node01h
192.168.4.202	node02h
Also disable iptables.
ssh-keygen for ssh key-pairs and let them login without password:
# ssh-keygen -N ""
# ssh-copy-id node01
# ssh-copy-id node02
Find iscsi
In node01/node02, do following:
# yum install -y iscsi-initiator-utils
# chkconfig iscsi on
# iscsiadm -m discovery --type sendtargets --portal 192.168.3.200
# service iscsi start
The newly added disk are named as /dev/sda, /dev/sdb.
HA Add-On
In node01/node02, install the package group via:
# yum groupinstall -y "High Availability"
Start ricci service, and set the service status for cman and rgmanager:
# chkconfig ricci on; service ricci start
# passwd ricci
# chkconfig cman off; chkconfig rgmanager off
Install httpd in both node:
# yum install -y httpd
Node01
Quorum Disk:
[root@node01 ~]# mkqdisk -c /dev/sda -l qdisk01
mkqdisk v3.0.12.1

Writing new quorum disk label 'qdisk01' to /dev/sda.
WARNING: About to destroy all data on /dev/sda; proceed [N/y] ? y
Initializing status block for node 1...
Initializing status block for node 2...
Initializing status block for node 3...
Initializing status block for node 4...
Initializing status block for node 5...
Initializing status block for node 6...
Initializing status block for node 7...
Initializing status block for node 8...
Initializing status block for node 9...
Initializing status block for node 10...
Initializing status block for node 11...
Initializing status block for node 12...
Initializing status block for node 13...
Initializing status block for node 14...
Initializing status block for node 15...
Initializing status block for node 16...
Then format the /dev/sdb, and use this filesystem for saving the apache
content:
# mkfs.ext4 /dev/sdb
# mount /dev/sdb /mnt
# cp -ar /var/www/* /mnt/
# umount /mnt
Cluster Configuration
/etc/cluster/cluster.conf:
<?xml version="1.0"?>
<cluster config_version="1" name="cluster01">
  <cman expected_votes="3"/>

  <clusternodes>
    <clusternode name="node01h" nodeid="1" votes="1">
      <fence>
        <method name="virsh_reboot">
          <device name="kvmhost01" port="node1"/>
        </method>
      </fence>
    </clusternode>

    <clusternode name="node02h" nodeid="2" votes="1">
      <fence>
        <method name="virsh_reboot">
          <device name="kvmhost01" port="node2"/>
        </method>
      </fence>
    </clusternode>
  </clusternodes>

  <totem token="20000"/>
  <quorumd interval="1" label="qdisk01" master_wins="1" tko="10" votes="1"/>

  <fencedevices>
    <fencedevice name="kvmhost01" agent="fence_virsh" ipaddr="192.168.3.1" login="root" passwd="gwoguwoguoeg" option="reboot"/>
  </fencedevices>

  <rm>
    <failoverdomains>
      <failoverdomain name="dom01">
        <failoverdomainnode name="node01h"/>
        <failoverdomainnode name="node02h"/>
      </failoverdomain>
    </failoverdomains>

    <service autostart="0" domain="dom01" name="service01">
      <ip address="192.168.122.209" monitor_link="on">
        <fs name="webdata01" device="/dev/sdb" fstype="ext4" mountpoint="/var/www" self_fence="1">
          <apache name="webserver01"/>
        </fs>
      </ip>
    </service>
  </rm>
</cluster>
Save the configuration and scp it to node02:
# ccs_config_validate
# scp ./cluster.conf  node02:/etc/cluster/
Start service/Stop Service scripts:
[root@node01 ~]# cd /usr/local/bin/
[root@node01 bin]# ls
clstart  clstart_all  clstop  clstop_all
[root@node01 bin]# pwd
/usr/local/bin
[root@node01 bin]# cat clstart
#!/bin/sh
service cman start
service rgmanager start
[root@node01 bin]# cat clstart_all
#!/bin/sh
ssh node01 /usr/local/bin/clstart &
ssh node02 /usr/local/bin/clstart &
wait
[root@node01 bin]# cat clstop
#!/bin/sh
service rgmanager stop
service cman stop
[root@node01 bin]# cat clstop_all
#!/bin/sh
ssh node01 /usr/local/bin/clstop &
ssh node02 /usr/local/bin/clstop &
wait
Now start the service:
# clstart_all
# clusvcadm -e service01 -m node01h
View the service status:
[root@node01 bin]# clustat
Cluster Status for cluster01 @ Tue Aug  1 15:57:18 2017
Member Status: Quorate

 Member Name                                                     ID   Status
 ------ ----                                                     ---- ------
 node01h                                                             1 Online, Local, rgmanager
 node02h                                                             2 Online, rgmanager
 /dev/block/8:0                                                      0 Online, Quorum Disk

 Service Name                                                     Owner (Last)                                                     State
 ------- ----                                                     ----- ------                                                     -----
 service:service01                                                node01h                                                          started
View ip addr on node01, you could see the 2 address attached to eth0.
Error
Emulate an error via:
# pkill -9 corosync
Now the node2 will try to detect the heartbeat, if not, it will finally reboot the
node01.
$ tail -f /var/log/message
Aug  1 15:58:21 node02 corosync[4089]:   [CMAN  ] quorum device re-registered
Aug  1 15:58:21 node02 corosync[4089]:   [QUORUM] Members[2]: 1 2
Aug  1 15:58:21 node02 qdiskd[4148]: Assuming master role
Aug  1 15:58:21 node02 qdiskd[4148]: Writing eviction notice for node 1
Aug  1 15:58:22 node02 qdiskd[4148]: Node 1 evicted
Aug  1 15:58:24 node02 corosync[4089]:   [TOTEM ] A processor failed, forming new configuration.
Aug  1 15:58:26 node02 corosync[4089]:   [QUORUM] Members[1]: 2
Aug  1 15:58:26 node02 corosync[4089]:   [TOTEM ] A processor joined or left the membership and a new membership was formed.
Aug  1 15:58:26 node02 kernel: dlm: closing connection to node 1
Aug  1 15:58:26 node02 corosync[4089]:   [CPG   ] chosen downlist: sender r(0) ip(192.168.4.202) ; members(old:2 left:1)
Aug  1 15:58:26 node02 corosync[4089]:   [MAIN  ] Completed service synchronization, ready to provide service.
Aug  1 15:58:26 node02 rgmanager[4511]: State change: node01h DOWN
Aug  1 15:58:26 node02 fenced[4332]: fencing node node01h
Aug  1 15:58:29 node02 fenced[4332]: fence node01h success
Aug  1 15:58:29 node02 rgmanager[4511]: Taking over service service:service01 from down member node01h
Aug  1 15:58:29 node02 rgmanager[5640]: [ip] Adding IPv4 address 192.168.122.209/24 to eth0
Aug  1 15:58:33 node02 rgmanager[5755]: [fs] mounting /dev/sdb on /var/www
Aug  1 15:58:33 node02 kernel: EXT4-fs (sdb): recovery complete
Aug  1 15:58:33 node02 kernel: EXT4-fs (sdb): mounted filesystem with ordered data mode. Opts:
Aug  1 15:58:33 node02 rgmanager[5923]: [apache] Checking Existence Of File /var/run/cluster/apache/apache:webserver01.pid [apache:webserver01] > Failed
Aug  1 15:58:33 node02 rgmanager[5945]: [apache] Monitoring Service apache:webserver01 > Service Is Not Running
Aug  1 15:58:33 node02 rgmanager[5967]: [apache] Starting Service apache:webserver01
Aug  1 15:58:34 node02 rgmanager[4511]: Service service:service01 started
After reboot, in node01 run clstart to start the cluster.
Recover the service to node01:
[root@node01 ~]# clustat
Cluster Status for cluster01 @ Tue Aug  1 16:02:23 2017
Member Status: Quorate

 Member Name                                                     ID   Status
 ------ ----                                                     ---- ------
 node01h                                                             1 Online, Local, rgmanager
 node02h                                                             2 Online, rgmanager
 /dev/block/8:0                                                      0 Online, Quorum Disk

 Service Name                                                     Owner (Last)                                                     State
 ------- ----                                                     ----- ------                                                     -----
 service:service01                                                node02h                                                          started
[root@node01 ~]# clusvcadm -r service01 -m node01h
Trying to relocate service:service01 to node01h...Success
service:service01 is now running on node01h
[root@node01 ~]# clustat
Cluster Status for cluster01 @ Tue Aug  1 16:03:38 2017
Member Status: Quorate

 Member Name                                                     ID   Status
 ------ ----                                                     ---- ------
 node01h                                                             1 Online, Local, rgmanager
 node02h                                                             2 Online, rgmanager
 /dev/block/8:0                                                      0 Online, Quorum Disk

 Service Name                                                     Owner (Last)                                                     State
 ------- ----                                                     ----- ------                                                     -----
 service:service01                                                node01h                                                          started
Configuration Modify
Use cman_tool version -r command. but not all of the services could be applied
in this way.


