
WorkingTipsOnRPIXC
Mar 12, 2021
Technology
目标
基于树莓派的arm64快速验证平台。
系统准备
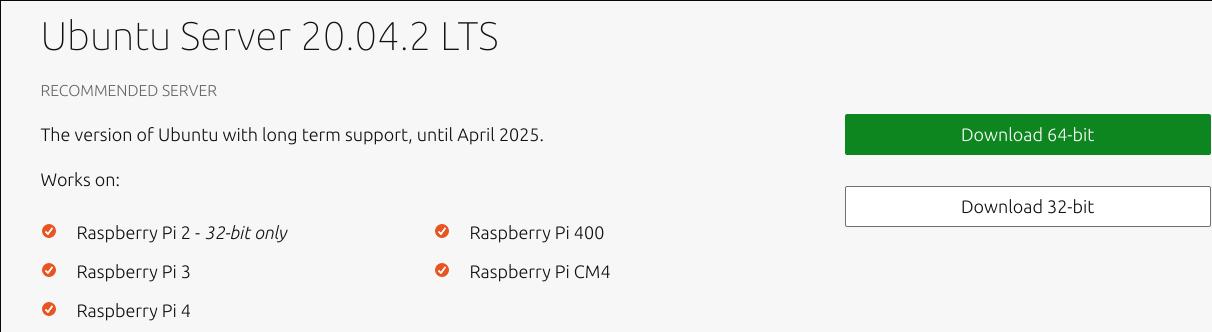
Ubuntu官网下载到Ubuntu 20.04.2 LTS 64位镜像:
https://ubuntu.com/download/raspberry-pi
插入tf卡,烧写img文件至tf卡中, Linux 命令为:
 $ sudo dd if=./ubuntu-20.04.2-preinstalled-server-arm64+raspi.img of=/dev/sdd bs=1M && sudo sync
记录了3108+1 的读入
记录了3108+1 的写出
3259499520字节(3.3 GB,3.0 GiB)已复制,79.1856 s,41.2 MB/s
Windows下可自行下载rpi镜像烧写软件以完成烧写操作。
初次登陆
如果具备mini-hdmi转接线及鼠标,则可外接显示器用于登陆RPI。
如果不具备显示器,则可以通过接入网络来远程登陆RPI,登陆到局域网段的路由器上查看rpi获取到的Ip地址即可。
例如, 在路由器上获取到RPI IP地址:
$ cat /var/lib/misc/dnsmasq.leases
1615556943 dc:a6:32:e2:0b:44 10.137.149.171 ubuntu ff:dc:6b:56:57:00:02:00:00:ab:11:b2:87:a0:99:d0:fb:b1:ce
而后用ssh登陆, 默认用户名/密码为ubuntu/ubuntu,初次登陆后会强制要求更改:
$ ssh ubuntu@10.137.149.171
。。。。

WARNING: Your password has expired.
You must change your password now and login again!
Changing password for ubuntu.
Current password:
New password:
Retype new password:
passwd: password updated successfully
Connection to 10.137.149.171 closed.
$ ssh ubuntu@10.137.149.171
ubuntu@10.137.149.171's password:
Welcome to Ubuntu 20.04.2 LTS (GNU/Linux 5.4.0-1028-raspi aarch64)
虚拟机开发环境准备
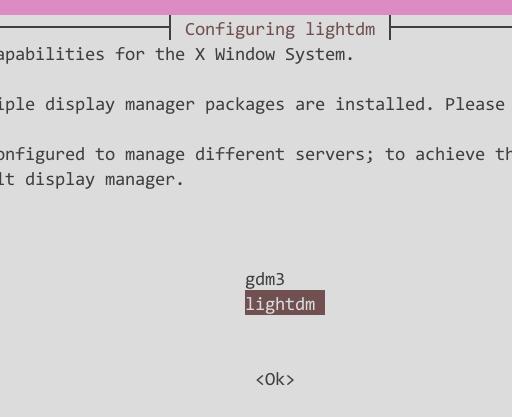
安装基本桌面, 选择lightdm:
$ sudo apt-get install lxde virt-manager tightvncserver net-tools
开启vnc:
$ vncserver
You will require a password to access your desktops.

Password:
Verify:
Would you like to enter a view-only password (y/n)? y
Password:
Verify:

New 'X' desktop is ubuntu:1

Creating default startup script /home/ubuntu/.vnc/xstartup
Starting applications specified in /home/ubuntu/.vnc/xstartup
Log file is /home/ubuntu/.vnc/ubuntu:1.log
此时需要先关闭正在运行的vncserver, 配置默认桌面环境后再重新创建:
ubuntu@ubuntu:~$ vncserver -kill :1
Killing Xtightvnc process ID 30773
ubuntu@ubuntu:~$ vim ~/.vnc/xstartup
#!/bin/sh
exec startlxde

ubuntu@ubuntu:~$ vncserver

New 'X' desktop is ubuntu:1

Starting applications specified in /home/ubuntu/.vnc/xstartup
Log file is /home/ubuntu/.vnc/ubuntu:1.log
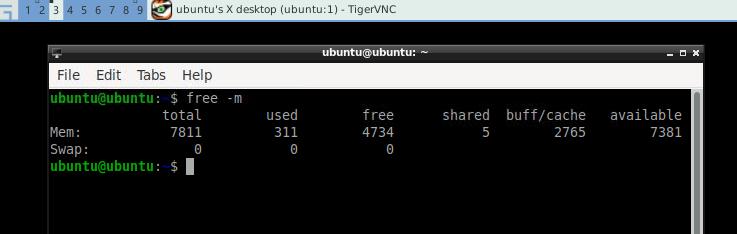
此时可以使用vncviewer登陆:
开启libvirtd权限:
$ sudo systemctl enable libvirtd
$ sudo systemctl start libvirtd
$  sudo usermod -a -G kvm,libvirt  ubuntu
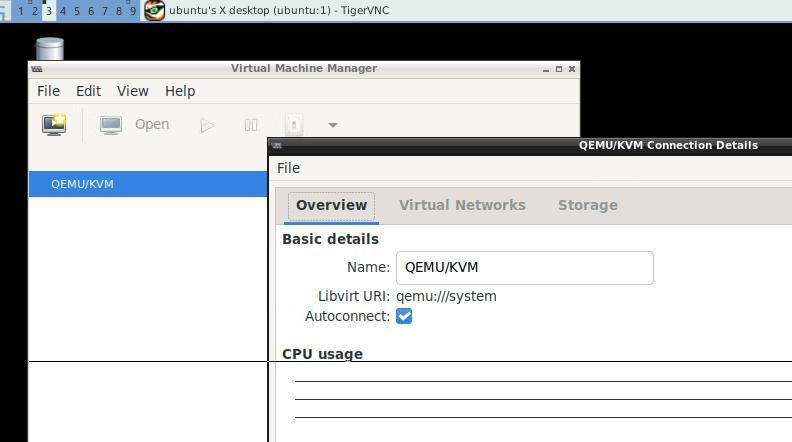
此时需重启rpi后,重新登陆/开启vnc后,验证virt-manager的可用性:
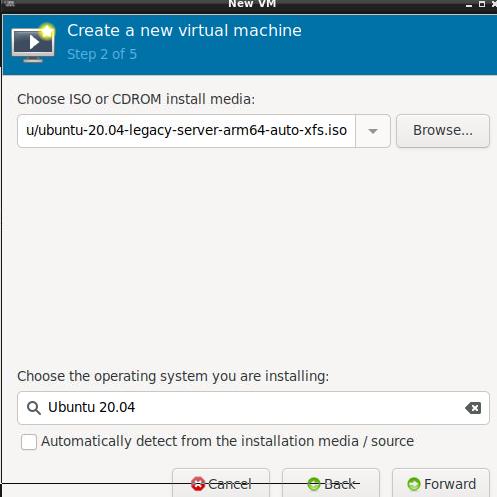
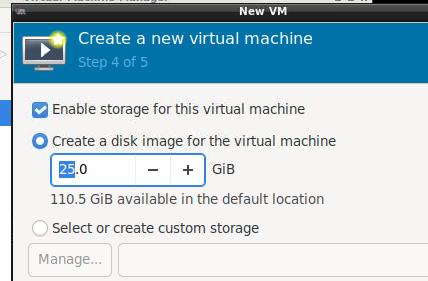
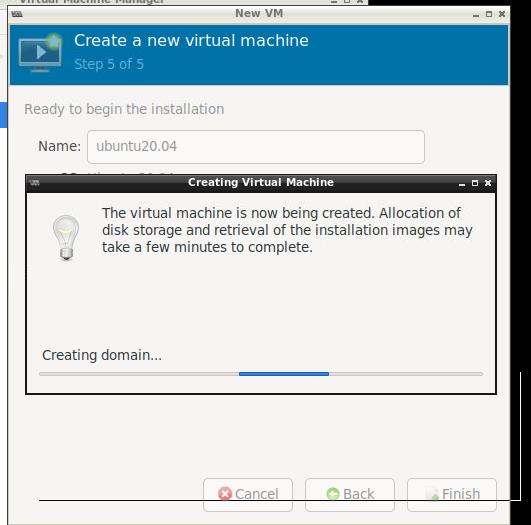
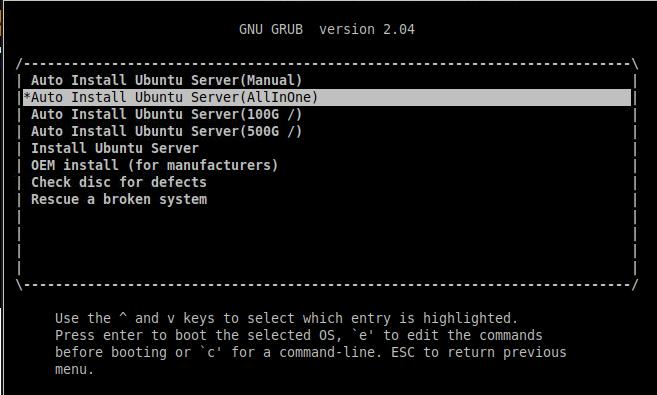
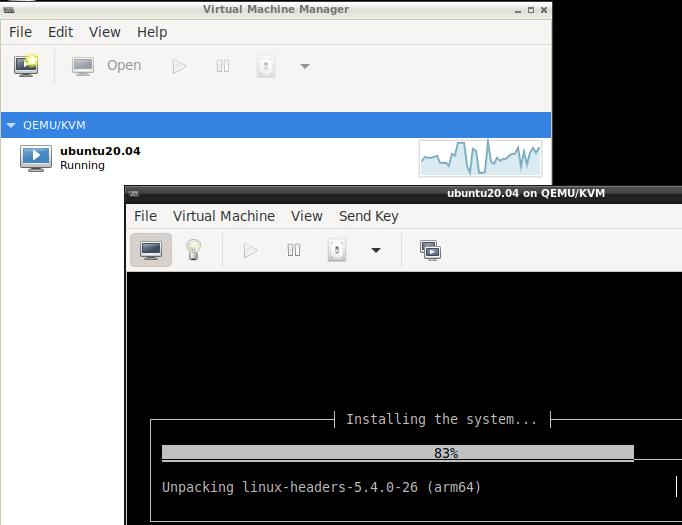
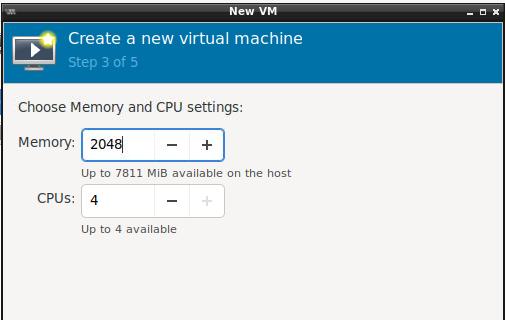
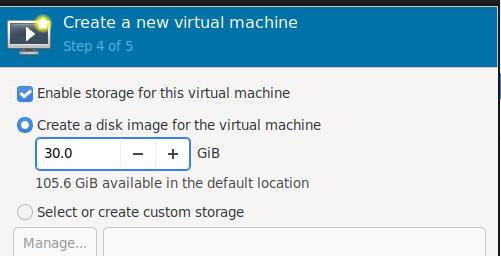
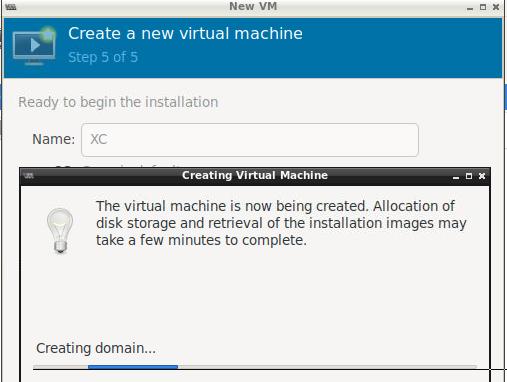
虚拟机系统安装
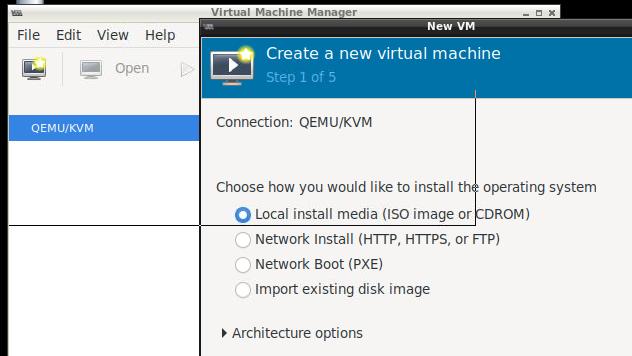

进入到安装界面后(All-In-One安装):
安装过程:
安装完毕后可以备份一下初始化镜像以便后续使用:
$ sudo virsh dumpxml ubuntu20.04 | grep qcow2
      <driver name='qemu' type='qcow2'/>
      <source file='/var/lib/libvirt/images/ubuntu20.04.qcow2'/>
ubuntu@ubuntu:~$ sudo cp /var/lib/libvirt/images/ubuntu20.04.qcow2 .
后续开始部署RONG:
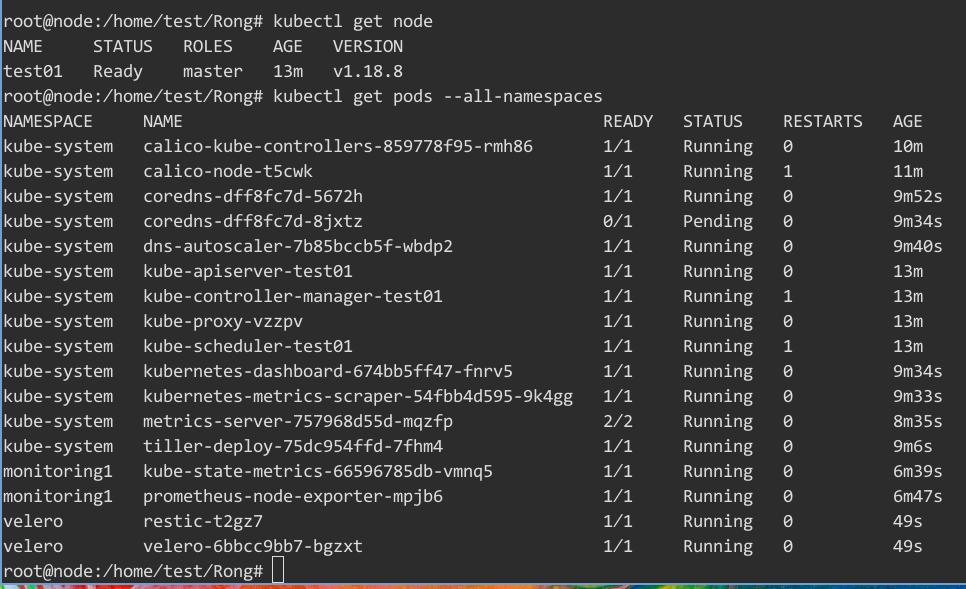
部署完毕后资源占用情况:
root@node:/home/test/Rong# free -m
              total        used        free      shared  buff/cache   available
Mem:           5909        1790         132           2        3987        4205
Swap:             0           0           0
root@node:/home/test/Rong# df -h
Filesystem               Size  Used Avail Use% Mounted on
udev                     2.9G     0  2.9G   0% /dev
tmpfs                    591M  2.5M  589M   1% /run
/dev/mapper/vgnode-root   24G   13G   12G  52% /
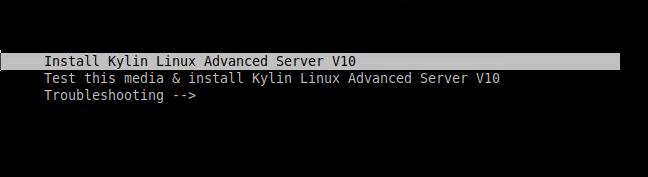
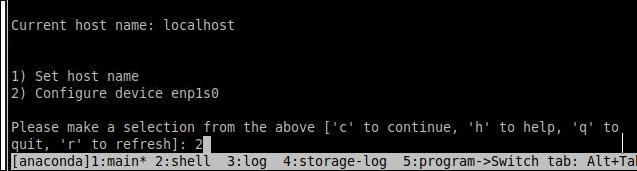
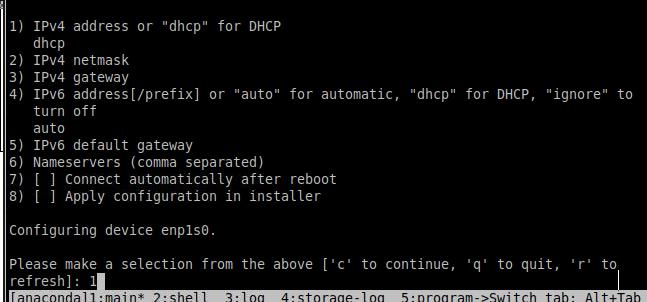
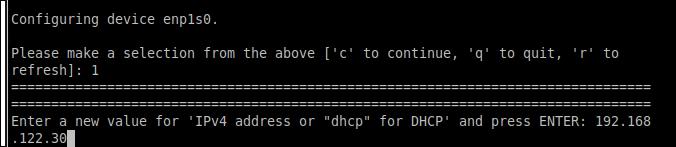
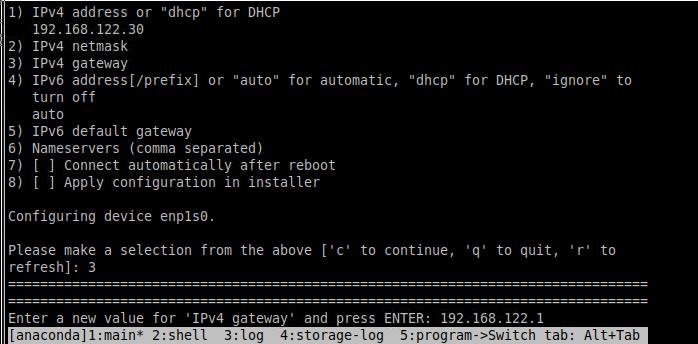
XC适配
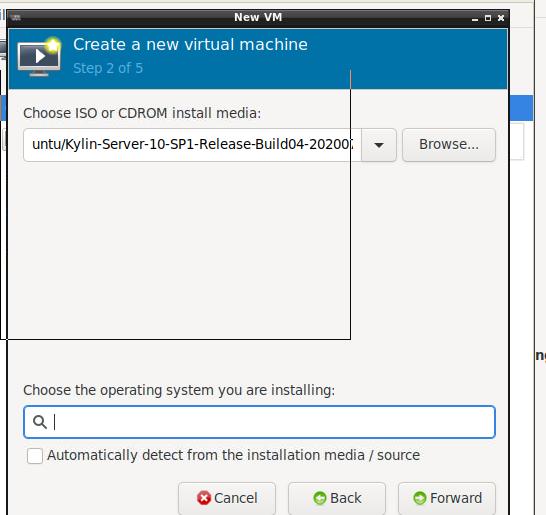
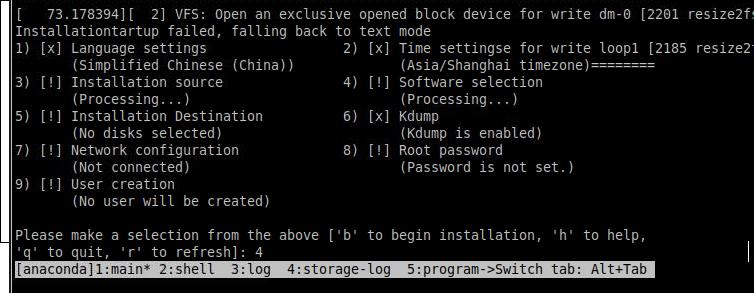
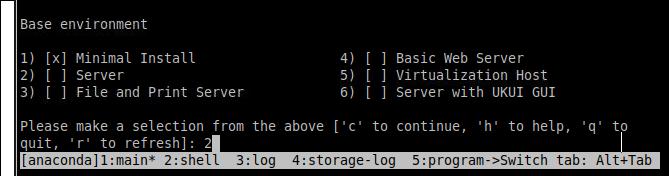
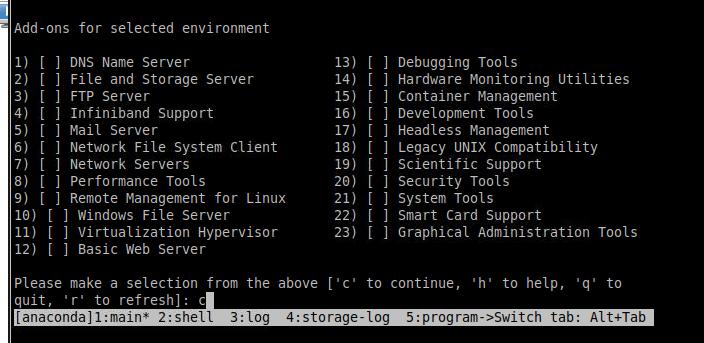
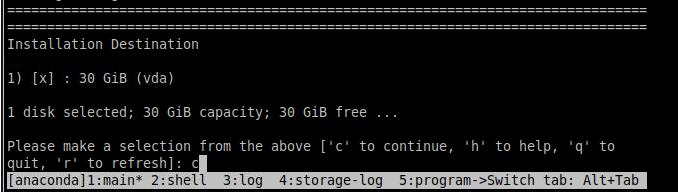
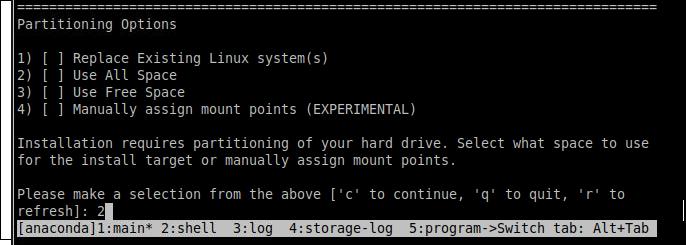
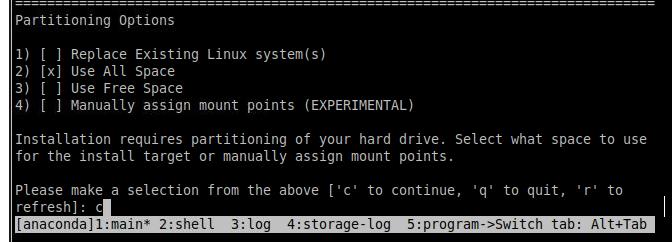
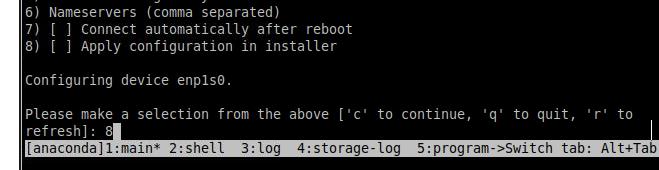
选择国产操作系统ISO用于安装:
安装界面:

外面ping:
ubuntu@ubuntu:~$ ping 192.168.122.30
PING 192.168.122.30 (192.168.122.30) 56(84) bytes of data.
64 bytes from 192.168.122.30: icmp_seq=1 ttl=64 time=0.941 ms
64 bytes from 192.168.122.30: icmp_seq=2 ttl=64 time=0.499 ms
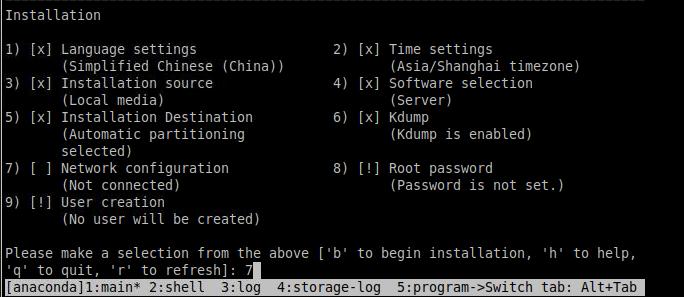
8-> 设置root password.
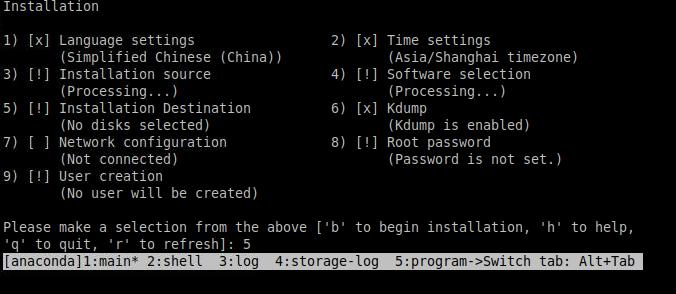
如果无其他设置,则直接安装
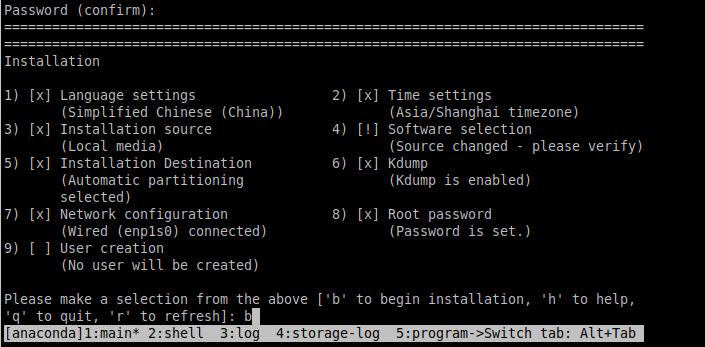
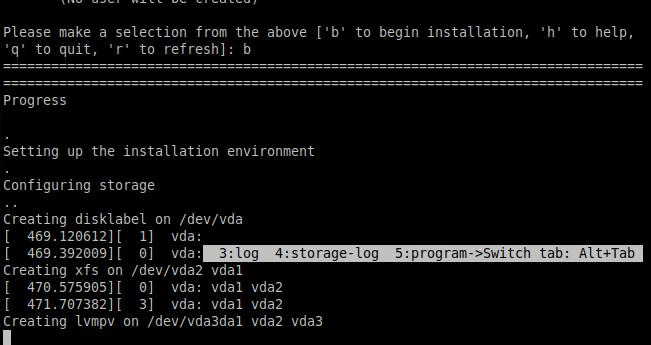
安装过程:
安装完毕后,登陆:
$ ssh root@192.168.122.30
The authenticity of host '192.168.122.30 (192.168.122.30)' can't be established.
ECDSA key fingerprint is SHA256:wC8hcKiDjbz1+l9MAIUWMZju0evX4ZAIQjz+GPzEL4I.
Are you sure you want to continue connecting (yes/no/[fingerprint])? yes
Warning: Permanently added '192.168.122.30' (ECDSA) to the list of known hosts.

Authorized users only. All activities may be monitored and reported.
root@192.168.122.30's password:

Authorized users only. All activities may be monitored and reported.
Web console: https://localhost:9090/ or https://192.168.122.30:9090/

Last failed login: Thu Apr  2 03:46:11 CST 2020 from 192.168.122.1 on ssh:notty
There was 1 failed login attempt since the last successful login.
[root@localhost ~]#
部署完RONG后,检查:
[root@localhost Rong]# kubectl get node
NAME     STATUS   ROLES    AGE     VERSION
test01   Ready    master   9m48s   v1.18.8
[root@localhost Rong]# uname -a
Linux localhost.localdomain 4.19.90-17.ky10.aarch64 #1 SMP Sun Jun 28 14:27:40 CST 2020 aarch64 aarch64 aarch64 GNU/Linux
[root@localhost Rong]# cat /etc/issue

Authorized users only. All activities may be monitored and reported.
pod对应的指标:
[root@localhost ~]# kubectl get pods --all-namespaces
NAMESPACE     NAME                                          READY   STATUS              RESTARTS   AGE
kube-system   calico-kube-controllers-f874b4f5f-846zc       0/1     CrashLoopBackOff    12         24m
kube-system   calico-node-4d869                             0/1     CrashLoopBackOff    12         25m
kube-system   coredns-dff8fc7d-f2n26                        0/1     ContainerCreating   0          23m
kube-system   dns-autoscaler-7b85bccb5f-264cz               0/1     ContainerCreating   0          23m
kube-system   kube-apiserver-test01                         1/1     Running             1          28m
kube-system   kube-controller-manager-test01                1/1     Running             1          28m
kube-system   kube-proxy-q6mnw                              1/1     Running             1          28m
kube-system   kube-scheduler-test01                         1/1     Running             1          28m
kube-system   kubernetes-dashboard-674bb5ff47-mw97w         0/1     ContainerCreating   0          23m
kube-system   kubernetes-metrics-scraper-54fbb4d595-64b6j   0/1     ContainerCreating   0          23m
kube-system   metrics-server-757968d55d-62czd               0/2     ContainerCreating   0          21m
kube-system   tiller-deploy-75dc954ffd-psj68                0/1     ContainerCreating   0          22m
同样的vm在华为的HI1616机器上表现正常。可见YINHE 麒麟 V10的系统bug较多,可能未曾适配过完整的硬件列表。