OnVRTest
May 3, 2017
Technology
Preparation
Ubuntu14.04, KVM(cpu host-passthrough), 16G memory, 8-Core CPU, 200G Disk.
Update/upgrade to newest version of ubuntu:
# apt-get update
# apt-get upgrade -y
Enable root login with the password set as engine123.
# sed -i '/PermitRootLogin without-password/PermitRootLogin yes' /etc/ssh/sshd_config
# service ssh restart
Networking
Using bridged networking in ubuntu:/etc/network/interfaces content:
# The loopback network interface
auto lo
iface lo inet loopback

# The primary network interface
auto eth0
iface eth0 inet manual


auto cloudbr0
iface cloudbr0 inet static
        address 10.17.17.2
        netmask 255.255.255.0
        gateway 10.17.17.1
        dns-nameservers 180.76.76.76
        bridge-ports eth0
        bridge_fd 5
        bridge_stp off
        bridge_maxwait 1

# Private network
auto cloudbr1
iface cloudbr1 inet manual
        bridge_ports none
        bridge_fd 5
        bridge_stp off
        bridge_maxwait 1
After configuration, restart the machine.
Repository For CloudStack
Use local directory for holding cloudstack installation packages:
# echo "deb file:/root/CloudStack4.5.1 ./">>/etc/apt/sources.list
# apt-get update
While the directory should contains following packages:
root@ubuntu:~# ls CloudStack4.5.1/
Packages.gz                      cloudstack-cli_4.5.1_all.deb     cloudstack-management_4.5.1_all.deb
cloudstack-agent_4.5.1_all.deb   cloudstack-common_4.5.1_all.deb  cloudstack-usage_4.5.1_all.deb
cloudstack-awsapi_4.5.1_all.deb  cloudstack-docs_4.5.1_all.deb
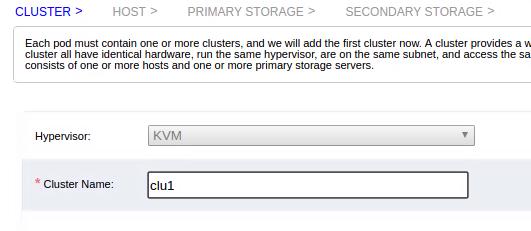
CloudStack Installation
Management Server
Install Cloudstack-management and mysql via:
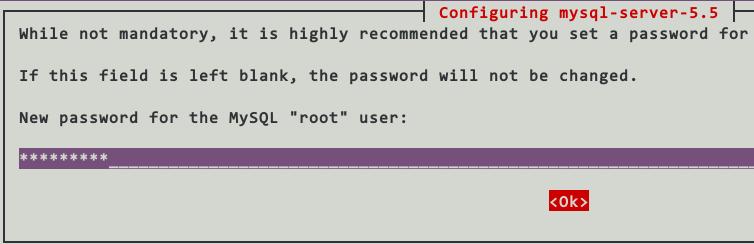
# apt-get install cloudstack-management mysql-server
Configure the password of mysql to engine123:
MySql Configuration:
# cat >>/etc/mysql/conf.d/cloudstack.cnf <<EOM
[mysqld]
innodb_rollback_on_timeout=1
innodb_lock_wait_timeout=600
max_connections=350
log-bin=mysql-bin
binlog-format = 'ROW'
EOM

# service mysql restart
Initialize the mysql databases via:
# cloudstack-setup-databases cloud:engine123@localhost --deploy-as=root:engine123 -e file -m mymskey44 -k mydbkey00
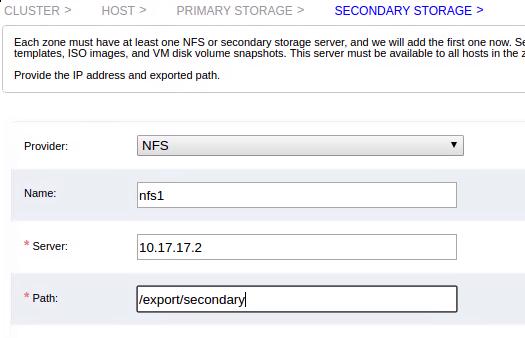
NFS Service
# mkdir -p /export/primary /export/secondary
# apt-get install nfs-kernel-server
# service nfs-kernel-server start
# cat >>/etc/exports <<EOM
/export  *(rw,async,no_root_squash,no_subtree_check)
EOM
# exportfs -a
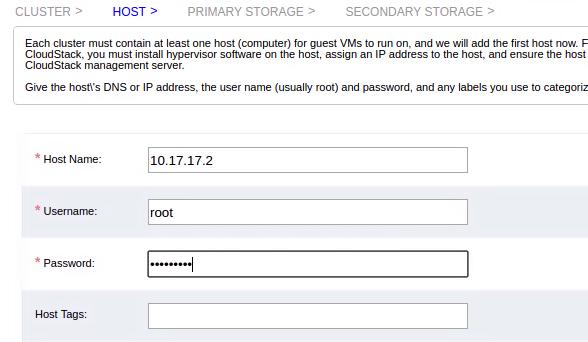
Agent
Install clouddstack-agent via:
# apt-get install cloudstack-agent
libvirt:
# vim /etc/libvirt/libvirtd.conf
listen_tls = 0
listen_tcp=1
tcp_port="16509"
auth_tcp="none"
libvirt-bin.conf:
# vim /etc/default/libvirt-bin
libvirtd_opts="-d -l"
qemu.conf for listening all of the window:
# vim /etc/libvirt/qemu.conf
vnc_listen = "0.0.0.0"
Now reboot your machien for taking all of the configurations effects.
Trouble-Shooting
When meeting following issue:
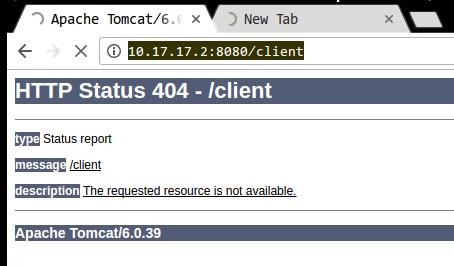 Do following commands for restart the service:
# service cloudstack-management status
# service cloudstack-agent status
# service tomcat6 status

# service cloudstack-management stop
# service tomcat6 stop
# service cloudstack-agent stop
# ps -efl | grep java

# service cloudstack-management start
# service cloudstack-management status
# service cloudstack-agent start
# service cloudstack-agent status
OR:
update-rc.d tomcat6 disable
cloudstack-setup-management
systemvm
Edit the configuration, and restart the service of cloudstack management.
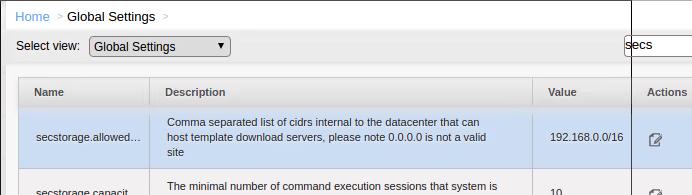

# service cloudstack-management restart
Install the systemvm like following:
# /usr/share/cloudstack-common/scripts/storage/secondary/cloud-install-sys-tmplt -m /mnt -u http://192.168.1.69/systemvm64template-4.5-kvm.qcow2.bz2 -h kvm -F
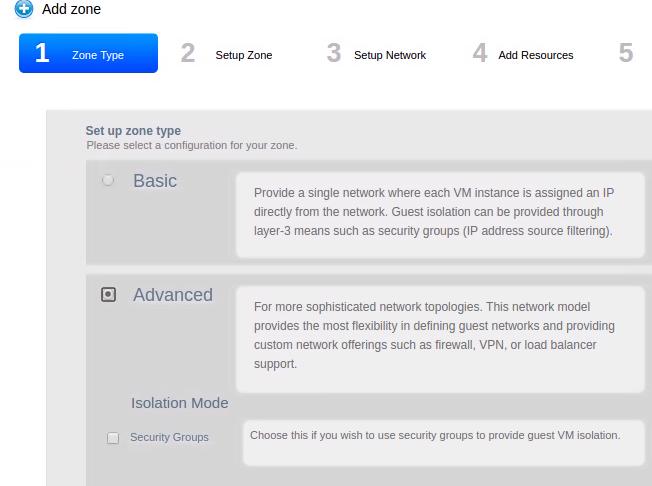
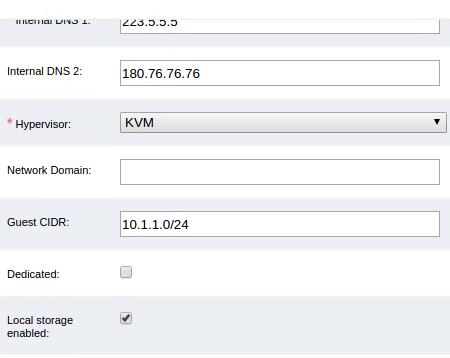
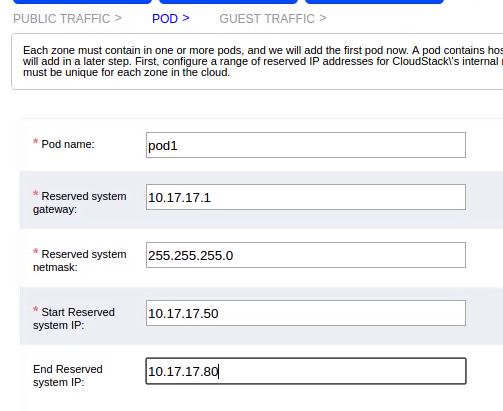
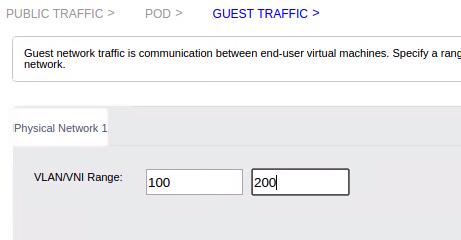
CloudStack Env


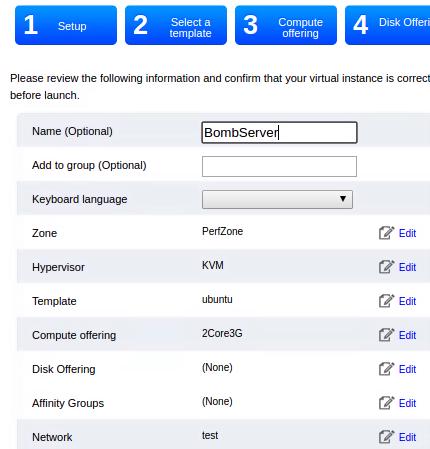
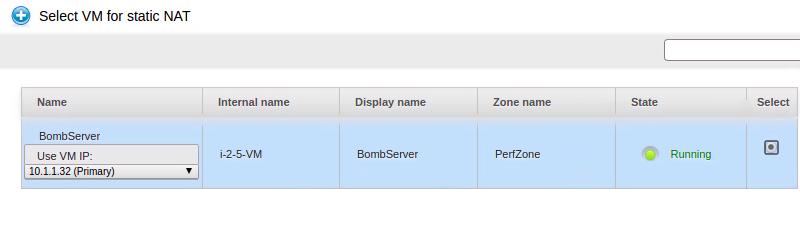
BombServer
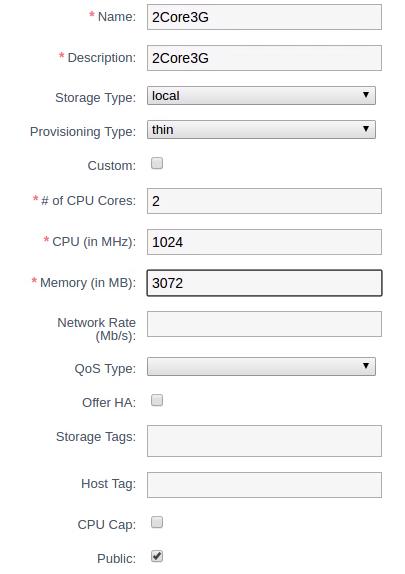
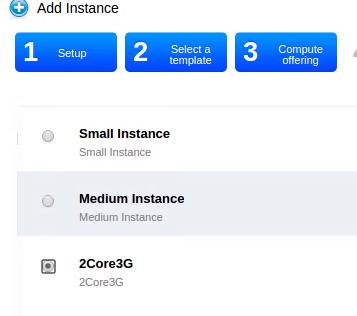
New Service Offering:
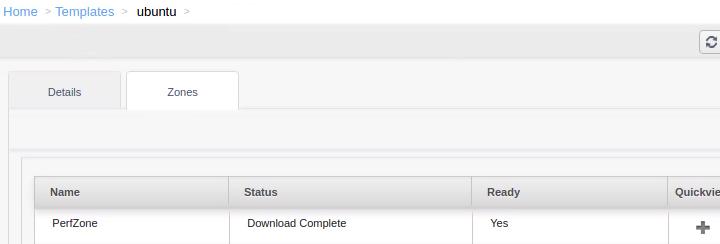
Template, download from http://192.168.1.69/myubuntu.qcow2:
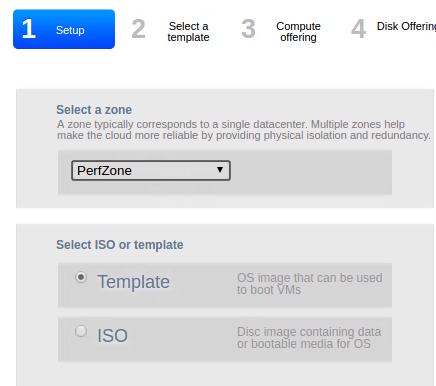
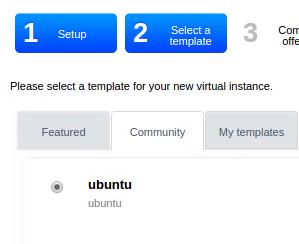
Start new instance:
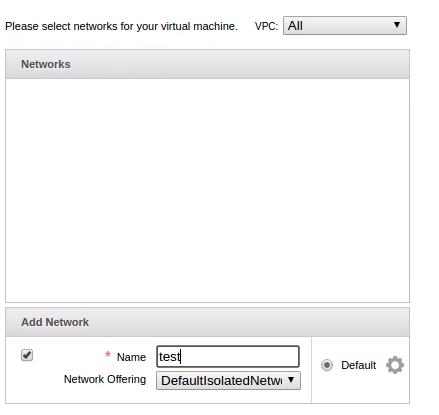
Networking:
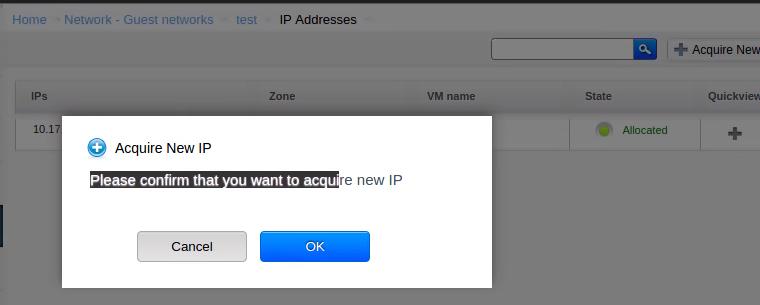

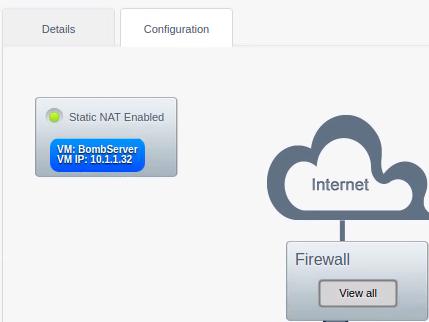
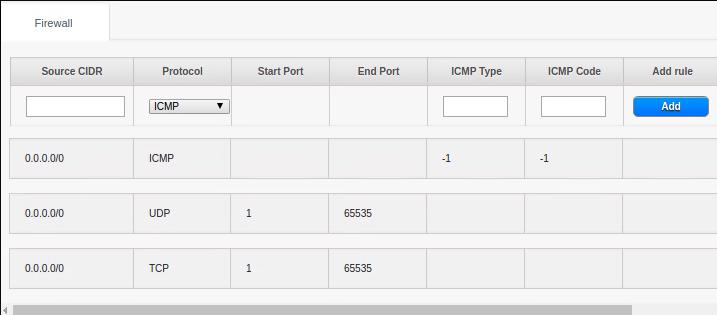
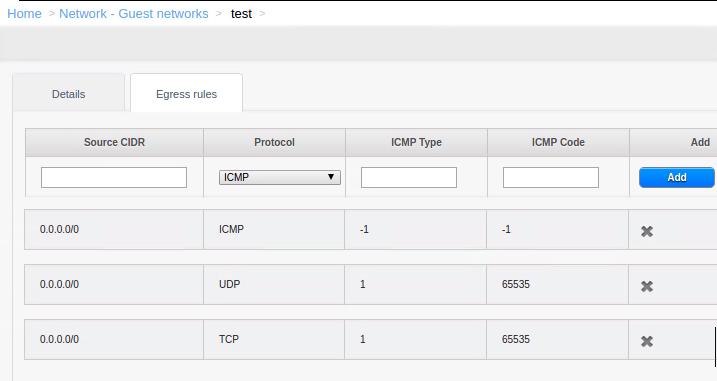
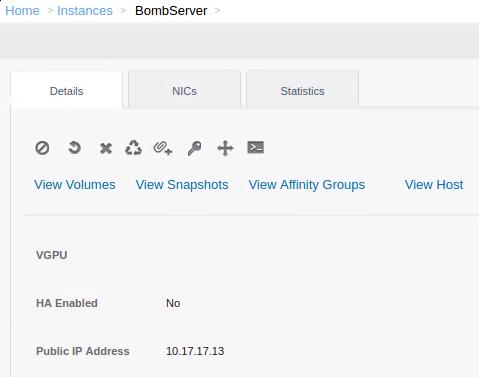
Now you could ping 10.17.17.13 and log into this machine via this IP.
Exceed Limitation
In Server10.17.17.2:
# vim /etc/security/limits.conf
* soft nofile 1048576
* hard nofile 1048576
root - nofile 1048576
root hard nofile 1048576
root soft nofile 1048576
And add following 3 lines into /etc/sysctl.conf:
# vim /etc/sysctl.conf
fs.file-max=1048576
net.netfilter.nf_conntrack_max = 6553500
net.ipv4.ip_local_port_range= 1024 65535
# sysctl -p /etc/sysctl.conf
fs.file-max = 1048576
net.netfilter.nf_conntrack_max = 6553500
net.ipv4.ip_local_port_range = 1024 65535
Add it into /etc/rc.local:
# vim /etc/rc.local
modprobe nf_conntrack
sysctl -p /etc/sysctl.conf
exit 0
Do the same things to BombServer and BombClient. Examine via:
# cat /proc/sys/net/netfilter/nf_conntrack_max
6553500
# ulimit -n
1048576
......
BombServer Setting
In instance 10.17.17.13, download Server-side code and compile:
# wget https://gist.github.com/yongboy/5318930/raw/ccf8dc236da30fcf4f89567d567eaf295b363d47/server.c
$ sudo apt-get install -y libev-dev
$ vim server.c
comment ev.h , replace it into `#include <ev.h>`
$ gcc -o server server.c -lev -lm
Start server via:
# ./server
start free -m is
             total       used       free     shared    buffers     cached
Mem:          3009        526       2483          0         16        419
-/+ buffers/cache:         90       2919
Swap:          511          0        511
Client Setting
Use a Ubuntu qcow2 file, start a qemu based vm on 10.17.17.2.
The ubuntu1404origin.qcow2 is modified to have a 10.17.17.190 ip address.
/etc/network/interfaces content:
# This file describes the network interfaces available on your system
# and how to activate them. For more information, see interfaces(5).

# The loopback network interface
auto lo
iface lo inet loopback

# The primary network interface
auto eth0
iface eth0 inet static
address 10.17.17.190
netmask 255.255.255.0
gateway 10.17.17.1
dns-nameservers 180.76.76.76
Start command:
root@ubuntu:~/testmachine# ls
startmachine.sh  ubuntu1404origin.qcow2
root@ubuntu:~/testmachine# cat startmachine.sh
qemu-system-x86_64 -net nic,model=virtio,macaddr=52:54:00:12:34:56,vlan=1 -net tap,vlan=1 -net nic,model=virtio,macaddr=52:54:00:12:34:57,vlan=2 -net tap,vlan=2 -net nic,model=virtio,macaddr=52:54:00:12:34:58,vlan=3 -net tap,vlan=3 -net nic,model=virtio,macaddr=52:54:00:12:34:59,vlan=4 -net tap,vlan=4 -net nic,model=virtio,macaddr=52:54:00:12:34:60,vlan=5 -net tap,vlan=5 -net nic,model=virtio,macaddr=52:54:00:12:34:61,vlan=6 -net tap,vlan=6 -net nic,model=virtio,macaddr=52:54:00:12:34:62,vlan=7 -net tap,vlan=7 -net nic,model=virtio,macaddr=52:54:00:12:34:63,vlan=8 -net tap,vlan=8 -hda ./ubuntu1404origin.qcow2 -m 3072 --enable-kvm
# ./startmachine.sh
Login into client machine(10.17.17.190), do following command:
# ifconfig eth1 10.17.17.254/24
# ifconfig eth2 10.17.17.253/24
# ifconfig eth3 10.17.17.252/24
# ifconfig eth4 10.17.17.251/24
# ifconfig eth5 10.17.17.250/24
# ifconfig eth6 10.17.17.249/24
# ifconfig eth7 10.17.17.248/24
# ifconfig eth8 10.17.17.247/24
# ifconfig eth9 10.17.17.246/24
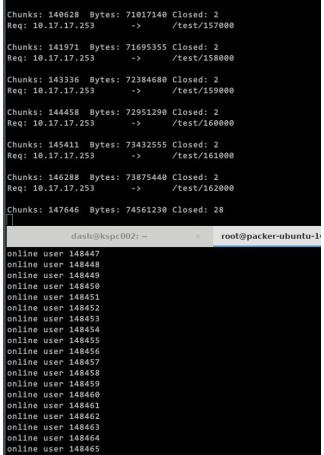
# ./client -h 10.17.17.13 -p 8000 -m 64000 -o 10.17.17.190,10.17.17.254,10.17.17.253,10.17.17.252,10.17.17.251,10.17.17.250,10.17.17.249,10.17.17.248
The client file is downloaded and compile via:
# wget https://gist.github.com/yongboy/5324779/raw/f29c964fcd67fefc3ce66e487a44298ced611cdc/client2.c
# gcc -o client client2.c -levent
When start Bombing the server, the captured image is listed as following: