
IRRemote on Arduino
Nov 14, 2013
Technology
###Preparation of the IRremote library Using the downloaded,
	Trusty@SomethingMissing:~/code/arduino/arduino-1.0.5/libraries$ cp -r ../../library/Arduino_IRremote_master/ ./
	Trusty@SomethingMissing:~/code/arduino/arduino-1.0.5/libraries$ pwd
	/home/Trusty/code/arduino/arduino-1.0.5/libraries
Or using git the get the latest one, in fact this one is not new at all , it updates 2 years ago.
$ git clone git://github.com/shirriff/Arduino-IRremote.git
Now we can use it for programming. ###Programming insert the code and verify the result.
	#include <IRremote.h>  // 使用IRRemote函数库

	const int irReceiverPin = 2;  // 红外接收器的 OUTPUT 引脚接在 PIN2 接口 定义irReceiverPin变量为PIN2接口

	IRrecv irrecv(irReceiverPin); // 设置irReceiverPin定义的端口为红外信号接收端口
	decode_results results;    // 定义results变量为红外结果存放位置

	void setup()
	{
	  Serial.begin(9600);   // 开启串口,波特率为9600
	  irrecv.enableIRIn();   // 启动红外解码
	}

	void loop()
	{
	  if (irrecv.decode(&results)) {   // 解码成功,把数据放入results变量中
	    // 把数据输入到串口
	    Serial.print("irCode: ");
	    Serial.print(results.value, HEX); // 显示红外编码
	    Serial.print(",  bits: ");
	    Serial.println(results.bits); // 显示红外编码位数
	    irrecv.resume();    // 继续等待接收下一组信号
	  }
	  delay(600); //延时600毫秒,做一个简单的消抖
	}
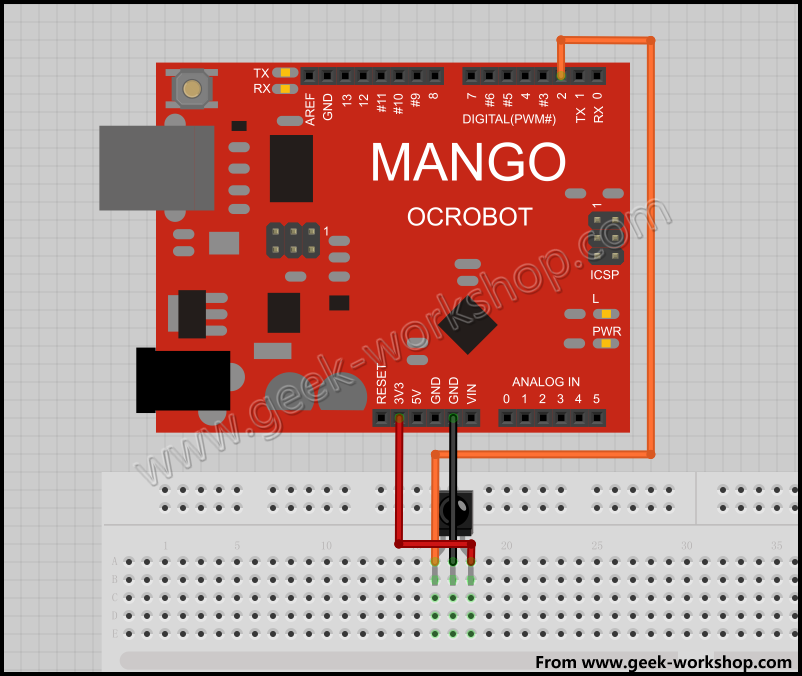
###Verification See the wired image:
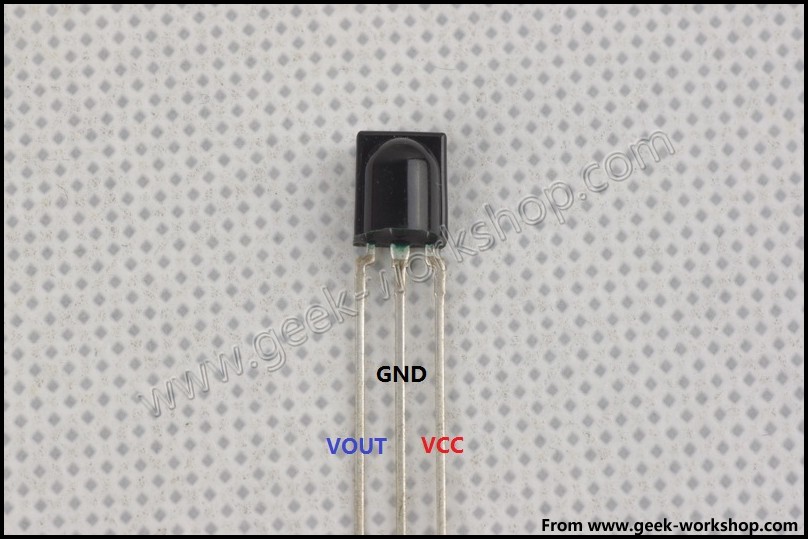
Then see how to connect the sensor:
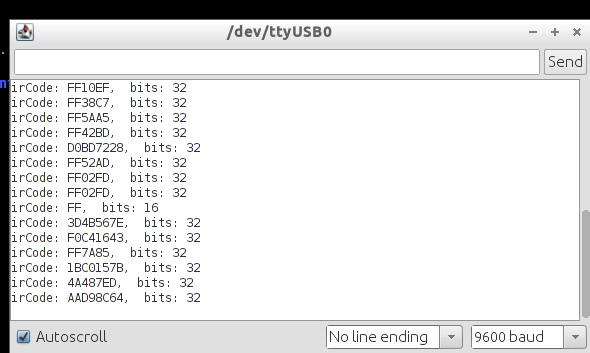
Now see the result:
###Seeing the light Now we can use IRremote for controlling our mp3 player. Because it only occupy 1 GPIO, and it could support so many combinations, we can use it to control the player’s activities.