Apr 7, 2024
Technology1. 前置条件
Ubuntu18.04操作系统,已安装x11docker, 安装方法详见x11docker github仓库。
2. 邮箱容器制作
撰写如下的Dockerfile:
FROM x11docker/xfce
RUN sed -i 's/deb.debian.org/mirrors.ustc.edu.cn/g' /etc/apt/sources.list
RUN apt-get update
RUN apt-get install -y firefox-esr thunderbird libreoffice fonts-wqy-microhei fonts-wqy-zenhei xfonts-wqy thunderbird-l10n-zh-cn firefox-esr-l10n-zh-cn libreoffice-help-zh-cn manpages-zh
RUN apt-get install -y fontconfig
RUN apt-get install -y evince
RUN apt-get install -y fcitx-pinyin fonts-arphic-uming
RUN fc-cache -fv
COPY locale.gen /etc/locale.gen
RUN apt-get install -y fcitx-pinyin fonts-arphic-uming
RUN apt-get install -y tzdata
RUN  apt-get install -y locales tzdata xfonts-wqy && \
    locale-gen zh_CN.UTF-8 && \
    locale-gen  && \
    update-locale LANG=en_US.UTF-8 LANGUAGE=en_US.UTF-8 LC_ALL=en_US.UTF-8 && \
    ln -fs /usr/share/zoneinfo/Asia/Shanghai /etc/localtime
ENV LANG=en_US.UTF-8 LANGUAGE=en_US.UTF-8 LC_ALL=en_US.UTF-8
其中locale.gen文件如下:
zh_CN.UTF-8 UTF-8
运行以下命令编译一个名为x11docker/securebrowser的容器:
$ docker build -t x11docker/securebrowser .
3. 容器启动及包装
撰写一个启动x11容器的命令文件:
$ cat /home/xxx/start_en.sh
read id < <(x11docker --showid --network=host --home x11docker/securebrowser thunderbird)
docker exec -e XMODIFIERS="@im=fcitx" -e QT_IM_MODULE="fcitx" -e GTK_IM_MODULE="fcitx" $id fcitx&
撰写一个桌面快速启动文件以快速调用:
$ cat /home/xxx/Secure.desktop
[Desktop Entry]
Version=1.0
Exec=xterm -e '/home/xxx/start_en.sh;sleep 10;bash'
Name=SecureApp
GenericName=SecureAPP
Comment=SecureApp
Encoding=UTF-8
Terminal=false
Type=Application
Categories=Application;Network;
注意需要安装xterm包以便可以方便的使用xterm调用启动文件。
Apr 2, 2024
TechnologyConfiguration:
After installation, do following:
# scp test@xxxxxx.xxx/grubdebs .
# ls grubdebs
grub2-common_2.06-13+deb12u1_amd64.deb
grub-common_2.06-13+deb12u1_amd64.deb
grub-efi-amd64_2.06-13+deb12u1_amd64.deb
grub-efi-amd64-bin_2.06-13+deb12u1_amd64.deb
grub-efi-amd64-signed_1+2.06+13+deb12u1_amd64.deb
grub-pc_2.06-13+deb12u1_amd64.deb
grub-pc-bin_2.06-13+deb12u1_amd64.deb
install.sh
libfuse2_2.9.9-6+b1_amd64.deb
shim-helpers-amd64-signed_1+15.7+1_amd64.deb
shim-signed_1.39+15.7-1_amd64.deb
shim-signed-common_1.39+15.7-1_all.deb
shim-unsigned_15.7-1_amd64.deb
# mv grub-pc* ../
# dpkg -i *.deb
# cd ..
# dpkg -i *.deb
hold the installed packages:
# apt-mark hold grub-common grub-efi-amd64 grub-efi-amd64-bin grub-efi-amd64-signed grub-pc grub-pc-bin grub2-common libfuse2 shim-helpers-amd64-signed shim-signed:amd64 shim-signed-common shim-unsigned
Reinstall the grub to let the new package take effect:
sudo umount /boot/efi
sudo mkfs.vfat -F32 /dev/vda1
sudo mount /dev/vda1 /boot/efi
sudo update-grub
sudo update-grub2
sudo grub-install /dev/vda
sudo grub2-mkconfig -o /boot/efi/EFI/ubuntu/grub.cfg
vim /etc/fstab
change efi
sudo reboot
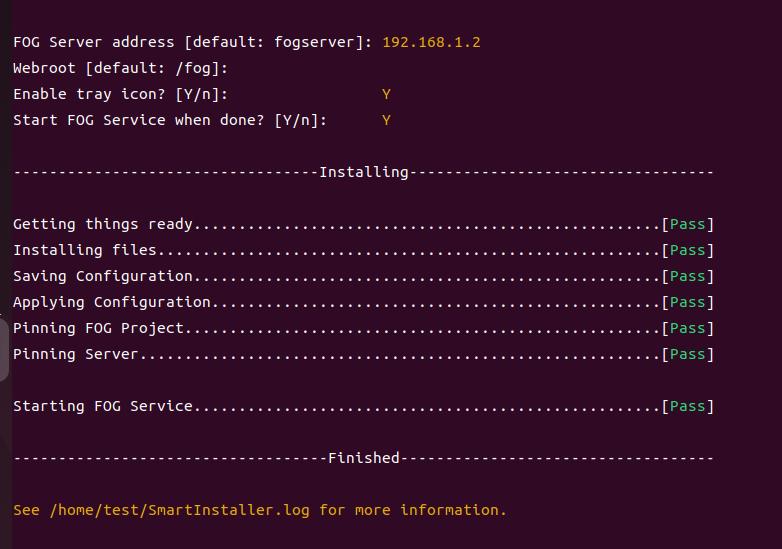
Install fog-client(ubuntu2204):
sudo apt update
sudo apt install nuget
sudo apt install mono-complete
sudo apt install apt-transport-https
sudo mono SmartInstaller.exe
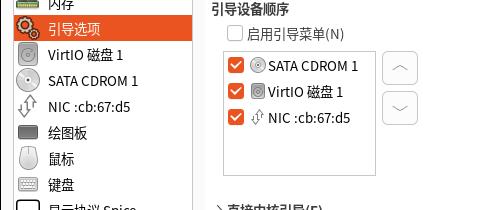
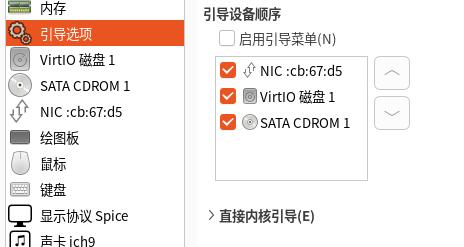
 Now shutdown the machine, Change to pxe mode, to test its start-up.
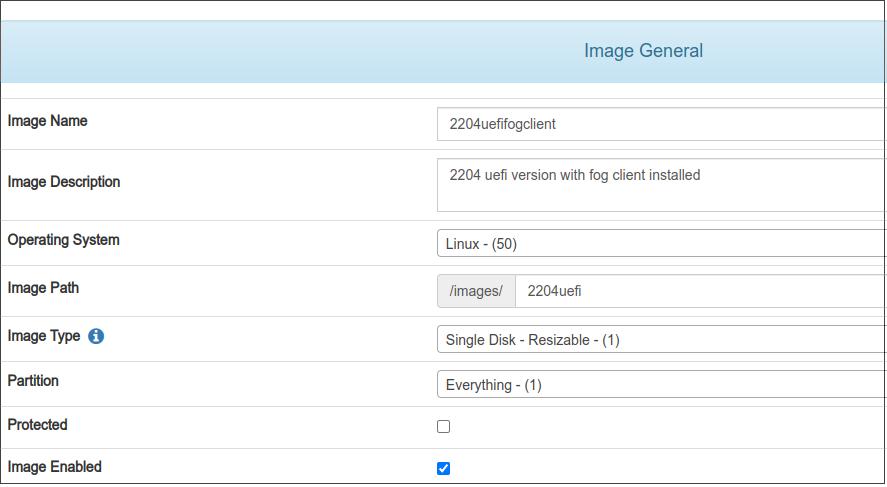
Registeration image:
Associate the image with newly created image:

Capture the image from this node:
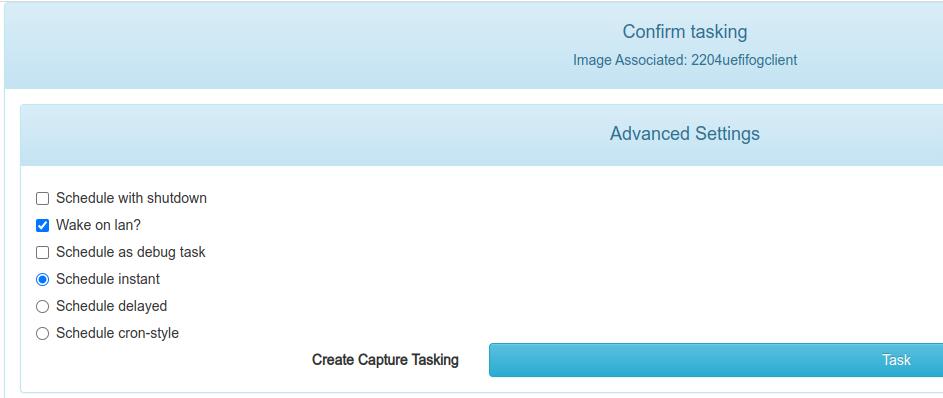
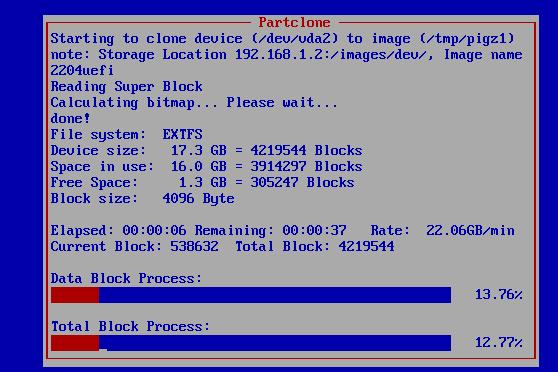
partclone and upload the image:
Mar 29, 2024
Technology创建一个名为charlie的容器:
$ sudo docker run --name charlie -ti ubuntu bash
运行以下命令,安装docker-enter等一系列工具到/usr/local/bin/下:
$ sudo docker run --rm -v /usr/local/bin:/target jpetazzo/nsenter
创建一个名为attach.sh的脚本, 这里为了简单起见,写死了CONTAINER及HOSTPATH/CONPATH等:
#!/bin/sh
set -e
CONTAINER=charlie
HOSTPATH=/home/dash/Work/DOCKER/docker
CONTPATH=/src

REALPATH=$(readlink --canonicalize $HOSTPATH)
FILESYS=$(df -P $REALPATH | tail -n 1 | awk '{print $6}')

while read DEV MOUNT JUNK
do [ $MOUNT = $FILESYS ] && break
done </proc/mounts
[ $MOUNT = $FILESYS ] # Sanity check!

while read A B C SUBROOT MOUNT JUNK
do [ $MOUNT = $FILESYS ] && break
done < /proc/self/mountinfo
[ $MOUNT = $FILESYS ] # Moar sanity check!

SUBPATH=$(echo $REALPATH | sed s,^$FILESYS,,)
DEVDEC=$(printf "%d %d" $(stat --format "0x%t 0x%T" $DEV))
echo "1"
docker-enter $CONTAINER  sh -c \
	     "[ -b $DEV ] || mknod --mode 0600 $DEV b $DEVDEC"
echo "2"
docker-enter $CONTAINER  mkdir /tmpmnt
docker-enter $CONTAINER  mount $DEV /tmpmnt
docker-enter $CONTAINER  mkdir -p $CONTPATH
docker-enter $CONTAINER  mount -o bind /tmpmnt/$SUBROOT/$SUBPATH $CONTPATH
docker-enter $CONTAINER  umount /tmpmnt
docker-enter $CONTAINER  rmdir /tmpmnt
使用方法:
### 这里对应到脚本中的HOSTPATH字段,映射主机目录
$ mkdir -p /home/dash/Work/DOCKER/docker
$ touch /home/dash/Work/DOCKER/docker/ccc
$ ./attach.sh
进入到容器中检查目录映射, 可以看到我们touch出来的ccc文件已在映射后的容器目录中:
$ ls /src/
ccc
Mar 27, 2024
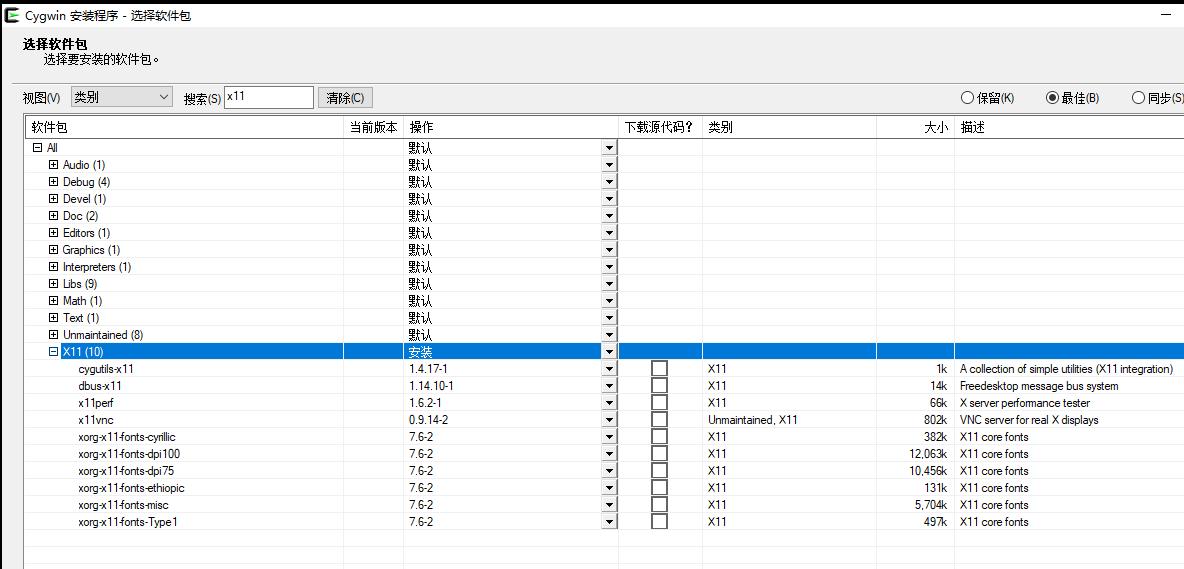
TechnologySelect X11 and install:
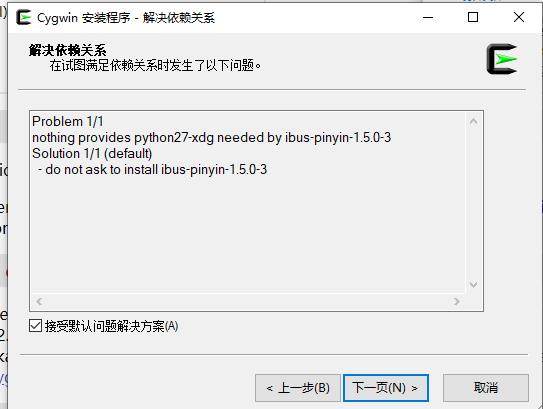
ibus-pinyin issue:
Installing:
Running terminal:
Key notes:


Mar 26, 2024
TechnologyEnvironment
Ubuntu22.04, with vfio pass-through nvidia card.
$ sudo apt update -y && sudo apt upgrade -y
$ sudo apt install -y git git-lfs
$ git lfs install
Install miniconda:
mkdir -p ~/miniconda3
wget https://repo.anaconda.com/miniconda/Miniconda3-latest-Linux-x86_64.sh -O ~/miniconda3/miniconda.sh
bash ~/miniconda3/miniconda.sh -b -u -p ~/miniconda3
rm -rf ~/miniconda3/miniconda.sh
~/miniconda3/bin/conda init bash
Install cuda(12.1.1-1):
wget https://developer.download.nvidia.com/compute/cuda/repos/ubuntu2204/x86_64/cuda-keyring_1.0-1_all.deb
sudo dpkg -i cuda-keyring_1.0-1_all.deb
sudo apt-get update
sudo apt install cuda=12.1.1-1
Activate the conda environment:
conda create -n opensora python=3.10
(base) dash@vfio2:~$ conda activate opensora
(opensora) dash@vfio2
pip3 install torch torchvision
pip install packaging ninja
pip install flash-attn --no-build-isolation
pip install -v --disable-pip-version-check --no-cache-dir --no-build-isolation --config-settings "--build-option=--cpp_ext" --config-settings "--build-option=--cuda_ext" git+https://github.com/NVIDIA/apex.git
pip3 install -U xformers --index-url https://download.pytorch.org/whl/cu121
git clone https://github.com/hpcaitech/Open-Sora
cd Open-Sora
pip install -v .
pip install gradio
Issue:
https://github.com/hpcaitech/Open-Sora/issues/209
