
WorkingTipsOnCellsOnAndroid10
Feb 2, 2022
Technology
1. cells src preparation
Clone the cells source code via:
# mkdir -p ~/Code/show/cells
# cd ~/Code/show/cells
# git clone https://github.com/jianglin-code/cells-android10.git
# cd cells-android10
# ls
cells  frameworks  kernel  README.md  system
2. aosp 10 src preparation
Clone the specified aosp 10 version(10.0.0_r33):
# mkdir -p ~/Code/show/aosp10
# cd ~/Code/show/aosp10
# repo init -u https://mirrors.tuna.tsinghua.edu.cn/git/AOSP/platform/manifest -b android-10.0.0_r33
# repo sync -j8
3. Kernel src preparation
For pixel 3a, clone the kernel src via:
# mkdir -p ~/Code/show/android-kernel
# cd ~/Code/show/android-kernel
#  repo init --depth 1 -u https://aosp.tuna.tsinghua.edu.cn/kernel/manifest -b android-msm-bonito-4.9-android10
# repo sync -j4
# ls
build  build.config  prebuilts  prebuilts-master  private
# du -hs *
732K	build
0	build.config
189M	prebuilts
5.8G	prebuilts-master
870M	private
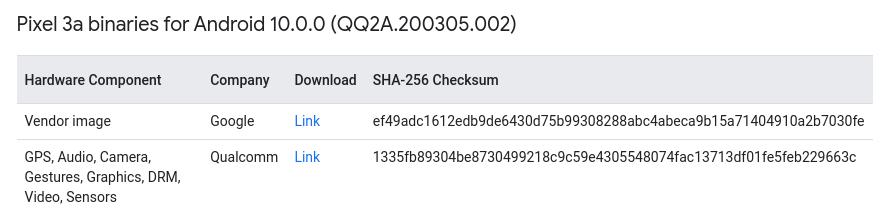
4. Driver binary preparation
Find the binary version from
https://source.android.com/setup/start/build-numbers#source-code-tags-and-builds:
QQ2A.200305.002 android-10.0.0_r30 Android10 Pixel 2、Pixel 2 XL、Pixel 3、Pixel 3 XL、Pixel 3a、Pixel 3a XL 2020-03-05
Downlod the driver binary from
https://developers.google.cn/android/drivers?hl=zh-cn#sargoqq2a.200405.005:
Copy the downloaded files to aosp10 src tree:
# cp extract-google_devices-sargo.sh extract-qcom-sargo.sh /root/Code/show/aosp10
5. Build kernel
Replace the source code via:
# mv private/msm-google private/msm-google.back
# cp -ar  ~/Code/show/cells/cells-android10/kernel/ private/msm-google
Build the kernel via:
# cd private/msm-google
# make mrproper
# cd ../../
# cp -r private/msm-google.back/techpack/ private/msm-google/
# vim build/build.sh
comment the line of soong_zip(line 798)
# build/build.sh
Examine the kernel out files:
# ls out/android-msm-pixel-4.9/dist/
abi.prop  Image.lz4              kernel-uapi-headers.tar.gz  System.map  wlan.ko
dtbo.img  kernel-headers.tar.gz  sdm670.dtb                  vmlinux
6. Build the aosp
Extract the binary files:
# ./extract-google_devices-sargo.sh
# ./extract-qcom-sargo.sh
Replace the kernel:
# mv device/google/bonito-kernel/Image.lz4 device/google/bonito-kernel/Image.lz4.back
# cp /root/Code/show/android-kernel/out/android-msm-pixel-4.9/dist/Image.lz4 device/google/bonito-kernel/Image.lz4
Including the cells into building:
# cp -r /root/Code/show/cells/cells-android10/cells/ vendor/
# vim device/google/bonito/device.mk
Added at the last line:
$(call inherit-product-if-exists, vendor/cells/cells_build.mk)
Building via:
# source build/envsetup.sh
# lunch aosp_sargo-userdebug
# vim frameworks/base/data/etc/privapp-permissions-platform.xml
Added:
    <privapp-permissions package="com.cells.cellswitch.secure">
        <permission name="android.permission.BLUETOOTH_PRIVILEGED"/>
    </privapp-permissions>
# vim vendor/cells/switchsystem/src/com/cells/cellswitch/secure/view/SwitchActivity.java
Commentd:
//import android.os.CellsManager;
//import android.os.ICellsManager;
# cp -r /root/Code/show/aosp10back/frameworks/multidex/library/
frameworks/multidex
# m -j128
The building will failed, solved via:
# development/vndk/tools/header-checker/utils/create_reference_dumps.py -l libbinder && development/vndk/tools/header-checker/utils/create_reference_dumps.py -l libhwbinder_noltopgo && development/vndk/tools/header-checker/utils/create_reference_dumps.py -l libhidlbase && m -j128
Output:
# ls out/target/product/sargo/*.img
out/target/product/sargo/boot-debug.img     out/target/product/sargo/ramdisk.img
out/target/product/sargo/boot.img           out/target/product/sargo/ramdisk-recovery.img
out/target/product/sargo/dtb.img            out/target/product/sargo/super_empty.img
out/target/product/sargo/dtbo.img           out/target/product/sargo/system.img
out/target/product/sargo/persist.img        out/target/product/sargo/system_other.img
out/target/product/sargo/product.img        out/target/product/sargo/vbmeta.img
out/target/product/sargo/ramdisk-debug.img  out/target/product/sargo/vendor.img
Final size for building:
# du -hs *
15G     android-kernel
177G    aosp10
2.4G    aosp10back
6.0G    cells
7. Flashing
With pixel 3a connected with usb:
$ adb devices
List of devices attached
92UAY04L95	device

$  adb reboot bootloader
Flash with following command:
$ fastboot devices
92UAY04L95	fastboot
$ export ANDROID_PRODUCT_OUT=/root/Code/show/aosp10/out/target/product/sargo
$ fastboot flashall -w
--------------------------------------------
Bootloader Version...: b4s4-0.2-6355063
Baseband Version.....: g670-00042-200421-B-6414611
Serial Number........: 92UAY04L95
--------------------------------------------
Checking 'product'                                 OKAY [  0.058s]
Setting current slot to 'b'                        OKAY [  0.138s]
.....
Erasing 'userdata'                                 OKAY [  0.311s]
Erase successful, but not automatically formatting.
File system type raw not supported.
Erasing 'metadata'                                 OKAY [  0.006s]
Erase successful, but not automatically formatting.
File system type raw not supported.
Rebooting                                          OKAY [  0.001s]
Finished. Total time: 336.662s
Flashing with wlan.ko, so that we could get wireless connection:
# disable-verity on the phone
adb root
adb disable-verity
adb shell sync
adb reboot

# push module
adb root
adb remount
adb push /media/nfs1/android-kernel/out/android-msm-pixel-4.9/dist/wlan.ko /vendor/lib/modules/

# reboot phone
adb reboot
8. Basic Usage
View the build number: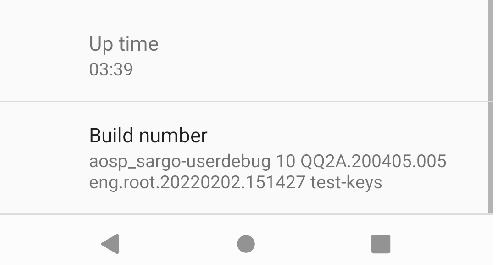
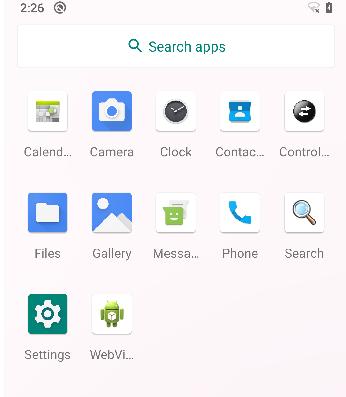
Control is the switch for dual-system:
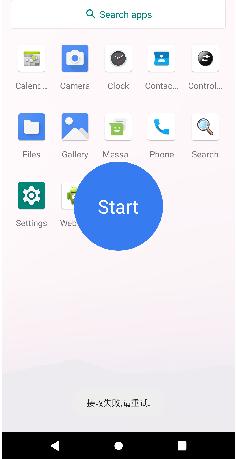
Press Control shows the Start button:
The second system is starting:
After started:

Press Start for entering the 2nd system:

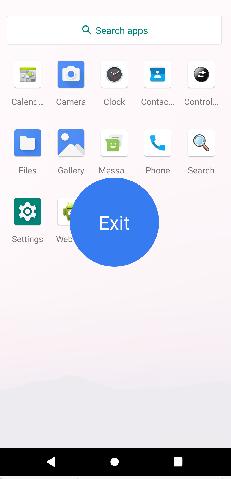
Press Control will show hints for Exit this system:
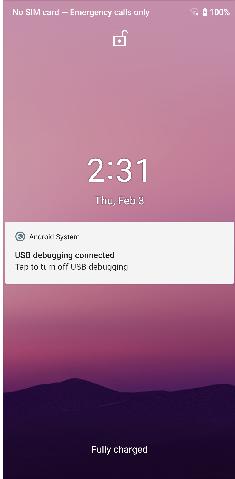
After exit, the system will show on the screen lock:
9. Customization
Language setting.
Install software shop in both system.:
$ adb install apks/MobileAssistant_1.apk
Performing Streamed Install
Success
Install more apks in both systems.
Changing the theme.