Ovirt HyperConverged InAir-Gapped Environment
Feb 14, 2020
Technology
0. AIM
For deploying Ovirt HyperConverged in air-gapped environment.
For some companies, their inner environment is air-gapped, e.g OA network. In
such air-gapped environment we could only use ISO and take some packages in
cd-roms for taking into their intra-network. How to deploy a ovirt drivened
private cloud in air-gapped room, I will take some experiment and try the
solution out.
1. Environment
In this chapter the environment will be available for ovirt deployment with glusterfs.
1.1 Hardware
I use my home machine for building the environment, the hardware is listed as:
CPU: Intel(R) Core(TM) i5-4460  CPU @ 3.20GHz
Memory: DDR3 1600 32G
Disk: 1T HDD.
1.2 OS/Networking/Software
My home machine runs ArchLinux, with nested virtualization.
Use qemu and virt-manager for setting the environment.
# qemu-system-x86_64 --version
QEMU emulator version 4.2.0
Copyright (c) 2003-2019 Fabrice Bellard and the QEMU Project developers
# virt-manager --version
2.2.1
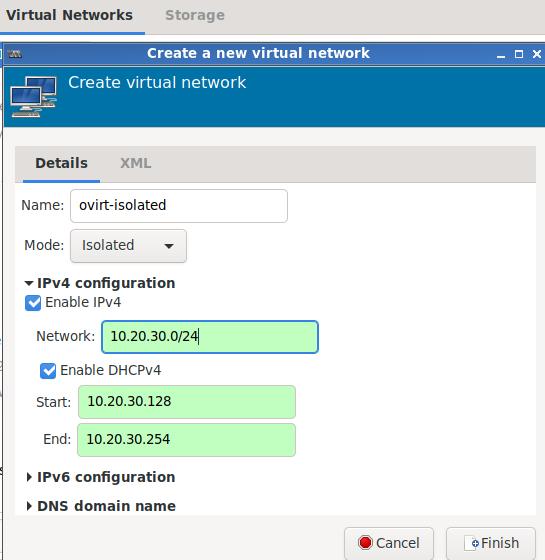
I setup a isolated networking in virt-manager, cidr is 10.20.30.0/24, 3 vms
will use this isolated networking for emulating the air-gapped environment, its name is ovirt-isolated:
1.3 VMs Preparation
I use 3 vms for setting up the environment, each of them have:
2 vcpus
10240 MB memory
vda: 100 GB, for installing the system.
vdb: 300 GB, for setting up the storage network.
NIC: 1x, attached to ovirt-isolated networking.
hostname - IP is listed as following:
instance1.com	10.20.30.31
instance2.com	10.20.30.32
instance3.com	10.20.30.33
engineinstance.com	10.20.30.34
For setting up the ip address, use nmtui in terminal, take instance1.com for example:

For setting up the hostname, also use nmtui:

Login to each machine and enable the password-less login, take instance1 for example:
# ssh-keygen
# vim /etc/hosts
127.0.0.1   localhost localhost.localdomain localhost4 localhost4.localdomain4
::1         localhost localhost.localdomain localhost6 localhost6.localdomain6
10.20.30.31     instance1.com
10.20.30.32     instance2.com
10.20.30.33     instance3.com
10.20.30.34	engineinstance.com
# ssh-copy-id root@instance1.com
# ssh-copy-id root@instance2.com
# ssh-copy-id root@instance3.com
Also add following items(engine vm’s hostname and ip address) into host machine(archLinux)‘s /etc/hosts:
10.20.30.31     instance1.com
10.20.30.32     instance2.com
10.20.30.33     instance3.com
10.20.30.34	engineinstance.com
2. Deploy Glusterfs
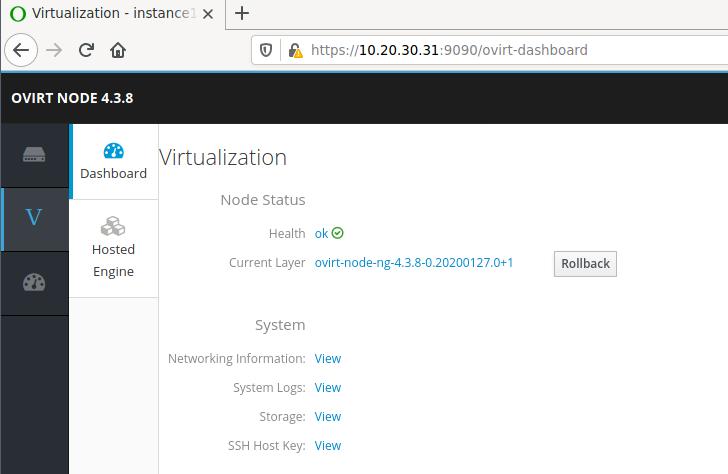
Use firefox for visiting https://10.20.30.31:9090:

use root for login, enter the instance1.com's cockpit web:
Click V->Hosted Engine, then click the start button under Hyperconverged:
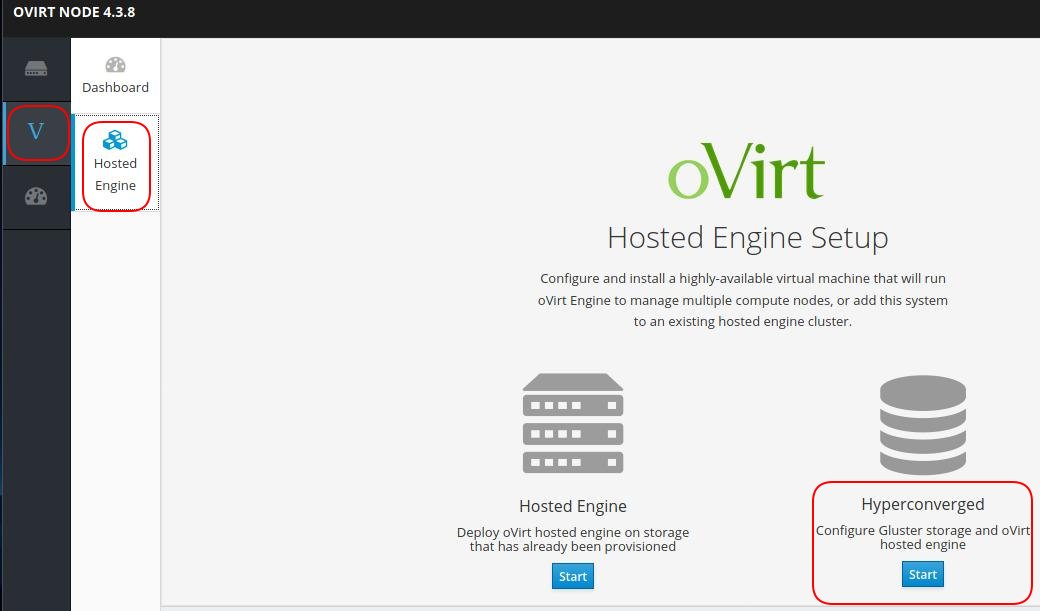
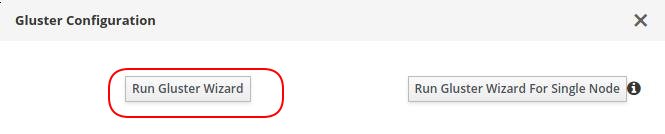
Click Run Gluster Wizard:
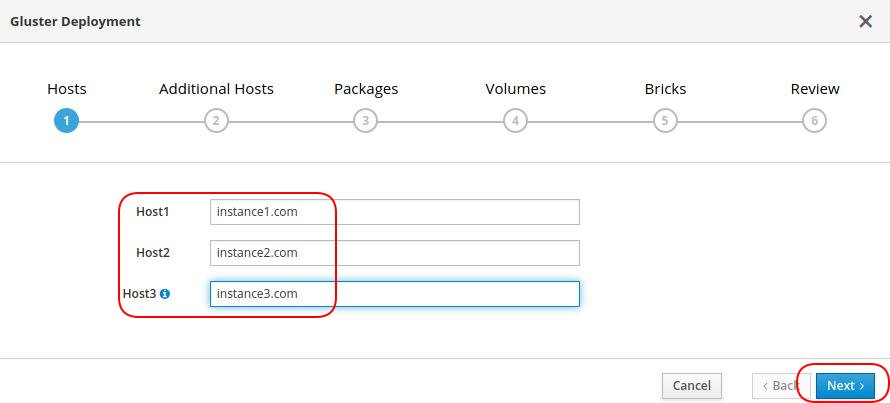
Fill in 3 nodes’s hostname, click next:
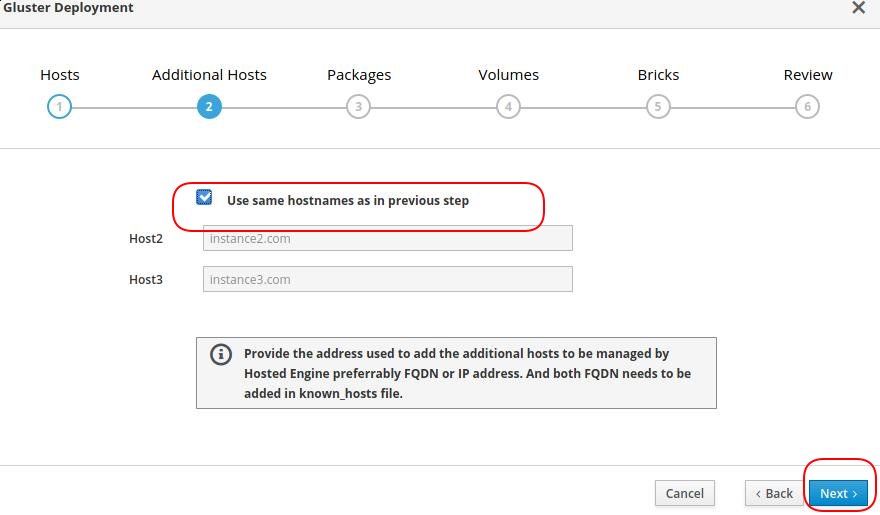
In Additional Hosts, click Use same hostnames as in previous step, thus Host2 and Hosts3 will be added automatically:
In Packages we keep the default empty items and click next for continue.
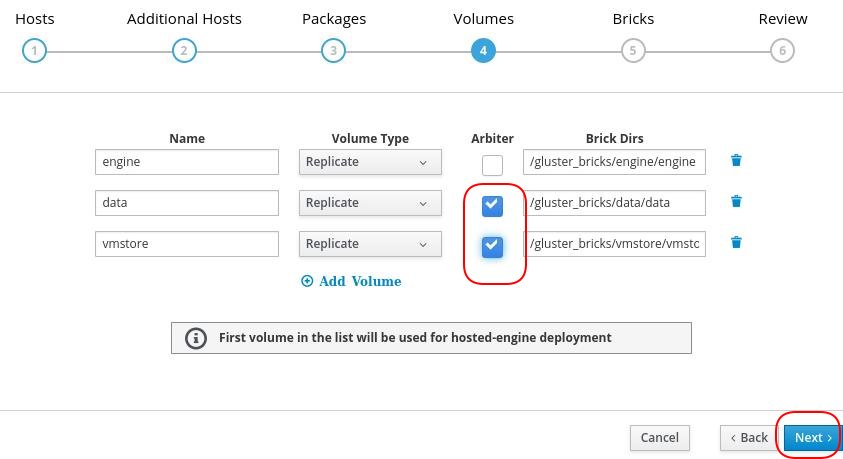
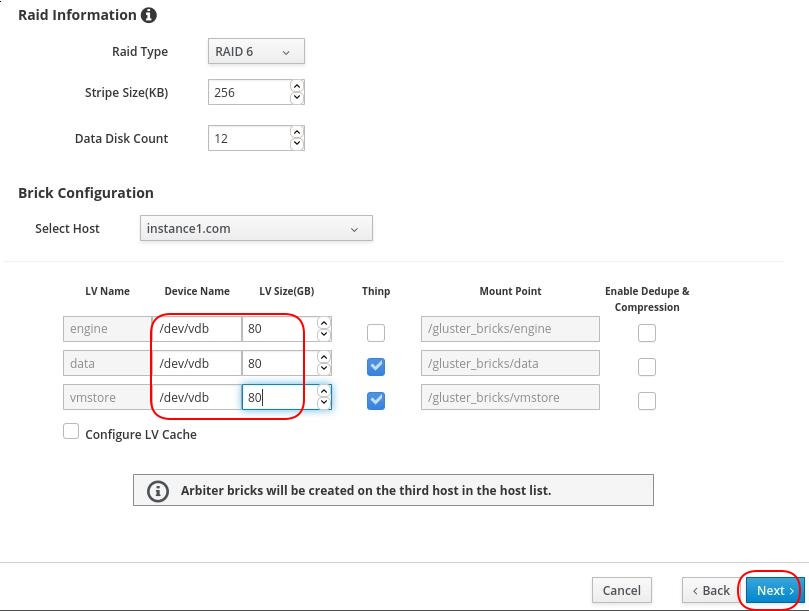
Keep the default volumn setting, and enable the Arbiter for data and vmstore:
Here we adjust the LV device name to vdb, and adjust the size as 80,80,80, click next for continue:
The volume size for running engine vm should be at least 58GB(ovirt default minimum size, actually takes more than this number. )
Review and click deploy:
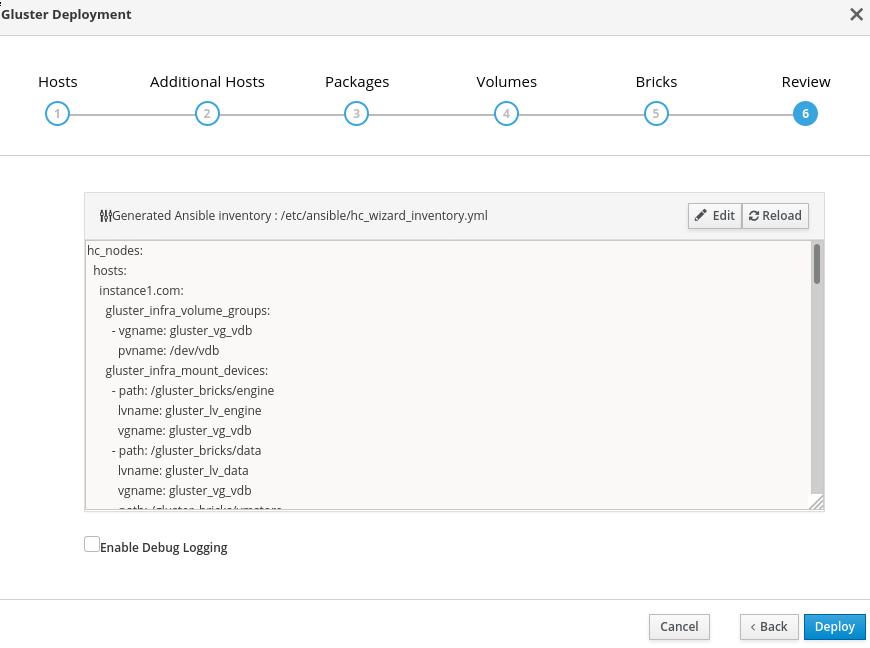
The ansible tasks will run until you see this hint:
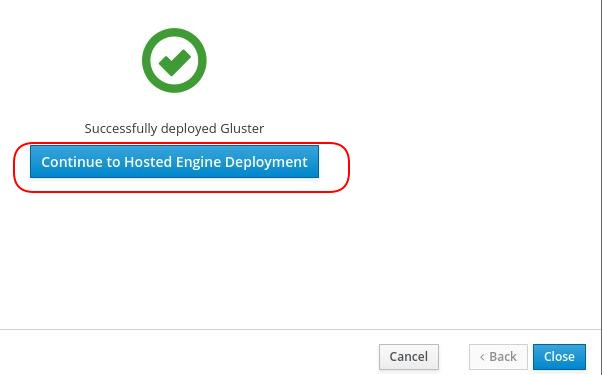
Click Continue to hosted engine deployment to continue.
3. Hosted Engine
Before continue, manually install the rpms in instance1.com:
# yum install -y ./ovirt-engine-appliance-4.3-20200127.1.el7.x86_64.rpm
# rpm -qa | grep ovirt-engine-appliance
ovirt-engine-appliance-4.3-20200127.1.el7.x86_64
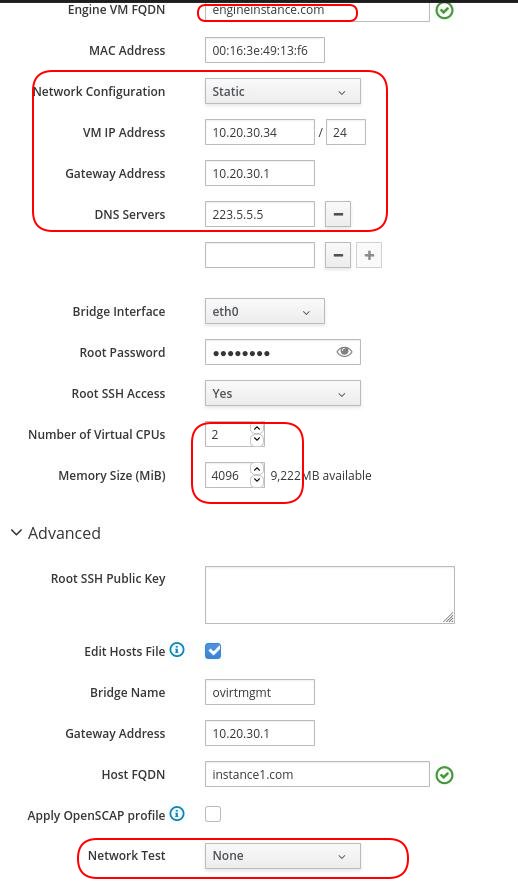
Fill the engine vm’s configuration infos:
Fill in admin portal password(this password will be used in web login) and continue:
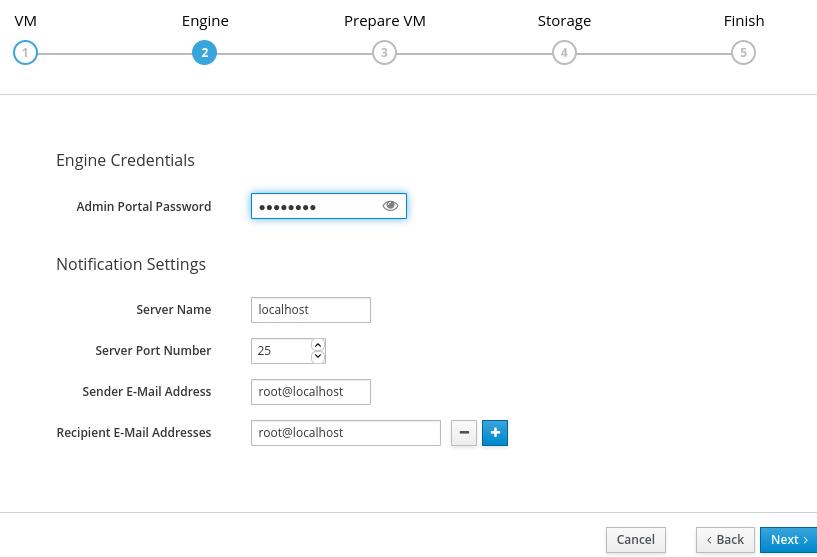
Examine the configuration and click Prepare VM:
Wait for about half an hour to see deployment successful:

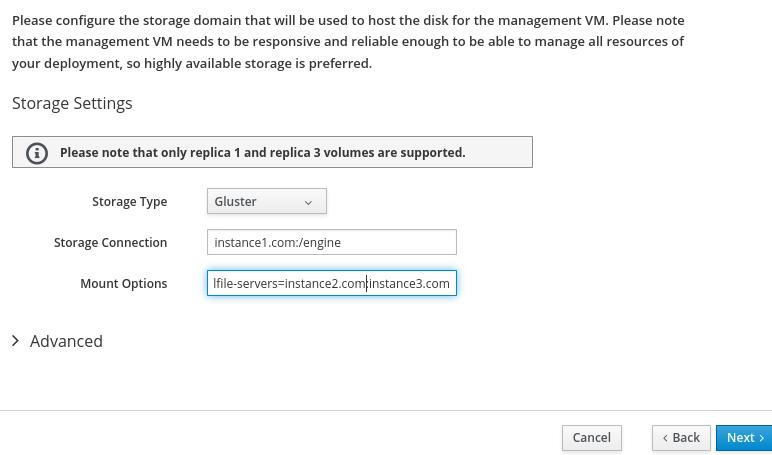
Keep the default configuration:
engine vm’s storage configuration will use Gluster, path will be Gluster’s engine volumn, and its parameter is:
backup-volfile-servers=instance2.com:instance3.com
for preventing the single-node issue for Gluster.
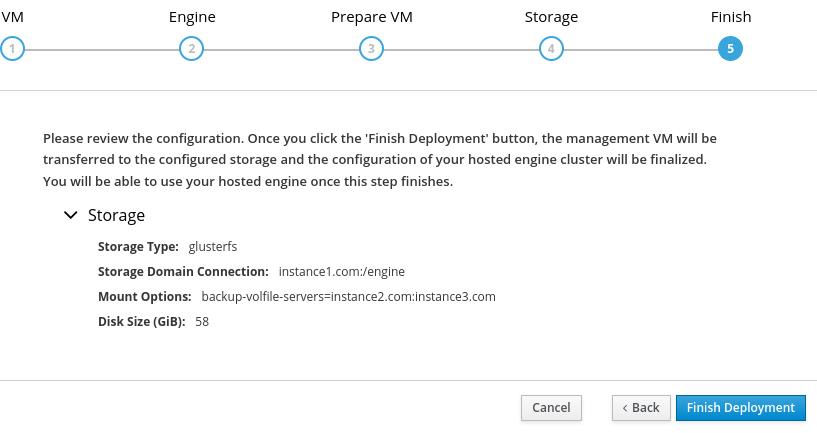
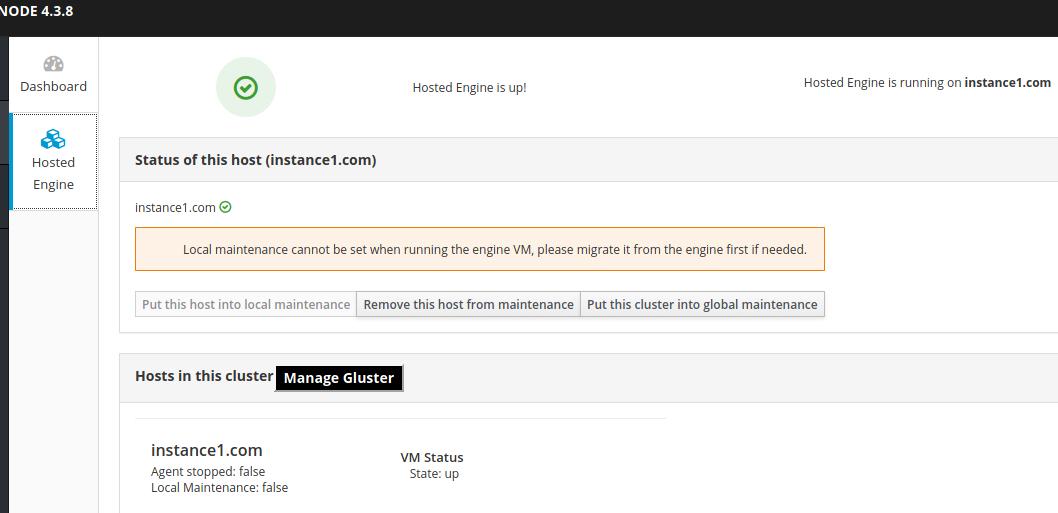
Click Finish deployment, and wait for a break:
Seeing this means deploy succeeded:
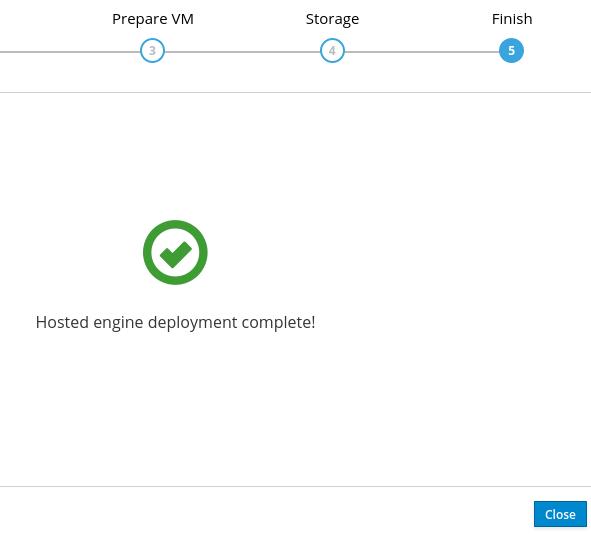
Refresh the status:
4. Portal
Visit engineinstance.com in host machine(ArchLinux):
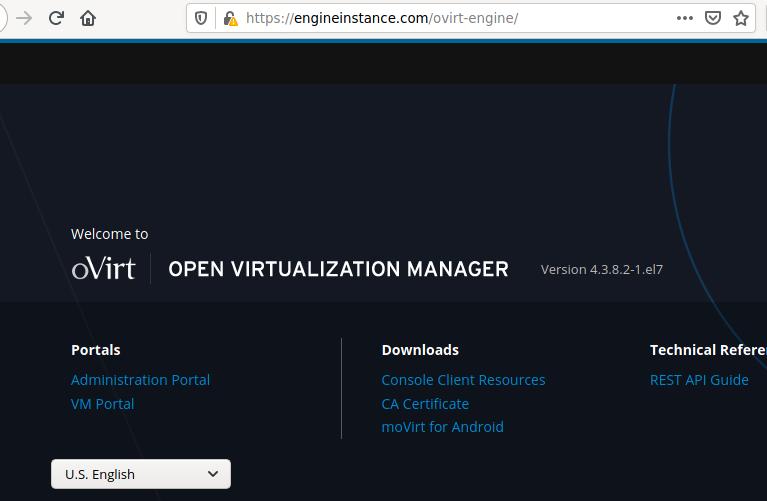
Click Administration Portal:
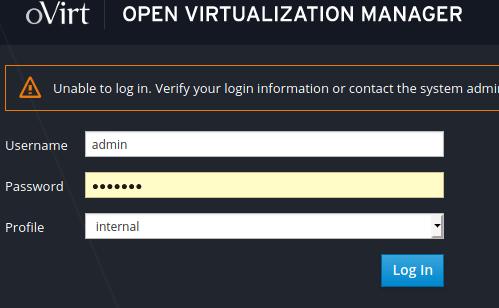
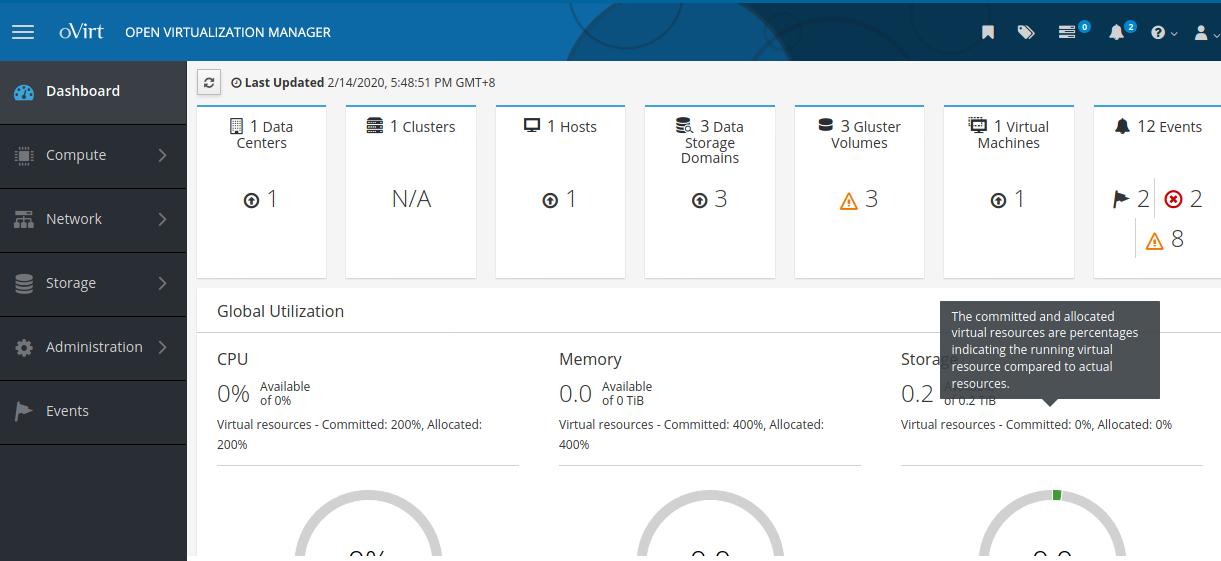
admin page is like following:
ssh into engine vm and check the disk partitions:
# ssh root@10.20.30.34
root@10.20.30.34's password:
Last login: Fri Feb 14 17:25:51 2020 from 192.168.1.1
[root@engineinstance ~]#df -h
Filesystem               Size  Used Avail Use% Mounted on
devtmpfs                 1.9G     0  1.9G   0% /dev
tmpfs                    1.9G   12K  1.9G   1% /dev/shm
tmpfs                    1.9G  8.9M  1.9G   1% /run
tmpfs                    1.9G     0  1.9G   0% /sys/fs/cgroup
/dev/mapper/ovirt-root   8.0G  2.3G  5.8G  29% /
/dev/mapper/ovirt-home  1014M   33M  982M   4% /home
/dev/mapper/ovirt-tmp    2.0G   33M  2.0G   2% /tmp
/dev/mapper/ovirt-var     20G  437M   20G   3% /var
/dev/vda1               1014M  157M  858M  16% /boot
/dev/mapper/ovirt-log     10G   45M   10G   1% /var/log
/dev/mapper/ovirt-audit 1014M   34M  981M   4% /var/log/audit
tmpfs                    379M     0  379M   0% /run/user/0
5. Create The First VM
5.1 Add ISO storage Domain
Login in to instance1.com, configure nfs share storage for holding ISO
images:
[root@instance1 ]# mkdir -p /isoimages
[root@instance1 ]# chown 36:36 -R /isoimages/
[root@instance1 ]# chmod 0755 -R /isoimages/
[root@instance1 ]# vi /etc/exports
[root@instance1 ]# cat /etc/exports
/isoimages *(rw,sync,no_subtree_check,all_squash,anonuid=36,anongid=36)
[root@instance1 ]# systemctl enable --now  nfs.service
Created symlink from /etc/systemd/system/multi-user.target.wants/nfs-server.service to /usr/lib/systemd/system/nfs-server.service.
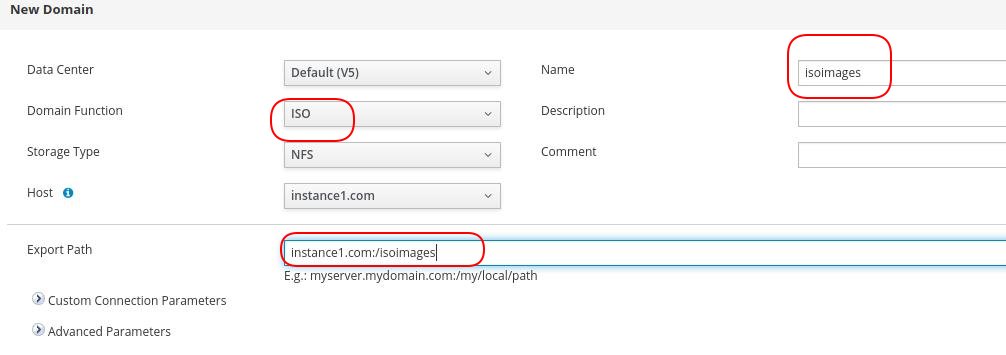
In ovirt manager portal , click Storage->Storage Domain, click New Domain:

Fill in name and path information:
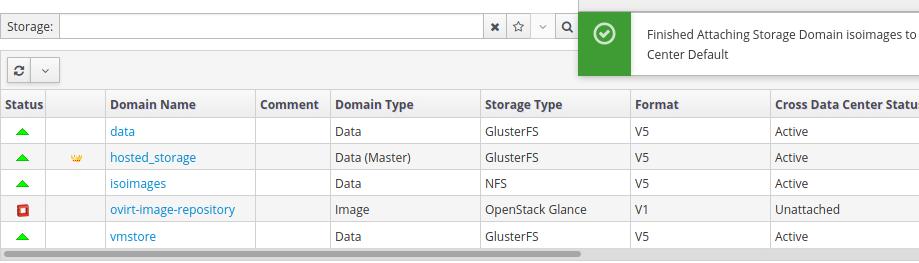
Finished adding isoimages:
5.2 Upload iso
Login to engien vm(engineinstance.com), download the iso from official site, we take ubuntu16.04.6 for example:
[root@engineinstance ~]# ovirt-iso-uploader -i isoimages upload ./ubuntu-16.04.6-server-amd64.iso
Please provide the REST API password for the admin@internal oVirt Engine user (CTRL+D to abort):
Uploading, please wait...
INFO: Start uploading ./ubuntu-16.04.6-server-amd64.iso
Uploading: [########################################] 100%
INFO: ./ubuntu-16.04.6-server-amd64.iso uploaded successfully
5.3 Create VM
Compute-> Virtual Machines, click new button:
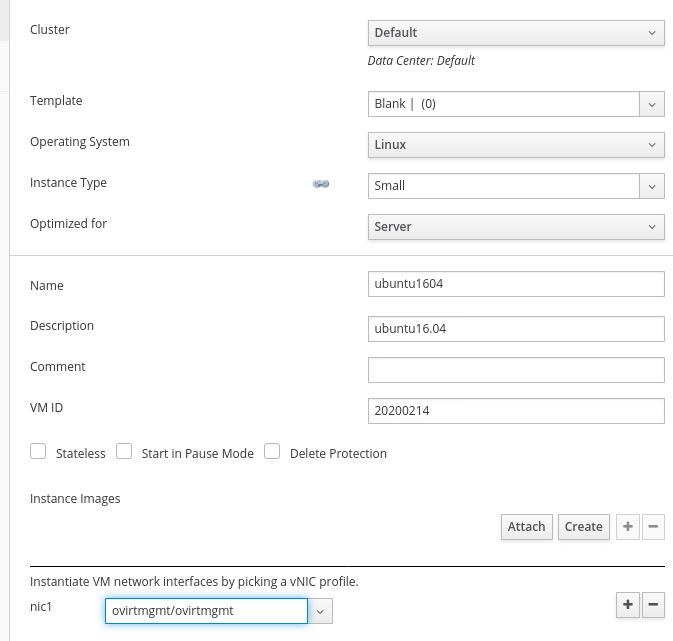
 Fill in informations:
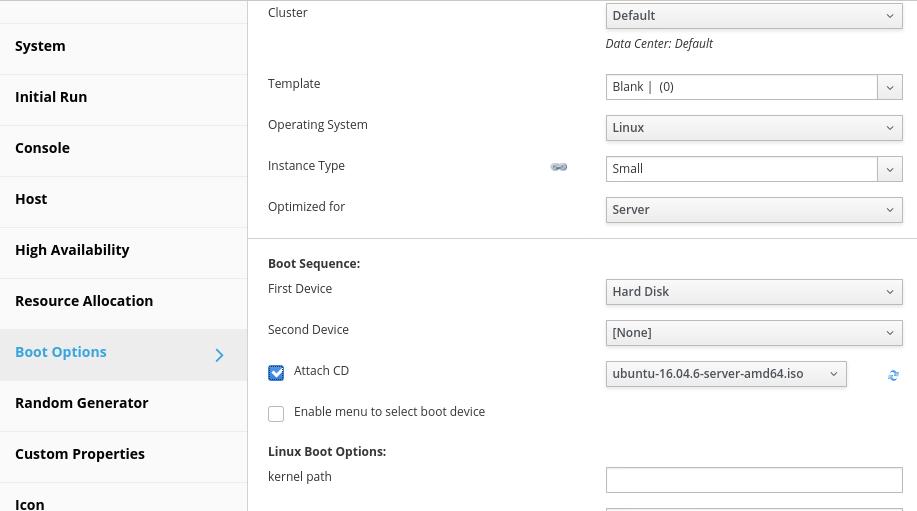
Click advanced options, select Boot Options, then attach uploaded iso:
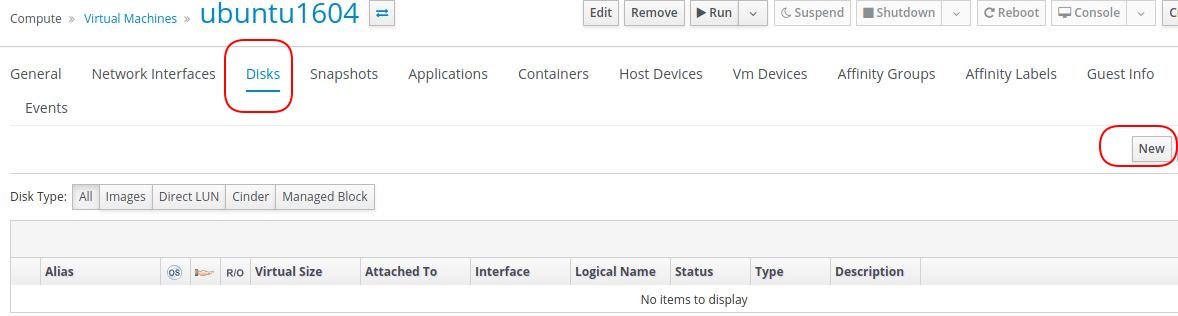
Click Disks, then click new:
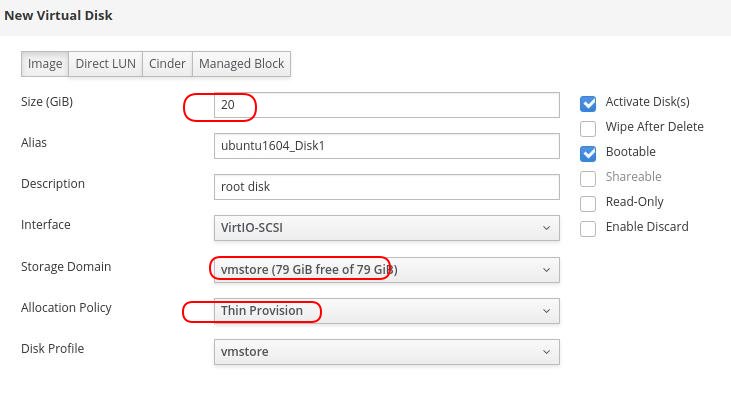
Fill in options:
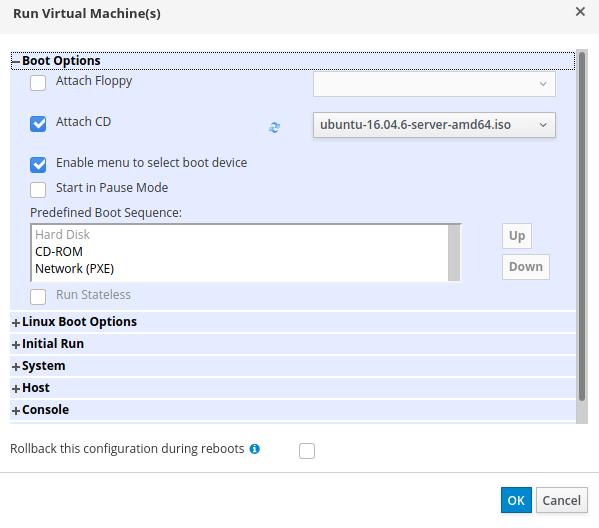
Click this new machine, and select run->run once:

Click OK for installation:
The installation image will be shown:
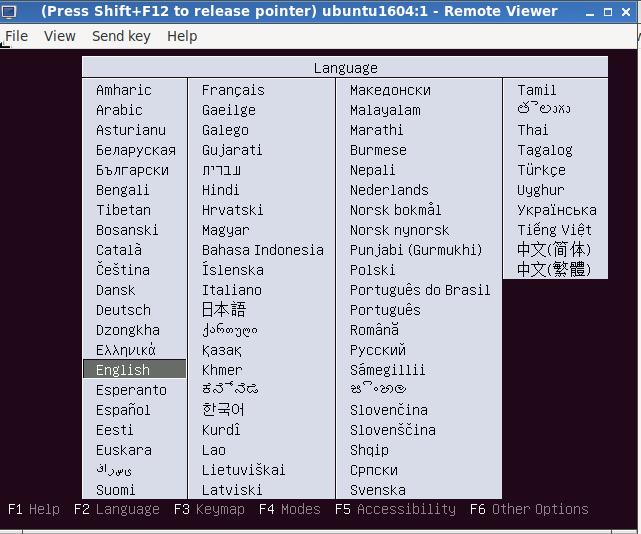
Configure installation options and wait until installation finished.
Since we use nested virtualization, the installation step will take a very
long time(>1h) for installing the os. For speedup, considering use NVME ssd
for locating the vm’s qcow2 files. Or use 3 physical servers.
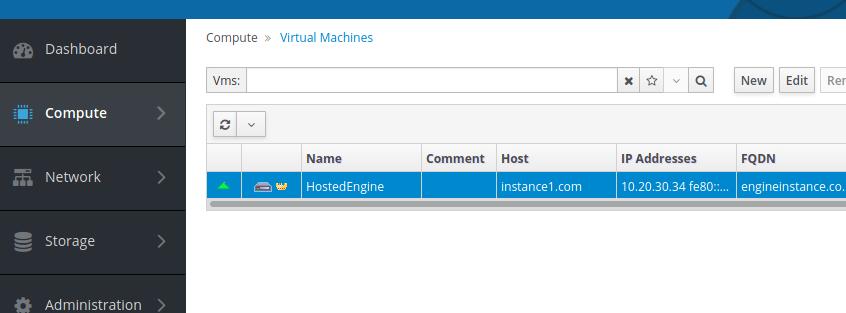
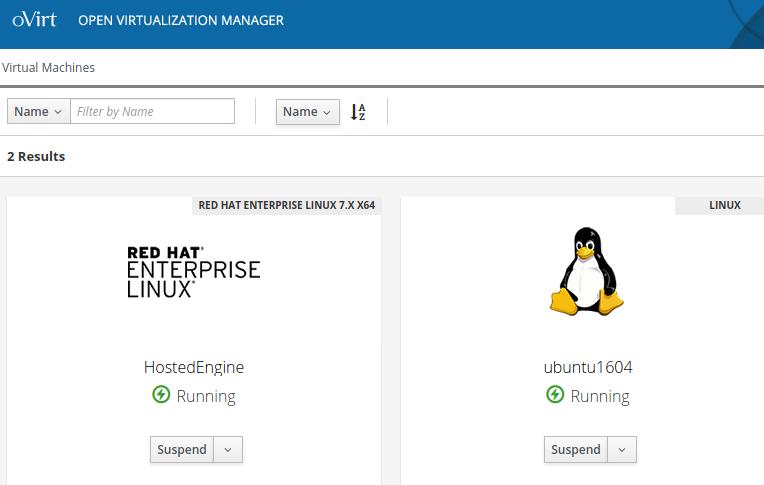
On vm portal we could see our newly created vm:
Examine the vms on instance1.com:
[root@instance1 isoimages]# virsh -r list
 Id    Name                           State
----------------------------------------------------
 2     HostedEngine                   running
 4     ubuntu1604                     running
6. Create vm using template
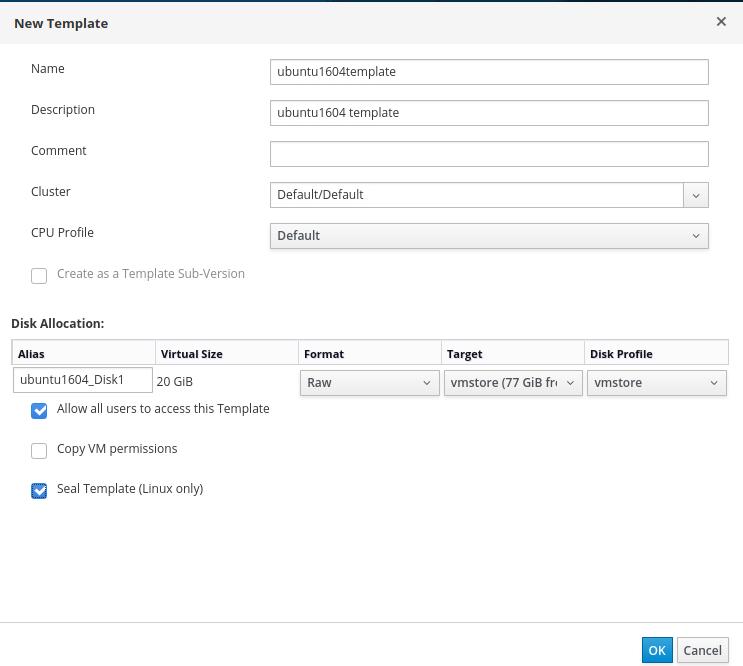
6.1 Create template
Create template via:
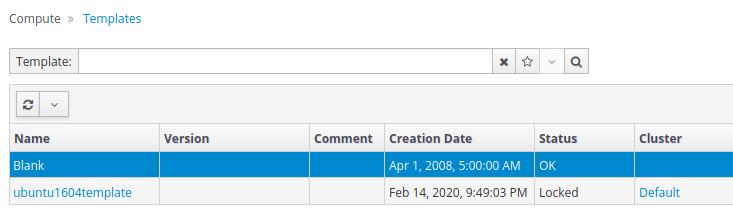
Check the status of template:
6.2 Create vm
Create new vm using template:
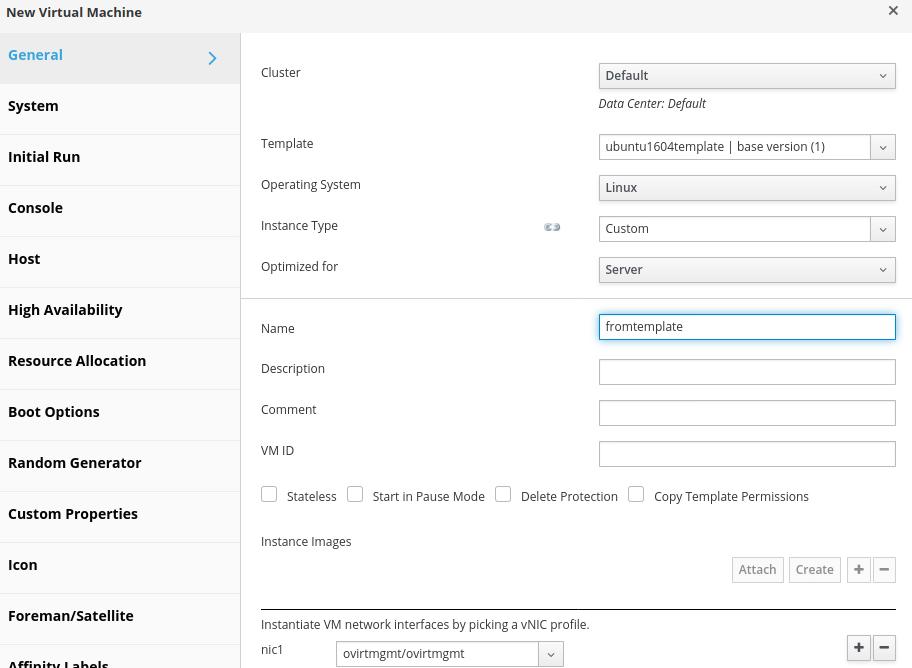
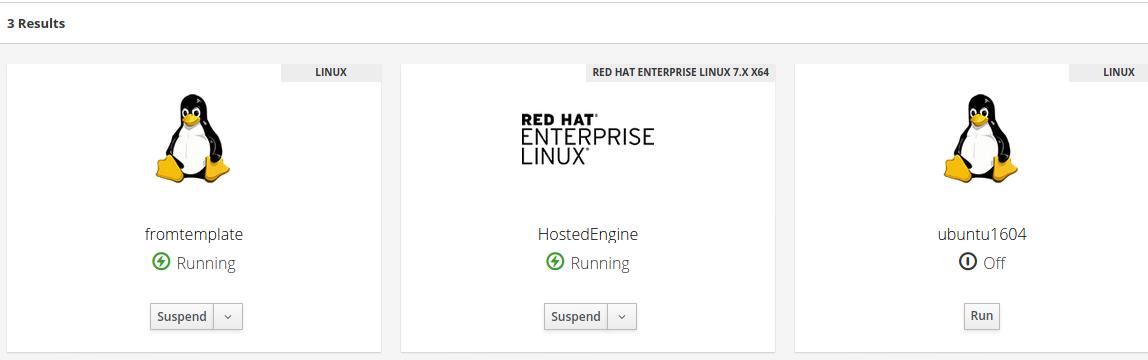
Start the machine and check result:
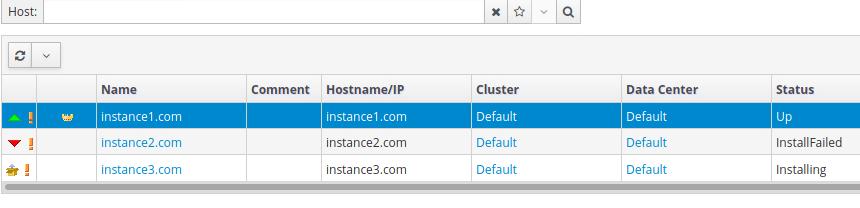
7. Add hosts
In engine vm, add following items:
Then we add hosts of instance2.com and instance3.com:
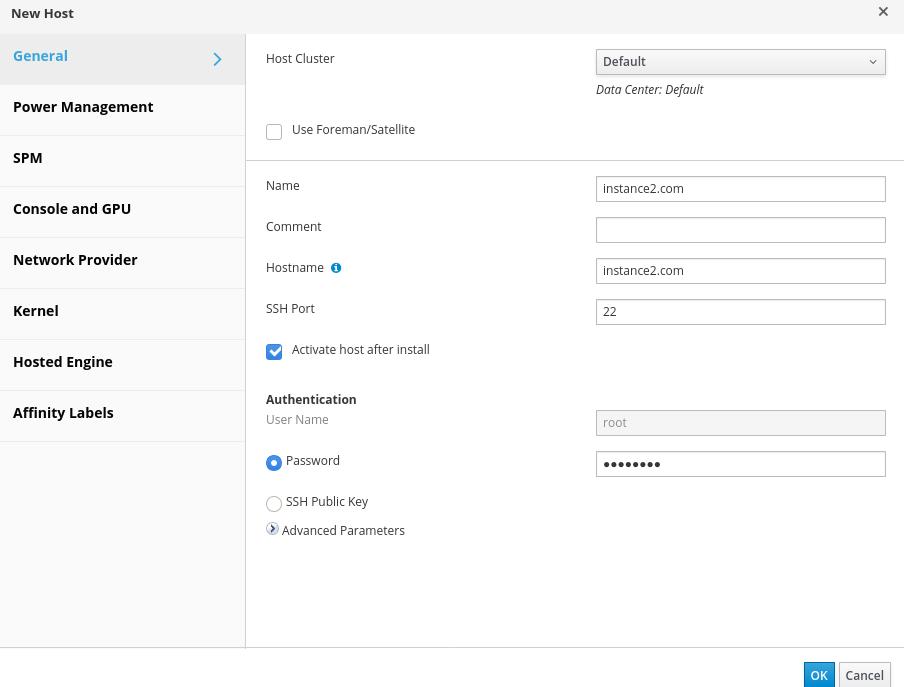
Result: