
LinuxTips6
Oct 9, 2016
LinuxTips
1. Working tips for remove dulipcate chars
http://codereview.stackexchange.com/questions/5441/removing-any-duplicate-characters-in-a-string
2. pip reinstallation
Uninstall all of the pip installed packages:
# pip freeze | xargs pip uninstall -y
3. ipython notebook
Install on ArchLinux via:
$ sudo pip install "ipython[all]"
Be sure to make your internet connection stable.
Run it via:
$ ipython notebook
ipython2 installation issue:
$ python2 -m pip install ipykernel
$ python2 -m ipykernel install --user
$ python2 -m pip  install "ipython[all]"
$ ipython3 notebook
Now you could create python2&python3 notebooks.
4. wkhtmltoimage
wkhtmltoimage could convert webpage into image files, like following command:
$ wkhtmltoimage http://purplepalmdash.github.io dash.jpg
5. Synergyc
Add following into ~/.config/awesome/rc.lua, then you could let synergyc auto-login
into another server:
"synergyc 192.168.0.219",
6. vromerc
vromerc configuration:
set userletters=0
7. Docker Registry
8. Trouble-Shooting In Libvirt
After installing archlinux, the virsh list will be failed with following message:
[root@Arch8G ~]# virsh list
error: failed to connect to the hypervisor
error: Failed to connect socket to '/var/run/libvirt/libvirt-sock': No such file or
directory
Solved via:
# systemctl enable libvirtd.service
# systemctl enable virtlogd.service
# systemctl restart libvirtd.service
# systemctl restart virtlogd.service
Now virsh list will be OK.
For user, you should add polkit related items, see:
https://wiki.archlinux.org/index.php/Libvirt#Using_polkit
also remember add yourself into the group kvm.
$ sudo usermod -a -G kvm dash
$ sudo usermod -a -G libvirtd dash
9. Docker using daocloud registry
Edit following file(Or you could edit it via: sudo systemctl edit docker.service):
# vim /etc/systemd/system/docker.service.d/override.conf
[Service]
ExecStart=
ExecStart=/usr/bin/dockerd --registry-mirror=http://1a653205.m.daocloud.io -H fd://
Now reload the service and restart docker.service via:
# systemctl daemon-reload
# systemctl restart docker.service
Now your docker pulling will from the daocloud website.
10. DEB Local Repository How-TO
In a ubuntu system, generate package repository metadatas:
# sudo apt-get install -y dpkg-dev
# dpkg-scanpackages . /dev/null | gzip -9c > Packages.gz
Now copy the directory into a webserver, like in 192.168.177.11, visit your
webpage, you will see http://192.168.177.11/xxxx contains all of the
packages and their metadata.
In the systems which you want to use this repository, do following:
$ sudo vim /etc/apt/sources.list.d/docker.list
deb http://192.168.177.11/ubuntu1604dockerrepo/	/
$ sudo apt-get update
Now examine the package docker-engine which in the private repository:
# apt-cache policy docker-engine
docker-engine:
  Installed: 1.12.3-0~xenial
  Candidate: 1.12.3-0~xenial
  Version table:
 *** 1.12.3-0~xenial 500
        500 http://192.168.177.11/ubuntu1604dockerrepo  Packages
        100 /var/lib/dpkg/status
Install this package via:
$ sudo apt-get install -y docker-engine --allow-unauthenticated
11. vagrant initial scripts for setting docker
Create the initial.sh under the vagrant folder:
# Use apt-cacher server
echo 'Acquire::http::Proxy "http://192.168.177.11:3142";'>/etc/apt/apt.conf.d/01proxy
# Added the primary repository
echo 'deb http://192.168.177.11/ubuntu1604dockerrepo/    /'>/etc/apt/sources.list.d/dockerrepo.list
apt-get update
apt-get -y install vim
apt-get install -y docker-engine --allow-unauthenticated
Using local docker registry:
# Use apt-cacher server
echo 'Acquire::http::Proxy
"http://192.168.177.11:3142";'>/etc/apt/apt.conf.d/01proxy
# Added the primary repository
echo 'deb http://192.168.177.11/ubuntu1604dockerrepo/
/'>/etc/apt/sources.list.d/dockerrepo.list
apt-get update
apt-get -y install vim
apt-get install -y docker-engine --allow-unauthenticated
# Added local docker registry
sed -i 's#fd://#fd:// --registry-mirror http://192.168.177.11:5000
--insecure-registry 192.168.177.11:5000#' /lib/systemd/system/docker.service
systemctl daemon-reload
systemctl restart docker
12. nginx docker way
Run via:
$ sudo docker run --name docker-nginx -p 80:80 -d -v ~/serve:/usr/share/nginx/html
nginx
With auto-index:
$ sudo docker run --name docker-nginx -p 80:80 -d -v ~/serve:/usr/share/nginx/html jrelva/nginx-autoindex
13. Combine Pictures
fotowall could genrate photo wall:
$ yaourt -S fotowall
Hugin could generate full-view pictures.
$ sudo pacman -S hugin
14. Docker Swarm How-to
http://www.lxy520.net/2016/07/02/shi-yong-docker-1-12-da-jian-duo-zhu-ji-docker-swarmji-qun/
https://www.linux.com/learn/how-use-docker-machine-create-swarm-cluster
15. Linux 性能监控专题
https://linux.cn/topic-linux-system-performance-monitoring.html
16. docker-compose in swarm
Install experimental version via:
## 测试版
curl -sSL http://acs-public-mirror.oss-cn-hangzhou.aliyuncs.com/docker-engine/test/internet | sh
curl -sSL http://acs-public-mirror.oss-cn-hangzhou.aliyuncs.com/docker-engine/test/intranet | sh

## 实验版
curl -sSL http://acs-public-mirror.oss-cn-hangzhou.aliyuncs.com/docker-engine/experimental/internet | sh
curl -sSL http://acs-public-mirror.oss-cn-hangzhou.aliyuncs.com/docker-engine/experimental/intranet | sh
https://docs.docker.com/compose/swarm/
17. kubernetes
https://coreos.com/kubernetes/docs/latest/kubernetes-on-vagrant.html
http://andrewmichaelsmith.com/2016/05/my-kubernetes-setup/
http://www.codeceo.com/article/kubernetes-guide.html
18. Changing disks
After changing disk(switch them) in archlinux, the efi menu should be rewritten into:
$ sudo cat /boot/loader/entries/arch.conf
title	ArchLinux
linux	/vmlinuz-linux
initrd	/initramfs-linux.img
options	root=/dev/sdb2 rw
Becareful of root=/dev/sda2 changing to root=/dev/sdb2.
17. Vagrant IP Setting
If your vagrant’s ip address won’t set properly, for example, eth1’s configuration is added into eth0, then you should install the following package:
$ sudo pacman -S community/virtualbox-guest-utils
18. badblocks checking in ArchLinux
Check the sda5 and sda3 of the disk via:
$ sudo badblocks -v /dev/sda5>badsectors5.txt && sudo badblocks -v
/dev/sda3>badsectors3.txt
smartmontools for checking disk healthy:
$ sudo pacman -S smartmontools
$ sudo smartctl -s on /dev/sda
$ sudo smartctl -H /dev/sda1
$ sudo smartctl -H /dev/sda
19. Manually build wordpress
https://www.sitepoint.com/how-to-manually-build-docker-containers-for-wordpress/
20. XenServer Get rrd data
Write a py file on XenServer, and run it:
import pprint, time, sys, os
import XenAPI
session = XenAPI.xapi_local()
session.xenapi.login_with_password("root", "xxxxx")
session_id=session._session
print session_id
wget_rrd_url="wget http://%s/host_rrd\?session_id\=%s" %("192.168.10.187", session._session)
print wget_rrd_url
os.system(wget_rrd_url)
session.logout()
21. Xen In Ubuntu
In ubuntu16.04, use xen hypervisor:
$ sudo apt-get update && sudo apt-get upgrade -y && sudo apt-get dist-upgrade -y
$ sudo apt-get install -y xen-hypervisor-amd64
$ sudo apt-get install -y virtinst virt-manager
Edit the grub for enabling the xen hypervisor:
$ sudo vim /etc/default/grub
GRUB_CMDLINE_LINUX_DEFAULT="Xen 4.1-amd64"
GRUB_CMDLINE_XEN="dom0_mem=1024M,max:1024M dom0_max_vcpus=2"
$ sudo update-grub
$ sudo reboot
Examine the usage:
$ sudo xl list
Name                                        ID   Mem VCPUs	State	Time(s)
Domain-0                                     0  1024     2     r-----      28.7
22. pv or hvm
Decided via:
$ sudo xl list --long CentOS69
Examine the result of the output:
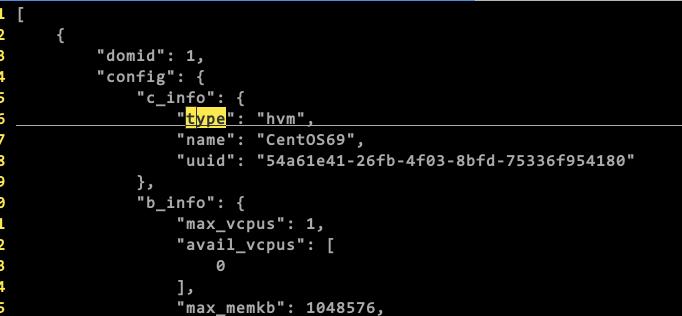
in our example, this machine is hvm, not pv.
23. vboxsf
Problem:
sudo mount -t vboxsf Shared_Folder ~/SF/
Gave following result:
VirtualBox: mount.vboxsf: mounting failed with the error: No such device
The solution for me was to stop vboxadd and do a setup after that:
cd /opt/VBoxGuestAdditions-*/init
sudo ./vboxadd setup
Then, you could also modprobe following:
$ sudo modprobe -a vboxguest vboxsf
$ sudo mount -t vboxsf -o uid=1000,gid=1000 vagrant /vagrant
Case you build failed, try following:
$ sudo yum install kernel-devel gcc
$ echo export KERN_DIR=/usr/src/kernels/`uname -r` >> ~/.bashrc
$ source ~/.bashrc     # to set the variable in your current shell
$ sudo echo $KERN_DIR  # verify the value is set
$ sudo ls $KERN_DIR    # verify the directory exists
24. purge xen
For switching back to default linux kernel rather than xen hypervisor, do following:
$ sudo apt-get purge xen*
$ sudo vim /etc/default/grub
// remove all of the xen related
$ sudo reboot
25. lvextend
extend to all of the usable space:
$ sudo lvextend -l +100%FREE /dev/vgonsda/lvubuntu
$ sudo resize2fs /dev/vgonsda/lvubuntu
In my situation this extend the root partition from 50G to 250G(all of the disk size)
26. ArchLinux Screen Brightness
Examine the brightness in sys folder:
# ls /sys/class/backlight
acpi_video0  intel_backlight
In our case is intel_backlight, thus we go into this folder and view its
parameters:
# ls /sys/class/backlight/intel_backlight
actual_brightness  bl_power  brightness  device  max_brightness  power
subsystem  type  uevent
# cat /sys/class/backlight/intel_backlight/max_brightness
648
# cat /sys/class/backlight/intel_backlight/brightness
643
It’s too bright, so we low down its value via:
# tee /sys/class/backlight/intel_backlight/brightness <<< 400
400
or we could set it via xbacklight:
# xbacklight -set 50
# xbacklight -set 100 ### Set to 100% brightness.
27. One-click startup
https://item.jd.com/10398791583.html
28. CloudStack HA
29. Get total memory of XenServer
Command:
$  xl info | grep total_memory
total_memory           : 7805
30. apt-fast
Install apt-fast for fetching back packages:
sudo add-apt-repository ppa:saiarcot895/myppa
sudo apt-get update
sudo apt-get -y install apt-fast
31. qemu bridge issue
Error message:
$ virsh start xcenter-win7
error: Failed to start domain xcenter-win7
error: internal error: /usr/lib/qemu/qemu-bridge-helper --use-vnet --br=br0
--fd=25: failed to communicate with bridge helper: Transport endpoint is not
connected
stderr=failed to parse default acl file `/etc/qemu/bridge.conf'
Solved via:
$ sudo mkdir -p /etc/qemu
$ sudo echo "allow br0">/etc/qemu/bridge.conf
Then you could use the qemu.
32. purge packages in archlinux
The command is:
$ sudo pacman -Rsn vagrant
This will remove all of the vagrant and its related packages.
33. dd for rescue disk
command:
$ sudo dd bs=262144 if=/dev/hda /dev/hdb conv=noerror,sync bs=10M status=progress
34. Download images automatically
Do following:
until sudo docker pull mesoscloud/zookeeper:3.4.6-ubuntu-14.04
do
	echo "fucku"
done

until sudo docker pull mesoscloud/mesos-master:0.24.1-ubuntu-14.04
do
	echo "fucku1"
done

until sudo docker pull mesoscloud/mesos-slave:0.24.1-ubuntu-14.04
do
	echo "fucku2"
done
until sudo docker pull mesosphere/marathon:v0.15.0
do
	echo "fuck U"
done
sudo docker save mesosphere/marathon:v0.15.0 | bzip2>marathon.tar.bz2
sudo docker save mesoscloud/mesos-slave:0.24.1-ubuntu-14.04| bzip2>slave.tar.bz2
sudo docker pull mesoscloud/zookeeper:3.4.6-ubuntu-14.04|bzip2>zookeeper.tar.bz2
sudo docker pull mesoscloud/mesos-master:0.24.1-ubuntu-14.04|bzip2>master.tar.bz2
35. Monitoring Docker
For monitoring docker host, containers, monitoring systems, and form the alert system.
36. Stop Docker-compose
Via sudo docker-compose down, then you will get all of the docker-compose
uped container down.
37. tsocks
Install:
$ sudo apt-get install tsocks
Configure:
$ sudo vim /etc/tsocks.conf
local = 192.168.1.0/255.255.255.0
#local表示本地的网络,也就是不使用socks代理的网络
local = 127.0.0.0/255.0.0.0
server = 127.0.0.1   #socks服务器的IP
server_type = 5  #socks服务版本
server_port = 8888  #socks服务使用的端口
38. vimdiff
Use dp or do for copying left to right or copy right to left.
39. Docker to Rocket
Tranform images via:
https://github.com/appc/docker2aci
$ docker save -o ubuntu.docker ubuntu
$ docker2aci ubuntu.docker
Extracting 706766fe1019
Extracting a62a42e77c9c
Extracting 2c014f14d3d9
Extracting b7cf8f0d9e82

Generated ACI(s):
ubuntu-latest.aci
$ actool --debug validate ubuntu-latest.aci
ubuntu-latest.aci: valid app container image
40. Detect display
Install lshw via:
$ sudo pacman -S lshw
$ sudo lshw -C display
$ sudo lshw -C display
41. Change Nomachine resolution
Detect all of the resolution configuration:
# xrandr -q
Now you get all of the resolution configuraitons. Change the current fb via:
$ xrandr --fb 1920x1080
42. Grafana collectd template
https://grafana.net/dashboards/203
Then manually replace all of the datasource segment:
For example: "datasource": "79's Graphite",.
43. at command
For do tasks in specified time:
# at 10PM
warning: commands will be executed using /bin/sh
at> cd /home/juju/http; axel
http://mirrors.aliyun.com/centos/7.3.1611/isos/x86_64/CentOS-7-x86_64-Everything-1611.iso
at> <EOT>
job 2 at Tue Dec 20 22:00:00 2016
Then this at will automatically download the centos7.3 iso in 10:00PM.
44. Run squid in docker
https://hub.docker.com/r/sameersbn/squid/
45. rkt image fetch
Command:
$ rkt fetch --insecure-options=image coreos-hyperkube-v1.4.6_coreos.0.aci
image: using image from file coreos-hyperkube-v1.4.6_coreos.0.aci
sha512-114e15d31926a6b185f658bc5c522fee
core@coreos1 ~ $ rkt image list
ID			NAME						SIZE
IMPORT TIME	LAST USED
sha512-114e15d31926	quay.io/coreos/hyperkube:v1.4.6_coreos.0	637MiB
1 minute ago	1 minute ago
46. Linux Installation Date
Via:
ls -alct /root
47. Daocloud speedup in ubuntu14.04
Edit following file:
$ sudo vim /etc/default/docker
DOCKER_OPTS="$DOCKER_OPTS --registry-mirror=http://1a653205.m.daocloud.io"
$ sudo service docker restart
48. hugo error
When meeting following issue:
hugo
Started building sites ...
ERROR: 2017/01/03 12:02:00 general.go:241: .Page's RSSlink is deprecated and
will be removed in Hugo 0.2. Use RSSLink instead
Solution will be:
$ grep -i "rsslink" ./ -r
./themes/hyde-a/layouts/partials/sidebar.html:      {{ if .Site.Params.rss
}}<a href="{{ .RSSlink }}" type="application/rss+xml"><i class="fa
fa-rss-square fa-3x"></i></a>{{ end }}
Replace all of the RSSlink with RSSLinke.
49. Start VirtualBox Vms
Start k8s cluster via one command:
$ VBoxManage list vms
$ VBoxManage startvm "k8s_coreos1" --type headless
$ VBoxManage startvm "k8s_coreos2" --type headless
$ VBoxManage startvm "k8s_coreos3" --type headless
50. ip namespace
Some operation tips:
# ip netns add testns
# ip netns exec testns ip addr
# ip netns exec testns ifconfig -a
# ip netns exec testns bash
# ip netns list
# ip netns delete testns
# ip netns list
# pacman -S ethtool
# ethtool -k br0 | grep netns
51. ip links
Create a Veth pair:
# ip link add veth0 type veth peer name veth1
Examine the result:
# ip link show
24: veth1@veth0: <BROADCAST,MULTICAST,M-DOWN> mtu 1500 qdisc noop state DOWN
mode DEFAULT group default qlen 1000
    link/ether 02:ec:bd:78:59:06 brd ff:ff:ff:ff:ff:ff
25: veth0@veth1: <BROADCAST,MULTICAST,M-DOWN> mtu 1500 qdisc noop state DOWN
mode DEFAULT group default qlen 1000
    link/ether 5a:a6:f5:88:27:9f brd ff:ff:ff:ff:ff:ff
Could it be transfered?
[root@DashSSD ~]# ethtool -k veth0 | grep netns
netns-local: off [fixed]
[root@DashSSD ~]# ethtool -k veth1 | grep netns
netns-local: off [fixed]
We could view Veth as a 2-wired, so we first add one port to a namespace:
# ip netns add netns1
# ip link set veth1 netns netns1
# ip link show
via ip link show we found the veth1 vanished.
And we could view the namespace owned link equips via:
# ip netns exec netns1 ip link show
1: lo: <LOOPBACK> mtu 65536 qdisc noop state DOWN mode DEFAULT group default
qlen 1
    link/loopback 00:00:00:00:00:00 brd 00:00:00:00:00:00
24: veth1@if25: <BROADCAST,MULTICAST> mtu 1500 qdisc noop state DOWN mode
DEFAULT group default qlen 1000
    link/ether 02:ec:bd:78:59:06 brd ff:ff:ff:ff:ff:ff link-netnsid 0
Add veth1 ip address:
# ip netns exec netns1 ip addr add 10.1.1.1/24 dev veth1
Add veth0 ip address:
# ip addr add 10.1.1.2/24 dev veth0
Now startup the equipment:
# ip netns exec netns1 ip link set dev veth1 up
# ip link set dev veth0 up
Ping eath other:
# ping 10.1.1.1
# ip netns exec netns1 ping 10.1.1.2
View remote:
[root@DashSSD dash]# ip netns exec netns1 ethtool -S veth1
NIC statistics:
     peer_ifindex: 25
[root@DashSSD dash]# ip link | grep 25
25: veth0@if24: <BROADCAST,MULTICAST,UP,LOWER_UP> mtu 1500 qdisc noqueue state
UP mode DEFAULT group default qlen 1000
52. Reset Virtualbox
Via following command:
$ VBoxManage controlvm "k8s_coreos1" reset
53. Docker monitoring
Use docker stats for viewing the resource usage of the docker instance.
$ sudo docker ps | grep squid
049axxxxx
$ sudo docker status 049axxxxx
The displaying status is:

Use docker top 049axxxx could see the resource usage.
docker port for viewing the port usage.
54. sdiff
You could use sdiff for generating side-to-side diff files.
55. Installation of XenServer 6.5
Use rufus for writing XenServer 6.5 iso into the flash disk, then install system.
https://rufus.akeo.ie/?locale=zh_CN
56. Normal User Using Virtualbox USB
Add the user into the group of vboxuser, then he have the priviledge of
using usb device.
$ sudo usermod -a -G vboxusers xxxx
Notice: you have to restart the machine to let your configuration take effects.
57. Shutdown all of the running VMs
Via following commands:
$ vboxmanage list runningvms | sed -r 's/.*\{(.*)\}/\1/' | xargs -L1 -I {} VBoxManage controlvm {} poweroff
58. Capture ScreenShot
Use following command hucapscr for capturing the screenshot and save
the link related markdown tips:
$ sudo vim /usr/bin/hucapscr
scrot -s '%Y_%m_%d_%H_%M_%S_$wx$h.jpg' -e 'mv $f ~/capscr/'
filename=`ls -t ~/capscr | head -n1`
cp ~/capscr/$filename /home/dash/Code/purplepalmdash.github.io/static/images/
#echo ""
echo ""|xclip
Simply ruun hucapscr, it will auto save the pictures.
59. Force Umount
For example, you could force umount the nfs directory when nfs server is gone.
umount -f -l /mnt/myfolder, and that will fix the problem.

-f – Force unmount (in case of an unreachable NFS system). (Requires kernel 2.1.116 or later.)
-l – Lazy unmount. Detach the filesystem from the filesystem hierarchy now, and cleanup all references to the filesystem as soon as it is not busy anymore. (Requires kernel 2.4.11 or later.)
69. Disk Clone
For recovering the error disks:
$ sudo dd if=/dev/sdX of=/dev/sdY bs=64K conv=noerror,sync
70. XenServer Time Sync Issue
tsc mode enable:
# xe vm-list
# xe vm-param-set uuid=82aa4fec-6b95-4f39-050c-cfbd3a8b9065 platform:tsc_mode=2
Or you could enable the ntp to the host IP.
Or if not HVM, check:
# echo 1 > /proc/sys/xen/independent_wallclock
71. Route for Internet
First make sure the ip_forward is enabled in /proc, then enter following
commands for setting up the NAT.
$ sudo iptables -t nat -A POSTROUTING -s  192.168.0.220/24 -j SNAT --to 192.168.0.121
$ sudo iptables -A FORWARD -s 192.168.0.220 -j ACCEPT
Next you should set the routing to the right IP address.
72. Time Sync using systemd
Via following:
# timedatectl set-ntp true
# timedatectl status
# vim /etc/systemd/timesyncd.conf
[Time]
NTP=0.arch.pool.ntp.org 1.arch.pool.ntp.org 2.arch.pool.ntp.org 3.arch.pool.ntp.org
FallbackNTP=0.pool.ntp.org 1.pool.ntp.org 0.fr.pool.ntp.org
73. OpenSuse sshd
Disable the firewalld via yast, and enable the sshd port from external zone.
74. vagrant-libvirt In Archlinux
Using following script you could re-enable vagrant-libvirt in archlinux for vagrant newer than 1.9.1.
#!/bin/sh

# in case it's already installled
vagrant plugin uninstall vagrant-libvirt

# vagrant's copy of curl prevents the proper installation of ruby-libvirt
sudo mv /opt/vagrant/embedded/lib/libcurl.so{,.backup}
sudo mv /opt/vagrant/embedded/lib/libcurl.so.4{,.backup}
sudo mv /opt/vagrant/embedded/lib/libcurl.so.4.4.0{,.backup}
sudo mv /opt/vagrant/embedded/lib/pkgconfig/libcurl.pc{,.backup}

CONFIGURE_ARGS="with-libvirt-include=/usr/include/libvirt with-libvirt-lib=/usr/lib" vagrant plugin install vagrant-libvirt

# https://github.com/pradels/vagrant-libvirt/issues/541
export PATH=/opt/vagrant/embedded/bin:$PATH
export GEM_HOME=~/.vagrant.d/gems/2.2.5
export GEM_PATH=$GEM_HOME:/opt/vagrant/embedded/gems

gem uninstall ruby-libvirt
gem install ruby-libvirt

# put vagrant's copy of curl back
sudo mv /opt/vagrant/embedded/lib/libcurl.so{.backup,}
sudo mv /opt/vagrant/embedded/lib/libcurl.so.4{.backup,}
sudo mv /opt/vagrant/embedded/lib/libcurl.so.4.4.0{.backup,}
sudo mv /opt/vagrant/embedded/lib/pkgconfig/libcurl.pc{.backup,}
The reason is: you have to change the Gem path from /opt to /usr/lib.
75. wget jre/jdk
Via vollowing command you could using wget for download jre/jdk from oracle:
# wget -c --no-check-certificate --no-cookies --header "Cookie: oraclelicense=accept-securebackup-cookie" http://download.oracle.com/otn-pub/java/jdk/6u45-b06/jdk-6u45-linux-x64.bin
# wget -c --no-check-certificate --no-cookies --header "Cookie: oraclelicense=accept-securebackup-cookie" http://download.oracle.com/otn-pub/java/jdk/6u45-b06/jre-6u45-linux-x64.bin
76. Local CDN
http://www.appinn.com/local-cdn/
77. Gateway On Multiple NICs
Add following lines in /etc/rc.local in Ubuntu:
eval `route -n | awk '{ if ($8 =="eth0" && $2 != "0.0.0.0") print "route del default gw " $2; }'`
route add default gw 192.168.0.176
78. virt-inst
For installing systems:
# virt-install --name=test --ram 512 --vcpus=1 -f /home/kvm/test.qcow2 --cdrom /opt/CentOS-6.5-x86_64-bin-DVD1.iso --graphics vnc,listen=0.0.0.0,port=5988, --network network=default, --force --autostart
Then vncviewer localhost:5988 you could get the installation window.
79. Atom plugin install
Install it via proxychains4 apm install markdown-pdf
80. Simple Web Server
$ wget https://gist.githubusercontent.com/sumpygump/9908417/raw/5fa991fda103d0b7a0c38512394a83ccada9ad6c/nweb23.c
$ gcc -O -DLINUX nweb32.c -o nweb
$ ./nweb 8848 ./
81. Show git config infos
Show configurations of git global setting:
$ git config --list
user.email=xxxx@gmail.com
user.name=xxxx
Set the git global setting:
# git config --global user.email xxxxx@gmail.com
# git config --global user.name "xxxx"
82. Wordpress issue
When using dockerized wordpress, you got the same content after you run sudo docker-compose down, the reason is because the docker-compose use the same
volumes, if you runs:
$ sudo docker volume prune
Your temp unused volumes will be deleted. Then you got a brand new wordpress docker container.
83. python extract zip
For converting Chinese:
#!/usr/bin/env python
# -*- coding: utf-8 -*-
# uzip.py

import os
import sys
import zipfile

print "Processing File " + sys.argv[1]

file=zipfile.ZipFile(sys.argv[1],"r");
for name in file.namelist():
    utf8name=name.decode('gbk')
    print "Extracting " + utf8name
    pathname = os.path.dirname(utf8name)
    if not os.path.exists(pathname) and pathname!= "":
        os.makedirs(pathname)
    data = file.read(name)
    if not os.path.exists(utf8name):
        fo = open(utf8name, "w")
        fo.write(data)
        fo.close
file.close()
Then extract the files via:
$ python2 abc.py aaa.zip
84. docker-compose network
Examine the network via docker network ls
85. teamviewer for rpi
Install will ask for installing qt, just run apt-get install -f solves the problem.
86. Remote controlling for rpi
Using dataplicity