NodeMCU And 1602I2C
Mar 31, 2016
Technology
最初入手的1602是N个口的, 激活它需要耗掉开发板上N个GPIO口,为此做完Arduino上的实 验就收了起来. 这次采购中看到店家有卖1602 I2C的转接卡,3块钱,顺手就买了回来.打算 用来做一个WIFI显示屏.
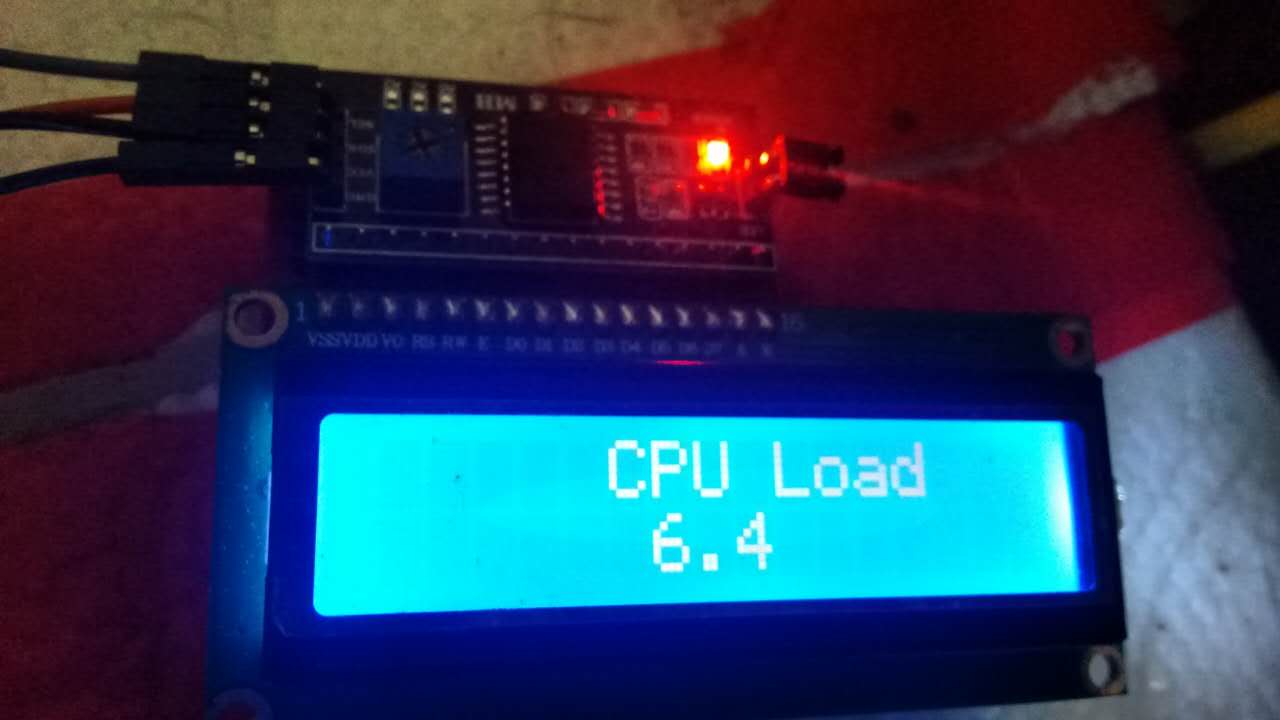
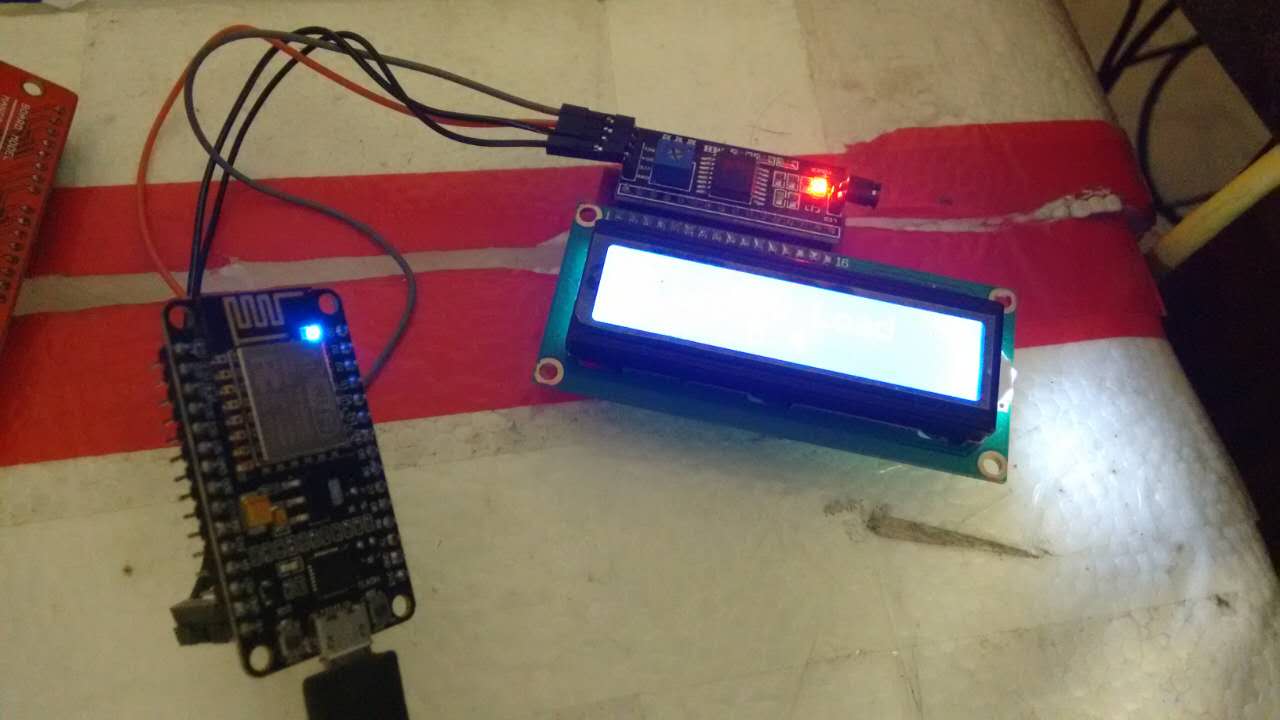
今天做了一个NodeMCU和1602连接实时显示CPU使用率的方案, 如下图所示,这里简单记录 一下制作过程.


连线图
1602 I2C上有四个口,分别是GND/VCC/SDA/SCL.
GND自然不用多说,连接NodeMCU上的GND即可.
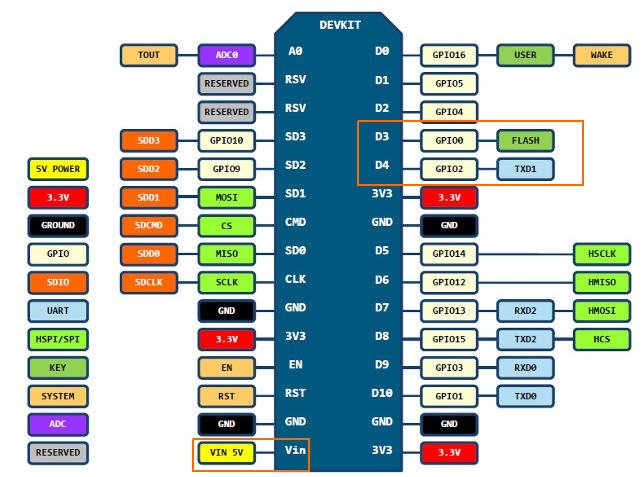
VCC我们使用5V输入,在NodeMCU上则是VIN口. 在下图里我用红色做了标注.
SDA接GPIO0, SDC接GPIO2,在图中我用橙色做了标识.

软件准备
我这里参考了 http://domoticx.com/esp8266-wifi-lcd-1602-2004-via-i2c-nodemcu/ 上的实例, 所以用ESPlorer来写入1602的库文件. ESPlorer的下载地址在:
http://esp8266.ru/esplorer/#download
如果你使用的是ArchLinux的话,一行命令就够了:
$ yaourt esplorer
如果你运行上述网址上的示例, 故事的结尾你会获得一个Hallo的显示,以及跑马灯式的显 示效果.
CPU Load Program
先上代码, 用Python写的, 如果你看过上面的示例程序就会明白, 往串口写入1602的lua 脚本,就能获得对应的显示效果,那么以下的Python代码就是每分钟读取CPU的负载值, 将 它封装在一个字符串中发送到NodeMCU连接的串口.
import psutil
import serial
import time


# Setup the Serial Port and open it.
ser = serial.Serial()
ser.baudrate = 9600
ser.port = '/dev/ttyUSB0'
ser.open()
## Todo, to check if the port is opened.

# Really talks to the i2c LCD.

# Setup the wiring
ser.write(b'i2c.setup(0, 4, 3, i2c.SLOW)\r\n')

# dofile, load the lcd library
ser.write(b'lcd = dofile("lcd1602.lua")()\r\n')

# Now Refresh the LCD.
ser.write(b'lcd.clear()\r\n')

# Fetching the percentage per 1 second
# Todo, change the while true into CTRL+C stopped.
while True:
    # Get current percentage
    ser.write(b'lcd.clear()\r\n')
    currentPer = str(psutil.cpu_percent()).encode('ascii')
    # Format oneLine
    ser.write(b'lcd.put(lcd.locate(0, 5), "CPU Load")\r\n')
    oneLine = b'lcd.put(lcd.locate(1, 6), "' + currentPer + b'")\r\n'
    # Write oneLine
    ser.write(oneLine)
    time.sleep(1)
代码运行的前提条件是,在ArchLinux上,安装pyserial库和psutil库,
而后运行sudo python WriteLoadToLCD.py.
$ sudo pacman -S python-psutil
$ sudo pacman -S python-pyserial
可以看到你的系统CPU使用率已经显示在1602 LCD上了,每分钟更新一次.
当然你也可以将显示
值从CPU使用率换成内存占用率,或是CPU温度,或是PM2.5的值等等. 你要做的就是构建自
己的数据CurrentPer和写入的格式oneLine.
通过串口发送数据, 通过NodeMCU驱动1602, 这功能对NodeMCU而言太小儿科了,所以接下 来我会继续做一个WIFI驱动的LCD.
