Read Digest On KVM
Jan 26, 2016
Technology
Some Words
VMM: (Virtual Machine Monitor)
VMX: (Virtual Machine eXtensions): instructions on processors with x86 virtualization.
Virtualization software: is most often used to emulate a complete computer system in order to allow a guest operating system to be run, for example allowing Linux to run as a guest on top of a PC that is natively running a Microsoft Windows operating system (or the inverse, running Windows as a guest on Linux).
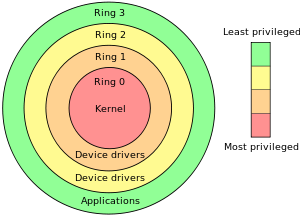
CPU Ring:
https://en.wikipedia.org/wiki/Protection_ring

VT-d, I/O Hardware Virtualization.
VT-c, Networking Hardware Virtualization.
Host kickstart file
Add following installation packages:
%packages
@virtualization
@Base
@Core
@additional-devel
@base
@large-systems
@storage-client-iscsi
@systgem-management-snmp
@virtualization
@virtualization-client
@virtualization-platform
@virtualization-tools
%end
Mouse On Windows Virtual Machine
Add twice the usb mouse:
<input type='tablet' bus='usb'
NUMA
Install the numa configuration tools via:
# apt-cache search numactl
numactl - NUMA scheduling and memory placement tool
# apt-get -y install numactl
Command: numactl --hardware, numastat, numastat -c qemu-kvm.
Check the numa banlancing policy via:
# cat /proc/sys/kernel/numa_balancing
0
echo 1 for open the auto balancing.
KSM, could merge the same memory page, even in different NUMA node.
# cat /sys/kernel/mm/ksm/merge_across_nodes
1
CPU Binding
Use virsh vcpuinfo xx for displaying the VCPU/CPU corresponding relationship.
virsh # emulatorpin 79
emulator: CPU Affinity
----------------------------------
       *: 0-7
Change it dynamically:
virsh # emulatorpin 79 0-3 --live

virsh # emulatorpin 79
emulator: CPU Affinity
----------------------------------
       *: 0-3
Now you could check the result via virsh dumpxml xxx:
  <vcpu placement='static'>4</vcpu>
  <cputune>
    <emulatorpin cpuset='0-3'/>
  </cputune>
1-1 binding using virsh:
# virsh vcpupin 79 0 0
# virsh vcpupin 79 1 1
# virsh vcpupin 79 2 2
# virsh vcpupin 79 3 3
# virsh dumpxml 79 | more
  <cputune>
    <vcpupin vcpu='0' cpuset='0'/>
    <vcpupin vcpu='1' cpuset='1'/>
    <vcpupin vcpu='2' cpuset='2'/>
    <vcpupin vcpu='3' cpuset='3'/>
Now view the vcpuinfo via:
# virsh vcpuinfo 79
VCPU:           0
CPU:            0
State:          running
CPU time:       9.2s
CPU Affinity:   y-------
CPU Hot-Plug-in
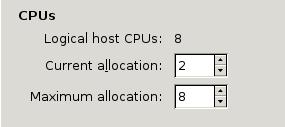
The cpu configuration info is listed as:

View the CPU infos via:
# cat /proc/interrupts
           CPU0       CPU1
Change the CPUs to 3:
virsh # setvcpus 80 3 --live
Now in the vm the result should be(or detect it via cat /proc/cpuinfo) :
# cat /proc/interrupts
           CPU0       CPU1       CPU2
CPU Working Mode
If we select the pass-through, then the cpuinfo should be:
# virsh dumpxml xxxxx
  <cpu mode='host-passthrough'>
  </cpu>
# cat /proc/cpuinfo
processor       : 1
vendor_id       : GenuineIntel
cpu family      : 6
model           : 58
model name      : Intel(R) Core(TM) i7-3770 CPU @ 3.40GHz
If we select the host-model, will choose the most similar:
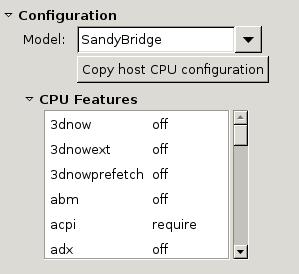
Or If we choose Copy host cpu mode, like following:
# cat /proc/cpuinfo
....
processor       : 1
vendor_id       : GenuineIntel
cpu family      : 6
model           : 42
model name      : Intel Xeon E312xx (Sandy Bridge)
Memory Balloon
Change the memory balloon to 1024 or 4096 via:
# virsh qemu-monitor-command PerfTune --hmp --cmd balloon 1024
# virsh qemu-monitor-command PerfTune --hmp --cmd info balloon
balloon: actual=1024
# virsh qemu-monitor-command PerfTune --hmp --cmd balloon 4096
Memory Limitation
Make configuration of the memory via:
virsh memtune PerfTune --hard-limit xxxxx --config
virsh memtune PerfTune --soft-limit xxxxx --config
virsh memtune PerfTune --swap-hard-limit xxxxx --config
virsh memtune PerfTune --min_guarantee xxxxx --config
–config, write to configuration xml –live, lively write –current ?
HugePage
Enable hugepage via:
# grep -i huge /proc/meminfo
AnonHugePages:  12820480 kB
HugePages_Total:       0
HugePages_Free:        0
HugePages_Rsvd:        0
HugePages_Surp:        0
Hugepagesize:       2048 kB
