WH Worktips(9)
Jul 10, 2015
Technology
Cobbler In Non-DHCP Server Networking
Sometimes you want to deploy system with cobbler server, in some restricted network which dhcp service is not allowed(considering broadcasting storm, security, etc.) Following are the steps of how-to:
Change Cobbler server setting:
$ sudo vim /etc/cobbler/settings
manage_dhcp: 0
$ sudo cobbler sync
$ sudo service dhcpd stop
Add the node definition in cobbler(useless):
# cobbler system add --name=node2 --profile=CentOS6.5-x86_64 --mac=52:54:00:71:59:64 --interface=eth0 --static=1 --ip-address=10.47.58.3 --dns-name=node2 --gateway=10.47.58.1
Now bootup your newly added computer with PXE, hit ctrl+B once you see the bios hint.
iPXE> config net0
hit ctrl+B should be like in following image: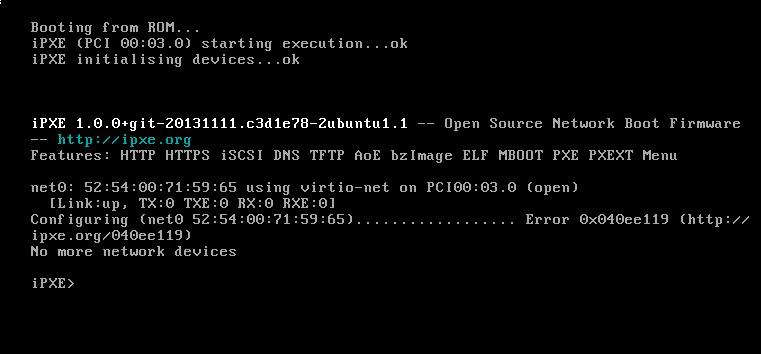
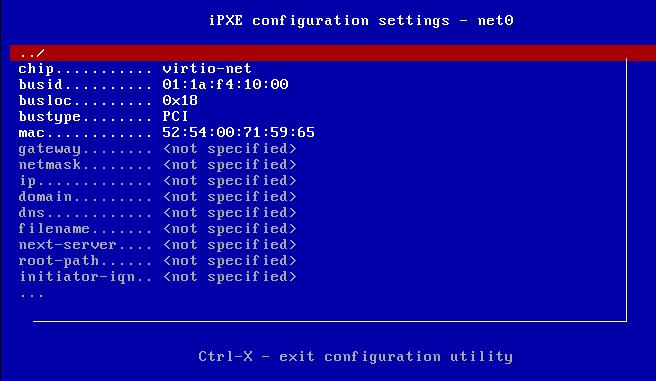
Setting like following: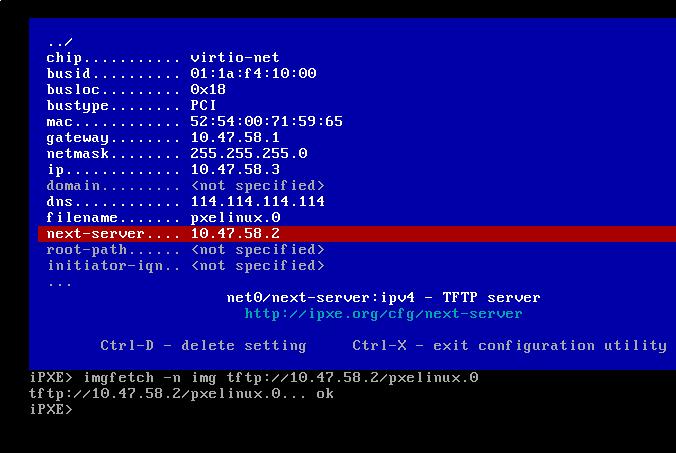
Hit Ctrl+x for saving the settings and continue to set:
iPXE> imgfetch -n img tftp://10.47.58.2/pxelinux.0
iPXE> imgload img
iPXE> boot
Now begin to install, you will met nework configuration fail issue: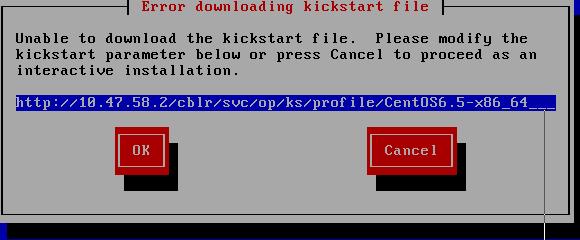
Hit Cancel, manually set up the network, first select installation method:
Configure TCP/IP: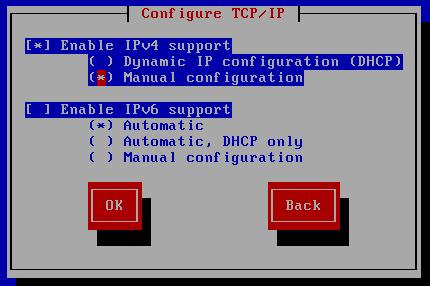
Configure IP address/gateway/dns/netmask: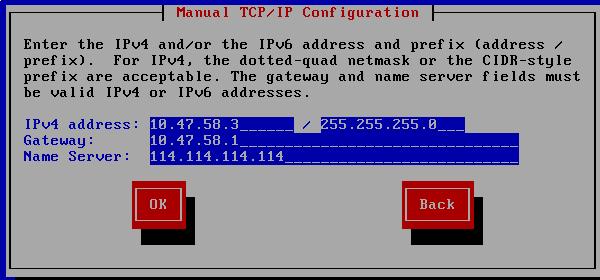
Now configure the installation setting, you could find it in your own ks configuration file: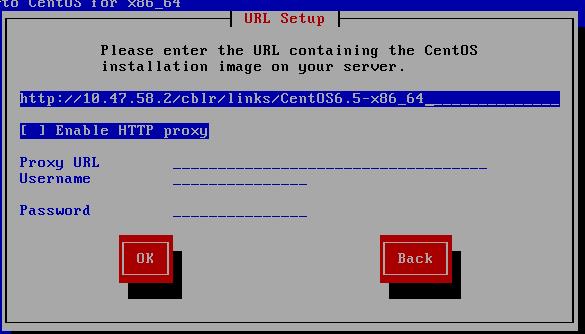
Continue to install, they are the same as you did before.
Cobbler in the existing DHCP enabled Network
Since the dhcp server is available in the network, simply press ctrl+B to enter the pxe boot menu and set the next_server to 10.47.58.2, then:
iPXE> imgfetch -n img tftp://10.47.58.2/pxelinux.0
iPXE> imgload img
iPXE> boot
Now select whichever you want to deploy, your configuration will be deployed ASAP.
Cobbler Server Image To New Network
You have to change following items:
- IP address.
- dhcp templates
- Next Server Name.
$ sudo vim /etc/cobbler/settings
next_server: 172.16.10.2
server: 172.16.10.2
$ sudo vim /etc/cobbler/dhcp.templates
subnet 172.16.10.0 netmask 255.255.255.0 {
     option routers             172.16.10.1;
     range dynamic-bootp        172.16.10.3 172.16.10.254;
     option domain-name-servers 114.114.114.114, 180.76.76.76;
     option subnet-mask         255.255.255.0;
     filename                   "/pxelinux.0";
     default-lease-time         21600;
     max-lease-time             43200;
     next-server                $next_server;
     class "pxeclients" {

//..................
$ sudo vim /etc/default/isc-dhcp-server
INTERFACES="eth0"
Notice the IP address should be in the same ip address range.
After modification, simply use cobbler sync for syncing your changes, now restart the cobbler server, your operation should be the same as the above situations.
Also if you have playbooks of ansible which uses the static IP address, you also have to replace the IP related settings.
