Chef Setup
May 26, 2015
Technology
For automatically deploying OpenStack, I use Chef for deployment, following records the steps for setting up the whole environment.
Machine Preparation
Chef Server: 2-Core, 3G Memory, IP address: xxx.xxx.10.211, Ubuntu14.04.
Chef Workstation: 4-Core, 8G Memory, a physical machine, IP address: xxx.xxx.0.119, Ubuntu14.04.
Install Server
Install the chef-server package, which downloaded from chef.io website, after installation, simply reconfigure it, this finishes the installation and configuration.
$ sudo dpkg -i chef-server-core_12.0.8-1_amd64.deb
$ sudo chef-server-ctl reconfigure
Configure the permit file, also create the user and organization for the chef:
# sudo chef-server-ctl user-crate YourName FirstName LastName Email PassWord --filename YourPermitFileName
$ sudo chef-server-ctl user-create youname YYYXXX Man xxxxxxx@163.com YOURPASSWORD --filename ~/youname.pem
# sudo chef-server-ctl org-create YourOrgName Your Company Name  --association_user YourUser --filename  YourOrgnizationPermitFile
$ sudo chef-server-ctl org-create youname YYYXXX Software, Inc. --association_user youname --filename ~/youname_org.pem
Install opscode-manager and reconfigure it via following commands:
$ sudo dpkg -i opscode-manage_1.13.0-1_amd64.deb
$ sudo opscode-manage-ctl reconfigure
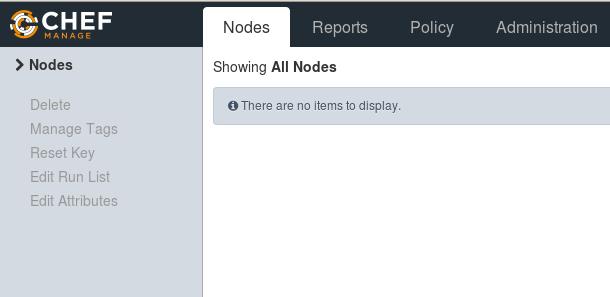
Now visit the webiste to see the Chef Server UI.

Chef Workstation
I use the physical machine for Chef Workstation.
Install it via:
$ sudo dpkg -i chef_12.3.0-1_amd64.deb
Fetch back the chef repository from github, configure it and add the ignore directory:
$ git clone https://github.com/opscode/chef-repo.git
$ cd chef-repo
$ mkdir .chef
$ echo ".chef">>~/chef-repo/.gitignore
$ git add .
$ git commit -m "Exclude the ./.chef directory from version control"
[master 64515ff] Exclude the ./.chef directory from version control
 1 file changed, 1 insertion(+)
Install the chefdk, and verify the chef, you should see all of the components OK, then you could continue for next step:
$ sudo dpkg -i chefdk_0.6.0-1_amd64.deb
$ chef verify
Transfer all of the pem file from the ChefServer to ChefWorkstation, and put them under the folder of ~/chef-repo/.chef:
$ scp xxx@xxxxx:/home/xxx/*.pem xxxx@ChefWorkstation:/home/xxxx/chef-repo/.chef
Add following item under the Workstation’s configuration:
$ sudo vim /etc/hosts
XXX.xxx.xxx.xxx  ChefServer
Now configure the knife.rb and let your authentification be verified.
$ vim ~/chef-repo/.chef/knife.rb
current_dir = File.dirname(__FILE__)
log_level                :info
log_location             STDOUT
node_name                "xxxxxxxxx"
client_key               "#{current_dir}/xxxxxxxxx.pem"
validation_client_name   "xxxxxxxxx_org"
validation_key           "#{current_dir}/xxxxxxxxx_org.pem"
chef_server_url          "https://ChefServer/organizations/xxxxxxxxx"
syntax_check_cache_path  "#{ENV['HOME']}/.chef/syntaxcache"
cookbook_path            ["#{current_dir}/../cookbooks"]
$ knife ssl fetch
WARNING: Certificates from ChefServer will be fetched and placed in your trusted_cert
directory (/home/dash/chef-repo/.chef/trusted_certs).

Knife has no means to verify these are the correct certificates. You should
verify the authenticity of these certificates after downloading.

Adding certificate for ChefServer in /home/xxxx/chef-repo/.chef/trusted_certs/ChefServer.crt
$ knife ssl check
Connecting to host ChefServer:443
Successfully verified certificates from `ChefServer'
Check how many clients has been added into the ChefServer, currently only one,
$ knife client list
xxxxxx-validator
Added Nodes
In Client1, Install the
$ sudo dpkg -i chef_12.3.0-1_amd64.deb
Add the pem files to every nodes:
# knife bootstrap Client1 -x xxxxxx -P XXXXXXXXXXXXX --sudo
If above steps fail, you should manually specify the ssl verification.
# scp Server/xxx.pem /home/xxxxx
# cp /home/xxxx/xxx.pem /etc/chef/validation.pem
# sudo chef-client -l debug -S https://ChefServer/organizations/xxxxx -K /etc/chef/validation.pem
##### OR
#  sudo chef-client -l debug -S https://ChefServer/organizations/xxxxx  -K /home/xxxx/xxxxx.pem
Bootstrap again:
# knife bootstrap Client1 -N ChefClient1 -x xxxxx -P xxxxxx --sudo --use-sudo-password
After bootstrap success, list all of the client:
root@ChefWorkstation:~/chef-repo# knife client list
ChefClient1
xxxx-validator
Using Cookbook
Create the Cookbook named nginx:
root@ChefWorkstation:~# cd chef-repo/
root@ChefWorkstation:~/chef-repo# ls
chefignore  cookbooks  data_bags  environments  LICENSE  README.md  roles
root@ChefWorkstation:~/chef-repo# knife cookbook create nginx
oot@ChefWorkstation:~/chef-repo/cookbooks/nginx# ls
attributes  CHANGELOG.md  definitions  files  libraries  metadata.rb  providers  README.md  recipes  resources  templates
Edit the cookbook:
Enable the installation:
# vim recipes/default.rb
package 'nginx' do
  action :install
end
Enable check the status:
service 'nginx' do
  action [ :enable, :start ]
end
Change the index.html file:
cookbook_file "/usr/share/nginx/html/index.html" do
  source "index.html"
  mode "0644"
end
Prepare the default index.html file:
$ cd ~/chef-repo/cookbooks/nginx/files/default
$ vim index.html
<html>
  <head>
    <title>Hello there</title>
  </head>
  <body>
    <h1>This is a test</h1>
    <p>Please work!</p>
  </body>
</html>
Since the nginx need apt-get to achive the latest status, add another package named apt:
knife cookbook create apt
Edit the default rb file:
vim ~/chef-repo/cookbooks/apt/recipes/default.rb
execute "apt-get update" do
  command "apt-get update"
end
Change the default rb file of the nginx:
+++ include_recipe "apt"

package 'nginx' do
  action :install
end
Also add it to the metadata.rb file:
$ vim ~/chef-repo/cookbooks/nginx/metadata.rb

long_description IO.read(File.join(File.dirname(__FILE__), 'README.md'))
version          '0.1.0'

+++  depends "apt"
Add Cookbook to your nodes:
knife cookbook upload apt
knife cookbook upload nginx
Or
knife cookbook upload -a
Edit the specified node:
knife node edit name_of_node

{
  "name": "client1",
  "chef_environment": "_default",
  "normal": {
    "tags": [

    ]
  },
  "run_list": [

+++ "recipe[name_of_recipe1]",
+++ "recipe[name_of_recipe2]"

  ]
}
In every want-to-deploy nodes, run:
$ sudo chef-client
Use Market
Download and use the knife
$ knife cookbook site download learn_chef_apache2
$ tar xzvf learn_chef_apache2-0.2.1.tar.gz -C cookbooks/
$ knife cookbook  upload -a
Besure to edit the node’s recipes.
Two tips:
Remove the cookbook from the server’s list:
# knife cookbook delete learn_chef_apache2 0.2.1
Directly remove the recipe from the node:
# knife node run_list remove ChefClient1 recipe[nginx]
# knife node run_list remove ChefClient1 recipe[eclipse]
