
Tips on 30Days30Skills(5)
Dec 6, 2014
Technology
Since the RESTful API is a little bit hard for setup, I ignore the Day10 and Day11, jump to Day 12, OpenCV.
Day 12 - OpenCV
Get the jar file
First download the opencv from: http://sourceforge.net/projects/opencvlibrary/files/latest/download
$ unzip *.zip
$ cd opencv-2.4.10
$ cmake -G "Unix Makefiles" -D CMAKE_CXX_COMPILER=/usr/bin/g++ -D CMAKE_C_COMPILER=/usr/bin/gcc -D WITH_CUDA=ON ..
$ make -j4 && make install
Trouble shooting when generating openCV jar file:
Correct output should be:
--   Java:
--     ant:                         /bin/ant (ver 1.9.4)
--     JNI:                         /usr/lib/jvm/java-7-openjdk/include /usr/lib/jvm/java-7-openjdk/include/linux /usr/lib/jvm/java-7-openjdk/include
--     Java tests:                  YES
Add JNi
export JAVA_HOME=/usr/lib/jvm/java-7-openjdk/
Then build with following command:
$ cmake -G "Unix Makefiles" -D CMAKE_CXX_COMPILER=/usr/bin/g++ -D CMAKE_C_COMPILER=/usr/bin/gcc -D WITH_CUDA=ON -D BUILD_SHARED_LIBS=OFF -D BUILD_NEW_PYTHON_SUPPORT=NO .. && make
For MACOS, you should install:
$ brew install ant
$ export JAVA_HOME=`/usr/libexec/java_home -v 1.6`
Then re-compile and now you could get the jar file under build/bin/.
Development on OpenCV
Using eclipse LUNA.
(venv)[Trusty@~/code/30days/Day12OpenCV/opencv-2.4.10/build/bin]$ pwd
/home/Trusty/code/30days/Day12OpenCV/opencv-2.4.10/build/bin
(venv)[Trusty@~/code/30days/Day12OpenCV/opencv-2.4.10/build/bin]$ ls *.jar
opencv-2410.jar
Add the new User Libraries:
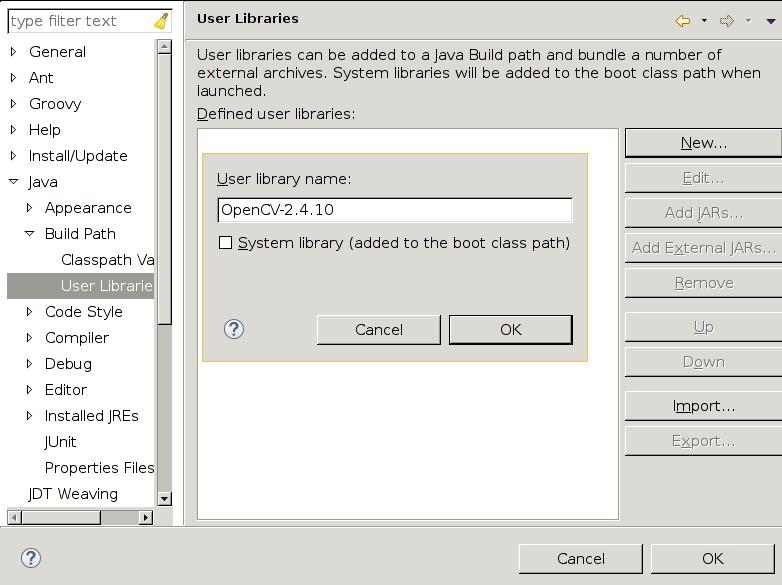
The detailed configuration steps could be refered to the http://segmentfault.com/a/1190000000358809, After configuration your User Libraries should be looked like this: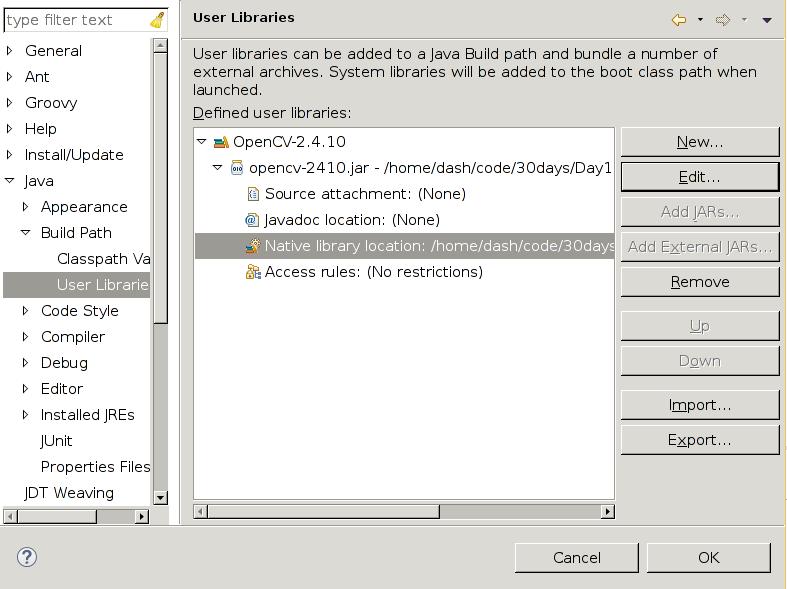
Add User Libraries thus you could see the configuration of the lib is looked like:
Code is like following:
package facedetection;
import org.opencv.core.Core;
import org.opencv.core.Mat;
import org.opencv.core.MatOfRect;
import org.opencv.core.Point;
import org.opencv.core.Rect;
import org.opencv.core.Scalar;
import org.opencv.highgui.Highgui;
import org.opencv.objdetect.CascadeClassifier;

public class MyFaceDetectionClass {
    public static void main(String[] args) {

        System.loadLibrary(Core.NATIVE_LIBRARY_NAME);
        System.out.println("\nRunning FaceDetector");

        CascadeClassifier faceDetector = new CascadeClassifier(MyFaceDetectionClass.class.getResource("haarcascade_frontalface_alt.xml").getPath());
        Mat image = Highgui
                .imread(MyFaceDetectionClass.class.getResource("shekhar.JPG").getPath());

        MatOfRect faceDetections = new MatOfRect();
        faceDetector.detectMultiScale(image, faceDetections);

        System.out.println(String.format("Detected %s faces", faceDetections.toArray().length));

        for (Rect rect : faceDetections.toArray()) {
            Core.rectangle(image, new Point(rect.x, rect.y), new Point(rect.x + rect.width, rect.y + rect.height),
                    new Scalar(0, 255, 0));
        }

        String filename = "ouput.png";
        System.out.println(String.format("Writing %s", filename));
        Highgui.imwrite(filename, image);
    }
}
Then you should place the xml file and the JPG file under the java class, after doing this, run the application, then you will got the png file generate with face detected.
Day 13 - Dropwizard
First you should install mondb in ArchLinux:
$ sudo pacman -S mongodb
Then in eclipse, create a new Maven project with the template of “maven-archetype-quickstart”, with the following configuration of Artifact Id and Group id.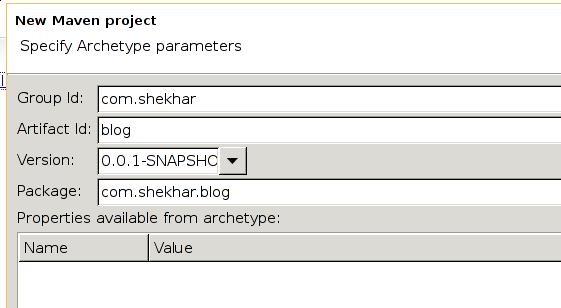
The default pom.xml should be modified,
Since the network environment is not stable, I created a vncserver at the VPS, and use VPS for developing.
In vps:
sudo apt-get install eclipse
sudo apt-get install mongodb
then install the maven from: http://download.eclipse.org/technology/m2e/releases/1.3