Tips on installing Yosemite
Nov 18, 2014
Technology
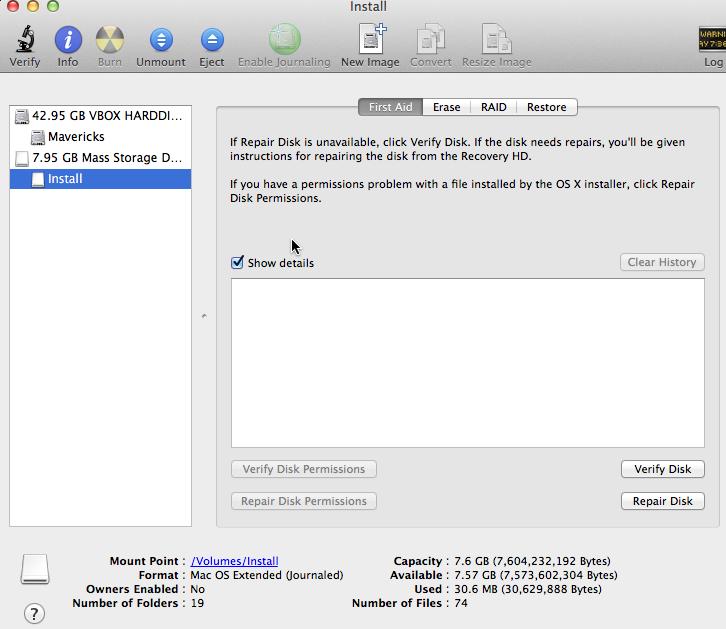
First get the installation image from the AppStore, then format a flash-disk more than 8G to following format:
Use following commands for creating the installation media:
kkkkkkkktttt-iMac:~ Trusty$ sudo /Applications/Install\ OS\ X\ Yosemite.app/Contents/Resources/createinstallmedia --volume /Volumes/Install --applicationpath /Applications/Install\ OS\ X\ Yosemite.app --nointeraction
Take a coffee, cause this will spend a long time for copying everything you need into the disk.
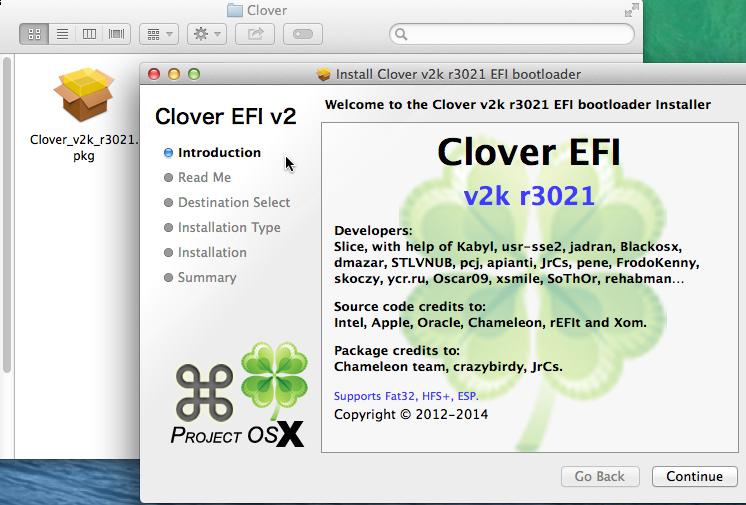
Install Clover:

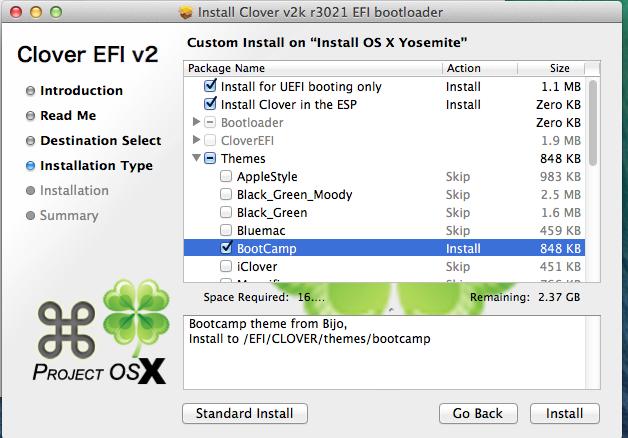
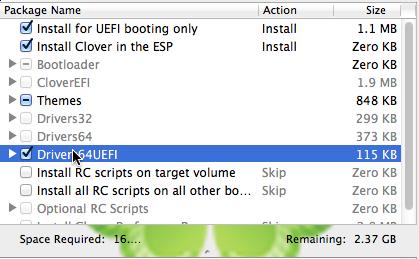
Customize Clover installation:

Copy the dsdt & ssdt files to EFI partition:
kkkkkkkktttt-iMac:Dsdt & Ssdt Trusty$ pwd
/Users/Trusty/Desktop/MacOS/SurfacePro/SurfacePro 1° Gen FilesPackage V.0.5.1/Dsdt & Ssdt
kkkkkkkktttt-iMac:Dsdt & Ssdt Trusty$ cp -ar * /Volumes/ESP/EFI/CLOVER/ACPI/patched/
Copy some device driver files into the Clover:
kkkkkkkktttt-iMac:MacOS Trusty$ tar xzvf GenericUSBXHCI_1.2.7.tar.gz
Copy GenericUSBXHCI.kext to 10.9/ 10.10/ Other/:
kkkkkkkktttt-iMac:kexts Trusty$ pwd
/Volumes/ESP/EFI/CLOVER/kexts
kkkkkkkktttt-iMac:kexts Trusty$ ls -F
10.10/  10.6/   10.7/   10.8/   10.9/   Other/
kkkkkkkktttt-iMac:10.10 Trusty$ sudo cp -r  /Users/Trusty/Desktop/MacOS/GenericUSBXHCI_Yosemite/ /Volumes/ESP/EFI/CLOVER/kexts/10.10/
Also we have to copy the fakesmc.kext should be copied to above folder.
kkkkkkkktttt-iMac:kexts Trusty$ ls *
10.10:
GenericUSBXHCI.kext     fakesmc.kext

10.6:

10.7:

10.8:

10.9:
GenericUSBXHCI.kext     fakesmc.kext

Other:
GenericUSBXHCI.kext     fakesmc.kext
Now copy the config.plist into the CLOVER root directory.
kkkkkkkktttt-iMac:SurfacePro 1° Gen FilesPackage V.0.5.1 Trusty$ pwd
/Users/Trusty/Desktop/MacOS/SurfacePro/SurfacePro 1° Gen FilesPackage V.0.5.1
kkkkkkkktttt-iMac:SurfacePro 1° Gen FilesPackage V.0.5.1 Trusty$ ls config.plist
config.plist
Now you got your installation disk OK.
